
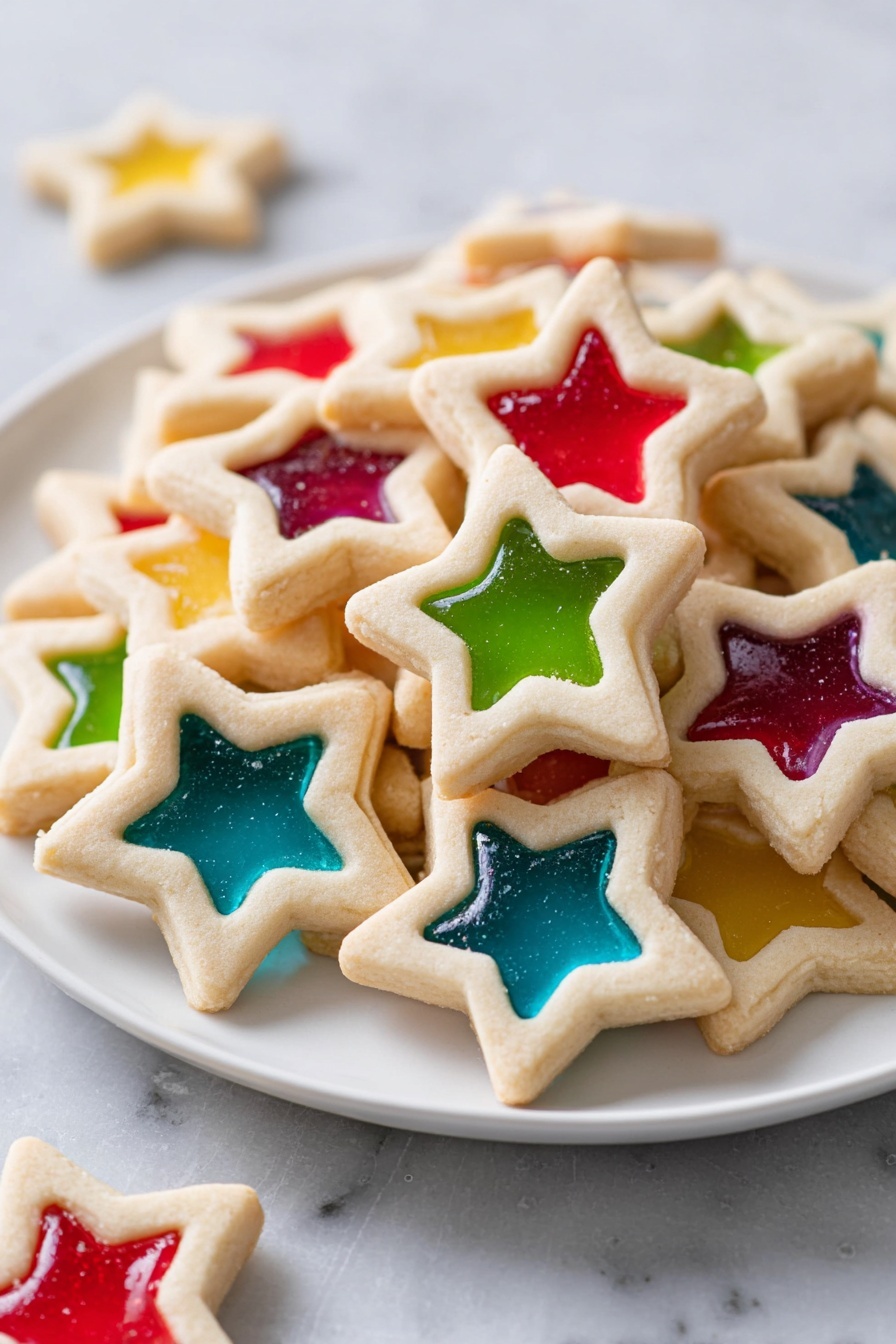
If you’re looking for a show-stopping holiday treat that’s as fun to make as it is to eat, then you’re going to absolutely adore this Stained Glass Cookies with Jolly Ranchers Recipe. Imagine biting into buttery, tender cookies with colorful, glossy centers that sparkle like little pieces of candy jewel glass. I first made these for a family Christmas party, and my house smelled like sweet magic the whole day. Stick around—I’ll walk you through everything so you can get these beauties just right every single time.
Why You’ll Love This Recipe
- Gorgeous Holiday Display: These cookies are like edible stained-glass art—they instantly elevate any cookie platter.
- Simple Ingredients: You’ll likely already have the basics, plus colorful Jolly Ranchers pack big flavor and vibrant colors.
- Fun for All Ages: Kids love helping unwrap and crush the candies, while adults appreciate the buttery cookie base.
- Make Ahead Friendly: Dough chilling and baking in batches make this manageable even during busy holiday seasons.

Ingredients You’ll Need
For this stained glass cookie recipe, the ingredients balance classic cookie richness with a colorful candy surprise. When shopping, try to find unsalted butter for the best control over saltiness, and pick your favorite Jolly Rancher flavors to customize the look and taste.
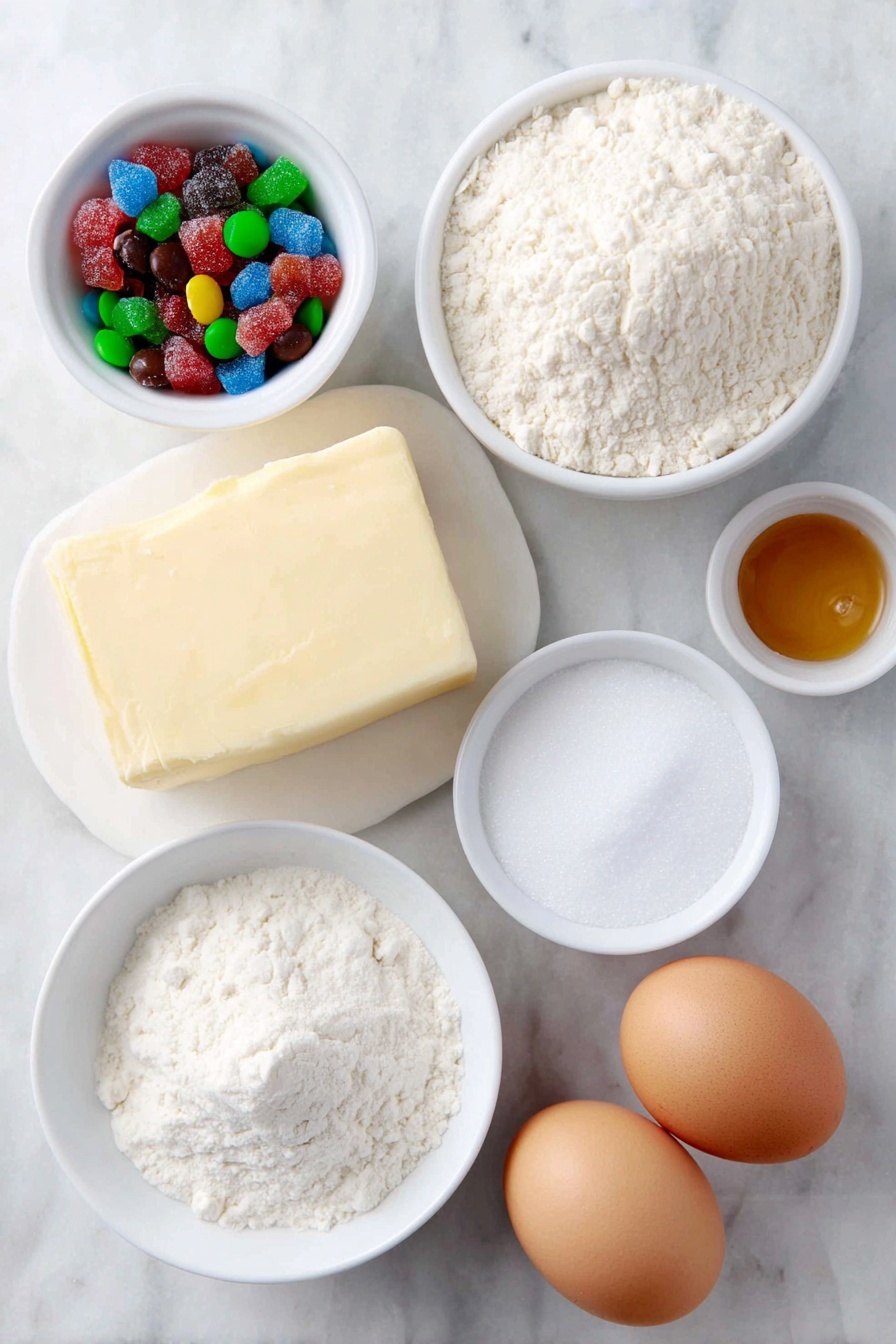
- Jolly Ranchers hard candies: Use a mix of colors for that stained glass effect—chop carefully to small bits, not powder.
- Unsalted butter: Room temperature butter is key to creamy mixing and tender dough.
- Granulated sugar: Provides sweetness and slight crunch, balancing the buttery dough.
- Salt: Just a hint to bring out all those flavors.
- Large eggs: Bind the dough and add moisture.
- Vanilla extract: Adds warmth and depth to the cookie flavor.
- All-purpose flour: Gives structure; spoon and level for accurate measurement.
Variations
While I love the classic Jolly Ranchers combo, there’s so much room to play here. Personally, I sometimes swap out the vanilla for almond extract for a different twist, or I switch shapes during holidays—hearts, snowflakes, you name it. Feel free to get creative!
- Flavor swaps: Adding a pinch of cinnamon or lemon zest can brighten the cookie flavor beautifully.
- Dietary tweaks: Use gluten-free flour blend if you need to avoid gluten—just keep an eye on texture.
- Shape and size: Smaller cookie cutters create bite-sized treats; larger cutouts show off the candy better.
- Hanging ornaments: Cut a small hole at the top of the cookie before baking and thread ribbon through once cool—so charming on the tree!
How to Make Stained Glass Cookies with Jolly Ranchers Recipe
Step 1: Prep the Candy “Stained Glass”
First things first—unwrap your Jolly Ranchers and sort them by color into small resealable bags. Then crush each color into small pieces using a meat mallet or heavy rolling pin. Don’t pulverize to powder; you want little shards that melt just enough in the oven to create a beautiful candy window. This step feels almost therapeutic—I love hearing the crunch!
Step 2: Make the Cookie Dough
Using a stand mixer or hand mixer, cream the softened butter with sugar and salt until fluffy—this step builds the cookie’s softness. Add eggs one at a time, mixing well after each. Then blend in the vanilla. With mixer on low, gradually add the flour, stopping as soon as it all comes together as a dough. This dough is soft but holds shape well, which is exactly what you want.
Step 3: Chill and Roll Out
Scrape out your dough onto plastic wrap and form a neat rectangle. Chill for at least one hour—this chilling is essential because it firms up the dough so it doesn’t spread too much in the oven. After chilling, divide the dough into thirds. Work with one portion at a time while keeping the rest refrigerated.
Step 4: Cut and Fill Your Cookie Shapes
On a lightly floured surface, roll the dough about 1/5-inch thick. Use a 3.5-inch star cutter (or any shape you prefer) to cut out as many cookies as possible. Place them on a silicone baking mat—trust me on this one; parchment paper has a higher chance of the cookies sticking here. Then, use a smaller cutter (around 1.75 inches) to cut a smaller shape out of each cookie’s center and carefully remove it. A toothpick is your friend here for precision!
Step 5: Fill With Crushed Candy and Bake
Fill the cut-out centers about three-quarters full with crushed Jolly Ranchers—don’t overfill or the candy can bubble over. Pop the tray into the fridge for 15–20 minutes to firm everything up again. Meanwhile, preheat your oven to 350°F (175°C). Bake for 12 to 14 minutes until the edges look set and the candy centers have melted beautifully. Let cookies cool completely on the baking sheet so the candy hardens into its glassy finish.
Step 6: Store and Enjoy
Once the cookies are fully cooled and firmed, store them in an airtight container. These stained glass treats keep well and can be stacked by layering parchment paper between them. My family enjoys these for days, and sometimes I stash a few away to surprise guests.
Pro Tips for Making Stained Glass Cookies with Jolly Ranchers Recipe
- Use Silicone Baking Mats: I tried parchment paper once, and the candy centers stuck and cracked. Silicone mats prevent that perfectly.
- Don’t Crush Candies Too Fine: The tiny shards melt better and create beautiful candy windows, while powder can burn or scorch.
- Chill Twice: Chill the dough before cutting and the filled cookies before baking to keep shapes crisp and candy centers intact.
- Remove Center Pieces Gently: Using a toothpick makes lifting out the smaller cutouts easy without stretching the dough.
How to Serve Stained Glass Cookies with Jolly Ranchers Recipe

Garnishes
I usually keep the cookies simple because their stained-glass centers are showstoppers on their own. But if I want a little festive flair, I dust the edges lightly with powdered sugar or pair them with sprigs of fresh rosemary for a piney holiday touch that looks and smells wonderful.
Side Dishes
These cookies are perfect with a hot cup of spiced cider, peppermint hot chocolate, or even a creamy latte. For holiday parties, I serve them alongside a cheese board with nuts and dried fruits to balance the sweetness.
Creative Ways to Present
Once, I made these with small holes pre-cut so I could thread red satin ribbons through and hang them like ornaments on the Christmas tree. They looked stunning with holiday lights glittering through the candy centers—guests kept asking if they were real ornaments! It’s a fun way to double the delight from your cookie batch.
Make Ahead and Storage
Storing Leftovers
I keep my leftover stained glass cookies in an airtight container at room temperature. Layering parchment between cookies prevents sticking and breakage. They stay fresh and crisp for up to a week in my experience, though honestly, they rarely last that long in my kitchen.
Freezing
I’ve also frozen the dough after cutting out the cookie shapes but before filling with candy. Wrap the cut dough tightly and freeze for up to 3 months; when ready, add crushed candies and bake. Although freezing the finished baked cookies isn’t ideal because the candy can lose its glossy charm, the dough freezes beautifully.
Reheating
Reheating these cookies isn’t really necessary since they’re best enjoyed fresh or at room temperature. But if you want to soften the candy centers slightly, a few seconds in the microwave (10-15 seconds) works. Just be careful not to melt the candy too much, or it can become hard and brittle again once cooled.
FAQs
-
Can I use other candies besides Jolly Ranchers for stained glass cookies?
Absolutely! While Jolly Ranchers are ideal because they melt evenly and come in great colors, you can experiment with other hard candies like Life Savers or Werther’s Originals. Just make sure to crush them to small shards and avoid candies with added fillings or coatings that may not melt properly.
-
Why do some stained glass cookie centers crack?
Centers can crack if the candy melts too unevenly or if the cooling process is rushed. To avoid this, bake at the correct temperature and allow the cookies to cool completely on the baking sheet before moving them. Using a silicone mat also helps with even heat distribution and prevents sticking.
-
How thick should I roll the dough for these cookies?
Rolling the dough about 1/5-inch thick works best to hold the candy fillings without spreading too much. Thinner dough can cause the candy to leak, while thicker dough might take longer to bake through.
-
Can I prepare these cookies ahead of time for a party?
Yes! You can make the dough and cut the shapes ahead of time, keeping them refrigerated or frozen until ready. If you plan to fill with candy and bake closer to serving, store the cut dough wrapped tightly so it keeps its shape perfectly.
-
Is there a way to make these cookies gluten-free?
You can substitute the all-purpose flour with a gluten-free baking blend that measures cup for cup. Just monitor the dough’s texture—gluten-free dough may be a bit more delicate, so chilling and handling gently is especially important.
Final Thoughts
Honestly, I absolutely love how this Stained Glass Cookies with Jolly Ranchers Recipe turns out every time. It always brings a little extra sparkle to my kitchen and smiles to everyone who tries them. Making these is such a satisfying way to share joy, especially during the holidays or for any special occasion. I hope you give them a try—you’ll enjoy the process as much as the delicious, pretty results. Happy baking, friend!
Print
Stained Glass Cookies with Jolly Ranchers Recipe
- Prep Time: 45 minutes
- Cook Time: 30 minutes
- Total Time: 2 hours 40 minutes
- Yield: 30 cookies 1x
- Category: Dessert
- Method: Baking
- Cuisine: American
Description
Delightfully colorful and festive Stained Glass Cookies featuring a buttery star-shaped shortbread exterior and vibrant, melted Jolly Rancher candy centers. Perfect for holiday celebrations or any occasion that calls for a touch of sweet creativity.
Ingredients
For the Cookies
- 1 cup (226g) unsalted butter, softened
- 1 cup (200g) granulated sugar
- 1/4 tsp salt
- 2 large eggs
- 1 tsp vanilla extract
- 3 cups (382g) all-purpose flour (spooned and leveled), plus more for dusting
For the Stained Glass Centers
- Jolly Ranchers hard candies (approx. 20), separated by color and crushed into small bits (not powder)
Instructions
- Prepare the Candy Centers: Unwrap the Jolly Ranchers and separate them by color. Place each color in separate small resealable bags and crush into small bits using a meat mallet, being careful not to pulverize them into powder. Set aside.
- Cream Butter and Sugar: In the bowl of an electric stand mixer, cream together softened butter, granulated sugar, and salt until the mixture is smooth and well combined.
- Add Eggs and Vanilla: Mix in the eggs one at a time, blending well after each addition. Then incorporate the vanilla extract thoroughly.
- Incorporate Flour: With the mixer on low speed, slowly add the all-purpose flour and mix just until the dough comes together and is well combined.
- Chill the Dough: Scrape the dough out onto a work surface and shape it into a rectangle. Wrap tightly in plastic wrap and chill in the refrigerator for 1 hour.
- Roll and Cut Dough: Cut the chilled dough into thirds. Leave one portion out to work with and keep the remaining portions refrigerated. On a floured surface, roll out the dough to about 1/5-inch thickness. Using a 3.5-inch star-shaped cookie cutter, cut out as many large stars as possible.
- Cut and Remove Center Stars: Transfer the large stars to a baking sheet lined with a silicone baking mat. Using a smaller 1.75-inch star cutter, cut out the center of each large star and remove these smaller stars carefully (a toothpick can help remove the center piece if needed). Re-roll scraps to cut additional stars.
- Add Crushed Candy: Fill the cut-out centers about three-quarters full with the crushed Jolly Rancher bits.
- Chill Before Baking: Refrigerate the cookies until firm, approximately 15 to 20 minutes. Meanwhile, preheat the oven to 350°F (175°C).
- Bake the Cookies: Bake the cookies in the preheated oven until they are set and the candy has melted to form a stained glass center, about 12 to 14 minutes.
- Cool and Harden: Let the cookies cool on the baking sheet until the candy centers have hardened completely.
- Repeat and Store: Repeat the process with the remaining refrigerated dough. Store the finished cookies in an airtight container.
Notes
- Use silicone baking mats instead of parchment paper for best results; some have experienced sticking with parchment.
- If needed, use a toothpick to help remove the small cut-out center pieces.
- To make the cookies hangable as ornaments, cut a small hole near the top with a standard plastic straw before chilling and baking.
Nutrition
- Serving Size: 1 cookie
- Calories: 160
- Sugar: 12g
- Sodium: 55mg
- Fat: 8g
- Saturated Fat: 5g
- Unsaturated Fat: 2.5g
- Trans Fat: 0g
- Carbohydrates: 20g
- Fiber: 0.5g
- Protein: 2g
- Cholesterol: 30mg

Your email address will not be published. Required fields are marked *