
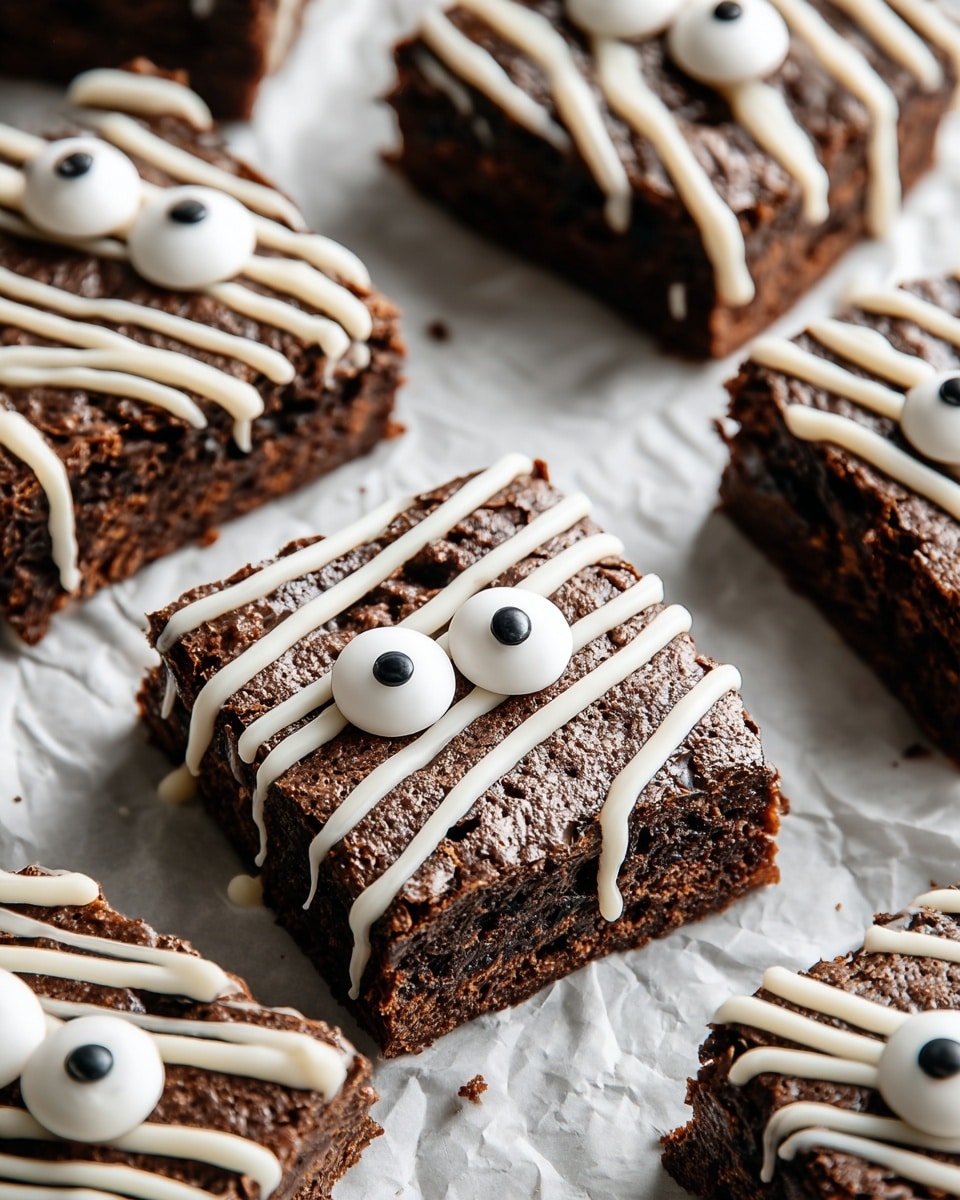
If you’re looking for a treat that’s as fun to make as it is to eat, you’re going to adore this Spooky Mummy Brownies Recipe. It’s perfect for Halloween parties, last-minute spooky snacks, or whenever you want to impress without a ton of fuss. I absolutely love how these brownies turn out – rich and fudgy underneath those playful mummy “bandages” made out of white chocolate. Keep reading, and I’ll share all my tips so you nail this festive treat every single time.
Why You’ll Love This Recipe
- Super Simple Steps: You don’t have to be a pro baker to pull off these adorable brownies – it’s mostly about assembling and decorating.
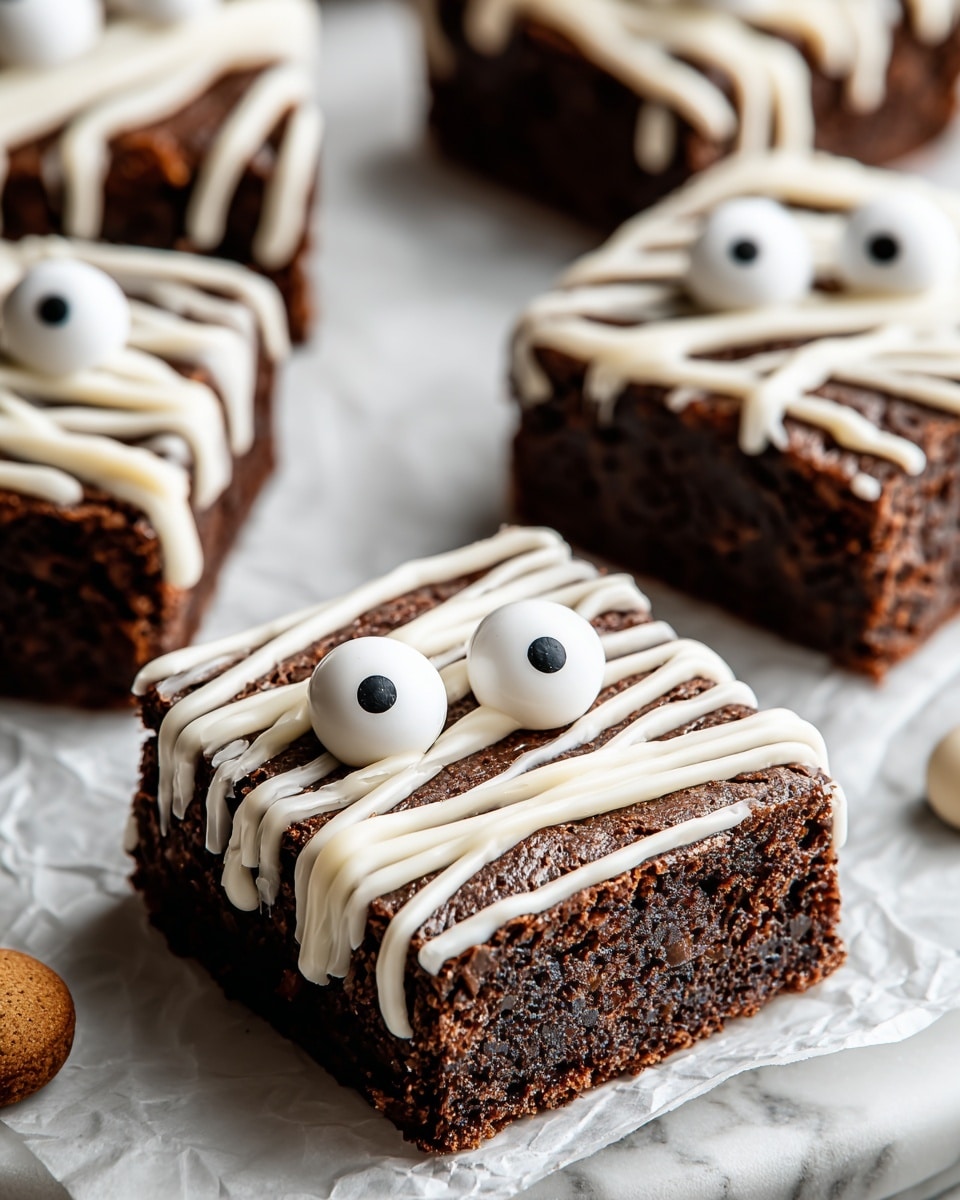
- Eye-Catching Fun: Candy eyes and white chocolate “bandages” turn ordinary brownies into a crowd-pleaser that’s perfect for spooky gatherings.
- Adaptable to Your Taste: Whether you like extra fudgy or a bit cakey, you can customize the base brownie with your favorite box mix or homemade recipe.
- Kid-Friendly Activity: Little helpers love drizzling the “bandages” and placing eyes, making it a perfect Halloween craft in the kitchen.

Ingredients You’ll Need
Since this Spooky Mummy Brownies Recipe is based on a classic brownie mix, the ingredients are simple and easy to find. The key is using good quality white chocolate chips and fun candy eyes to truly bring the mummy look to life.
- Brownie mix: Choose your favorite boxed mix or homemade brownie base. I like fudgy brownies that hold up well to decorating.
- White chocolate chips: These melt beautifully and piped on in bands look just like mummy wraps. Look for good quality white chocolate for smooth melting.
- Candy eyes: The finishing touch! You can find them in baking aisles or online, and they immediately transform your brownies into spooky mummies.
Variations
When I first made these, I tried a few twists and found that this recipe is super flexible. Feel free to make it your own — you’ll find that the festive vibe never gets old no matter how you customize it!
- Chocolate drizzle instead of white chocolate: For a darker, spookier effect, swap white chocolate for melted dark or milk chocolate. My family actually liked this better because it adds a little extra richness.
- Peanut butter mummy wraps: Try piping melted peanut butter chips or even drizzling peanut butter — perfect if you want a nutty twist.
- Gluten-free brownie mix: I’ve successfully swapped the box mix for a gluten-free version, and the mummy decor still works wonderfully.
- Mini mummy brownies: Bake the brownies in mini muffin tins for bite-sized spooky treats — perfect for parties or lunches.
How to Make Spooky Mummy Brownies Recipe
Step 1: Bake Your Brownies Like a Pro
Start by preparing your brownie mix exactly as the package or recipe says. I like to grease my baking pan thoroughly to make clean cutting easier later on. Bake until a toothpick inserted comes out with just a few moist crumbs – this keeps them nice and fudgy. Then, let those brownies cool completely before moving on — warm brownies can melt your white chocolate drizzle and mess up the design.
Step 2: Cut Into Mummy-Worthy Squares
Once cooled, slice your brownies into even squares. I usually get 12 decent-sized pieces from a standard 9×13 pan. If you want smaller munchies, you can cut smaller or into fun shapes using cookie cutters — but squares keep it classic and easy for adding those mummy “bandages.”
Step 3: Melt and Pipe the White Chocolate “Bandages”
Melt the white chocolate chips gently in the microwave in 15-second bursts, stirring in between to avoid burning. Once smooth, transfer the chocolate to a piping bag or a plastic sandwich bag with the corner snipped off — this gives you control for drizzling. Zigzag the chocolate over each brownie square in overlapping lines to mimic mummy bandages. Don’t worry if it’s not perfect; a little messiness looks authentically spooky!
Step 4: Add Candy Eyes and Let Set
Quickly but gently press 2 candy eyes onto each brownie before the white chocolate sets. This step is where your mummies really come to life! Set the brownies aside and let the chocolate harden completely — this usually takes about 15-20 minutes at room temperature or a few minutes in the fridge. Then, you’re ready to serve!
Pro Tips for Making Spooky Mummy Brownies Recipe
- Don’t Skip Cooling: I learned the hard way — piping white chocolate on warm brownies melts the chocolate and ruins the look. Patience pays off here!
- Use Parchment Paper: Line your baking pan with parchment for cleaner edges and easier brownie removal.
- Control Chocolate Flow: If your white chocolate is too thick for piping, stir in a teaspoon of vegetable oil to make it smoother and drizzle-friendly.
- Placement of Eyes: Place candy eyes while the white chocolate is still tacky to ensure they stick well – otherwise they might slide off.
How to Serve Spooky Mummy Brownies Recipe
Garnishes
I usually keep the garnishes simple because these mummy brownies already steal the show. Sometimes, I sprinkle a tiny pinch of edible glitter or colored sugar around the plate for a festive sparkle. A light dusting of powdered sugar can also mimic “dusty mummy wraps” if you want a delicate Halloween touch.
Side Dishes
To round out a Halloween dessert table, I love pairing these brownies with creamy vanilla ice cream or a scoop of pumpkin spice gelato. A warm mug of spiced hot chocolate or apple cider complements their richness perfectly and keeps the spooky spirit alive.
Creative Ways to Present
One year, I set up a “mummy graveyard” with brownie squares decorated with smashed Oreo “dirt” and mini tombstone cookies next to the mummies — the kids were obsessed! You can also arrange the brownies on a tray decorated with fake spider webs and plastic spiders for that eerie Halloween vibe.
Make Ahead and Storage
Storing Leftovers
Once the brownies are decorated and the chocolate has set, store leftovers in an airtight container at room temperature. They stay moist and delicious for up to 3 days, but I can never keep them around that long!
Freezing
If you want to prepare these in advance, you can freeze uncut brownies right after baking and cooling. When ready to decorate, thaw completely at room temperature before adding the white chocolate and candy eyes. Freezing after decorating isn’t ideal because the candy eyes can come off or get damaged.
Reheating
I usually eat these brownies cold or at room temperature to preserve the white chocolate design. But if you prefer warm, microwaving a brownie for 10-15 seconds works well — just avoid heating for too long, or the candy eyes might start to droop.
FAQs
-
Can I use homemade brownies for the Spooky Mummy Brownies Recipe?
Absolutely! While this recipe is based on a boxed mix for convenience, homemade brownies work wonderfully and add a personal touch. Just make sure they’re completely cooled before decorating to keep the white chocolate from melting.
-
What if I don’t have candy eyes? Can I make my own?
No worries if you can’t find candy eyes! You can make your own by piping small white and black dots of icing or melted chocolate onto parchment paper, then letting them harden before placing on your brownies.
-
How should I melt the white chocolate for the mummy wraps?
I recommend microwaving in short bursts (15 seconds), stirring often to prevent burning. If it’s too thick, add a teaspoon of vegetable oil or shortening to smooth it out for easy piping.
-
Can I prepare the spooky mummy decoration ahead of time?
It’s best to decorate the brownies on the day you plan to serve them so the white chocolate stays fresh and crisp. However, you can melt the white chocolate a few hours ahead and keep it covered at room temperature for piping when you’re ready.
Final Thoughts
Making the Spooky Mummy Brownies Recipe always reminds me of the joy of simple, festive baking that brings everyone together. From the first time I piped those white chocolate bandages to seeing my kids’ faces light up with candy eyes, this recipe has been a staple in my Halloween traditions. If you want a sweet treat that’s fun, easy, and guaranteed to impress, this is it. Trust me, once you try it, you’ll want to make it every spooky season!
Print
Spooky Mummy Brownies Recipe
- Prep Time: 15 minutes
- Cook Time: 30 minutes
- Total Time: 45 minutes
- Yield: 12 brownies 1x
- Category: Dessert
- Method: Baking
- Cuisine: American
Description
These Spooky Mummy Brownies are a fun and festive treat perfect for Halloween or any spooky occasion. Moist and chocolatey brownies are decorated with white chocolate to mimic mummy bandages and topped with candy eyes for a playful, creepy effect that kids and adults will love.
Ingredients
Brownie Base
- 1 box brownie mix (plus ingredients listed on the box, typically eggs, oil, and water)
Toppings
- 1/2 cup white chocolate chips
- Candy eyes (12 pieces)
Instructions
- Prepare Brownies: Follow the preparation instructions on the brownie mix box, combining the mix with the necessary eggs, oil, and water. Pour the batter into a greased baking pan.
- Bake: Bake the brownies according to package directions, usually at 350°F (175°C) for about 25-30 minutes, or until a toothpick inserted comes out clean.
- Cool and Cut: Allow the brownies to cool completely in the pan before cutting them into 12 even squares.
- Melt White Chocolate: Melt the white chocolate chips gently, either in a microwave-safe bowl in 20-second intervals stirring between each or using a double boiler, until smooth.
- Decorate: Transfer the melted white chocolate to a piping bag or a plastic bag with a small corner cut off. Drizzle the white chocolate in a zigzag pattern over each brownie square to create the look of mummy bandages.
- Add Candy Eyes: Immediately place candy eyes on top of each brownie while the white chocolate is still wet so they stick properly.
- Set: Let the white chocolate set completely before serving to ensure decorations stay in place.
Notes
- For best results, ensure brownies are fully cooled before decorating to prevent melting the candy eyes.
- You can substitute white chocolate chips with white candy melts if preferred.
- Use a toothpick or skewer to adjust the drizzle for a more realistic mummy bandage effect.
- Store decorated brownies in an airtight container at room temperature for up to 3 days.
- Adding a pinch of salt to the brownie mix can enhance the chocolate flavor.
Nutrition
- Serving Size: 1 brownie
- Calories: 220
- Sugar: 20g
- Sodium: 150mg
- Fat: 10g
- Saturated Fat: 6g
- Unsaturated Fat: 3g
- Trans Fat: 0g
- Carbohydrates: 30g
- Fiber: 1g
- Protein: 2g
- Cholesterol: 25mg

Your email address will not be published. Required fields are marked *