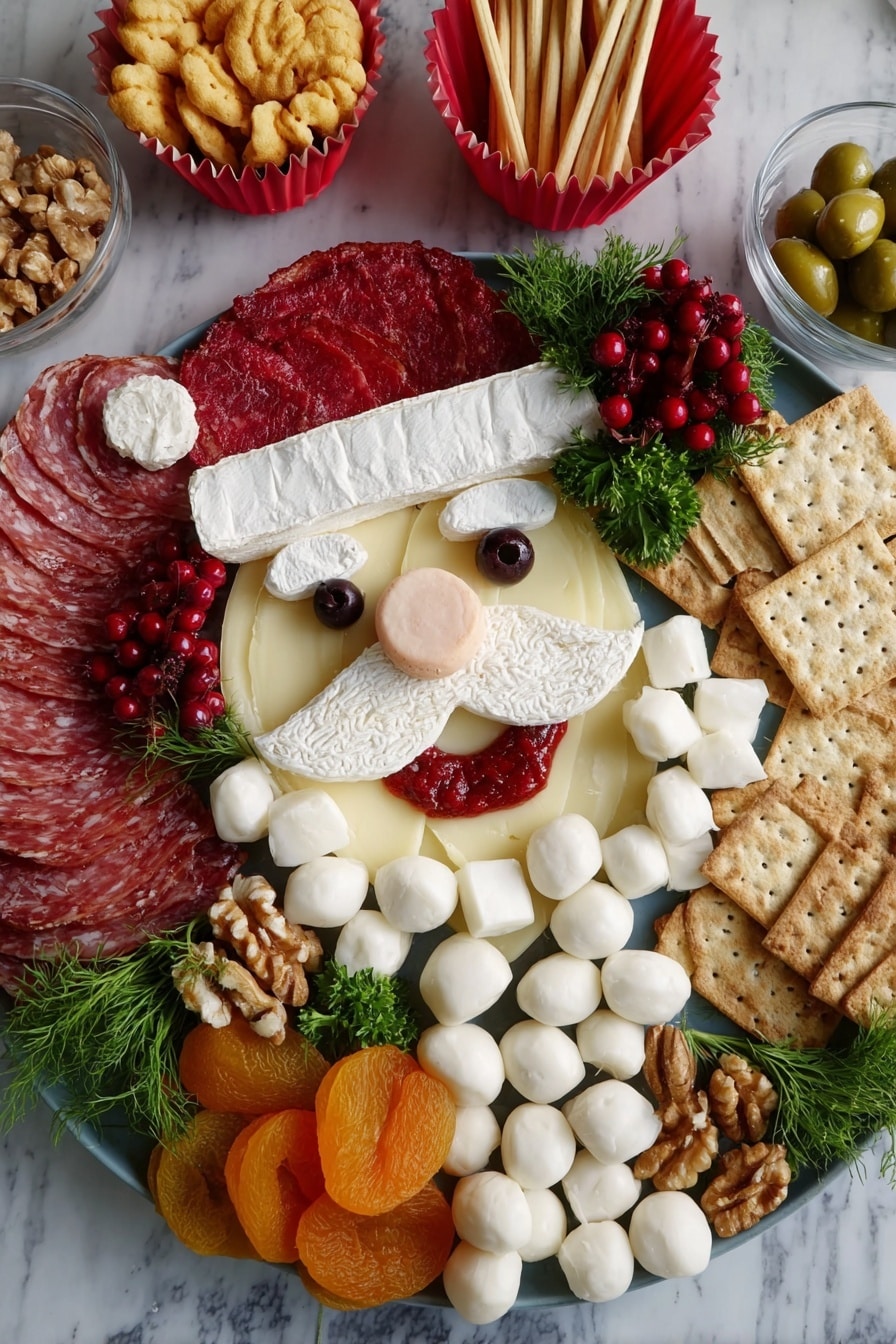
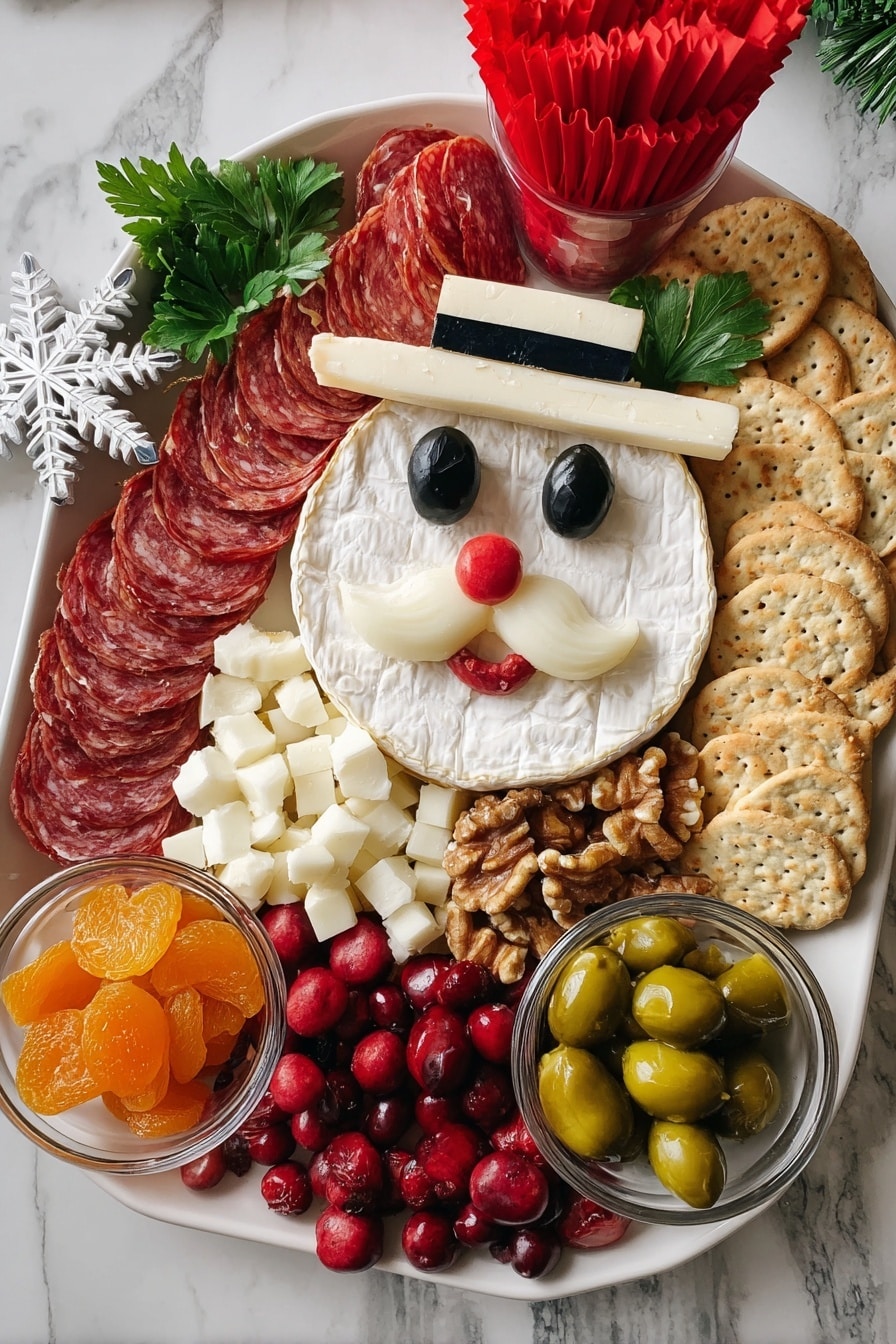
If you’re on the hunt for a festive, fun, and absolutely charming appetizer that’s sure to be the star of your holiday table, I can’t recommend this Santa Cheese Board with Wraps and Fruits Recipe enough! It’s not just any cheese board — it’s a magical Santa face made from delicious cheeses, salami curls, crackers, and fresh fruits that will have your guests swooning before the first bite. Honestly, I love this because it’s easy to assemble, looks incredible, and offers a delightful mix of savory and sweet that everyone can enjoy.
Why You’ll Love This Recipe
- Festive & Fun Presentation: This Santa face design turns your cheese board into a holiday centerpiece everyone talks about.
- Simple Yet Impressive: With straightforward steps and common ingredients, you’ll whip up a stunning spread in no time.
- Perfect Flavor Balance: The combo of cheeses, salami, nuts, fruits, and crackers hits all the right savory and sweet notes.
- Great for Sharing: Easily customizable for your crowd size and dietary preferences without fuss.
Ingredients You’ll Need
One of the things I love about the Santa Cheese Board with Wraps and Fruits Recipe is how each ingredient brings a unique texture and flavor, making the whole spread delightful to nibble on. I always recommend fresh, quality cheeses and ripe fruits to make it pop visually and taste-wise.
- Salami: Choose medium-thin slices for easy curling and a nice savory punch.
- Halloumi cheese: Its firm texture makes it perfect for cutting out snowflake shapes that hold well on the board.
- Mozzarella balls: Mild and creamy, these bring softness and a fresh touch.
- Brie cheese: Soft and buttery, perfect for shaping Santa’s face and hat details.
- Nuts (Assorted): Adds crunch and a salty contrast—almonds, cashews, or pecans work beautifully.
- Green olives or candied jalapeños: A great burst of briny or sweet heat for complexity.
- Crackers (Assorted): I like a mix of crisp water crackers and multigrain for variety.
- Apricots (or other fruit): Choose dried or fresh based on preference; they add a lovely sweetness.
- Grapes (red or green): Juicy and refreshing, they also make the board visually festive.
- Red bell pepper: Use a small sliver for Santa’s mouth—bright and crunchy.
- Black olive: Just one is enough for a charming eye detail.
- Fresh herbs: Parsley or rosemary sprigs add a fresh aroma and festive green sprinkles around the board.
Variations
One of the reasons this Santa Cheese Board with Wraps and Fruits Recipe is so great is how customizable it is. I often tweak ingredients depending on what I have or the tastes of my guests. Feel free to make it your own!
- Vegetarian Variation: Skip the salami and add more flavorful cheeses like aged cheddar or gouda; stuffed grape leaves or roasted red peppers can add a savory touch.
- Seasonal Fruits: I’ve swapped in pears or figs around the holidays for a luxurious twist that pairs beautifully with cheese.
- Kid-Friendly Version: Use mild cheeses and sweet fruits, and arrange the salami curls in playful shapes — my niece loves helping with this!
- Nut-Free Variation: Simply omit nuts and add extra fruit or seeds like pumpkin or sunflower to keep the crunch.
How to Make Santa Cheese Board with Wraps and Fruits Recipe
Step 1: Shape the Snowflakes and Cube the Halloumi
Start by grabbing your halloumi block and a medium-sized snowflake cookie cutter. I discovered this trick of cutting out snowflakes from halloumi gives a festive vibe and the cheese keeps its shape well without melting or getting soggy. After cutting a few snowflakes, chop the remaining halloumi into bite-sized cubes for easy snacking.
Step 2: Create Santa’s Face with Brie Cheese
Remove the brie from its packaging and slice off about one-third around the top. Cut small triangles from this part to form Santa’s iconic mustache. Lay the larger brie piece on your serving board or tray as the base for the face. Pro tip: arranging the brie on a slightly folded napkin helps keep it in place and adds a cozy feel. Use the smaller pieces to fashion the hat and other details.
Step 3: Make the Eyes and Mouth
Slice the black olive into two thin circles for Santa’s eyes, and cut a thin sliver of red bell pepper into a crescent for the mouth. Place these carefully onto the brie face, stepping back now and then to see if it’s getting the jolly expression just right!
Step 4: Arrange the Salami Curls for Santa’s Hat
Halve your salami slices and use them to create whimsical curls for Santa’s hat by layering them leaning against each other. Don’t rush this part — the curls give this board so much character. For the hat’s “pom-pom,” place one of the halloumi snowflakes at the tip. It’s such a fun finishing touch that truly brings Santa to life!
Step 5: Add Crackers, Fruits, Nuts, and Olives
Scatter the crackers in the corners of your serving tray for an inviting look. Add small bowls or clusters of your chosen fruits like apricots and grapes, as well as nuts and olives. I always try to fill in any gaps on the board so it looks full and abundant but not crowded—this balance really matters for aesthetics and ease of grabbing.
Step 6: Garnish with Fresh Herbs and Serve Immediately
Finish by tucking in sprigs of fresh herbs like parsley or rosemary. These not only look gorgeous but add that crisp, fresh aroma that welcomes everyone to dig in. The best part? Serve your Santa Cheese Board with Wraps and Fruits Recipe right away to enjoy the freshest flavors and textures.
Pro Tips for Making Santa Cheese Board with Wraps and Fruits Recipe
- Use Fresh Cheeses: I always buy the freshest brie and halloumi because they hold shape better and taste so rich.
- Salami Curl Technique: When curling the salami slices, gently warm them for a few seconds in the microwave to make curling easier and avoid tearing.
- Balance the Board: Fill white space with nuts and small fruits so every bite has a nice mix of flavors.
- Avoid Overcrowding: Don’t pile too high — layering carefully keeps it pretty and easy to grab what you want.
How to Serve Santa Cheese Board with Wraps and Fruits Recipe
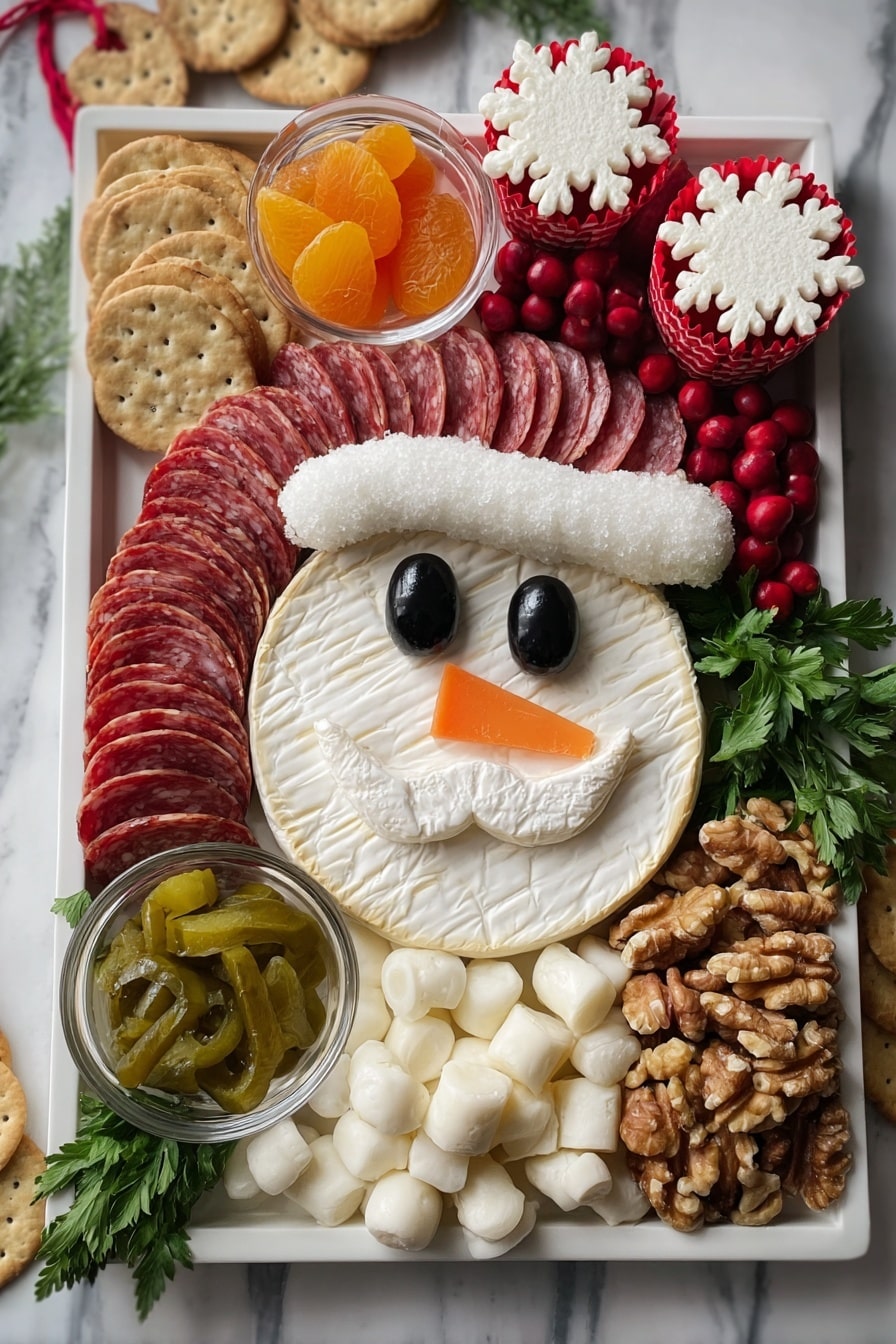
Garnishes
I always use fresh rosemary and parsley sprigs as garnishes because they add lovely color contrast and impart a wonderful festive aroma. Adding a sprinkle of pomegranate seeds can bring a bright pop of red too, which looks fantastic during Christmas gatherings.
Side Dishes
This Santa Cheese Board pairs perfectly with a crisp white wine or a bubbly prosecco. For sides, I love serving it alongside a warm spinach-artichoke dip or some buttery crostini to keep the savory goodness flowing.
Creative Ways to Present
One special way I’ve presented this board is on a rustic wooden slab, lined with fresh pine branches around the edges to really amplify the holiday spirit. Stringing some tiny fairy lights nearby turns it into a whimsical centerpiece that invites guests to gather around and “ooooh” and “ahhh” before diving in.
Make Ahead and Storage
Storing Leftovers
If you have any leftovers (although it tends to disappear fast!), I recommend storing the cheeses and meats separately in airtight containers wrapped in parchment paper to maintain freshness. The fresh fruits and crackers are best stored separately in the fridge and sealed bags respectively.
Freezing
Since this recipe relies on fresh cheeses and crunchy crackers, freezing isn’t ideal if you want to maintain texture. I’ve tried freezing halloumi cubes before, but they get a bit rubbery on thawing. For best results, enjoy fresh!
Reheating
There’s no reheating needed here — this board is best served chilled or room temperature. If you want a warm bite, briefly heat the halloumi cubes in a skillet for a crispy, golden sear, which is a lovely twist.
FAQs
-
Can I prepare the Santa Cheese Board with Wraps and Fruits Recipe ahead of time?
You can prep some elements ahead, like slicing cheese and salami, or washing fruits and herbs, but I’d recommend assembling the board just before serving to keep the crackers crisp and fruits fresh.
-
What alternatives can I use if I don’t have halloumi cheese?
Firm cheeses like queso fresco or paneer can substitute halloumi for the snowflake shapes, though these may not hold through as long without melting.
-
How do I keep crackers from getting soggy on the cheese board?
Arrange crackers just before serving and keep them separate from wetter items like olives or juicy fruits. Using small bowls for dips and olives also helps prevent moisture transfer.
-
Can I make this recipe vegan?
While this recipe is cheese-heavy, you can create a vegan version using plant-based cheeses and replacing meat with marinated tofu or tempeh slices, plus plenty of fruits and nuts.
-
What kind of fruits work best on this board?
Fresh, firm fruits like grapes, apples, and pears hold up well, and dried fruits like apricots add sweetness—both pairs wonderfully with the cheeses and meats.
Final Thoughts
I absolutely love how this Santa Cheese Board with Wraps and Fruits Recipe brings the holiday spirit right to the table in such a fun and delicious way. When I first served it, my whole family went crazy for the creative look and flavorful combinations. It’s perfect for last-minute entertaining and special enough to save for those holiday celebrations you really want to wow at. I promise, once you try it, this board will become a tradition you’ll be eager to make every year. So grab your cheeses, rolls of salami, and fresh fruits — and let’s get assembling the jolliest cheese board ever!
Print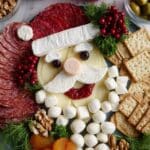
Santa Cheese Board with Wraps and Fruits Recipe
- Prep Time: 20 minutes
- Cook Time: 0 minutes
- Total Time: 20 minutes
- Yield: 12 servings 1x
- Category: Appetizer
- Method: No-Cook
- Cuisine: American
Description
Create a festive and delightful Magical Santa Charcuterie Board featuring an artful arrangement of salami, assorted cheeses, nuts, fruits, and crackers. This no-cook, visually charming Christmas-themed snack platter is perfect for holiday gatherings and impresses with its creative Santa face design using brie, halloumi, and colorful fresh ingredients.
Ingredients
Meats & Cheeses
- 12 oz Salami
- 2 oz Halloumi cheese
- ½ cup Mozzarella balls
- 8 oz Brie cheese
Fruits & Vegetables
- ⅓ cup Apricots (or other fruit of choice)
- 1 cup Grapes (Red or green, or both)
- 1 Red bell pepper (one small sliver)
- ⅓ cup Green olives (or candied jalapeños)
- 1 Black olive (only one)
Other
- ⅔ cup Nuts (Assorted or your favorite type)
- 1 cup Crackers (Assorted)
- Fresh herbs (for garnish)
Instructions
- Cut Halloumi Snowflakes and Cubes: Using a medium snowflake-shaped cookie cutter, cut out a few snowflakes from the halloumi cheese block. Then cut the remaining halloumi into cubes for the board.
- Prepare Brie Cheese Features: Remove the brie from its packaging. Slice off about the top third of the circumference. Cut small triangles out of this slice to form Santa’s mustache. Reserve a thin strip from the loose brie to create a Santa cap.
- Arrange Brie on Board: Cover your serving tray or board with a decorative napkin. Position the brie pieces to represent Santa’s face. Add halves of green olives as eyes and bell pepper slices to create the mouth. Place the brie strip to form a cap on Santa’s head.
- Prepare and Arrange Salami: Cut the salami slices in half and arrange them in playful curls on the board as if they are leaning on each other. Extend the salami layout upward to simulate Santa’s hat and add the halloumi snowflake pom-pom at the hat’s tip.
- Position Crackers and Accompaniments: Place crackers in the corners of the board. Add small containers or piles of cowboy candy (candied jalapeños), green olives, apricots, and other dippers in opposite corners.
- Fill the Board: Neatly arrange mozzarella balls, nuts, fresh herbs, grapes, and remaining cheese cubes to compactly fill empty spaces, ensuring a colorful and festive presentation.
- Serve Immediately: Present the Magical Santa Charcuterie Board fresh for your guests to enjoy the seasonal flavors and artistic layout.
Notes
- This dreamy Santa charcuterie board is a perfect festive cheese board for Christmas celebrations.
- Feel free to customize the fruits and nuts to your preference while maintaining the colorful and varied look.
- Use fresh herbs like rosemary or thyme to add an aromatic touch and visual appeal.
- Since no cooking is involved, prepare immediately before serving to preserve freshness and texture.
Nutrition
- Serving Size: 1 serving
- Calories: 295 kcal
- Sugar: 3 g
- Sodium: 929 mg
- Fat: 23 g
- Saturated Fat: 9 g
- Unsaturated Fat: 13 g
- Trans Fat: 0.1 g
- Carbohydrates: 9 g
- Fiber: 1 g
- Protein: 14 g
- Cholesterol: 43 mg

