

If you’re craving a dessert that’s pure comfort and takes you back to simpler times, this Rich & Creamy Buttermilk Pie is exactly what you need. With its silky-smooth filling and irresistible old-fashioned flavor, every bite feels like a warm hug. This pie comes together in about an hour and fifteen minutes from start to finish—most of which is hands-off baking and cooling time! It’s as easy as it gets, making it the ideal treat for busy weeknights or a last-minute sweet fix. One slice and you’ll understand why this recipe is adored by so many.
Why You’ll Love This Recipe
- Effortless and Quick: The simple mixing method (no mixer required!) means you can have the pie in the oven within 20 minutes.
- Old-Fashioned Flavor: Buttermilk pie is a Southern classic, and its creamy, slightly tangy custard strikes the perfect balance of sweet and tart.
- Versatile: Perfect for every occasion—serve it chilled on a summer evening or alongside coffee for a cozy winter dessert.
- Family-Friendly: There’s nothing in here to frighten off picky eaters—just pure, comforting flavor that everyone enjoys.

Ingredients You’ll Need
Gather up these pantry basics and a few little extras—each one plays a key role in the pie’s distinct character:
- Granulated Sugar: Sweetens the filling and helps create that signature golden top.
- All-Purpose Flour: Adds body so the custard sets up soft, not runny.
- Salt: Just a pinch offsets the sweetness and rounds out the flavors.
- Eggs & Egg Yolk: Essential for structure and richness; the extra yolk ensures extra creaminess.
- Unsalted Butter (melted): Gives the filling its luscious, melt-in-your-mouth texture. Salted butter works in a pinch, just dial back the added salt.
- Pure Vanilla Extract: Vanilla is non-negotiable for that classic bakery aroma.
- Lemon Extract: Brightens up the custard, adding a delicate citrusy twist.
- Coconut Extract: Optional, but a drop or two creates a subtle, almost undetectable depth that makes people say, “What’s that delicious flavor?”
- Buttermilk (warmed): The star of the show—its subtle tang sets this pie apart.
- Unbaked Pie Shell (chilled): Use your favorite homemade pie crust or a store-bought shell for convenience. Either way, keep it cold for the best texture.
Note: The extracts can be adjusted to suit your taste. Don’t be afraid to play around!
Variations
This pie is endlessly adaptable. Here are some easy ways to make it your own:
- Citrus Zest: Add a bit of freshly grated lemon or orange zest for extra zing.
- Brown Sugar Swap: Substitute half the granulated sugar with light brown sugar for a hint of caramel flavor.
- Crust Twist: Try a graham cracker crust or even a shortbread crust for added texture and sweetness.
- Dairy-Free: Use plant-based butter and your favorite non-dairy buttermilk substitute—just make sure it’s thick and tangy!
- Nutty Addition: A handful of chopped pecans or coconut flakes sprinkled over the top before baking adds crunch and flavor.
Experiment and find your signature version!
How to Make Rich & Creamy Buttermilk Pie
Here’s a step-by-step guide so you can follow along without any stress:
Step 1: Preheat & Prep
Heat your oven to 350°F. Place your cold, unbaked pie shell in a pie dish and pop it back into the fridge until you’re ready to fill it—keeping the crust cold is key!
Step 2: Combine Dry Ingredients
In a large mixing bowl, whisk together the sugar, flour, and salt. If you want the silkiest texture possible, sift them first. Set the bowl aside.
Step 3: Whisk the Eggs
In a separate large bowl, whisk the eggs and egg yolk until their color is uniform and the mixture is slightly frothy. This will give your pie a beautiful, even texture.
Step 4: Bring It All Together
Gradually whisk the dry mixture into the eggs until everything is smooth. Next, add the melted butter and all extracts, whisking until well combined.
Step 5: Add the Buttermilk
Gently stir in the warm buttermilk. Mix just until everything is incorporated and there are no streaks. If the batter looks a bit foamy, let it settle for a couple of minutes.
Step 6: Fill & Bake
Pour the batter into your chilled pie shell. Put the pie on the lower rack of your oven and bake for 25 minutes. Then transfer it to the middle rack and bake for another 25 minutes. The edges should be set but the center will have the slightest jiggle—don’t overbake!
Step 7: Cool & Finish
Let the pie cool on a rack for 2–3 hours until the pan is no longer hot underneath. For the perfect slice, refrigerate for at least two more hours so it fully sets.
Your patience will be rewarded!
Serving
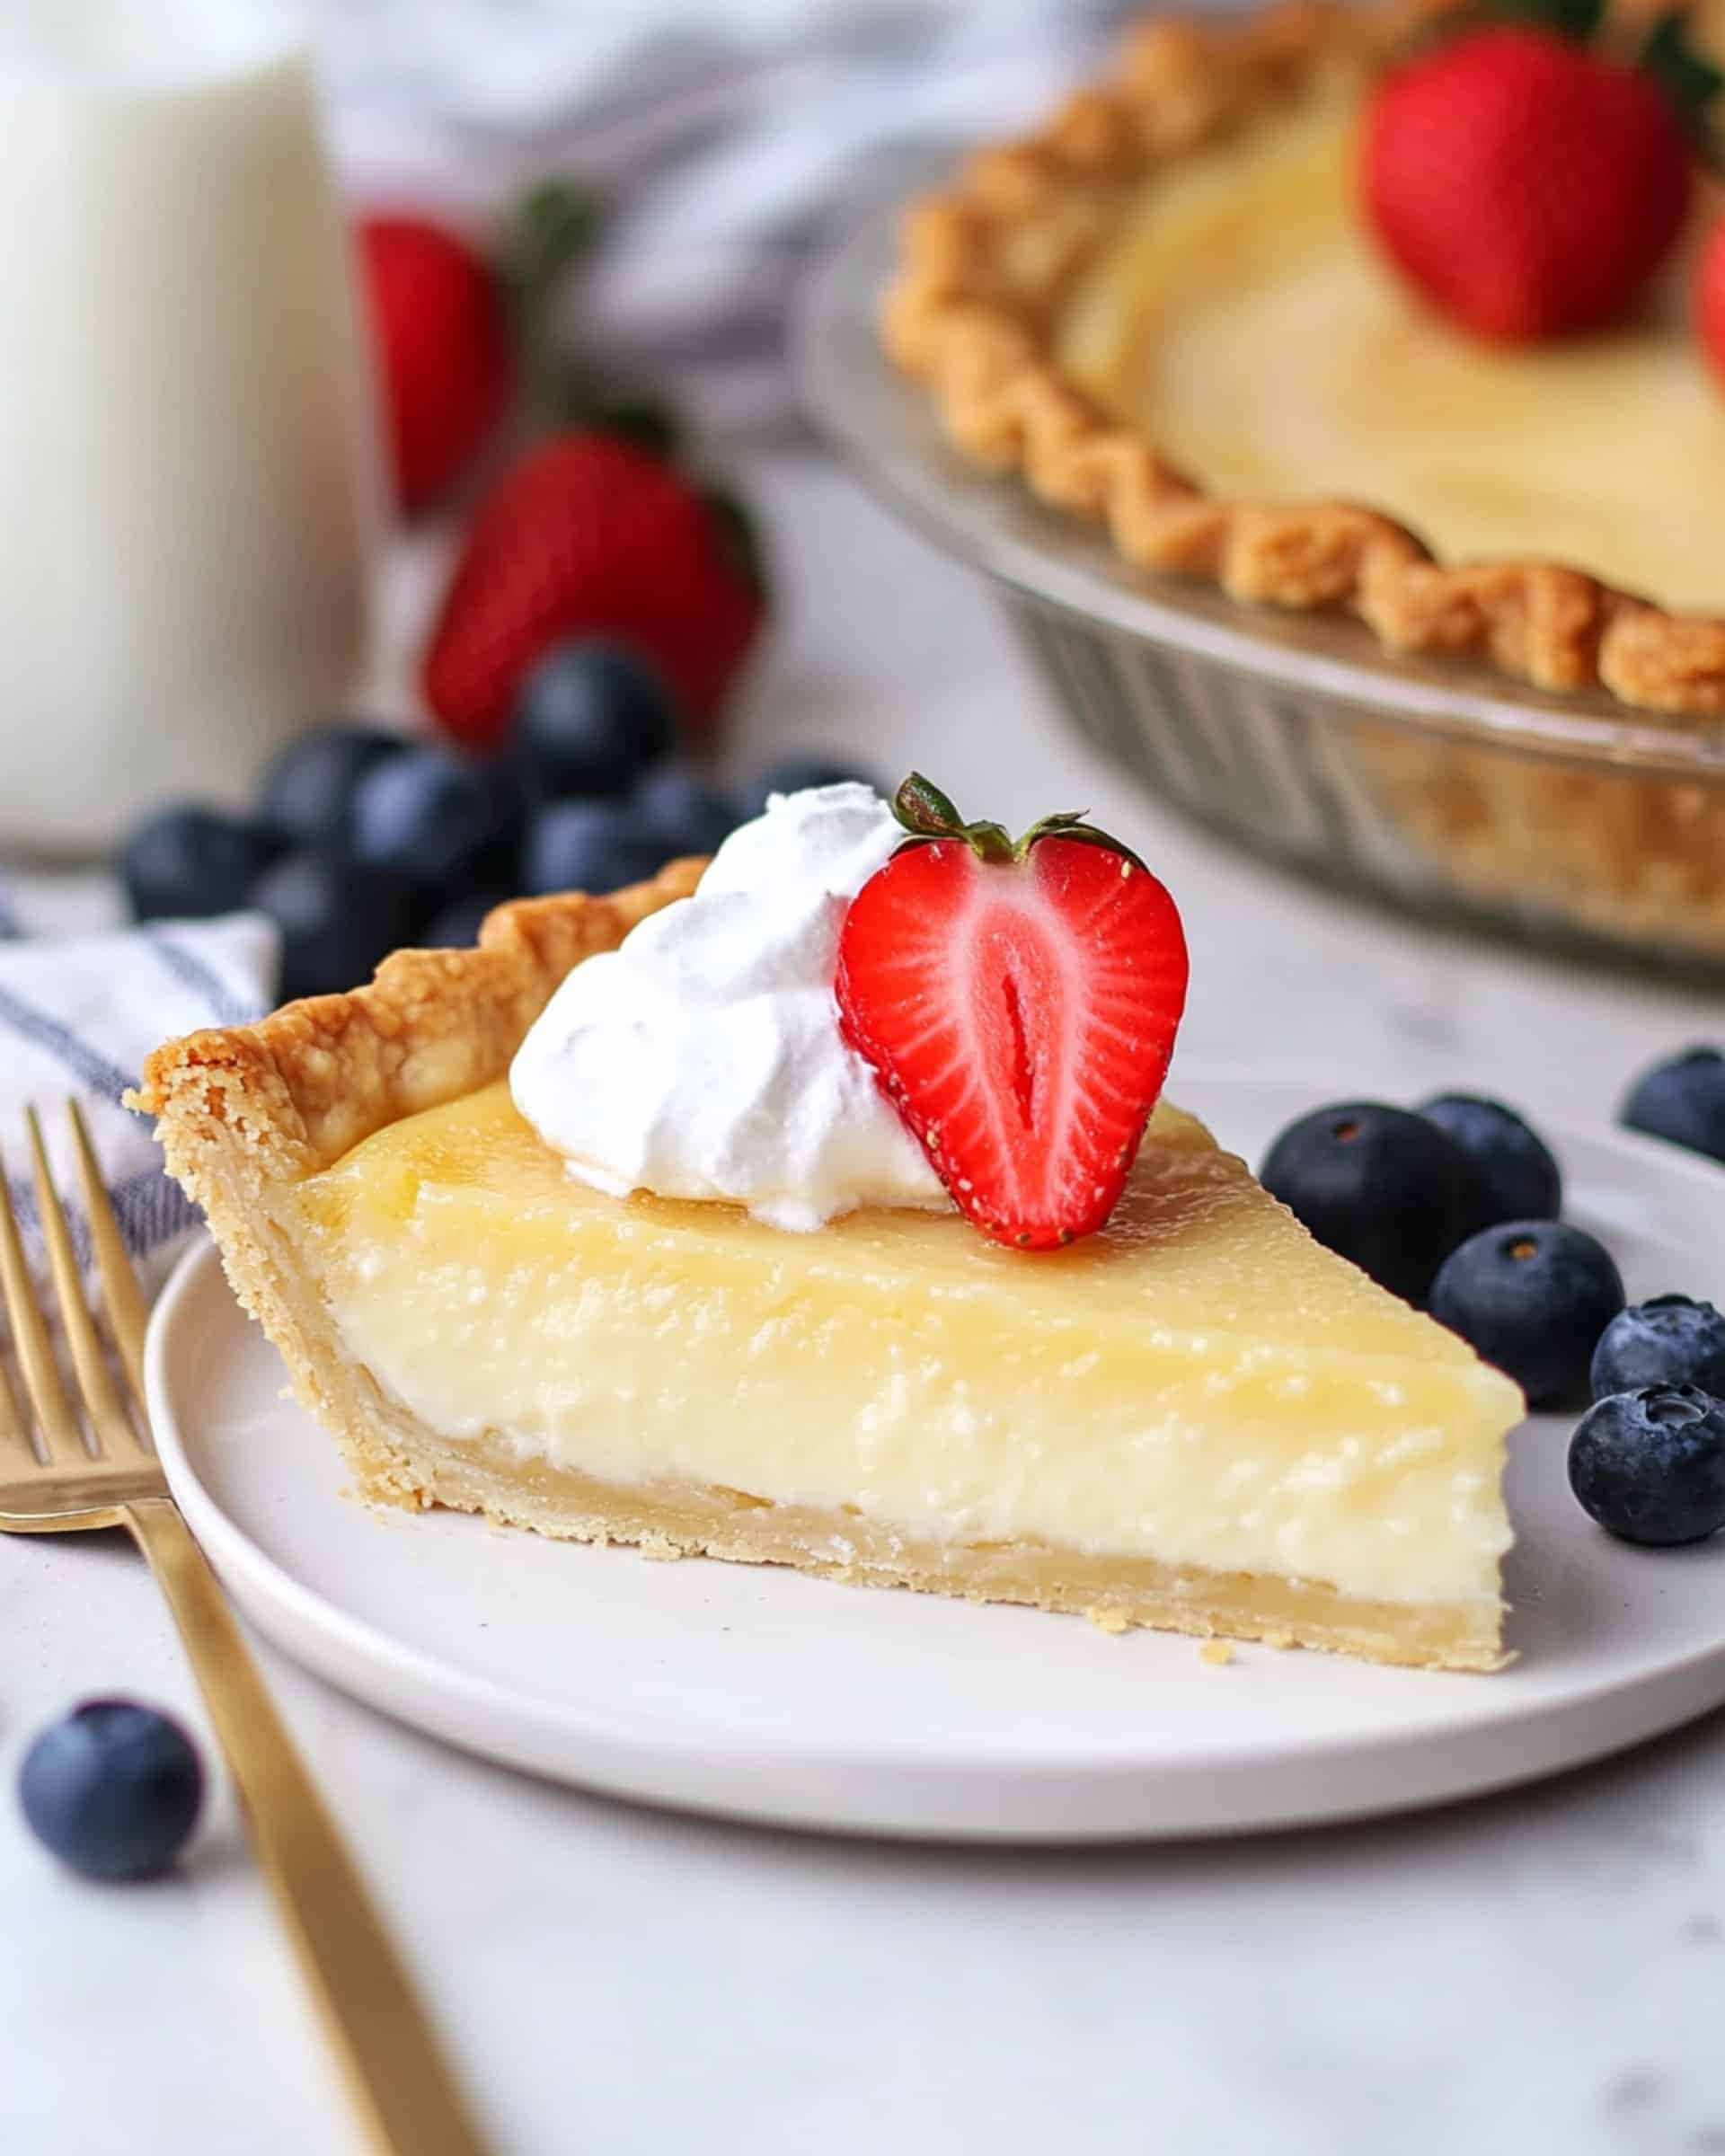
Serve slices chilled or at room temperature, with a dollop of whipped cream and fresh berries, if you want to dress it up.
Pro Tips for Making the Recipe
- Warming the Buttermilk: Take the chill off before adding, as cold buttermilk can make the butter seize and create a lumpy batter.
- Don’t Overbake: The pie should tremble slightly in the middle when you take it out—think of it like a cheesecake.
- Room Temp Ingredients: Bringing eggs, buttermilk, and butter to room temperature helps everything combine smoothly.
- Rest is Key: Allowing the pie to chill completely ensures you get picture-perfect slices that hold together.
- Sift the Dry Ingredients: This optional step gives the custard the creamiest texture imaginable.
How to Serve
This pie really shines on its own, but here are a few serving ideas to make it unforgettable:
- Classic: Enjoy a naked slice, savoring the subtle tang and creamy filling.
- With Whipped Cream: Add a cloud of lightly sweetened whipped cream for old-school diner vibes.
- Fresh Berries: Scatter raspberries, strawberries, or blueberries on top for an elegant, fresh contrast.
- Coffee’s Companion: This pie pairs beautifully with coffee or strong tea—ideally with friends or family gathered around.
- Add Crunch: A sprinkle of candied nuts or toasted coconut before serving is a game-changer!
Make Ahead and Storage
Storing Leftovers
Cover leftover pie tightly with plastic wrap or foil and keep it chilled in the fridge. It will stay delicious for up to five days.
Freezing
Want to make the pie ahead? No problem. Once completely cooled, wrap individual slices or the whole pie in plastic wrap and then foil. Freeze for up to 2 months. Thaw overnight in the refrigerator before serving.
Reheating
Buttermilk pie is at its best cold or at room temperature, but if you prefer it warm, pop a slice in the microwave for 10–15 seconds. Just don’t overheat—nobody wants rubbery custard!
FAQs
Can I use store-bought pie crust?
Absolutely. Store-bought crusts are perfectly fine and save even more time. If you have a favorite homemade crust, use it! Just remember to chill it before filling.
What can I substitute for buttermilk?
If you don’t have real buttermilk, you can “make” some by mixing whole milk with a tablespoon of lemon juice or vinegar. Let it sit for five minutes before using. It won’t be quite as tangy, but it works in a pinch.
Why is my pie runny in the middle?
If your pie is too soft, it likely needs a little more time to finish setting. Don’t slice until thoroughly cooled and chilled—it should be just set when you gently nudge the pan.
Can I make this pie ahead for holidays or parties?
Yes! This pie is an entertainer’s dream since it actually improves as it chills. Make it a day in advance and keep it refrigerated until ready to serve.
Final Thoughts
If you’ve never made buttermilk pie before, now’s the perfect time. This recipe is quick, absolutely foolproof, and guaranteed to win hearts at your table. Let the simple, old-fashioned flavors turn even a regular night into something special. Gather your ingredients, blend them with intention, and savor every creamy bite—you’ll be looking for an excuse to bake it again. Give it a try and see just how delightful homemade pie can be!
Print
Rich & Creamy Buttermilk Pie Recipe
- Prep Time: 20 minutes
- Cook Time: 55 minutes
- Total Time: 1 hour 15 minutes
- Yield: 8 servings 1x
- Category: Desserts
- Method: Baking
- Cuisine: Southern American
- Diet: Vegetarian
Description
This rich and creamy buttermilk pie is a classic Southern dessert featuring a silky, custard-like filling flavored with vanilla, lemon, and coconut extracts, nestled in a flaky pie shell. The pie comes together effortlessly, offering a wonderfully tangy flavor with a hint of sweetness. Perfect for holidays and gatherings, this buttermilk pie is best enjoyed chilled, garnished with whipped cream and fresh berries.
Ingredients
Dry Ingredients
- 1 1/2 cups granulated sugar
- 1/4 cup all-purpose flour
- 1/4 teaspoon salt
Wet Ingredients
- 2 eggs, room temperature
- 1 egg yolk, room temperature
- 5 tablespoons unsalted butter, melted
- 1 1/2 teaspoons pure vanilla extract
- 1/4 teaspoon lemon extract (adjust to taste)
- 1/8 teaspoon coconut extract (adjust to taste)
- 1 cup buttermilk, warm
Pie Shell
- 1 (9-inch) unbaked pie shell, chilled
Instructions
- Prepare the Oven – Preheat your oven to 350°F (175°C) to ensure the pie bakes evenly in a hot environment.
- Combine Dry Ingredients – In a large bowl, whisk together the granulated sugar, all-purpose flour, and salt. For an extra-smooth filling, sift these ingredients together. Set aside.
- Beat the Eggs – In another large bowl, whisk the eggs and egg yolk until the mixture is completely uniform in color and well combined.
- Mix Dry and Wet Ingredients – Gradually whisk the dry ingredients into the egg mixture. Continue whisking until the batter is smooth and free of lumps.
- Add Butter and Extracts – Whisk in the melted butter, vanilla extract, lemon extract, and coconut extract until everything is thoroughly incorporated.
- Add Buttermilk – Slowly stir in the warm buttermilk, mixing until the batter is smooth and no streaks remain. If the mixture develops bubbles on top, let it settle for a few moments before proceeding.
- Fill the Pie Shell – Pour the prepared batter into the chilled, unbaked 9-inch pie shell.
- Bake the Pie – Place the pie on the lower oven rack and bake for 25 minutes. Once that time is up, move the pie to the middle rack and bake for another 25 minutes, or until the edges are set and the center is just slightly jiggly.
- Cool the Pie – Remove the pie from the oven and transfer it to a cooling rack. Allow it to cool for 2-3 hours, or until the bottom of the pan is no longer hot to the touch.
- Chill Before Serving – Once cooled, refrigerate the pie for at least 2 more hours to let it fully set before slicing and serving.
- Garnish and Serve – Serve the pie cold or at room temperature, plain or topped with whipped cream and fresh berries as desired.
Notes
- For best texture, use room temperature eggs and gently warm the buttermilk.
- Sifting the dry ingredients ensures a lump-free custard filling.
- Letting the pie cool completely and chill before slicing helps the filling set firmly.
- You can customize the extracts to your taste preferences.
- Serve with whipped cream and berries for added flavor and presentation.
Nutrition
- Serving Size: 1 slice (1/8 pie)
- Calories: 355
- Sugar: 33g
- Sodium: 181mg
- Fat: 16g
- Saturated Fat: 9g
- Unsaturated Fat: 6g
- Trans Fat: 0g
- Carbohydrates: 48g
- Fiber: 0g
- Protein: 5g
- Cholesterol: 90mg

Your email address will not be published. Required fields are marked *