
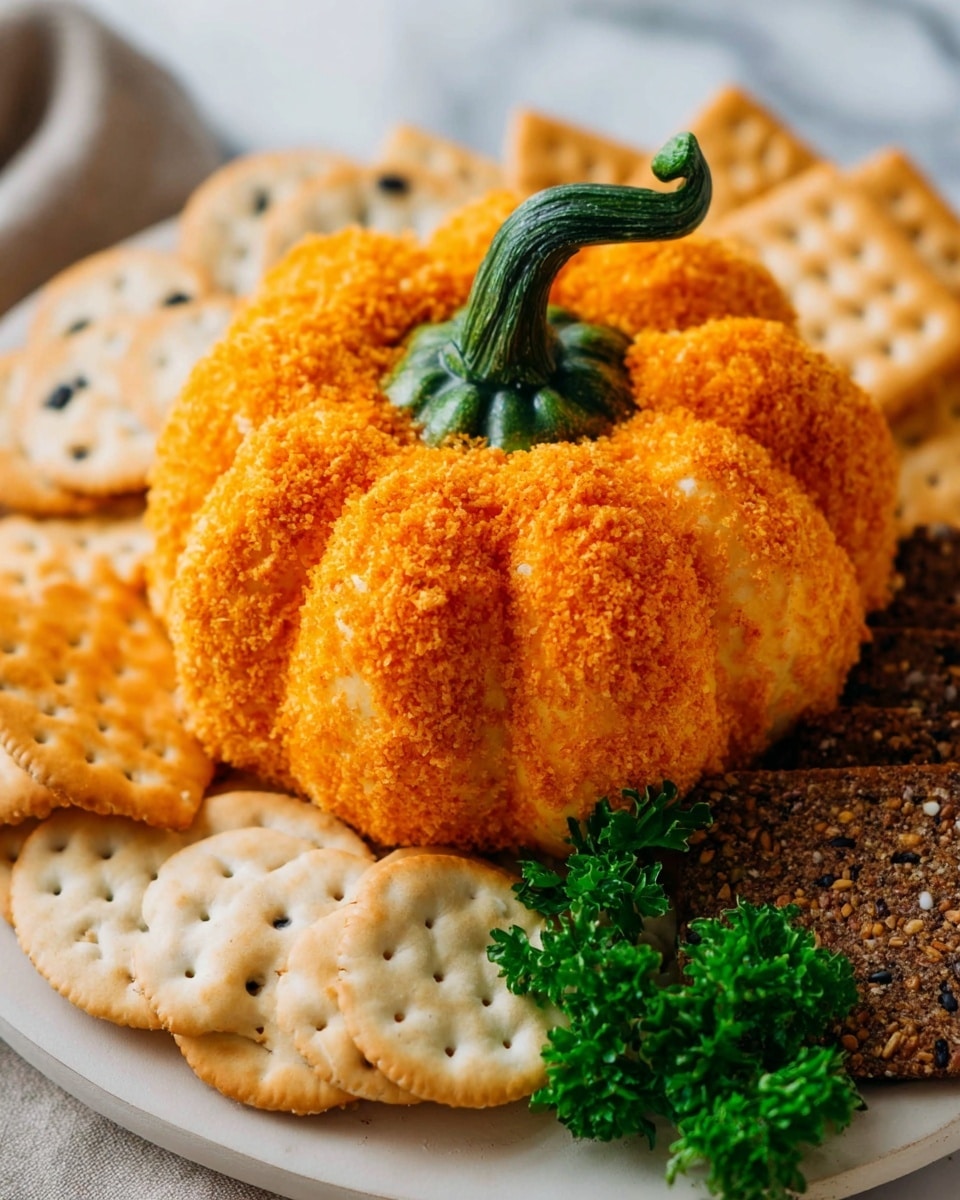
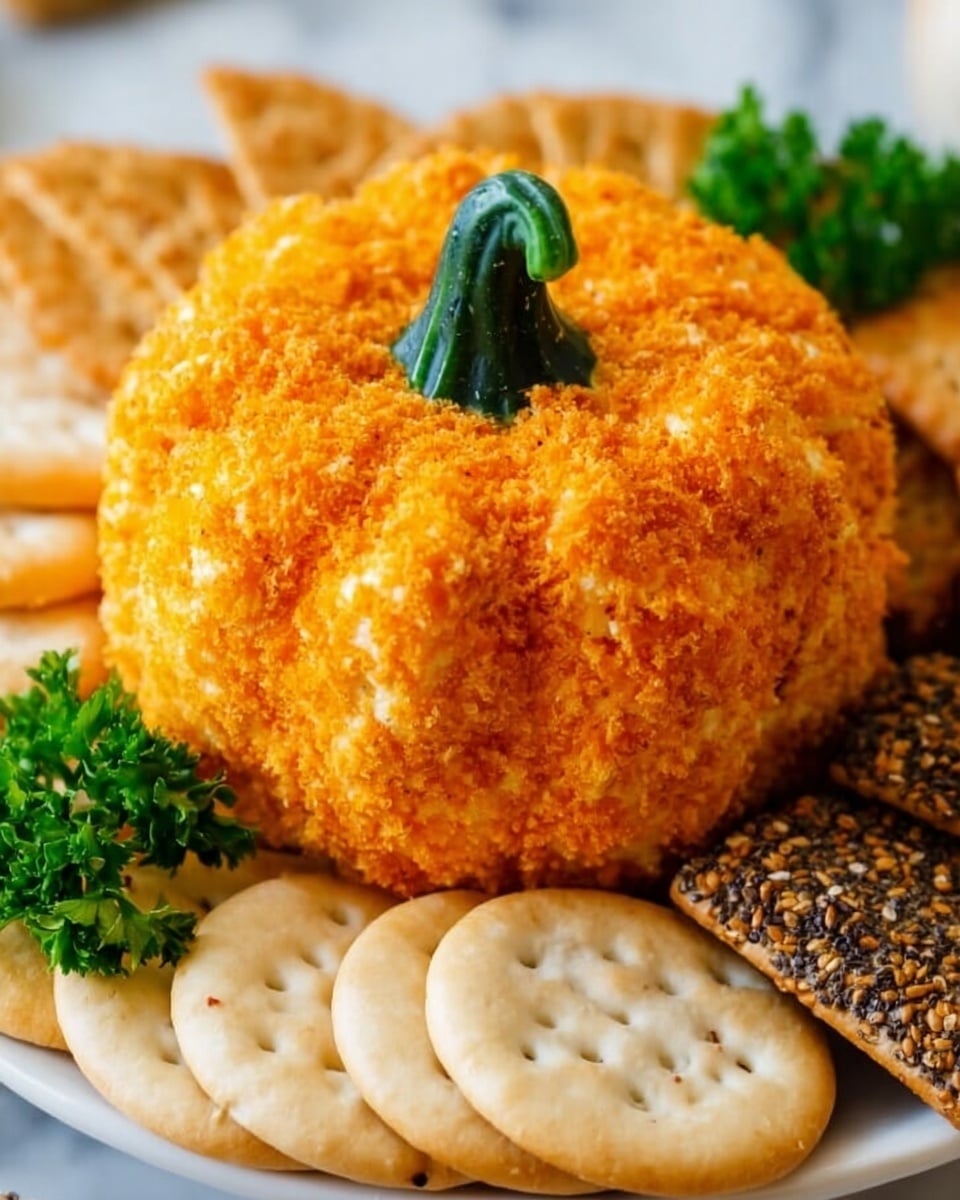
If you’re looking for a fun, festive appetizer that’s as charming as it is delicious, you absolutely have to try this Pumpkin-Shaped Cheese Ball with Crunchy Crackers and Bell Pepper Stem Recipe. I love this because it’s simple to make but instantly becomes the centerpiece of any fall gathering. Picture a creamy, tangy cheese ball rolled in crunchy cracker crumbs, shaped perfectly like a pumpkin with a real bell pepper “stem” on top—it’s both adorable and irresistibly tasty!
Why You’ll Love This Recipe
- Festive & Fun Presentation: It looks just like a little pumpkin, making it perfect for holiday parties or cozy autumn nights.
- Simple Ingredients: You likely have most of these on hand, and the flavors meld together beautifully with very little effort.
- Textural Contrast: Creamy cheese inside and crunchy cheese cracker coating—that combo always gets rave reviews from my guests.
- Versatile Serving: Serve it with your favorite crackers or fresh veggies for a guaranteed crowd-pleaser.

Ingredients You’ll Need
The ingredients come together in this recipe to create a rich, full-flavored cheese ball with a touch of savory spices. When shopping, I recommend picking really good sharp cheddar because it makes all the difference—your cheese ball tastes more vibrant and less processed.
- Cream cheese: Make sure it’s softened to room temperature for smooth mixing, and use full fat for the creamiest texture.
- Butter: Like the cream cheese, softened butter blends easily, adding richness without overpowering the other flavors.
- Sharp cheddar cheese: Freshly grated gives you the best flavor and avoids clumping—skip the pre-shredded if you can.
- Garlic powder: Adds a mellow savory note—just a little goes a long way here.
- Onion powder: A subtle depth enhancer that balances the garlic perfectly.
- Pepper: Freshly ground black pepper gives a gentle kick—adjust to your taste.
- Smoked paprika: This ingredient gives the cheese ball a fun smoky flavor, which also makes it taste a bit more like the real pumpkin spice aroma of fall.
- Cheese crackers: Crushed to coat the exterior—Cheez-Its are my go-to because of their saltiness and sturdy crunch.
- Bell pepper stem: Not the usual addition, but it gives the perfect natural “stem” that takes this pumpkin cheese ball from cute to iconic.
Variations
I love that you can customize the pumpkin cheese ball to fit your vibe. I’ve tweaked this with different cheeses or coatings and each version has its charm, so don’t hesitate to get creative.
- Cheese swaps: I sometimes mix in Gouda or pepper jack to add a smoky or spicy twist; it’s always a hit with my family.
- Coating ideas: Instead of cheese crackers, try crushed nuts like pecans for a more rustic look and a crunchy contrast.
- Herb additions: Toss in a bit of fresh chopped parsley or chives for freshness if you want a green pop inside the cheese ball.
- Dietary modifications: Use vegan cream cheese and shredded dairy-free cheese for a plant-based version that’s surprisingly tasty.
How to Make Pumpkin-Shaped Cheese Ball with Crunchy Crackers and Bell Pepper Stem Recipe
Step 1: Mix Your Cheeses and Seasonings
Start by combining softened cream cheese, butter, and finely grated sharp cheddar in a bowl. Sprinkle in garlic powder, onion powder, pepper, and smoked paprika. I like to use a sturdy spoon or even my hands (washed, of course!) to mix everything until it’s uniform and feels creamy yet a little textured from the cheddar. This step is where the base flavor really comes together, so don’t rush.
Step 2: Shape and Chill the Pumpkin
Lay the cheese mixture on a large piece of plastic wrap. Now comes the fun part: wrap and shape it into a compact ball. Make sure the ball is smooth on the surface so it looks like a neat pumpkin later. Add a second layer of plastic wrap around it, then wrap two wide rubber bands tightly around opposite sides to create that classic pumpkin ribbed effect. I discovered this rubber band trick after trying to carve pumpkin lines by hand, and it saves so much time!
Pop your pumpkin cheese ball into the fridge for at least two hours to let it firm up—this step is key so it holds shape when you coat it.
Step 3: Coat with Crunchy Cracker Crumbs
After chilling, carefully remove the rubber bands and plastic wrap. Pour crushed cheese crackers onto a plate and roll the cheese ball around so it’s fully coated. Press the crumbs in gently but firmly; they add an irresistible crunch that complements the creamy inside perfectly.
Step 4: Add the Bell Pepper Stem and Serve
For the finishing touch, press a fresh bell pepper stem into the top of the cheese ball—this mimics a real pumpkin’s stem and is such a cute, unexpected detail! Now your pumpkin cheese ball is ready to impress. Serve it on a festive platter with your favorite crunchy crackers. I love how it instantly becomes a conversation starter at parties!
Pro Tips for Making Pumpkin-Shaped Cheese Ball with Crunchy Crackers and Bell Pepper Stem Recipe
- Room Temperature Cheeses: Always soften cream cheese and butter fully before mixing to avoid lumps and make shaping easier.
- Rubber Band Pumpkin Ribs: Using rubber bands to create the pumpkin’s ridges gives a clean look—just be gentle when removing so you don’t mess up the shape.
- Avoid Over-Mixing: Mix just enough to combine; over-working can make the cheese ball too dense and less creamy.
- Coating Crunch Matters: Crushing crackers finely but not into dust gives a nicer texture and helps the crumbs stick better.
How to Serve Pumpkin-Shaped Cheese Ball with Crunchy Crackers and Bell Pepper Stem Recipe
Garnishes
I typically keep garnishes simple because the pumpkin cheese ball itself steals the show. A sprinkle of chopped fresh chives around the base adds a nice pop of color, or you can scatter some toasted pumpkin seeds nearby if you want extra crunch. Seasonal edible flowers can also make the presentation festive and pretty.
Side Dishes
This cheese ball pairs beautifully with an assortment of crunchy crackers, sliced cucumbers, or colorful bell pepper strips—compliments the pepper stem perfectly! A crisp green salad or a bowl of spiced nuts balances out the richness if you’re serving a bigger spread.
Creative Ways to Present
One of my favorite ways to wow guests is placing the pumpkin cheese ball on a bed of kale or mixed greens to mimic a pumpkin patch, then adding mini gourds and candles around it for a cozy, rustic centerpiece. It’s especially fun for Thanksgiving or Halloween parties and doubles as décor and deliciousness!
Make Ahead and Storage
Storing Leftovers
I wrap leftover cheese ball tightly in plastic wrap and then place it in an airtight container in the fridge. It keeps beautifully for up to 4 days, and you can always re-coat with fresh crushed crackers before serving again to refresh the crunchy outside.
Freezing
I don’t usually freeze the shaped cheese ball because the texture changes a bit once thawed, but you can freeze the mixed cheese for up to 3 months in a sealed container, then shape and chill freshly when ready to serve.
Reheating
This cheese ball is best served cold or at room temperature, so I recommend just letting leftovers sit out for 20 minutes after taking them from the fridge before serving again. It softens up nicely without losing the shape or coating crunch.
FAQs
-
Can I make the Pumpkin-Shaped Cheese Ball with Crunchy Crackers and Bell Pepper Stem Recipe ahead of time?
Absolutely! In fact, preparing it a few hours or even a day ahead is perfect to let the flavors meld. Just keep it tightly wrapped and chilled until you’re ready to coat with cracker crumbs and add the bell pepper stem for serving.
-
What crackers work best for the crunchy coating?
I personally use cheese crackers like Cheez-Its because their salty flavor complements the cheese ball, but buttery Ritz crackers or even gluten-free crackers work well too. Just crush them finely enough to stick but still have some texture.
-
How do I keep the pumpkin shape from falling apart?
The key is to chill the shaped cheese ball for at least two hours (overnight is even better) to allow it to firm up. Also, using rubber bands to create ridges helps maintain the pumpkin look without any carving.
-
Can I use other vegetables besides bell pepper for the stem?
Definitely! Some DIYers use celery stalks or even small carrot tops. But I love bell pepper stems because they’re sturdy, edible, and have that perfect natural look that completes the pumpkin effect.
Final Thoughts
This Pumpkin-Shaped Cheese Ball with Crunchy Crackers and Bell Pepper Stem Recipe holds a special place in my heart as a simple yet creative dish that brings people together. It’s one of those recipes that makes entertaining feel effortless while still impressing everyone with how cute and tasty it is. I think once you try it, you’ll find it’s a new seasonal staple you’ll reach for year after year—so go ahead, gather your ingredients, and get to shaping that perfect little pumpkin. Your friends and family will thank you!
Print
Pumpkin-Shaped Cheese Ball with Crunchy Crackers and Bell Pepper Stem Recipe
- Prep Time: 15 minutes
- Cook Time: 0 minutes
- Total Time: 2 hours 15 minutes
- Yield: 10 servings 1x
- Category: Appetizer
- Method: No-Cook
- Cuisine: American
- Diet: Vegetarian
Description
This Pumpkin Cheese Ball is a festive and fun appetizer perfect for fall gatherings. Made with a creamy blend of cream cheese, sharp cheddar, and buttery seasonings, it’s shaped into a pumpkin and coated with crunchy cheese cracker crumbs. Topped with a bell pepper stem to resemble a pumpkin’s stem, it’s both visually appealing and delicious, offering a perfect combination of savory flavors and creamy texture.
Ingredients
Cheese Mixture
- 8 ounces cream cheese (softened)
- 2 tablespoons butter (softened)
- 8 ounces sharp cheddar cheese (finely grated)
- 1/4 teaspoon garlic powder
- 1/4 teaspoon onion powder
- 1/4 teaspoon pepper
- 1/2 teaspoon smoked paprika
Coating & Garnish
- 1 cup crushed cheese crackers (such as Cheez-Its)
- 1 bell pepper stem
Instructions
- Combine Ingredients: In a bowl, place the softened cream cheese, softened butter, finely grated sharp cheddar cheese, garlic powder, onion powder, pepper, and smoked paprika. Stir the mixture until all ingredients are thoroughly combined and form a smooth, uniform cheese blend.
- Shape the Cheese Ball: Transfer the cheese mixture onto a large piece of plastic wrap. Wrap the plastic tightly around the cheese mixture while shaping it into a round ball. Add a second layer of plastic wrap over the ball for extra firmness.
- Add Pumpkin Ribs: Stretch two wide rubber bands around opposite sides of the wrapped cheese ball to create indentations resembling pumpkin ribs. Add two more rubber bands evenly spaced to emphasize the ribbed shape, giving the cheese ball a pumpkin-like appearance.
- Chill: Refrigerate the cheese ball for at least two hours to allow it to firm up and set in shape.
- Coat with Crumbs: Remove the rubber bands and unwrap the plastic wrap carefully. Place the crushed cheese crackers on a plate, then roll the cheese ball in the crumbs until fully coated, giving it a crunchy exterior.
- Add the Stem: Press the bell pepper stem gently into the top center of the cheese ball to mimic the appearance of a pumpkin stem.
- Serve: Arrange the pumpkin cheese ball on a serving platter and serve with additional crackers or vegetables for dipping.
Notes
- This pumpkin cheese ball blends creamy and sharp cheeses with aromatic spices, making it a seasonal crowd-pleaser.
- Using rubber bands to create the pumpkin ribs is a simple trick to make it visually festive.
- Crushed cheese crackers provide a crunchy contrast to the creamy cheese ball.
- The bell pepper stem adds a colorful, authentic pumpkin look and is edible.
- Chilling time is essential to ensure the cheese ball firms up properly for easy slicing and serving.
- Serve with various crackers, sliced vegetables, or bread for dipping options.
Nutrition
- Serving Size: 1 serving
- Calories: 225 kcal
- Sugar: 1 g
- Sodium: 234 mg
- Fat: 17 g
- Saturated Fat: 11 g
- Unsaturated Fat: 6 g
- Trans Fat: 0 g
- Carbohydrates: 3 g
- Fiber: 1 g
- Protein: 8 g
- Cholesterol: 55 mg

Your email address will not be published. Required fields are marked *