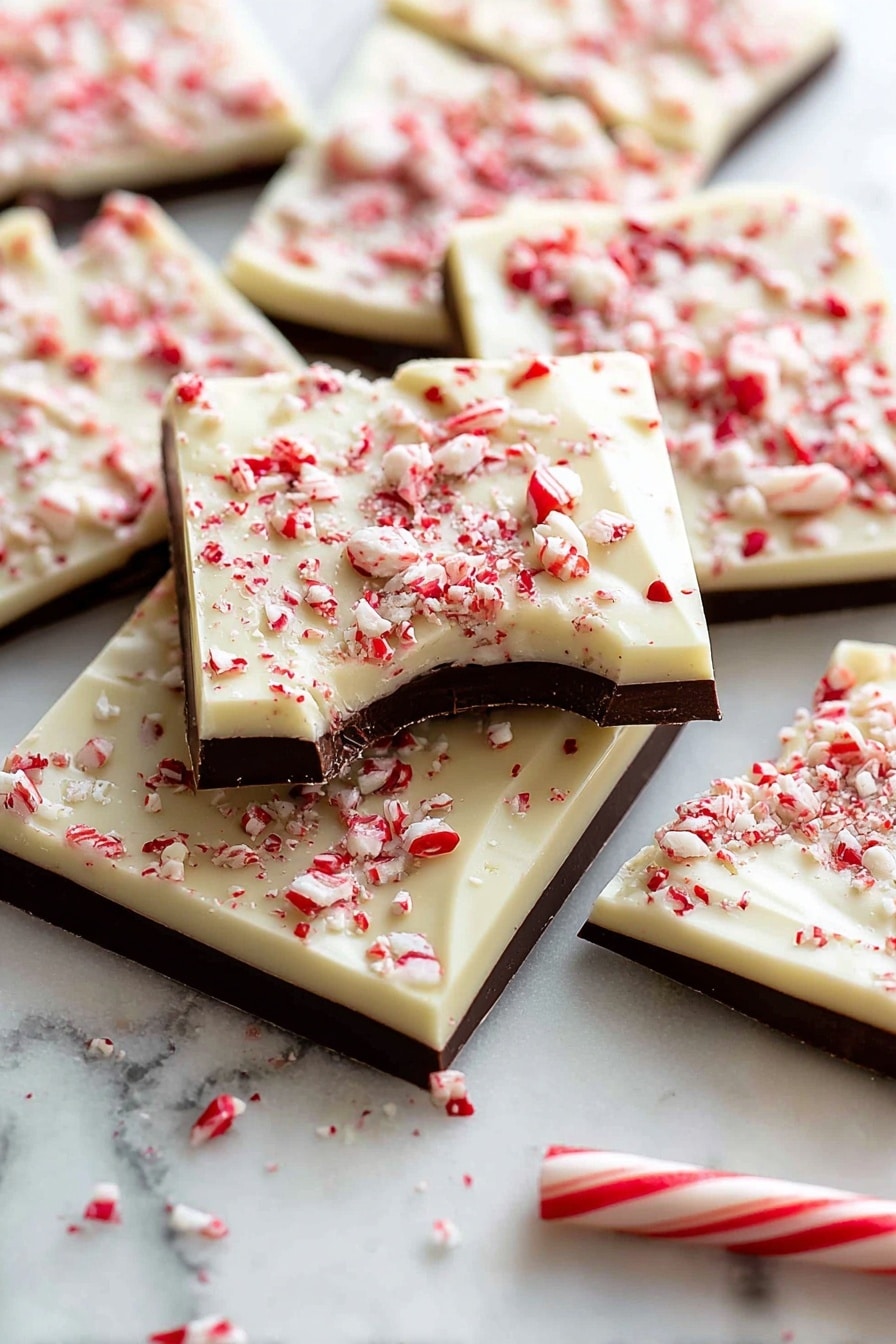
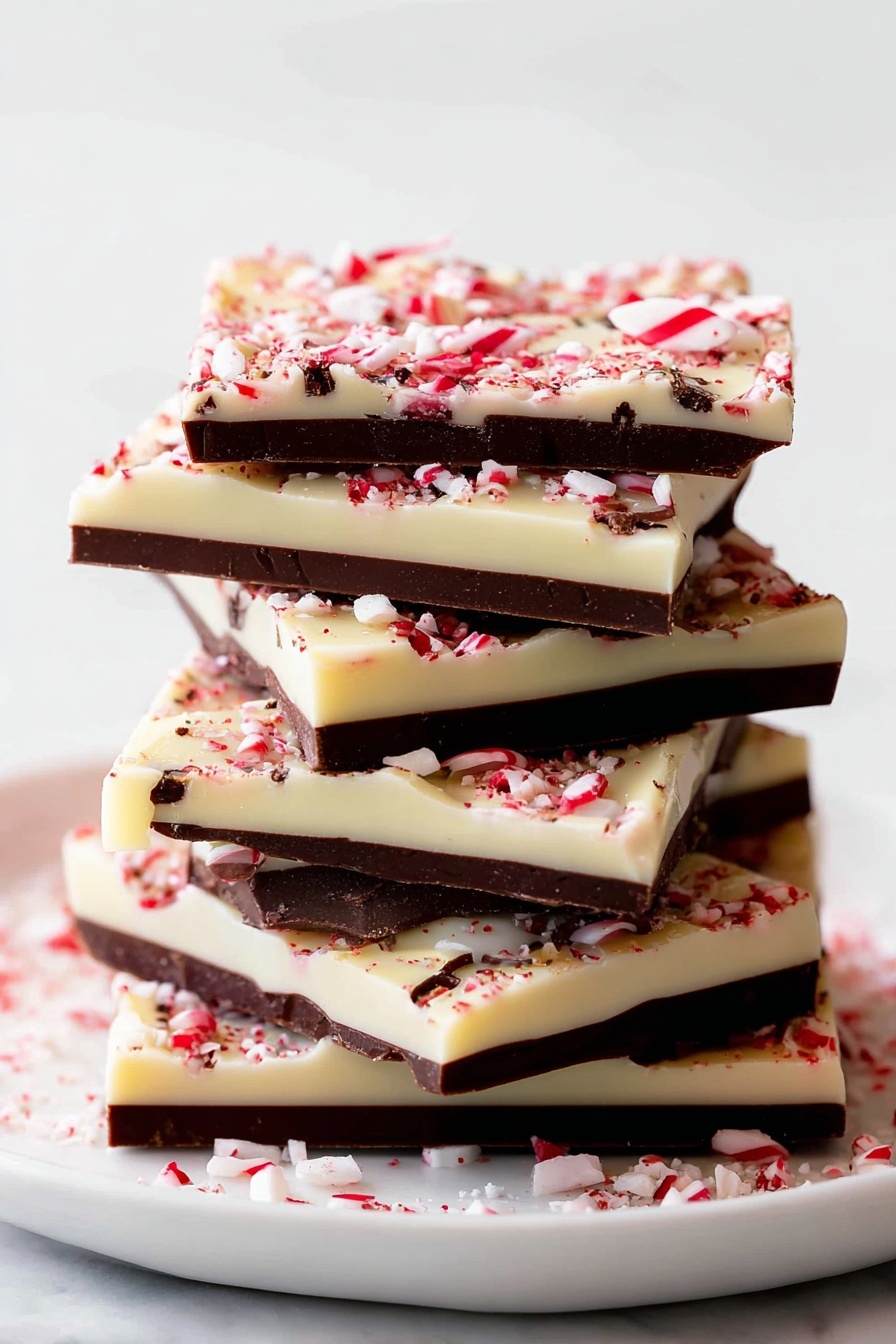
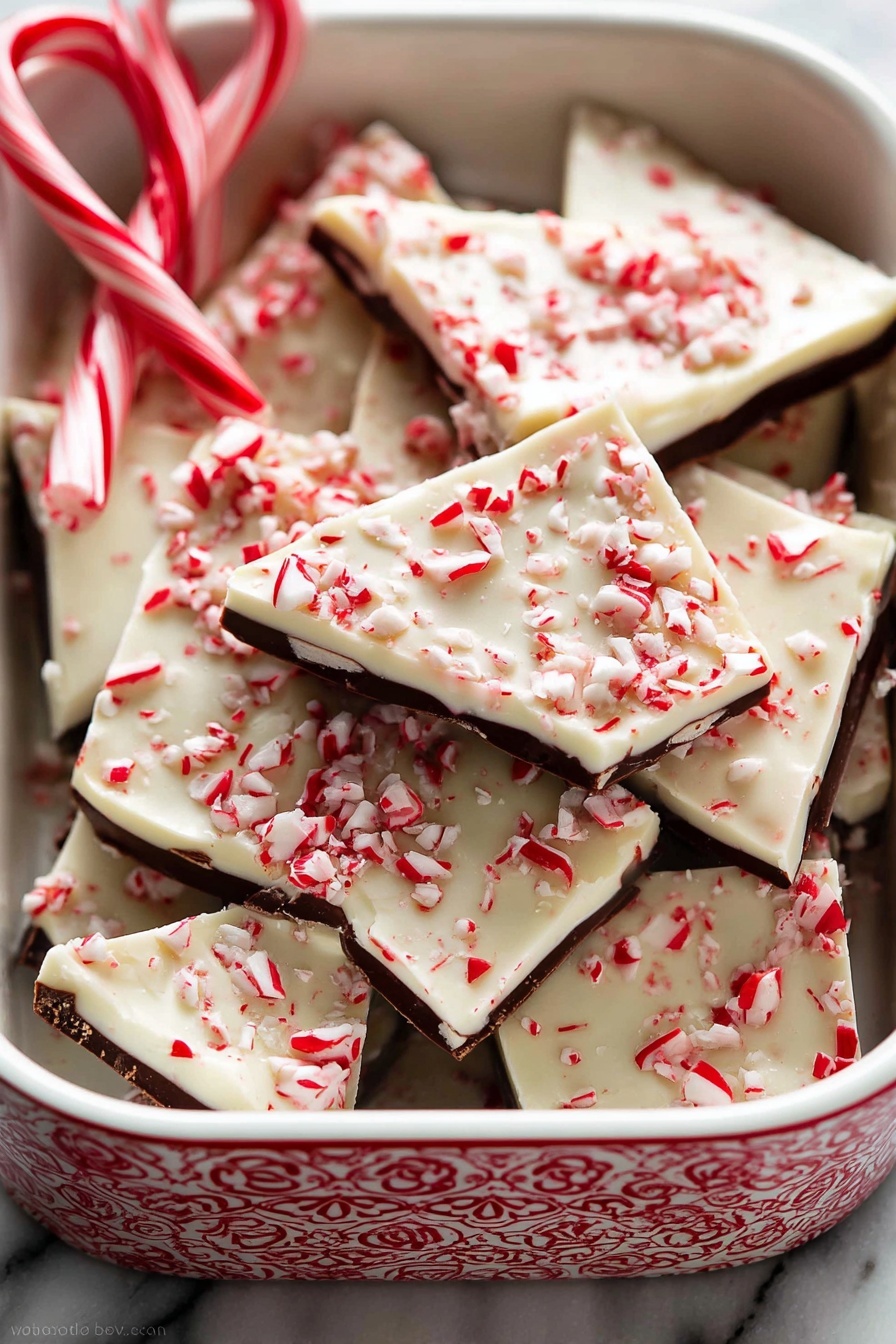
If you’re looking for a quick, crowd-pleasing holiday treat, I’ve got you covered with my Peppermint White Chocolate Bark Recipe. This recipe combines creamy white chocolate, rich semi-sweet chocolate, and a refreshing peppermint kick, all topped with crunchy crushed candy canes. It’s one of those festive bites that everyone will go crazy for — and trust me, it’s easier to make than you might think!
Why You’ll Love This Recipe
- Simple to Make: You don’t need fancy tools or techniques; perfect for beginners and pros alike.
- Festive Flavor: The peppermint and chocolate combo is a classic holiday hit that feels fresh and indulgent.
- Customizable: You can play with candy toppings or chocolate types to suit your taste.
- Great for Gifting: This bark stores well and makes a thoughtful, homemade present for friends and family.
Ingredients You’ll Need
The magic of this Peppermint White Chocolate Bark Recipe really lies in a few quality ingredients that complement each other beautifully. Picking good chocolate and fresh candy canes makes a world of difference in flavor and texture.
- White Chocolate: Use high-quality white chocolate bars or chips for smooth melting and rich flavor.
- Semi-Sweet or Bittersweet Chocolate: This contrast balances the sweetness of the white chocolate beautifully.
- Vegetable or Coconut Oil: A touch of oil helps melt the chocolate smoothly and gives your bark a glossy finish.
- Peppermint Extract: Fresh peppermint extract adds the perfect festive zing; avoid artificial peppermint oils.
- Candy Canes: Crush them fresh just before topping to keep that satisfying crunch and vibrant color.
Variations
I love that this Peppermint White Chocolate Bark Recipe is so versatile — feel free to tweak it to fit your cravings or dietary needs. Play around with the add-ins or swap out the chocolates to make it your own.
- Dark Chocolate Version: I once used rich dark chocolate for both layers and added a pinch of sea salt — it gave the bark a wonderful depth and sophistication.
- Nutty Crunch: Sprinkle chopped pistachios or almonds along with the candy canes for added texture and flavor; my kids loved the surprise crunch!
- Vegan Adaptation: Use vegan white chocolate and semi-sweet chocolate, plus coconut oil instead of vegetable oil, to make it dairy-free without compromising taste.
- Seasonal Twist: Add a few drops of orange extract or swap out candy canes for crushed peppermint candies for a different seasonal vibe.
How to Make Peppermint White Chocolate Bark Recipe
Step 1: Prep Your Pan and Ingredients
Start by lining an 8-inch or 9-inch square baking pan with parchment paper or aluminum foil. This makes removing the bark a breeze later on, plus prevents sticking. Smooth out any wrinkles so your bark has an even surface. I prefer parchment because it doesn’t tear as easily when peeling off the bark.
Step 2: Melt the First Layer of White Chocolate
Here’s where the magic begins! Place 6 ounces of chopped white chocolate into a heatproof bowl or liquid measuring cup. Add 1/2 teaspoon of your oil—it really helps the chocolate stay shiny and smooth. I like microwaving mine in 20-second bursts, stirring well after each, to avoid overheating—which white chocolate is notorious for. Once melted and silky, stir in 1/4 teaspoon peppermint extract for that festive aroma.
Pour this creamy layer into your lined pan and spread it out evenly with an offset spatula or the back of a spoon. Pop the pan in the fridge for 10–15 minutes until it’s mostly set but not rock-hard; this ensures the layers stick together properly.
Step 3: Melt and Spread the Semi-Sweet Chocolate Layer
Using the same melting method, melt your semi-sweet chocolate with another 1/2 teaspoon oil. Stir in the remaining 1/4 teaspoon peppermint extract once smooth. Pour this over your chilled white chocolate base, spreading evenly again.
Back into the fridge it goes for another 10–15 minutes, just until it firms up enough to hold the final white chocolate layer.
Step 4: Finish with White Chocolate and Candy Canes
Melt the remaining white chocolate minus the peppermint extract, with the last 1/2 teaspoon of oil. Pour this smooth, glossy layer over the chocolate stack and spread evenly. Now comes the fun part: sprinkle crushed candy canes right over the top. I like placing the candy canes in a sealed bag and giving them a gentle whack with a rolling pin to get just the right level of crunch.
Chill for about an hour until fully set. To serve, lift the whole bark out using the parchment and break into irregular shards or neatly cut squares. If it’s been chilling longer than a few hours, let it warm to room temp for 10–15 minutes before slicing, so the layers don’t separate.
Pro Tips for Making Peppermint White Chocolate Bark Recipe
- Melting Chocolate Carefully: I always use short microwave bursts and stir often to avoid burning, which is super common with white chocolate.
- Layer Setting Time: Don’t skip chilling until layers are just set but still slightly tacky; this helps the layers stick together seamlessly.
- Oil Makes a Difference: Adding oil keeps the chocolate smooth and glossy, plus makes cutting the bark less brittle.
- Candy Cane Crushing: Crushing your candy canes fresh lets you control the size — I prefer a mix of fine and bigger pieces for texture and visual fun.
How to Serve Peppermint White Chocolate Bark Recipe

Garnishes
I usually just stick to the crushed candy canes — their vibrant red and white pieces make the bark look so festive and feel deliciously crunchy. Sometimes, I add a tiny sprinkle of edible glitter or a few mini peppermint candy drops for extra sparkle when gifting.
Side Dishes
This bark pairs so well with a hot drink, especially peppermint tea, mulled wine, or a cozy cup of hot cocoa. If you’re serving at a party, set it alongside an assortment of cookies and maybe a cheese board for a delightful contrast.
Creative Ways to Present
One holiday season, I layered the bark pieces in a clear glass jar with alternating layers of crushed candy canes for a beautiful gift. Or, try cutting the bark into festive shapes using cookie cutters for parties — kids love it! Wrapping individual pieces in cellophane with a ribbon also makes darling party favors.
Make Ahead and Storage
Storing Leftovers
I store leftover bark in an airtight container in the fridge. It stays fresh and crunchy for up to 3 weeks, which is perfect since we rarely have enough to last that long! During colder months, you can leave it out at room temperature for a couple of days without any worries.
Freezing
Freezing peppermint bark works well if you want to make a batch ahead. Wrap the bark tightly in plastic wrap and store it in a freezer-safe bag or container. When ready to enjoy, thaw it in the fridge overnight to keep the texture perfect.
Reheating
Since this is a no-bake treat, reheating isn’t necessary. Just let frozen or refrigerated bark come to room temperature before serving — this softens it slightly and unlocks those lovely melting notes in the chocolate without losing crunch.
FAQs
-
Can I use chocolate chips instead of chopped chocolate in this recipe?
Yes, chocolate chips work just fine! Just be sure to use good-quality chips, and follow the same gentle melting process in short bursts to avoid burning. Sometimes chips have stabilizers that can affect melting, so stir continuously until smooth.
-
What if I don’t have peppermint extract? Can I use vanilla instead?
Definitely! Vanilla extract can be a nice alternative if you want a milder flavor. The peppermint extract gives that iconic holiday flair, but vanilla keeps the bark sweet and comforting. You could also try almond extract for a fun twist.
-
Why does my white chocolate sometimes seize when melting?
White chocolate is sensitive to heat and moisture. Melting it slowly in short intervals and stirring often helps prevent overheating. Also, avoid getting any water into the bowl because it can cause the chocolate to seize and become grainy.
-
Can I make this bark thicker or thinner?
Absolutely! Simply adjust the amount of chocolate and the size of your pan. For thicker bark, use a smaller pan or add extra chocolate layers. For thinner bark, spread each layer more thinly or use a larger baking sheet.
Final Thoughts
I absolutely love how this Peppermint White Chocolate Bark Recipe turns out every single time — creamy, crunchy, and packed with that cool peppermint punch. It’s become my go-to holiday treat to whip up when I want something impressive but fuss-free. Give it a try, and I bet you’ll want to make it year after year too. Trust me, once you taste that first bite, you’ll be hooked!
Print
Peppermint White Chocolate Bark Recipe
- Prep Time: 30 minutes
- Cook Time: 15 minutes (melting and layering)
- Total Time: 1 hour 45 minutes
- Yield: 1 batch, just over 1 lb 1x
- Category: Dessert
- Method: No-Cook
- Cuisine: American
Description
A decadent peppermint bark recipe featuring layers of smooth white and semi-sweet chocolate infused with peppermint extract and topped with crushed candy canes for a festive holiday treat. This bark is easy to make using the microwave for melting chocolate and offers a perfect balance of creamy chocolate and refreshing peppermint crunch.
Ingredients
White Chocolate Layers
- 12 ounces (339g) white chocolate, coarsely chopped and divided*
- 1 and 1/2 teaspoons vegetable oil or coconut oil, divided
- 1/2 teaspoon peppermint extract, divided
Semi-Sweet Chocolate Layer
- 6 ounces (170g) semi-sweet or bittersweet chocolate, coarsely chopped*
- 1/2 teaspoon vegetable oil or coconut oil (included in total above)
- 1/4 teaspoon peppermint extract (included in total above)
Topping
- 2–3 regular-size candy canes (24–36g total), crushed
Instructions
- Prepare the Pan: Line the bottom and sides of an 8-inch or 9-inch square baking pan with parchment paper or aluminum foil, smoothing out any wrinkles. Alternatively, use a lined baking sheet. Set aside.
- Make Bottom White Chocolate Layer: Place 6 ounces of white chocolate in a small heatproof bowl or liquid measuring cup. Add 1/2 teaspoon of oil. Melt the chocolate in 20-second increments in the microwave, stirring vigorously after each until smooth and fully melted. Stir in 1/4 teaspoon of peppermint extract. Pour the melted white chocolate into the prepared pan and spread into a thin, smooth layer with an offset spatula or spoon. Refrigerate for 10–15 minutes until almost set but not fully hardened.
- Make Semi-Sweet Chocolate Layer: In a small heatproof bowl or liquid measuring cup, place the 6 ounces of semi-sweet chocolate. Add 1/2 teaspoon of oil. Melt in 20-second increments in the microwave, stirring thoroughly after each until smooth. Stir in remaining 1/4 teaspoon peppermint extract. Pour over the chilled white chocolate layer and spread evenly. Refrigerate for another 10–15 minutes until nearly set.
- Make Top White Chocolate Layer: Place the remaining white chocolate in a small heatproof bowl or liquid measuring cup. Add last 1/2 teaspoon oil. Melt as before in 20-second increments, stirring until smooth. Pour over the semi-sweet chocolate layer and spread evenly. This layer is not flavored with peppermint extract.
- Add Candy Cane Topping: Evenly sprinkle crushed candy canes over the top white chocolate layer. To crush, place unwrapped candy canes in a sealed bag and gently crush using a rolling pin or meat mallet.
- Set the Bark: Refrigerate the entire bark for about 1 hour or until completely set and hardened.
- Cut and Store: Remove the bark from the pan by lifting the foil or parchment. Break or cut into pieces of desired size. If chilled longer than 3–4 hours, let sit at room temperature for 10–15 minutes before cutting to avoid separation of layers. Store leftovers covered in the refrigerator for up to 3 weeks. Bark can be kept at room temperature for a few days during colder months but may soften.
Notes
- Melting chocolate in short increments and stirring well is crucial to prevent overheating and seizing.
- Do not let the white chocolate layers set completely in the fridge before adding the next layer; this helps the layers adhere better and prevents separation.
- You can use either vegetable oil or coconut oil to add shine and help with texture.
- Use an offset spatula for smooth spreading of chocolate layers, but a spoon works as well.
- Store the bark properly to maintain freshness and texture.
Nutrition
- Serving Size: 1 oz (28g)
- Calories: 150
- Sugar: 15g
- Sodium: 10mg
- Fat: 9g
- Saturated Fat: 5g
- Unsaturated Fat: 4g
- Trans Fat: 0g
- Carbohydrates: 18g
- Fiber: 1g
- Protein: 1g
- Cholesterol: 5mg


