
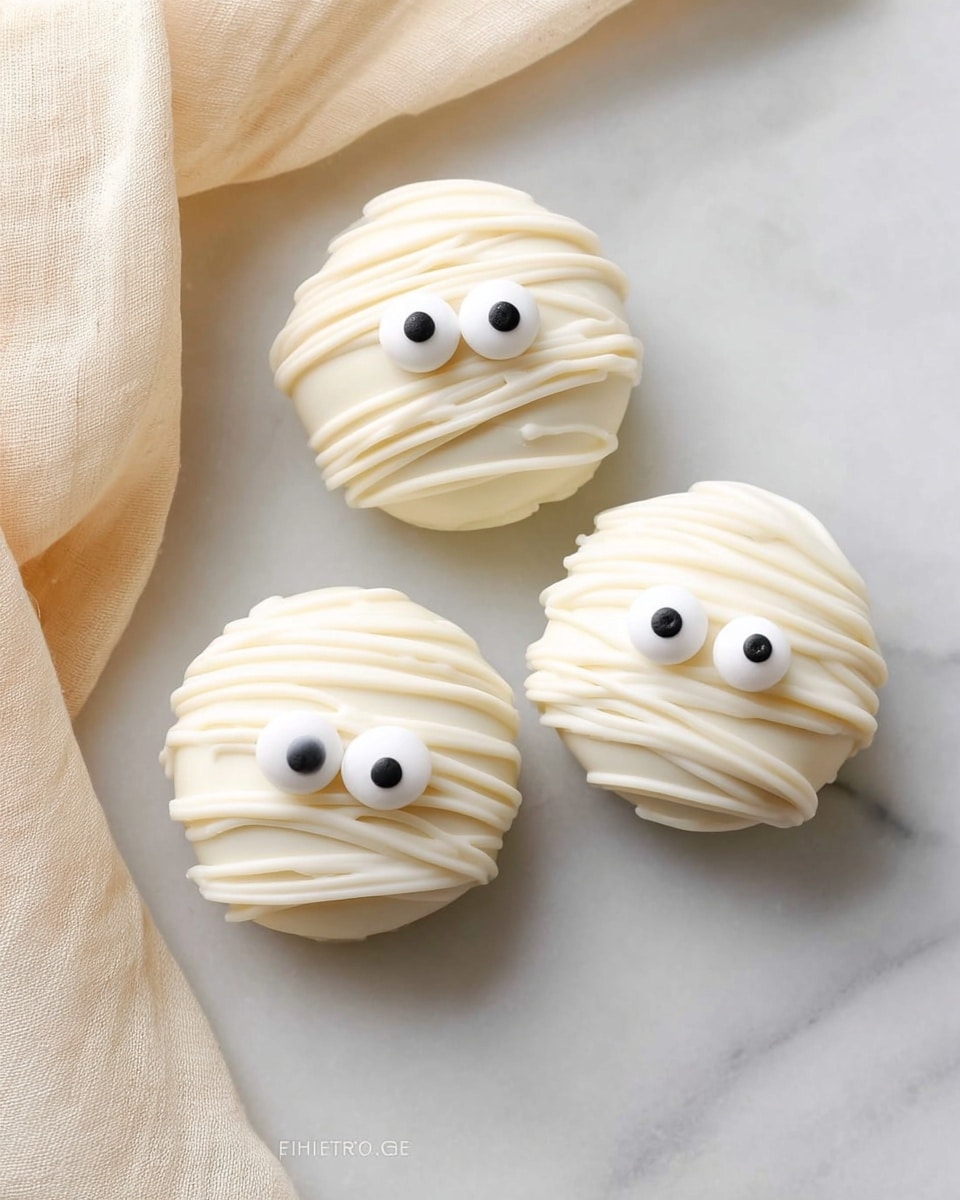
If you’re looking for a fun, spooky treat that’s easy and sure to impress, you’re going to absolutely love this Mummy Oreo Balls Recipe. These little Halloween gems combine creamy, dreamy centers with a crisp white chocolate coating that’s just begging to be devoured. Trust me, whether you’re making them for a party, your kids, or a quick festive snack, they come together fast and always steal the show.
Why You’ll Love This Recipe
- Super Easy & No-Bake: You don’t need fancy equipment or an oven to get these delicious mummy balls done in under an hour.
- Kid-Friendly Fun: Making these with little helpers is a blast — plus, they get to decorate their own spooky mummies!
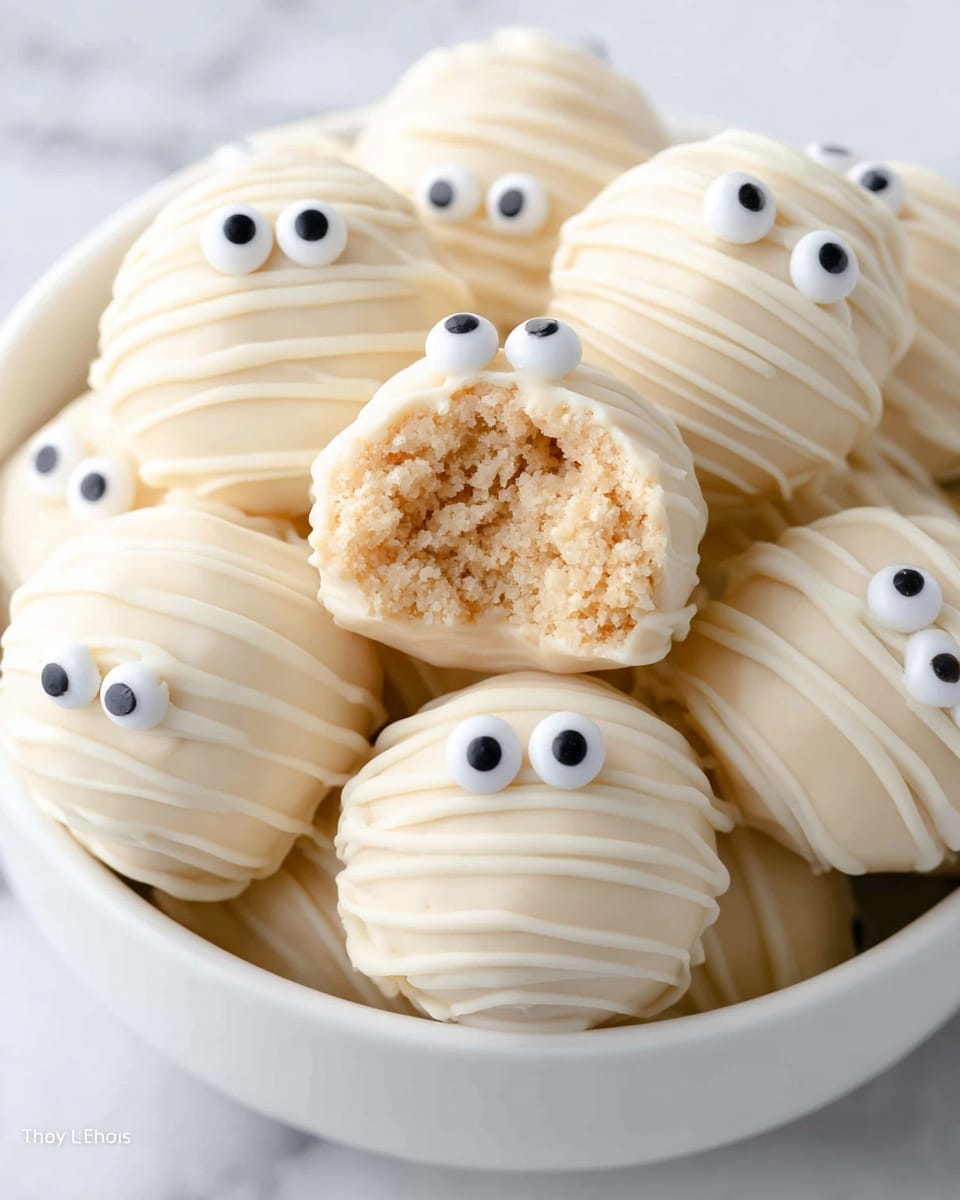
- Perfectly Creamy & Crunchy: The cream cheese infused Oreos inside with a crisp vanilla coating is pure magic for your taste buds.
- Great for Parties or Gifts: These make fantastic festive treats that everyone will ask you to bring back again.

Ingredients You’ll Need
These ingredients are simple but do amazing things together. The golden Oreos give a subtle vanilla crunch, while cream cheese adds unbelievable creaminess — a combo that’s basically irresistible. Choosing quality candy melts makes your mummies shine and hold up beautifully.
- Golden Oreos: Using golden cookies over chocolate Oreos brightens the flavor and pairs perfectly with vanilla coatings.
- Cream Cheese: Softened to room temperature, this adds richness and helps bind everything together without overpowering the flavor.
- Vanilla Candy Melts or Dipping Wafers: I recommend good-quality melts to get that smooth, glossy finish — they melt evenly and harden nicely.
- Candy Eyes: These add the spooky, cute mummy character — plus they’re so easy to stick on once the coating sets.
Variations
I love making this Mummy Oreo Balls Recipe my own by switching up flavors and decorations depending on the occasion. Don’t be afraid to get creative — if something feels right, give it a try!
- Chocolate Candy Coating: I’ve swapped the vanilla melts for white and dark chocolate combos to add some twist — it looks beautiful and tastes even better.
- Flavored Cream Cheese: Adding a splash of peppermint or cinnamon extract to the cream cheese can really turn these into festive treats.
- Nut or Candy Mix-ins: You can fold in mini toffee bits or finely chopped nuts inside for an unexpected crunch that my family loves.
- Gluten-Free Option: Try gluten-free golden sandwich cookies and make sure your candy melts are gluten-friendly for an allergy-conscious version.
How to Make Mummy Oreo Balls Recipe
Step 1: Crush Those Golden Oreos
First off, give yourself a pat on the back because this recipe starts easy! Grab your food processor and pulse the Oreos until you’re left with fine crumbs that almost feel like sand. If you don’t have a processor, you can put the Oreos in a ziplock bag and use a rolling pin to crush them. Just make sure there aren’t any chunky bits left that won’t bind well with the cream cheese.
Step 2: Mix Cream Cheese into the Crumbs
In a large bowl, add your softened cream cheese to the Oreo crumbs. Stir everything together until it’s smooth and well combined — no dry spots here! It’ll look like cookie dough, and if your cream cheese is too cold, it might feel lumpy, so be sure it’s softened for easy mixing.
Step 3: Roll into Perfect Little Balls
Using a cookie scoop, portion out the mixture and roll it between your hands to make smooth, roughly 1-inch balls. I like to wear disposable gloves here because the mixture can get a bit sticky. Place them on a parchment-lined baking sheet and pop them into the freezer for about 30 minutes — this step is key for firm balls that won’t fall apart when dipped.
Step 4: Dip in Melted Vanilla Candy Coating
While your balls chill, melt the vanilla candy melts following the package instructions. Once melted, transfer the chocolate to a small bowl. Using a fork to hold each ball carefully on top (don’t poke through them — you want to keep them intact!), dip it into the coating until fully covered. Tap off any excess chocolate before placing it back on the parchment. This gives you that beautiful smooth shell that snaps when you bite in.
Step 5: Decorate Your Mummies
Pour the leftover coating into a Ziploc bag, snip a tiny corner, and lightly drizzle stripes over each coated ball to create mummy wraps. Then quickly add the candy eyes — if your coating starts to harden, just dab a little melted chocolate on the back of the eyes to make them stick better. It’s a fun step that brings these little guys to life and always gets compliments.
Step 6: Chill and Serve
Pop the tray back in the fridge for another 15-20 minutes so everything sets up nicely. Then get ready to serve your adorable, spooky, and downright delicious Mummy Oreo Balls! You’ll find they’re surprisingly addictive — trust me, friends and family can’t stop sneaking them.
Pro Tips for Making Mummy Oreo Balls Recipe
- Don’t Overprocess the Oreos: I found that pulsing gently keeps the crumbs fine but prevents turning them into a powder, which affects texture.
- Keep Cream Cheese Room Temp: Mixing with cold cream cheese makes lumps, and that can be tricky to fix later — patience here pays off!
- Use a Fork Carefully When Dipping: Don’t poke the truffle ball, just support it on the fork tines to keep its shape pristine.
- Freeze the Balls Before Dipping: This makes them firmer and less likely to fall apart during the chocolate dunking process.
How to Serve Mummy Oreo Balls Recipe
Garnishes
I usually keep it simple with just candy eyes and the vanilla drizzle to let these mummies shine. But if I’m feeling extra crafty, I add a little edible glitter or some black licorice “wrapping” for more texture. Plus, you can try mini chocolate chips or edible gel to add little spooky details!
Side Dishes
These Oreo balls pair perfectly with a fun Halloween punch, a glass of cold milk, or even your favorite coffee brew. For parties, I love setting them alongside pumpkin cupcakes or ghost-shaped sugar cookies — it makes a festive and irresistible dessert table.
Creative Ways to Present
Try piling these mummies in a decorative cauldron, or serve them on black lace doilies for that extra spooky vibe. I once arranged them standing in a “spooky graveyard” scene with crushed cookies as “dirt” and little tombstone picks — kids went crazy for it!
Make Ahead and Storage
Storing Leftovers
I store leftover mummy Oreo balls in an airtight container in the fridge where they stay fresh and firm for up to a week. Make sure you separate layers with parchment paper so they don’t stick together or lose their pretty drizzle design.
Freezing
These freeze beautifully! I’ve frozen mine once fully coated and decorated by placing them on a parchment-lined tray first, then into a freezer-safe container. When you want them, just thaw in the fridge overnight — they keep their texture and flavor surprisingly well.
Reheating
Since these are chilled treats, reheating isn’t necessary; simply bring them to room temperature before enjoying for the best taste and softness. Avoid microwaving, or the chocolate shell might melt and lose its snap.
FAQs
-
Can I use regular chocolate Oreos instead of golden ones?
Absolutely! Using regular chocolate Oreos will give the mummy balls a richer, chocolatey base that pairs nicely with white or even dark candy coating. The flavor changes slightly, but the texture and process remain the same.
-
What if I don’t have a food processor?
No worries! You can place the Oreos in a heavy-duty zip-top bag and crush them using a rolling pin or meat mallet until fine crumbs form. Just be patient and work gently to get an even crumb size.
-
How do I keep the candy eyes from falling off?
If your candy coating starts to harden, simply add a small dot of melted chocolate to the back of each eye before pressing it gently onto the ball. This extra “glue” secures them in place perfectly.
-
Can I make these ahead of time?
Yes! You can prepare the Oreo balls fully coated and chilled a day or two in advance. Just store them well in the fridge, and they’ll hold up great for your party or Halloween celebration.
Final Thoughts
I absolutely love how this Mummy Oreo Balls Recipe has become a staple for my family’s Halloween gatherings. They’re so easy to whip up, kid-approved, and always disappear in minutes. The combination of creamy cookie filling with a sweet vanilla shell is just heavenly, and decorating them unleashes my inner kid every time. I hope you enjoy making (and eating!) these as much as I do — they’re perfect for turning any ordinary day into a fun, festive celebration.
Print
Mummy Oreo Balls Recipe
- Prep Time: 20 minutes
- Cook Time: 0 minutes
- Total Time: 50 minutes
- Yield: 14 Oreo balls 1x
- Category: Dessert
- Method: No-Cook
- Cuisine: American
Description
Delightfully spooky and easy to make, these Mummy Oreo Balls combine crushed Golden Oreos and creamy cream cheese, coated in a smooth vanilla candy melt shell and decorated with candy eyes for a fun Halloween treat that’s no-bake and kid-friendly.
Ingredients
Base
- 20 Golden Oreos
- 4 ounces cream cheese (softened to room temperature)
Coating
- 10 ounces vanilla candy melts or dipping wafers
Decoration
- 1 package candy eyes
Instructions
- Prepare baking sheet: Line a large baking sheet with parchment paper and set aside to catch any drips and keep your Oreo balls from sticking.
- Crush Oreos: Pulse the Golden Oreos in a food processor until they become a very fine crumb, ensuring a smooth texture for the truffles.
- Mix base: Combine the Oreo crumbs and softened cream cheese in a large mixing bowl. Stir thoroughly until the mixture is well combined and smooth.
- Form balls: Using a cookie scoop, portion out about 1-inch balls. Roll each ball between the palms of your hands until smooth. Place the formed balls onto the parchment-lined baking sheet.
- Freeze: Transfer the baking sheet into the freezer for 30 minutes to allow the Oreo balls to set firmly before coating.
- Melt chocolate: Melt the vanilla candy melts according to package instructions, either using a microwave or a double boiler method, until smooth.
- Coat balls: Pour the melted chocolate into a small bowl or glass. Using a fork, carefully dip each Oreo ball, ensuring the ball is coated fully while resting on the tines without piercing it. Tap off excess chocolate.
- Set coated balls: Place the coated Oreo balls back onto the parchment-lined baking sheet to begin hardening.
- Decorate: Pour the remaining melted chocolate into a Ziploc bag, cut a small hole in the bottom corner, and drizzle chocolate over the balls in a mummy-like pattern. Immediately stick two candy eyes on each ball. If the chocolate thickens too quickly, use a small dot of melted chocolate to adhere the eyes.
- Chill: Place the decorated Oreo balls in the fridge for 15-20 minutes to allow the chocolate coating and decorations to fully set.
- Serve: Remove from fridge and enjoy your festive mummy Oreo balls!
Notes
- Perfect no-bake Halloween treat that’s quick and easy to make with kids.
- Use room temperature cream cheese for best mixing results.
- If candy melts harden too fast, warm slightly to keep workable.
- Store finished Oreo balls in an airtight container in the fridge for up to a week.
Nutrition
- Serving Size: 1 Oreo ball
- Calories: 111
- Sugar: 7 g
- Sodium: 86 mg
- Fat: 6 g
- Saturated Fat: 2 g
- Unsaturated Fat: 3 g
- Trans Fat: 0 g
- Carbohydrates: 13 g
- Fiber: 1 g
- Protein: 1 g
- Cholesterol: 9 mg

Your email address will not be published. Required fields are marked *