
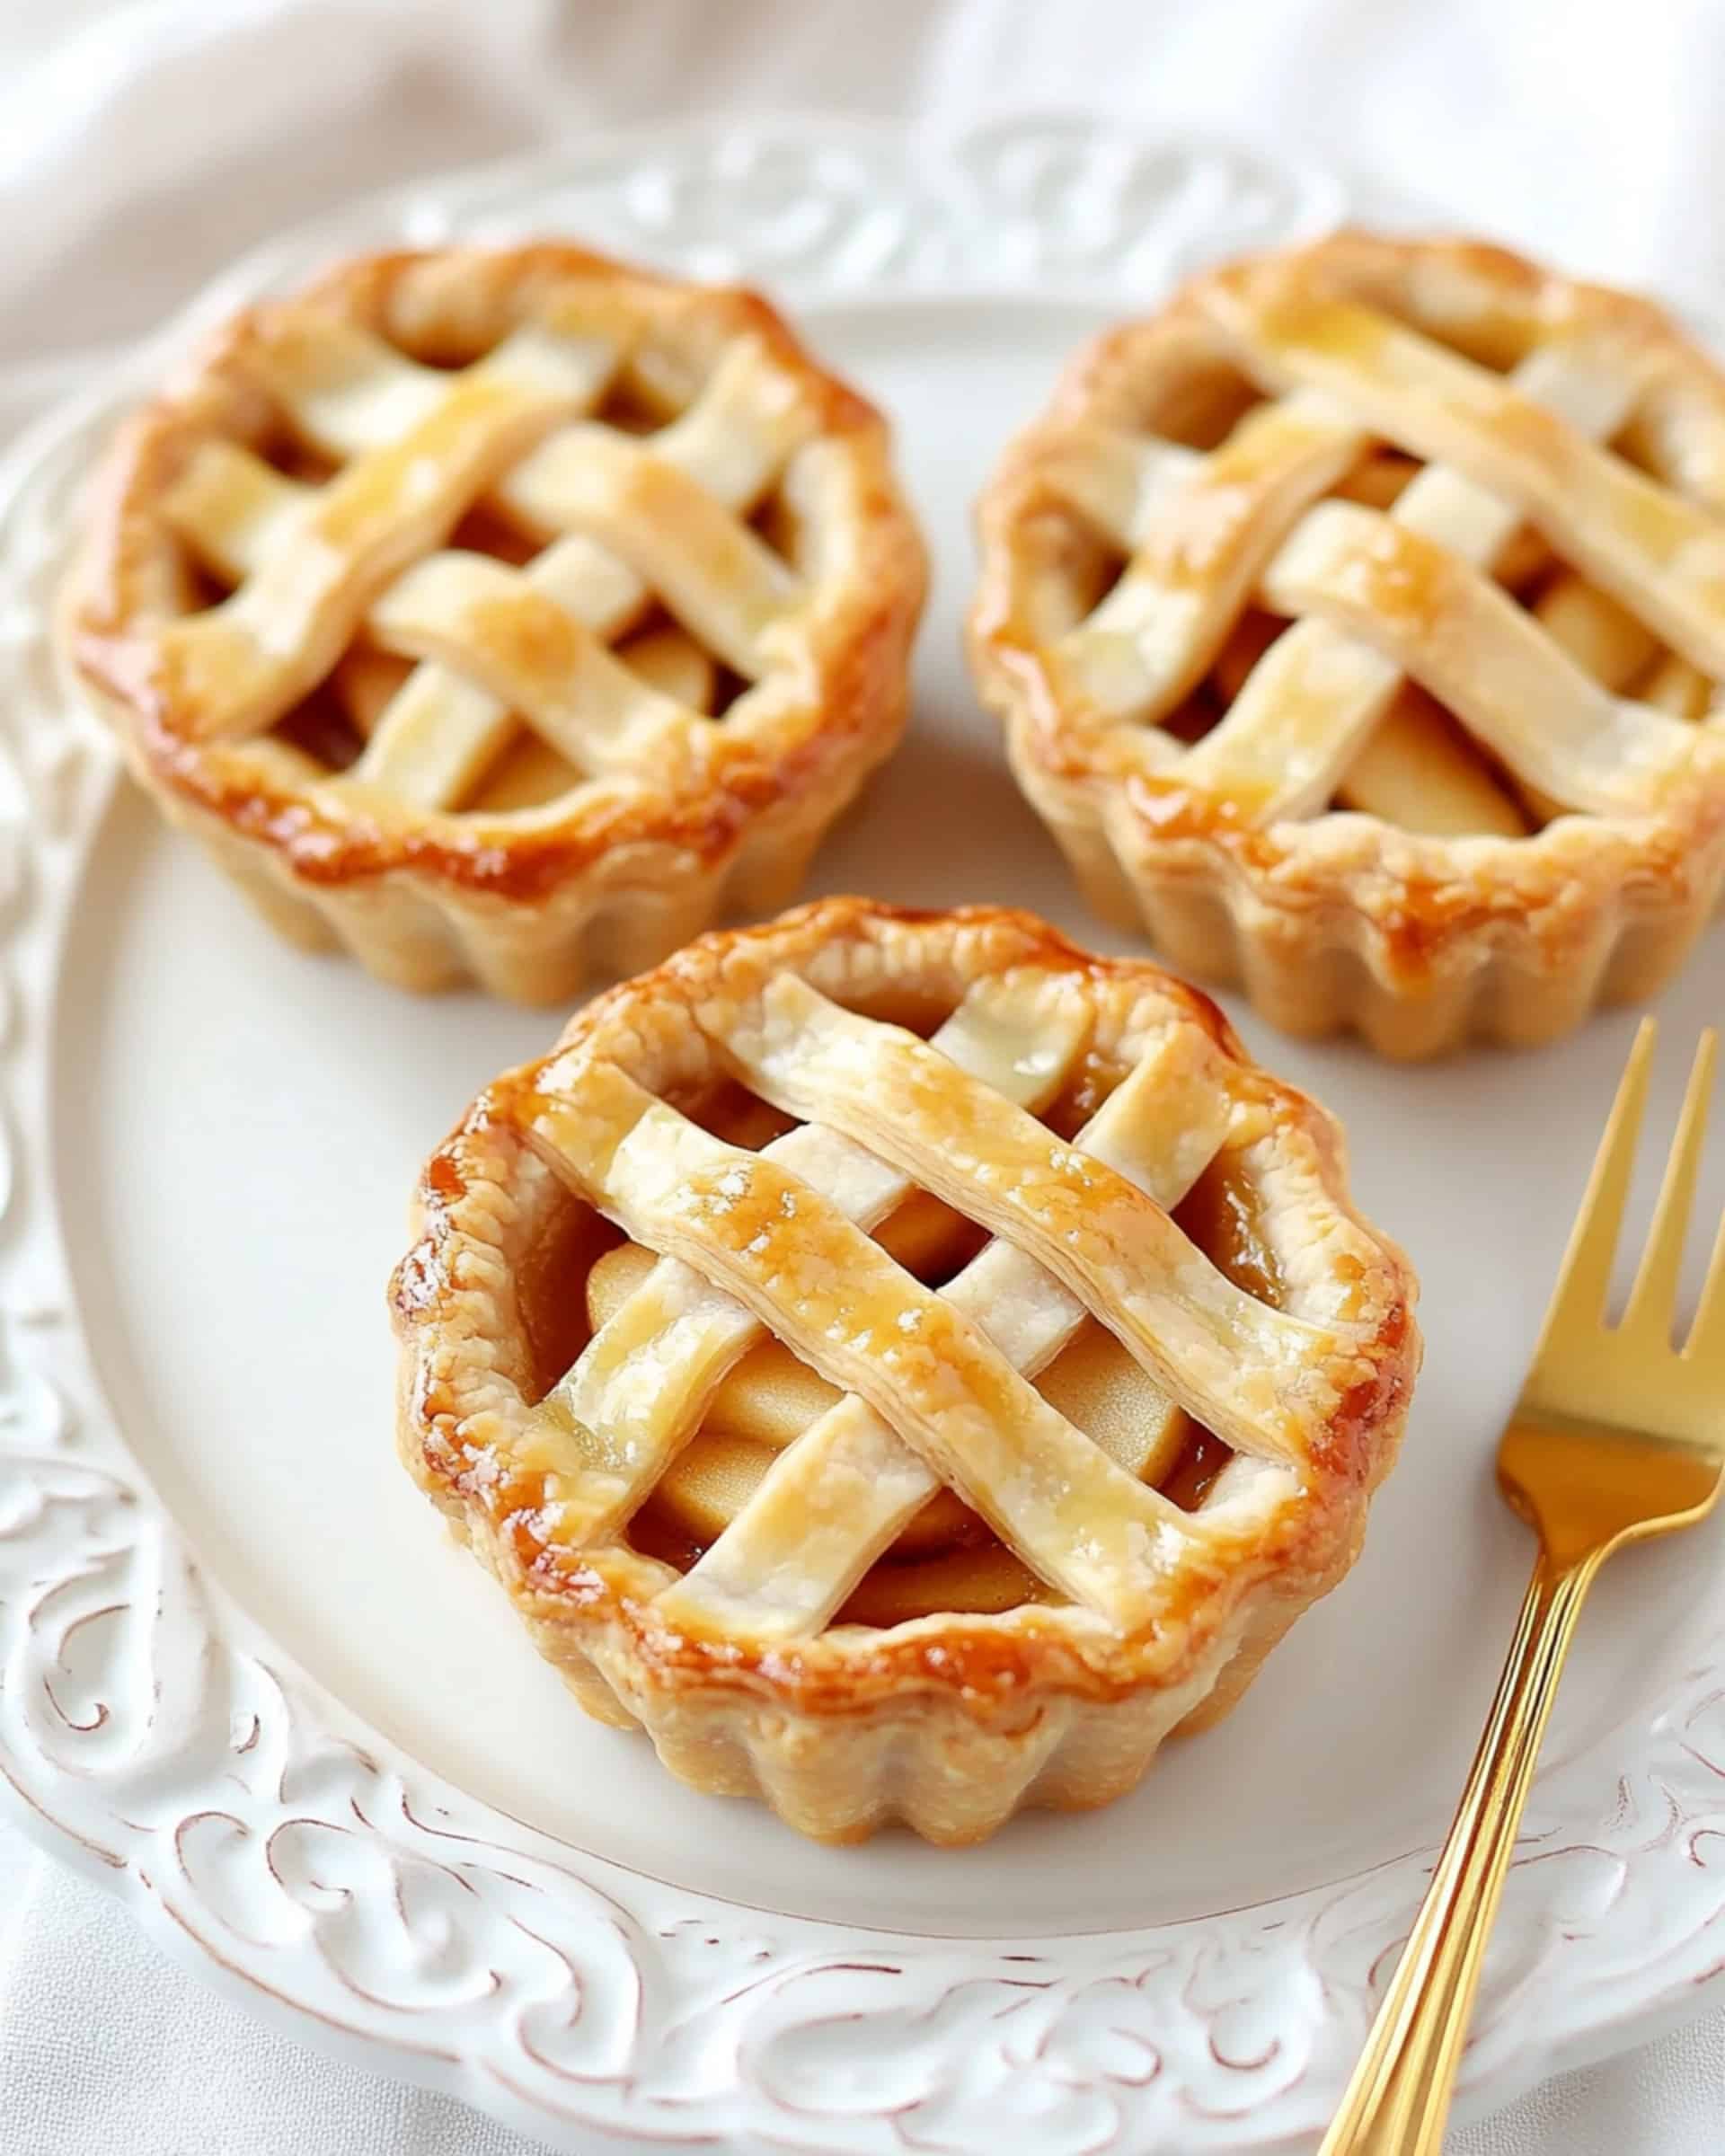
Meet your new favorite weeknight dessert: Mini Apple Pies! These sweet little hand-held pies are the answer to all of life’s “I want dessert, but I don’t want to fuss” moments. Think buttery, flaky pie crusts packed with juicy, spiced apples and a hint of vanilla—all baked to golden perfection in bite-sized form. They’re incredibly easy to make, quick enough for a busy day, and so charming that both kids and adults can never resist a second (or third!). Whether you need something special for a family dinner or an on-the-go treat, these mini pies are a delicious delight through and through.
Why You’ll Love This Recipe
- Effortless and Quick: No need for fancy equipment or complicated techniques. If you have a muffin pan and a cookie cutter (or even just a cup), you’re halfway there. Start to finish, you’re under an hour from craving to warm, flaky pies out of the oven.
- Portable and Shareable: The mini size means they’re perfect for lunchboxes, parties, or any time you want a no-mess dessert. Everyone gets their own little pie, and there’s zero slicing involved.
- Classic Apple Pie Flavor: Despite their size, these pies absolutely deliver the cozy, cinnamon-laced, sweet-tart flavor you adore in a traditional apple pie.
- Customizable: The base recipe leaves so much room for creativity. Try new toppings, mix up your apples, or use up odds and ends of dough for decorative tops. They’re just as much fun to make as they are to eat.

Ingredients You’ll Need
Gather your essentials and let’s get baking! Here’s what makes these mini apple pies irresistible:
- Pie Crusts: Use homemade for ultimate flakiness or keep it simple with store-bought—either works beautifully. The crust is your crispy, buttery foundation.
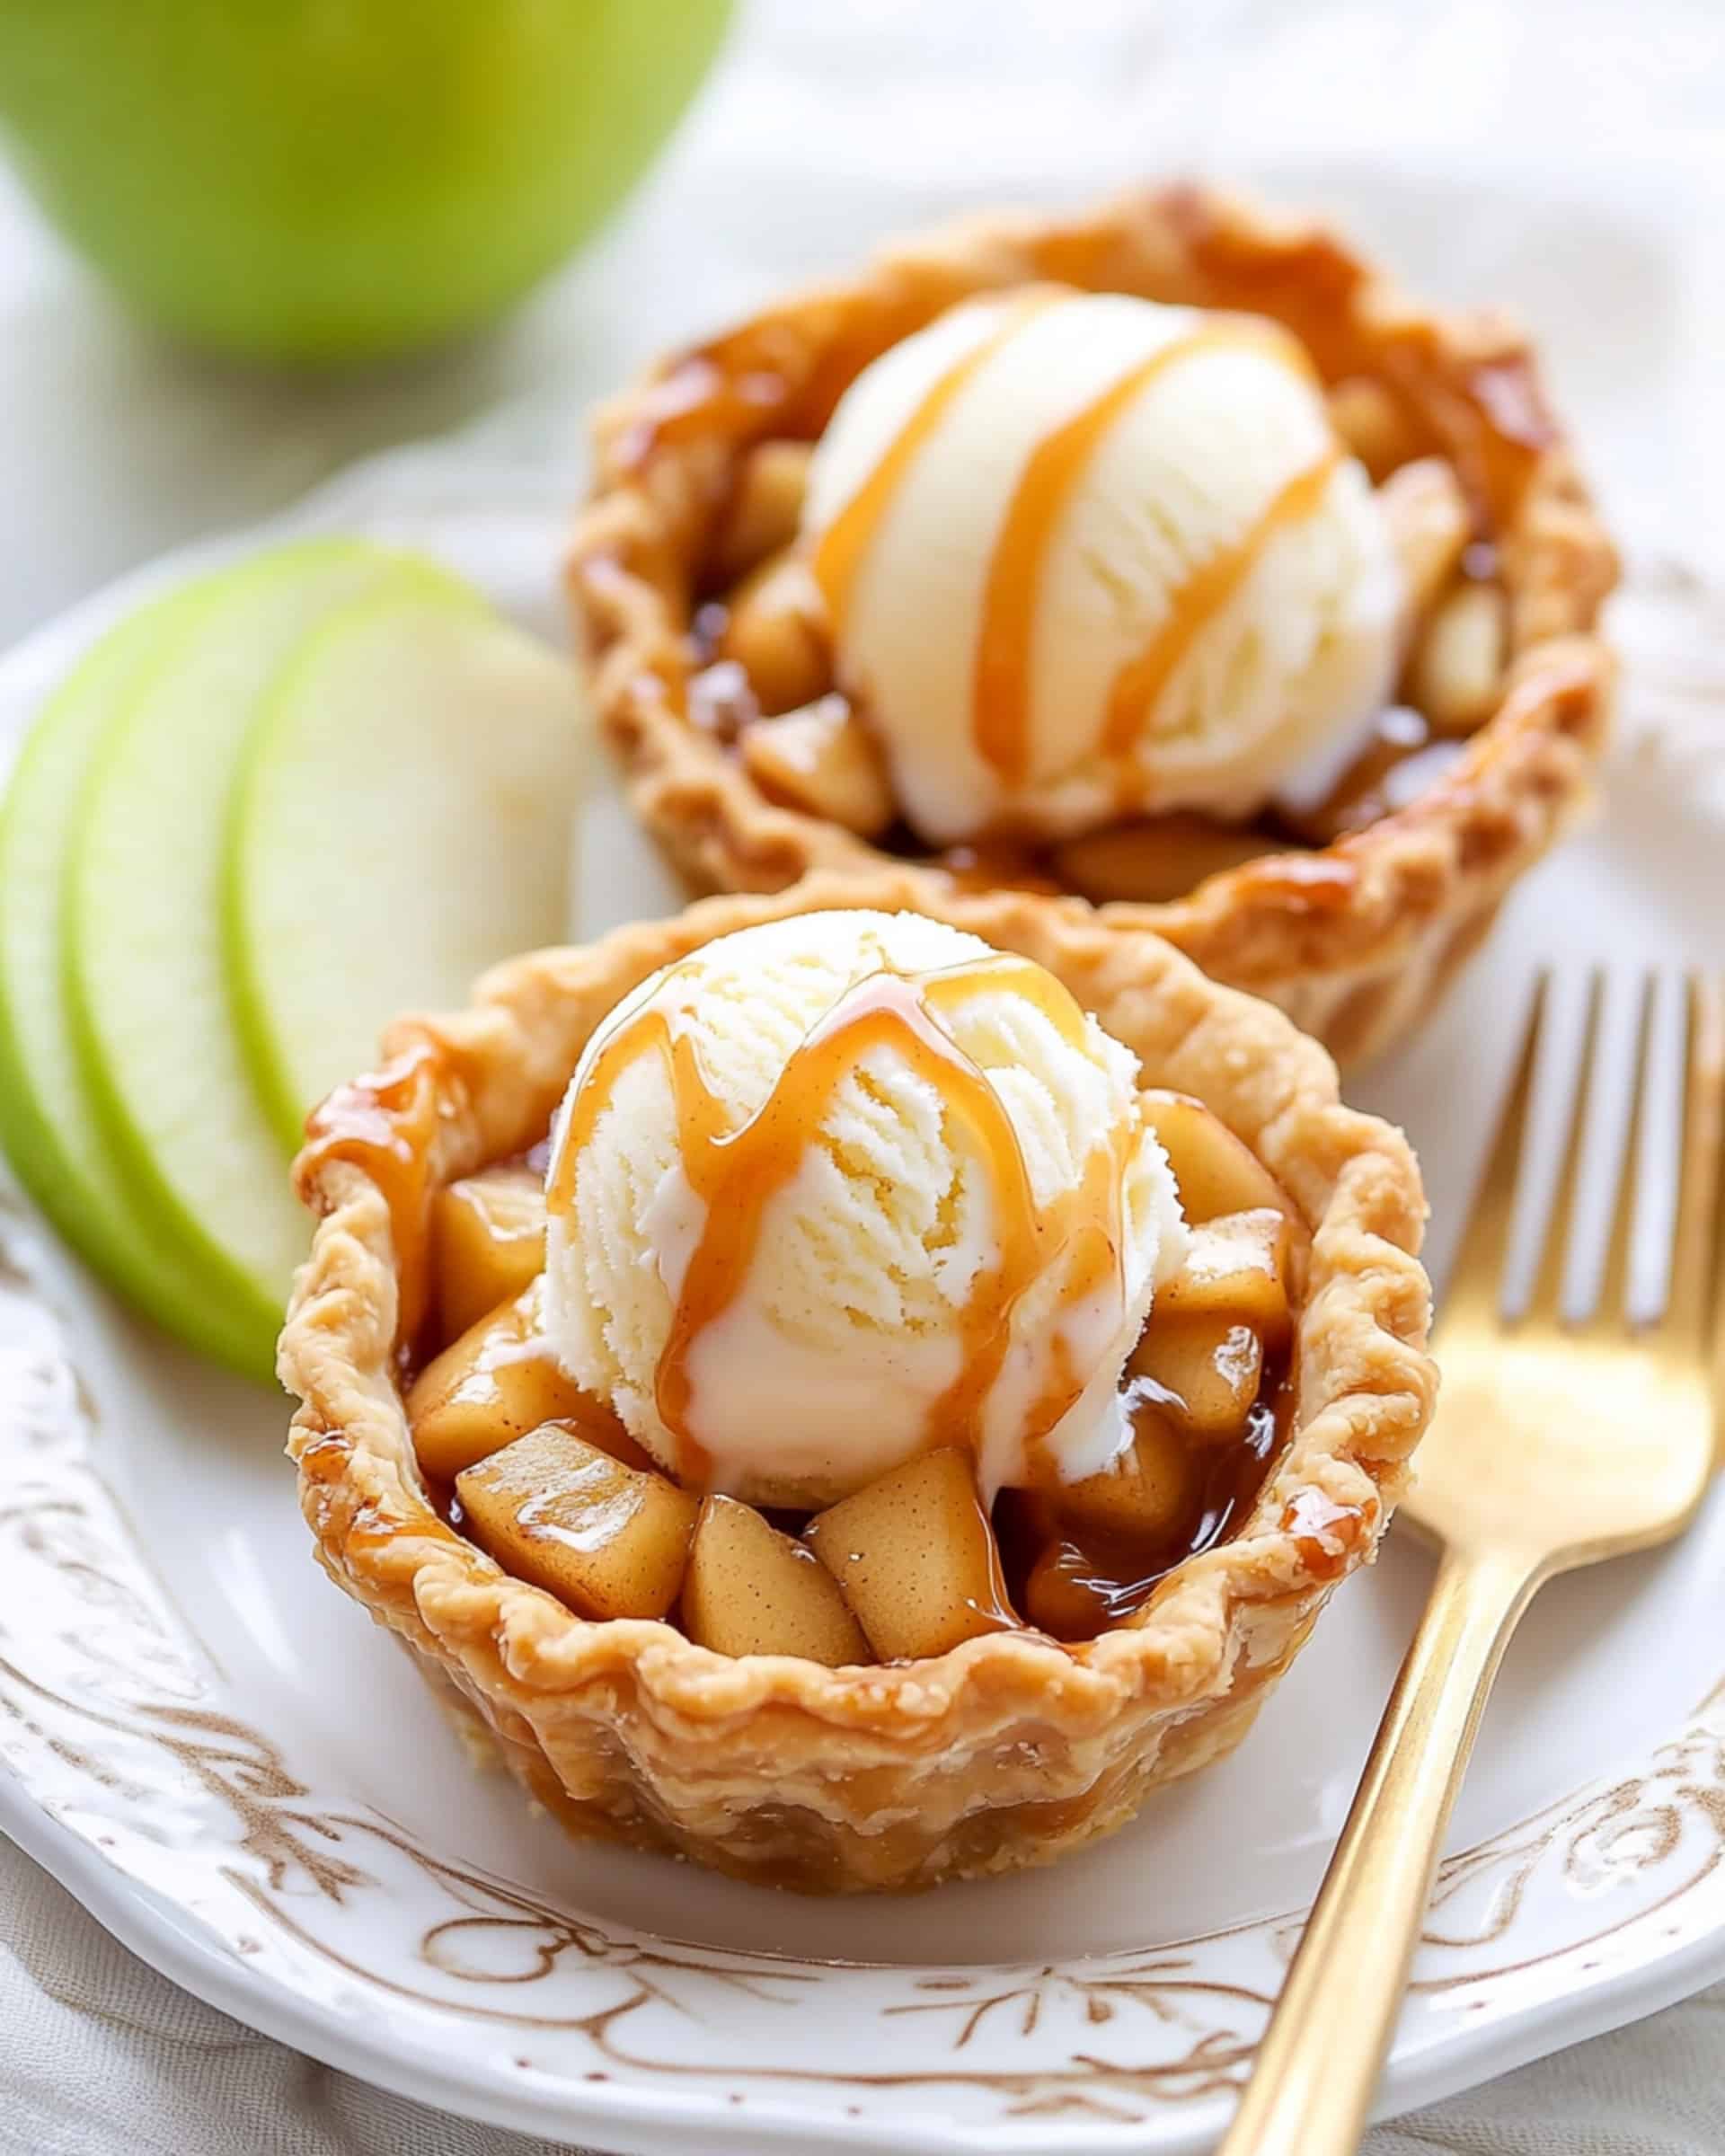
- Chopped Apples: Go for a good baking apple like Granny Smith or Honeycrisp. These give that classic tangy-sweet bite and hold up well in baking.
- Granulated Sugar: Sweetens the apple filling, balancing the tartness of the fruit.
- All-Purpose Flour: Just enough to thicken the filling. No runny pies here!
- Ground Cinnamon: Essential for that iconic apple pie warmth.
- Pure Vanilla Extract: Enhances the flavor and adds delicious depth. Don’t skip it if you want bakery-level aroma.
- Ground Nutmeg: A little goes a long way—adds complexity and coziness.
- Unsalted Butter: Optional, but a little buttery richness on top of each pie takes them over the top.
Extra pie dough is perfect for topping: get creative with lattice, cut-outs, or shapes for a fun finish!
Variations
Want to make these pies truly your own? Here are some delicious ideas:
- Fruit Swaps: Substitute some apples with pears or berries for a twist on the classic.
- Nuts: Sprinkle chopped pecans or walnuts into the filling for crunch and nuttiness.
- Spice it Up: Add a dash of allspice or ginger for a spicier bite.
- Caramel Drizzle: Drizzle with caramel sauce after baking for a decadent treat.
- Sugar Crunch: Sprinkle a bit of coarse sugar on top of the crusts before baking for a sparkly, crunchy finish.
How to Make Mini Apple Pies
Step 1: Prep Your Oven and Pans
Start by preheating your oven to 425°F (220°C). Grab your muffin pan and lightly dust your surface for rolling out the dough.
Step 2: Cut Out the Crusts
Roll out the pie crust dough to about 1/8-inch thick. Use a 3.5-inch cookie cutter (or a drinking glass works in a pinch!) to cut out 12 circles. Press each circle into the wells of your muffin pan, tucking them in gently around the sides. Pop the pan (and any extra dough) into the fridge—cold dough = flakier crust.
Step 3: Make the Apple Filling
In a large bowl, combine your chopped apples, sugar, flour, cinnamon, vanilla, and nutmeg. Stir well so every apple bit is glossy and spiced.
Step 4: Assemble the Pies
Spoon about three tablespoons of filling into each crust-lined muffin cup. If you’re using butter, cube it into twelve tiny pieces and place one atop each pie’s filling.
Step 5: Create the Tops
Roll out the remaining dough, cut out little shapes (try hearts, stars, leaves, or classic lattice strips), and lay them over the pies. The more whimsical, the better!
Step 6: Bake
Into the oven they go for 18 to 23 minutes, or until the crusts are golden and the filling starts to bubble. Let cool for 10-15 minutes before carefully removing from the pan.
Step 7: Cool and Enjoy
Once out of the pan, finish cooling on a wire rack…if you can wait that long!
Pro Tips for Making the Recipe
- Keep Your Dough Cold: Cold dough yields flakier pies. Chill the pan between steps if you’re working in a warm kitchen.
- Uniform Apple Pieces: Chop apples into similar-sized pieces for even baking and a perfect bite.
- Don’t Overfill: Filling expands as it bakes. Slightly under-filling prevents spills and sticky edges.
- Let Them Cool Slightly: Removing pies from the pan is easiest after they’ve cooled and set, about 10-15 minutes.
How to Serve
These mini pies are delightful warm, room temperature, or cold! For a classic touch, serve just as they are—their handheld size is part of the charm.
For a special treat, pair them with a scoop of vanilla ice cream or a dollop of whipped cream. A sprinkle of powdered sugar or a drizzle of caramel sauce doesn’t hurt, either. They make a stunning addition to a dessert spread at picnics, parties, or holiday gatherings.
Make Ahead and Storage
Storing Leftovers
Pop leftovers in an airtight container and store in the fridge for up to 5 days. The crust stays crisp and the apples get even more flavorful!
Freezing
Mini apple pies freeze surprisingly well! Wrap each individually and freeze for up to 2 months. Thaw overnight in the fridge or bring to room temperature on the counter.
Reheating
To enjoy warm, microwave pies for about 15-20 seconds for a quick treat, or reheat in the oven at 325°F until just heated through for a crispier crust.
FAQs
Can I use store-bought pie crust instead of homemade?
Absolutely! Store-bought pie crusts are a tremendous time-saver and still give you a flaky, delicious base. If you have the time and energy for homemade, go for it—but don’t hesitate to take the shortcut.
What kind of apples work best for mini pies?
Choose firm, tart apples like Granny Smith, Honeycrisp, or Braeburn. These hold their shape during baking and provide that classic apple pie flavor balance of sweet and tart.
Can I make these mini apple pies in advance for a party?
Definitely. You can bake the pies a day or two ahead and store them in the refrigerator. If you want them extra fresh, assemble the pies and refrigerate them unbaked, then bake off the batch just before serving.
How do I prevent the bottoms from getting soggy?
A light dusting of flour and sugar under the apples helps absorb any extra juices. Also, using the right apples and not overfilling are key to keeping that crust wonderfully crisp.
Final Thoughts
Mini Apple Pies are pure joy in every bite—simple to assemble, brimming with cinnamon-apple flavor, and perfect for sharing (or not!). With make-ahead flexibility, endless variations, and that classic pie comfort, they’re destined to become a regular in your dessert rotation. Give them a try, get creative, and bask in the sweet satisfaction of your very own homemade mini pies!
Print
Mini Apple Pies Recipe
- Prep Time: 30 minutes
- Cook Time: 25 minutes
- Total Time: 55 minutes
- Yield: 12 mini pies 1x
- Category: Desserts
- Method: Baking
- Cuisine: American
- Diet: Vegetarian
Description
These mini apple pies are the perfect bite-sized dessert, combining a flaky pie crust with a sweet, cinnamon-apple filling. Easy to make with either homemade or store-bought pie crust, they’re ideal for parties, gatherings, or a special family treat. Baked in a standard muffin pan, these individual apple pies are deliciously cozy with the classic flavors of vanilla and warm spices in every bite.
Ingredients
For the Pie Crust
- 2 pie crusts (homemade or store-bought)
For the Apple Filling
- 2 1/2 cups chopped apples (315 grams)
- 1/4 cup granulated sugar (50 grams)
- 2 tablespoons all-purpose flour, measured correctly (15 grams)
- 1 teaspoon ground cinnamon
- 1 teaspoon pure vanilla extract
- 1/8 teaspoon ground nutmeg
For Assembly
- 1 tablespoon unsalted butter (15 grams), optional
Instructions
- Prepare the Oven and Your Tools: Preheat the oven to 425°F (220°C). Lightly flour your work surface to prevent sticking.
- Roll and Cut the Pie Crust: Roll the pie crusts to 1/8-inch thickness. Using a 3.5-inch cookie cutter or cup, cut out 12 circles. Re-roll leftover dough as needed to get all the circles.
- Shape the Mini Pie Shells: Place each dough circle into the cavity of a standard 12-count muffin pan, pressing gently to ensure the dough fits snugly. Place the pan and any leftover crust in the refrigerator while you prepare the filling.
- Prepare the Apple Filling: In a large mixing bowl, combine the chopped apples, sugar, flour, cinnamon, vanilla extract, and nutmeg. Stir until everything is well mixed and the apples are evenly coated.
- Fill the Pie Shells: Remove the muffin pan from the refrigerator. Evenly distribute the apple pie filling among the dough-lined muffin cups (about 3 tablespoons per cup).
- Add Butter: Dice the butter into 12 small pieces and place one piece on top of the filling in each pie, if using.
- Top the Pies: Remove extra pie crust from the fridge, cut out small shapes or lattice strips, and place them over the top of each mini pie for decoration.
- Bake: Bake in the preheated oven for 18 to 23 minutes or until the crust is golden brown and the filling is bubbling.
- Cool: Remove the muffin pan from the oven and let the pies cool for 10 to 15 minutes. Carefully lift the pies out and transfer to a wire rack to finish cooling before serving.
Notes
- Store leftover mini apple pies in the refrigerator for up to 5 days.
- Reheat pies in the microwave before serving for best taste.
- You can use a variety of apples for different flavors and textures.
- Add decorative crust shapes or lattice to personalize your mini pies.
Nutrition
- Serving Size: 1 mini pie
- Calories: 180
- Sugar: 11g
- Sodium: 85mg
- Fat: 7g
- Saturated Fat: 3g
- Unsaturated Fat: 3g
- Trans Fat: 0g
- Carbohydrates: 28g
- Fiber: 2g
- Protein: 2g
- Cholesterol: 7mg

Your email address will not be published. Required fields are marked *