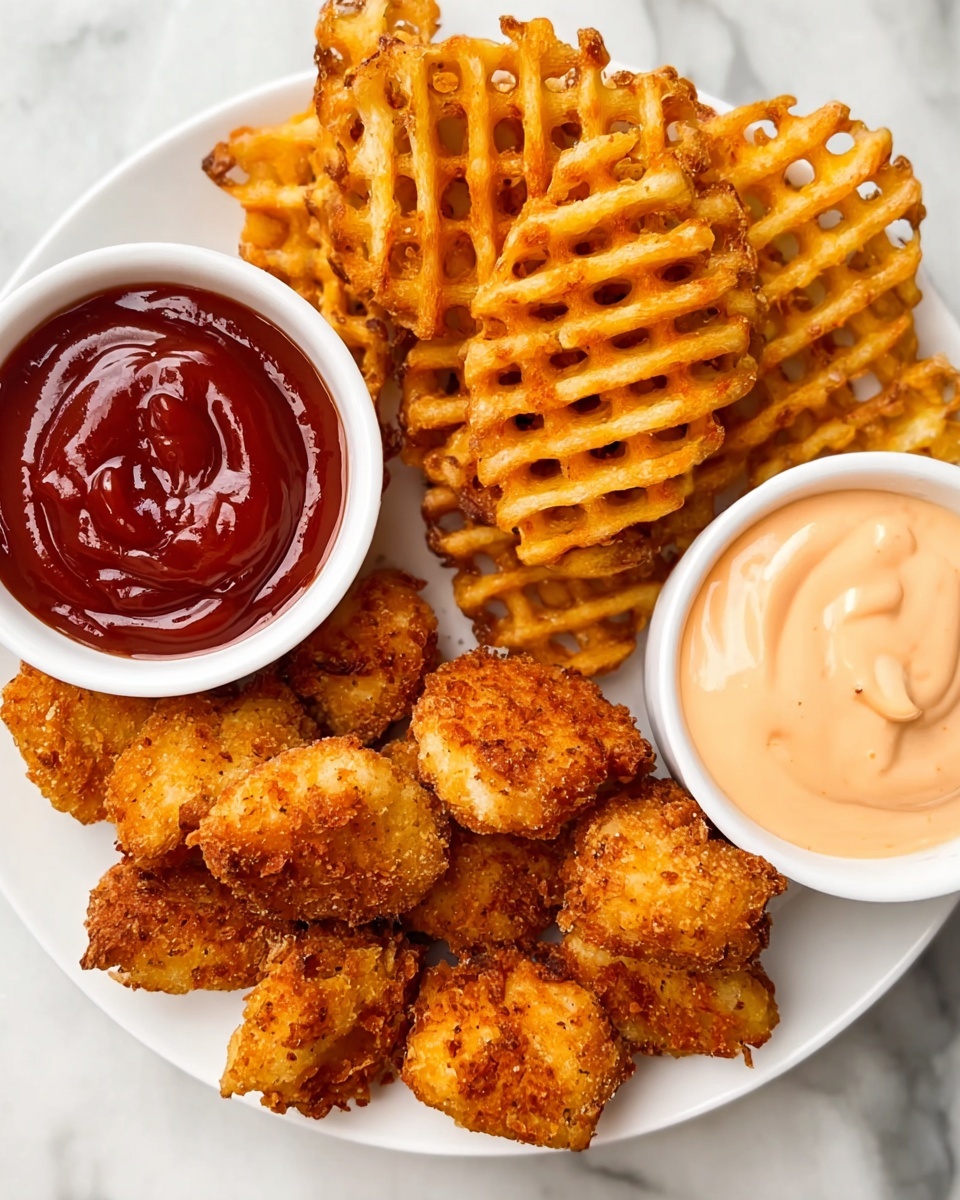
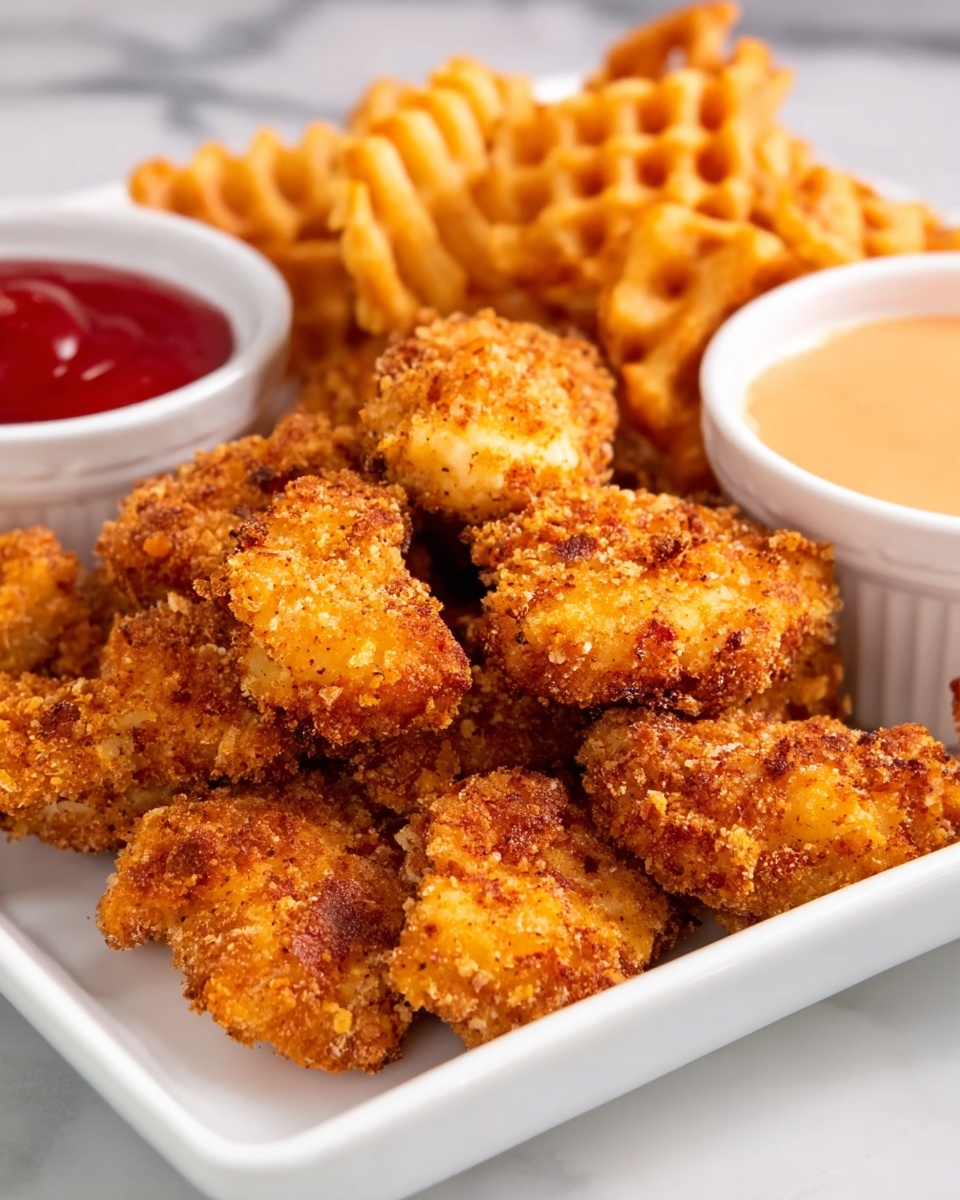
If you’re anything like me, homemade comfort food holds a special place in your heart. This Homemade Chicken Nuggets with Crispy Panko Coating Recipe is one of those dishes I never get tired of making or eating. The way the golden, crunchy panko crust hugs the tender, juicy chicken – honestly, it’s magic on a plate. I love whipping these up for a quick dinner or even a weekend snack, and you’ll find they’re a huge crowd-pleaser at any gathering.
One of the things that makes this Homemade Chicken Nuggets with Crispy Panko Coating Recipe stand out is how easy it is to get restaurant-worthy crunch right in your own kitchen. No deep frying or complicated steps, just simple ingredients and smart techniques that you’ll pick up quickly. When I first tried this recipe, I was shocked by how crispy the nuggets turned out compared to the frozen kind, and now it’s become a go-to for family dinners and lunchbox treats alike.
Why You’ll Love This Recipe
- Crunchy Panko Coating: Baking the panko with oil before coating adds a deeper crunch and golden color that really stands out.
- Simple Ingredients: You probably have most of these in your pantry, making it super easy to whip up anytime cravings hit.
- Oven-Baked, Not Fried: Healthier than typical fried nuggets, but still with that irresistible crispy texture everyone loves.
- Versatile Serving: These nuggets shine with your favorite sauces, making them perfect for family dinners, game day, or even lunchboxes.
Ingredients You’ll Need
Getting the right balance of crispy coating and flavorful chicken starts with fresh ingredients and a few simple pantry staples. Here’s what I recommend, along with some shopping tips based on what I’ve learned.
- Panko bread crumbs: These larger, flaky crumbs create the best crunch; I always toast them first for extra crispiness.
- Vegetable oil: Just a bit helps brown the panko perfectly without greasiness.
- Garlic powder: Adds a savory note that works wonders in the coating.
- Onion powder: Helps deepen the flavor with a subtle bite.
- Freshly ground black pepper: For a little edge and warmth.
- Paprika: Gives a slight smoky sweetness and beautiful color.
- Kosher salt: Divided use ensures the chicken and coating are seasoned just right.
- Cooking spray: Keeps the nuggets from sticking while baking and helps crisp the coating.
- All-purpose flour: Works as the base layer for the coating to help the egg stick.
- Large egg: Acts as the glue between flour and panko for a perfect crust.
- Boneless, skinless chicken breast: Cut into bite-sized pieces—this is the star of the show, so fresh and good-quality are key.
- Copycat Chick-Fil-A Sauce or honey mustard (optional): I always have one of these on hand because dipping makes the experience extra special.
Variations
I love that this Homemade Chicken Nuggets with Crispy Panko Coating Recipe is such a blank canvas for creativity. Play with the spices in the coating or try different dipping sauces to make it your own. Here are a few of my favorite twists.
- Spicy Kick: I like adding a pinch of cayenne or smoked paprika to the panko mix for a subtle heat that livens things up.
- Herb Infusion: Fresh chopped parsley or dried Italian seasoning mixed with the panko adds a fresh herbal flavor that’s a nice change of pace.
- Gluten-Free Option: Swap all-purpose flour with a gluten-free flour blend and use gluten-free panko for family members avoiding gluten.
- Air Fryer Variation: If you have an air fryer, try cooking the nuggets there for a quicker, equally crunchy result.
How to Make Homemade Chicken Nuggets with Crispy Panko Coating Recipe
Step 1: Toast the Panko for Extra Crunch
Start by preheating your oven to 400°F. Toss the panko bread crumbs with the vegetable oil in a large bowl so they’re lightly coated. Spread them out evenly on a baking sheet and bake for 3 to 5 minutes, stirring a couple of times. Keep a close eye so they get golden brown but don’t burn—that toasted panko is what gives these nuggets their irresistible crunch.
Step 2: Season the Coating Mix
While the panko is still warm, pour it back into the bowl and add your garlic powder, onion powder, black pepper, paprika, and half a teaspoon of kosher salt. Toss everything together until it’s evenly combined—this step is where a lot of the flavor happens, so be sure to mix well.
Step 3: Prepare Your Dredging Station
Set up your breading stations: put the flour in one shallow dish, beat the egg in another, and get your seasoned panko ready in the big bowl. Place a wire rack on a baking sheet and spray it lightly with cooking spray—this rack keeps the nuggets crisp all around by allowing air to circulate.
Step 4: Coat the Chicken Pieces
Season your chicken pieces all over with a teaspoon of kosher salt. Then, one by one, toss them in the flour, shake off the excess, dip into the beaten egg, letting the extra drip off, and finally roll in the seasoned panko mixture. Press the crumbs onto the chicken to help them stick better. Arrange each nugget on the prepared wire rack—it’s best not to crowd them so they bake evenly.
Step 5: Bake Until Perfectly Cooked
Bake the nuggets in the 400°F oven for about 15 to 18 minutes. You want them fully cooked with an internal temperature of 165°F, so I always use a meat thermometer to be sure. The outside should be crisp and golden, while the inside stays juicy. If you’d like them a bit crispier, just pop them back under the broiler for a minute—but watch closely so they don’t burn!
Step 6: Season and Serve
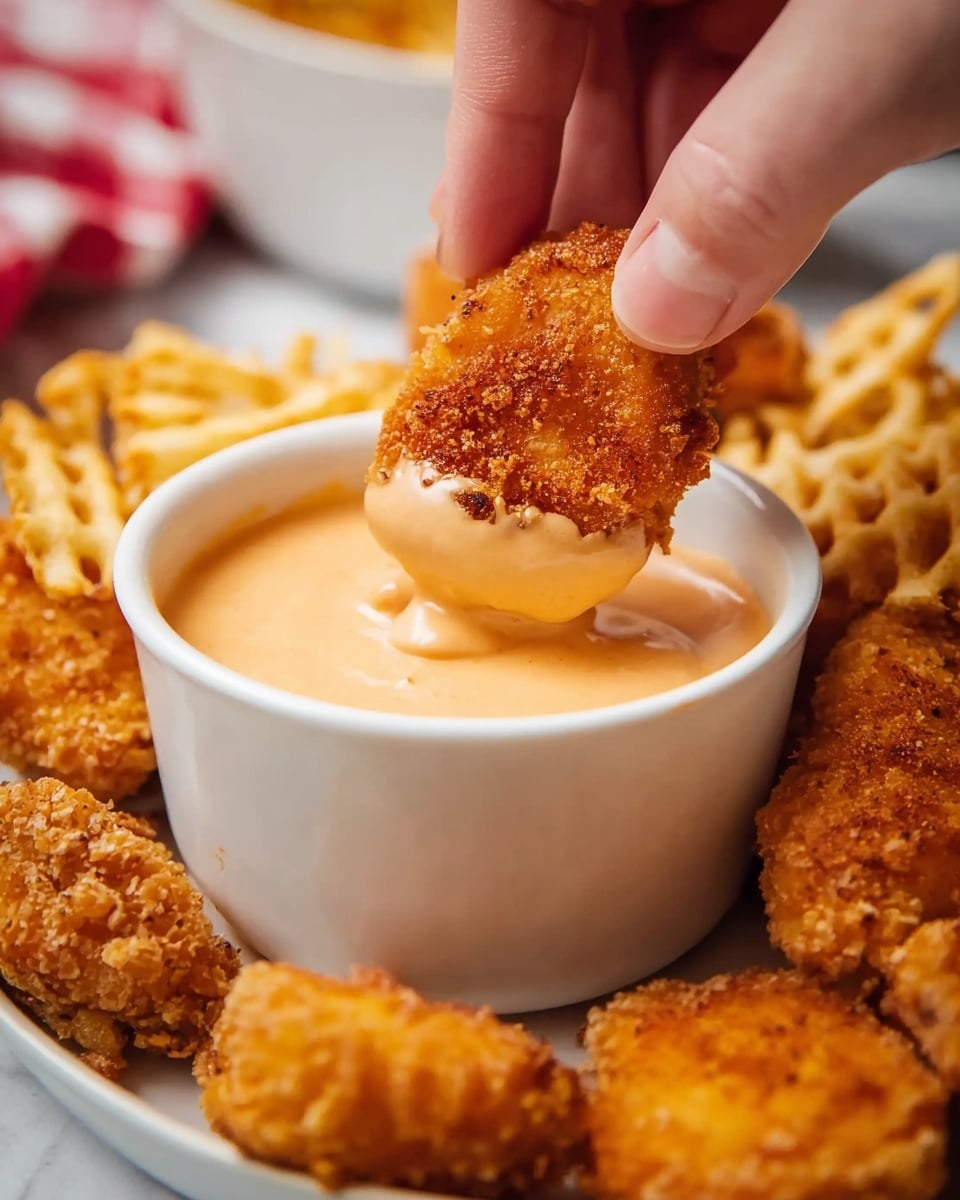
Once out of the oven, sprinkle a little more salt if you like, and serve alongside your favorite dipping sauce. My family goes crazy for honey mustard or a quick DIY copycat Chick-Fil-A sauce. Trust me, those little extras make a world of difference and keep everyone coming back for more.
Pro Tips for Making Homemade Chicken Nuggets with Crispy Panko Coating Recipe
- Toast Panko First: Toasting the panko before using it ensures that your nuggets get that perfect crunch every single time.
- Don’t Skip the Wire Rack: Baking on a wire rack lets hot air circulate all around, keeping the coating crispy rather than soggy.
- Use Fresh Spices: I learned that fresh garlic and onion powder make a noticeable difference compared to old, stale spices—don’t skip this for flavor!
- Avoid Overcrowding: Crowding the nuggets on the pan traps steam, making them less crispy, so give them space to shine.
How to Serve Homemade Chicken Nuggets with Crispy Panko Coating Recipe

Garnishes
I usually keep garnishes simple with some fresh chopped parsley or a sprinkle of flaky sea salt right after baking. The parsley adds a pop of color and freshness, while the sea salt gives that extra seasoning hit that wakes up your taste buds.
Side Dishes
I love pairing these nuggets with classic sides like crispy oven-baked fries, a fresh green salad, or even some steamed veggies for balance. On weekends, my family enjoys dipping into homemade mac and cheese or creamy coleslaw alongside the nuggets—it’s comfort food bliss!
Creative Ways to Present
For parties, I like to serve these nuggets on a platter lined with parchment paper, surrounded by little bowls of different dips—think BBQ sauce, ranch, and spicy mayo. Sometimes I even skewer them on bamboo sticks with cherry tomatoes and pickles for a fun nugget appetizer tray. These little touches make it feel festive and special without extra fuss.
Make Ahead and Storage
Storing Leftovers
If you end up with leftovers (which doesn’t happen often in my house!), store them in an airtight container in the fridge. I recommend placing a paper towel underneath to absorb any moisture and keep that crust crispy.
Freezing
I sometimes freeze cooked nuggets for busy weeknights—just freeze them on a baking sheet until firm, then transfer to a freezer-safe bag. This way, you can pull out exactly how many you need whenever the craving hits, and they bake back up nicely straight from frozen.
Reheating
To reheat and keep that satisfying crunch, I pop leftovers in a 375°F oven or toaster oven for about 8 to 10 minutes. Avoid microwaving if you can—it tends to make the coating soggy, and we definitely don’t want that!
FAQs
-
Can I use chicken thighs instead of chicken breasts for this recipe?
Absolutely! Chicken thighs tend to have more fat and stay juicy, which can make your nuggets extra flavorful. Just make sure to cut them into similar-sized pieces for even cooking, and watch the baking time closely since thighs can cook a bit faster or slower depending on thickness.
-
Is it possible to fry these nuggets instead of baking?
Yes, though this recipe is designed for baking. If you prefer frying, you can use the same coating method, then shallow or deep fry the nuggets until golden brown and cooked through. Just be mindful of oil temperature to avoid greasy or undercooked nuggets.
-
How can I make this recipe gluten-free?
Swap the all-purpose flour for a gluten-free blend and use gluten-free panko breadcrumbs. Many stores carry these alternatives now, and they work just as well to create that signature crispy coating.
-
What’s the best dipping sauce to serve with these nuggets?
I’m a big fan of honey mustard or a copycat Chick-Fil-A sauce that blends mayo, honey, and a bit of tangy vinegar. But feel free to get creative with BBQ, ranch, or even sriracha mayo for a spicy twist—the coating handles sauces so well!
-
How long do homemade chicken nuggets stay fresh in the fridge?
They’re best eaten within 3 to 4 days. After that, the texture and flavor start to decline, so plan to enjoy them fairly quickly or freeze any extras.
Final Thoughts
This Homemade Chicken Nuggets with Crispy Panko Coating Recipe has truly become a favorite in my kitchen, and I’m excited for you to try it too. There’s just something so satisfying about serving up crunchy, juicy nuggets that you made from scratch with love. Whether you’re feeding hungry kids or just treating yourself to a cozy meal, these nuggets never disappoint. Give them a go—you’ll be amazed at how easy and delicious homemade can be!
Print
Homemade Chicken Nuggets with Crispy Panko Coating Recipe
- Prep Time: 10 mins
- Cook Time: 18 mins
- Total Time: 28 mins
- Yield: 2 to 4 servings 1x
- Category: Appetizer
- Method: Baking
- Cuisine: American
Description
Crispy homemade Chicken Nuggets baked to golden perfection with a flavorful panko breadcrumb coating seasoned with garlic, onion, paprika, and black pepper. These nuggets are easy to prepare, oven-baked for a healthier twist, and perfect for serving with your favorite dipping sauces like honey mustard or Chick-fil-A sauce.
Ingredients
Coating
- 1 1/4 cups panko bread crumbs
- 1 Tbsp. vegetable oil
- 3/4 tsp. garlic powder
- 3/4 tsp. onion powder
- 1/2 tsp. freshly ground black pepper
- 1/4 tsp. paprika
- 1 1/2 tsp. kosher salt, divided
- Cooking spray
- 1/3 cup all-purpose flour
- 1 large egg
Chicken
- 1 lb. boneless, skinless chicken breast, cut into 1 1/2″ pieces
Serving
- Copycat Chick-Fil-A Sauce or honey mustard, for serving (optional)
Instructions
- Preheat and Toast Panko: Preheat the oven to 400°F. In a large bowl, toss the panko bread crumbs with vegetable oil to evenly coat. Spread the mixture on a baking sheet and bake for 3 to 5 minutes, stirring after 2 minutes, until golden brown. Watch closely to prevent burning.
- Season Bread Crumbs: While the panko is still warm, transfer it back into the bowl. Add garlic powder, onion powder, freshly ground black pepper, paprika, and 1/2 teaspoon kosher salt. Toss well to combine all the seasonings evenly with the toasted breadcrumbs.
- Prepare Coating Stations: Place a wire rack on a baking sheet and spray it with cooking spray to prevent sticking. Pour the all-purpose flour into a shallow dish. In a separate shallow dish, beat the egg until well blended.
- Coat the Chicken: Season the chicken pieces with 1 teaspoon kosher salt all over. Dredge each piece in the flour, shaking off excess. Dip into the beaten egg, letting the excess drip off, then roll in the seasoned panko crumbs, pressing firmly so the coating adheres well. Arrange the coated chicken pieces on the prepared wire rack.
- Bake the Nuggets: Bake the chicken nuggets at 400°F for 15 to 18 minutes, or until the internal temperature reaches 165°F as measured by an instant-read thermometer, ensuring the chicken is fully cooked and juicy inside.
- Serve: Immediately after baking, season the nuggets with additional salt if desired. Serve hot with your favorite dipping sauces such as a copycat Chick-Fil-A sauce or honey mustard for extra flavor.
Notes
- Keep a close eye when toasting the panko breadcrumbs to prevent burning, stirring frequently.
- Press the breadcrumbs firmly on the chicken to help the coating stay crispy after baking.
- Using a wire rack helps air circulate around the chicken pieces for even browning and crispness.
- Feel free to substitute the vegetable oil with olive oil for a different flavor profile.
- Leftover nuggets can be reheated in an oven or air fryer to retain crispiness.
Nutrition
- Serving Size: 1/4 of recipe (approximately 4-5 nuggets)
- Calories: 320
- Sugar: 1g
- Sodium: 700mg
- Fat: 12g
- Saturated Fat: 2g
- Unsaturated Fat: 8g
- Trans Fat: 0g
- Carbohydrates: 30g
- Fiber: 2g
- Protein: 28g
- Cholesterol: 75mg


