
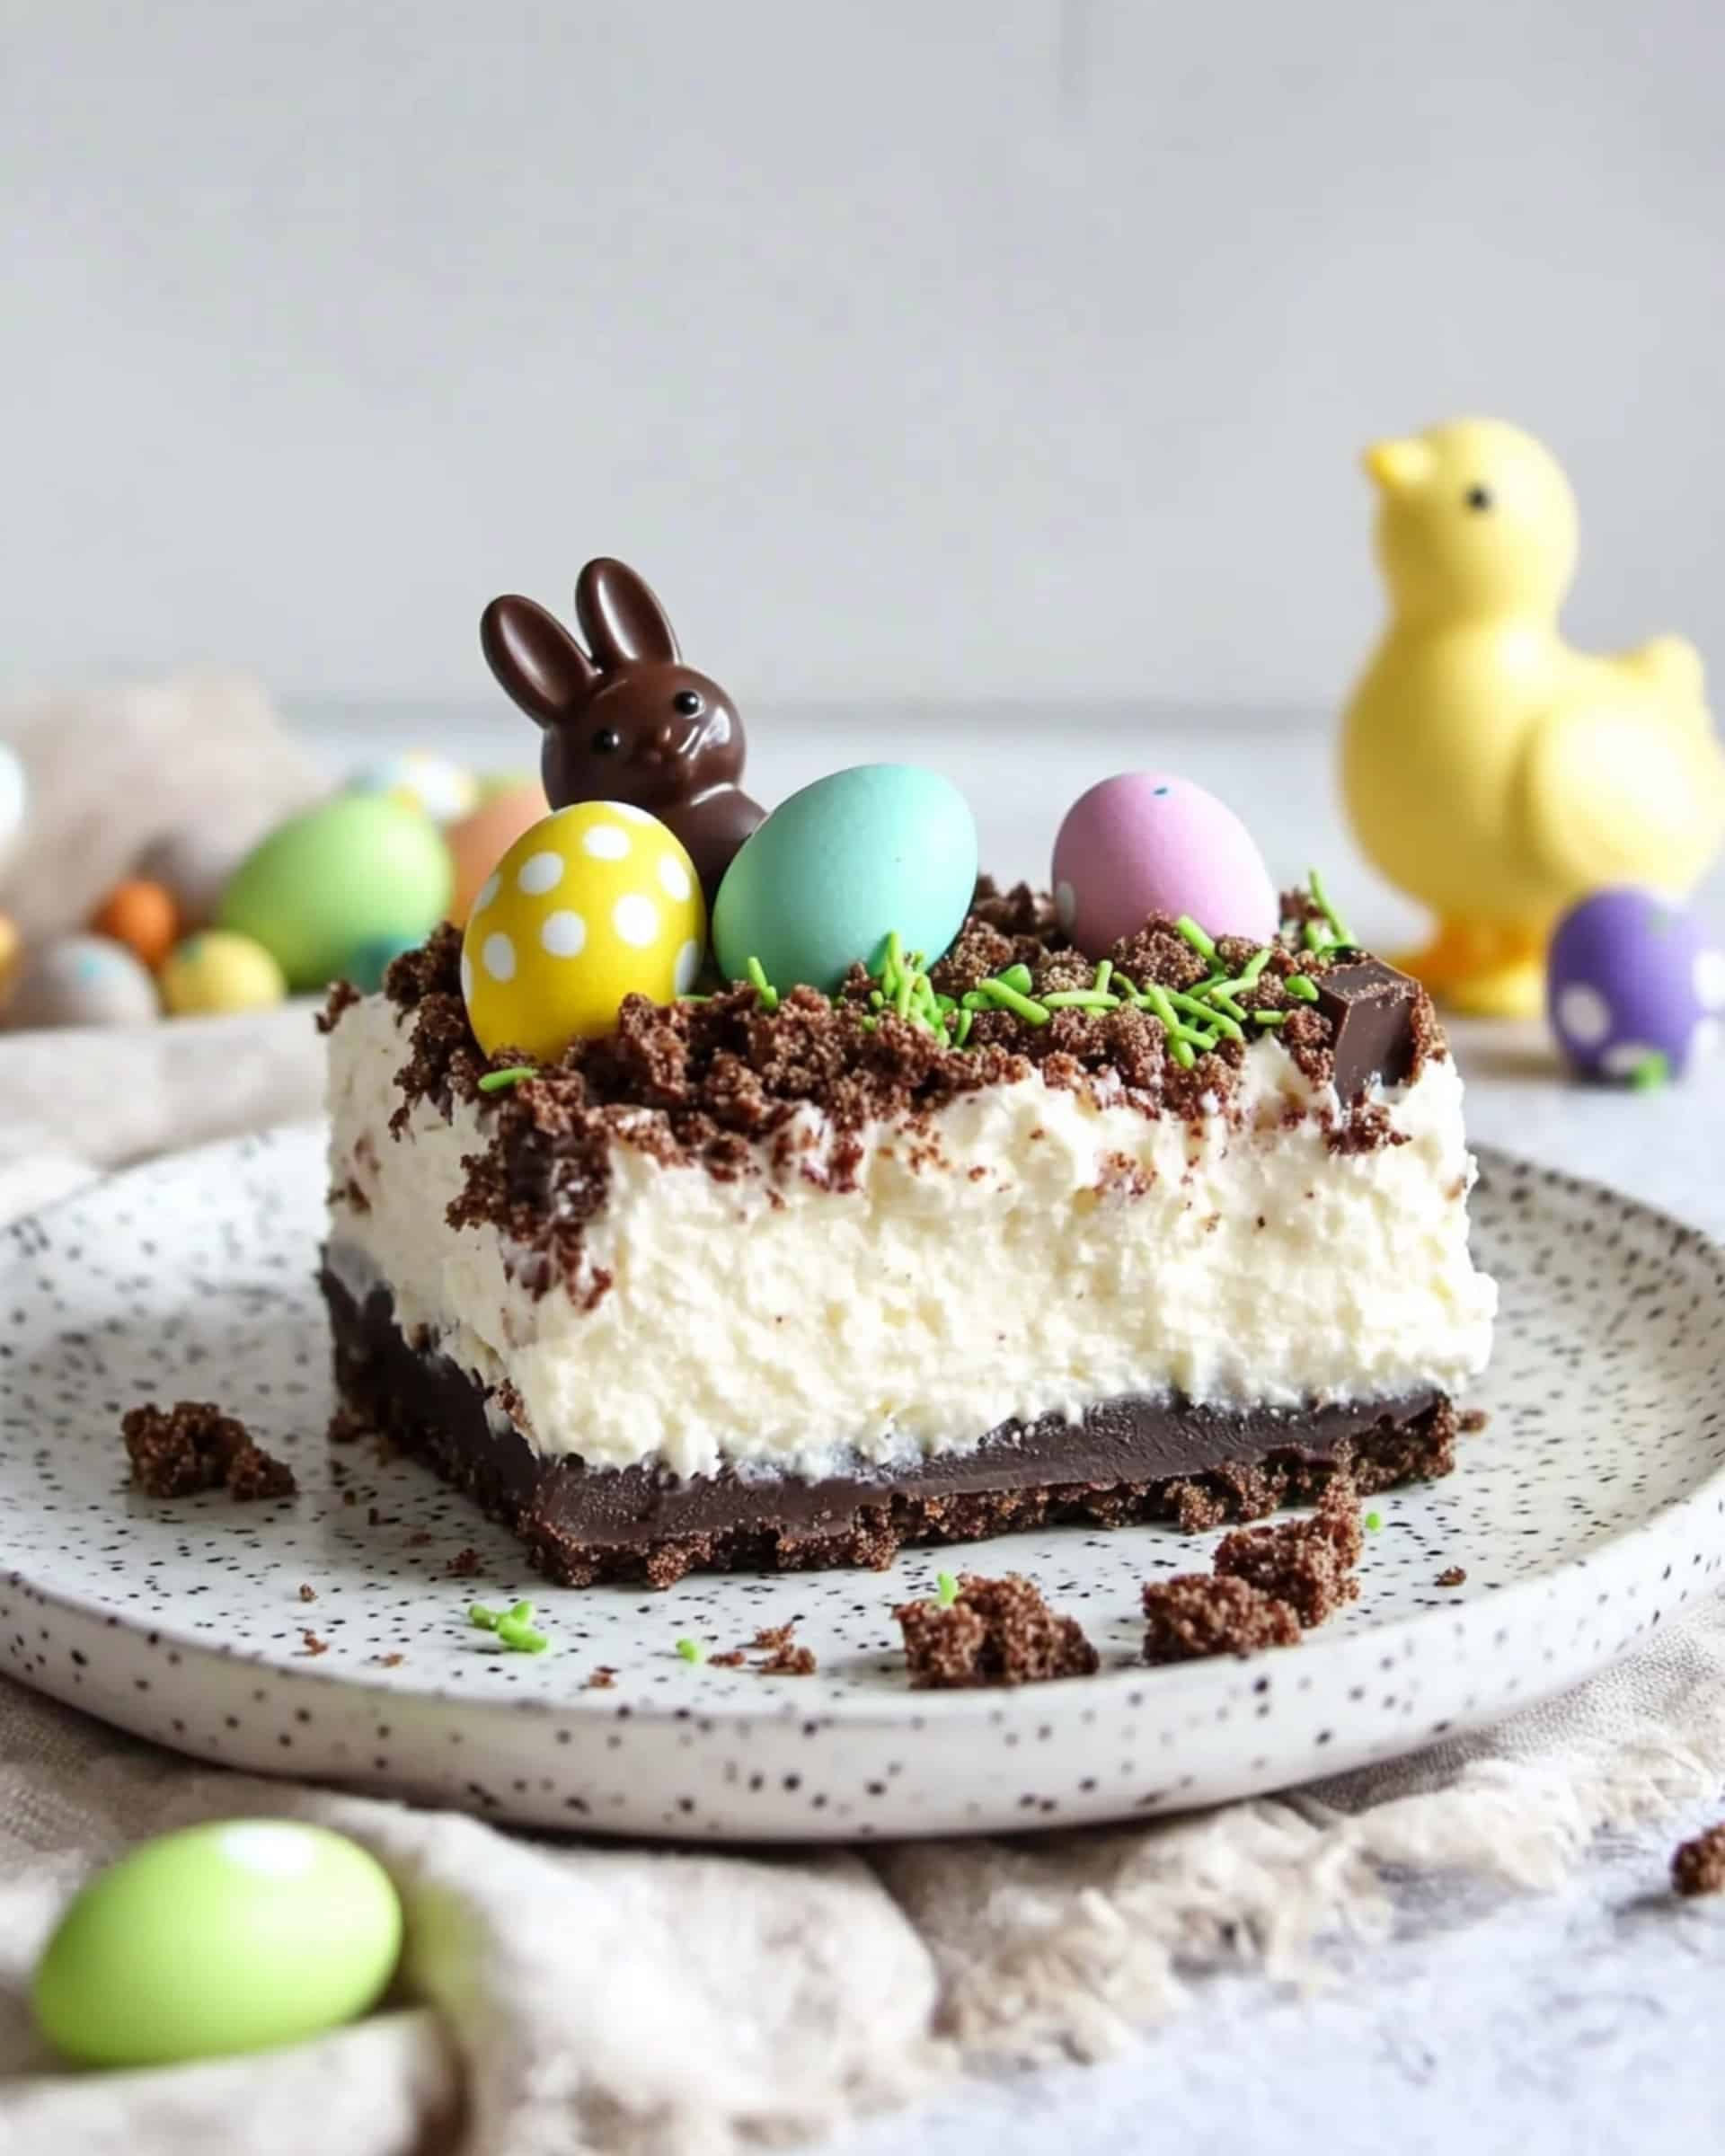
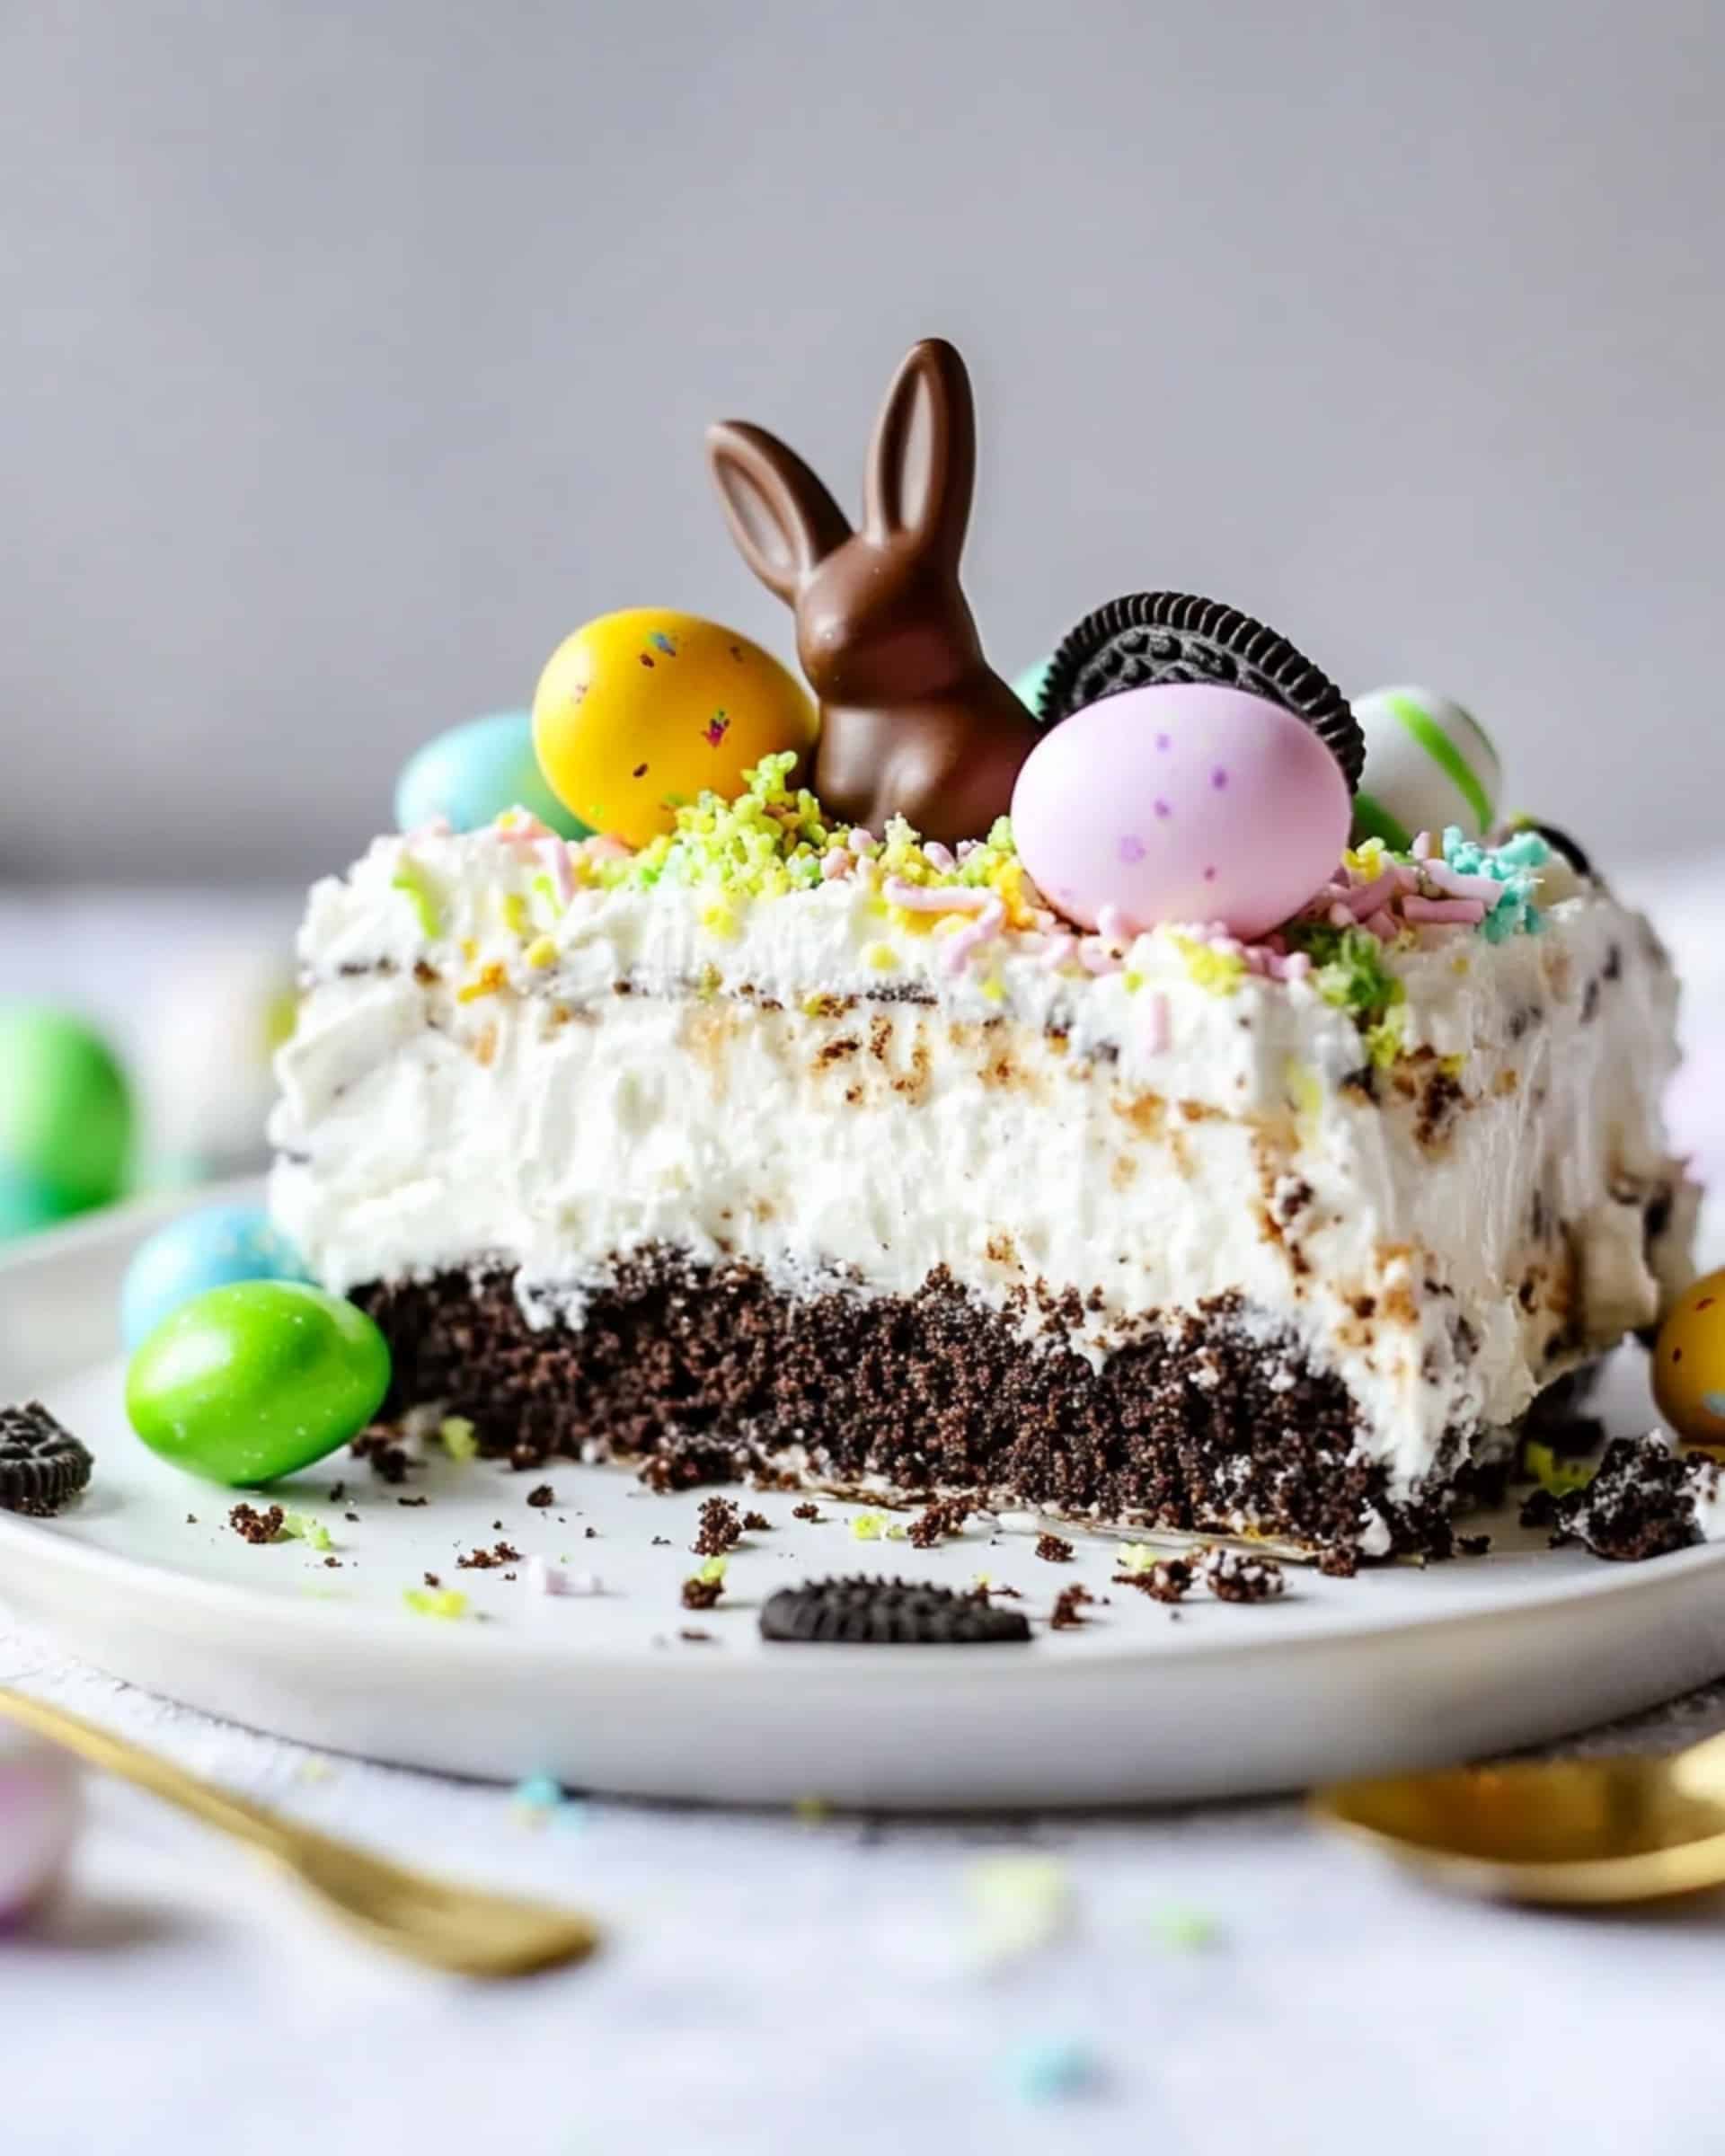
This Easter Bunny Dirt Cake is a showstopping holiday dessert that combines creamy layers with chocolate cookie “dirt” for a festive treat that will delight both kids and adults alike. The no-bake dessert features a luscious cream cheese and pudding mixture topped with crushed chocolate cookies and adorable Easter decorations—perfect for your spring celebrations!
Why You’ll Love This Recipe
- No Baking Required: This is a completely no-bake dessert that comes together with minimal effort—perfect for busy holiday preparations.
- Make-Ahead Friendly: You can prepare this cake a day in advance, which means less stress on the day of your Easter gathering.
- Customizable Fun: Let your creativity shine with different Easter-themed decorations that will make this dessert uniquely yours.
- Kid-Approved: Children absolutely love the playful concept of “dirt” cake, and they can even help with decorating!

Ingredients You’ll Need
- Chocolate sandwich cookies: These form both the “dirt” base and topping for your cake. The classic cream-filled cookies provide that authentic soil look that makes this dessert so fun.
- Cream cheese: Provides a rich tanginess that balances the sweetness. Make sure it’s at room temperature for smooth blending.
- Butter: Adds richness and helps create that velvety texture in the filling. Room temperature is key for proper blending.
- Powdered sugar: Sweetens the cream cheese mixture without adding graininess that regular sugar might.
- Whipped topping: Creates a light, airy texture in the filling. The stabilized nature helps the dessert hold its shape beautifully.
- White chocolate or vanilla instant pudding: Adds structure and flavor to the filling. Either flavor works wonderfully, depending on your preference.
- Milk: Activates the pudding mix and creates the proper consistency for your filling.
- Easter decorations: Small chocolate bunnies, edible grass (or green-tinted coconut), jelly beans, and chocolate eggs transform this from a simple dirt cake to an Easter masterpiece.
Variations
Chocolate Lover’s Version
Replace the vanilla pudding with chocolate pudding for an extra chocolatey experience. Add mini chocolate chips to the filling for even more chocolate goodness.
Spring Garden Theme
Use strawberries cut to look like carrots (orange-tinted white chocolate dipped) alongside your bunnies for a garden theme. Add flower-shaped sprinkles or small edible flower decorations.
Individual Servings
Make single-serving dirt cups in clear plastic cups or small mason jars—perfect for Easter gatherings where individual desserts are preferable.
Allergen-Friendly Option
Use dairy-free cream cheese, non-dairy whipped topping, and dairy-free pudding mix for those with dairy allergies. There are also gluten-free chocolate sandwich cookies available for those with gluten sensitivities.
How to Make Easter Bunny Dirt Cake
Step 1: Create the Base
Crush about two-thirds of the chocolate sandwich cookies (filling and all) until they resemble dirt. Spread these crumbs evenly across the bottom of a 9×13-inch dish to form your cake’s foundation.
Step 2: Prepare the Creamy Filling
In your stand mixer with the paddle attachment, blend the room temperature cream cheese and butter until completely smooth. Add the powdered sugar and mix for another minute until well combined, making sure to scrape down the sides. Then gently fold in the whipped topping until incorporated.
Step 3: Add the Pudding
In a separate bowl, vigorously whisk the dry pudding mix with the milk for 1-2 minutes until it thickens. Once thickened, carefully fold this pudding mixture into your cream cheese mixture until evenly blended.
Step 4: Assemble the Cake
Pour the creamy filling mixture over your cookie crumb base and spread it out evenly with a spatula. Make sure to create a level surface for your “dirt” topping.
Step 5: Add the “Dirt” Topping
Crush the remaining chocolate cookies and sprinkle them evenly over the top of the cream mixture, completely covering it to create the dirt effect.
Step 6: Chill and Decorate
Cover the dish and refrigerate for at least 3 hours or overnight. Once thoroughly chilled, add your Easter decorations—position chocolate bunnies, sprinkle edible grass, arrange jelly beans and chocolate eggs to create a festive Easter scene.
Pro Tips for Making the Recipe
- Cookie Crushing Technique: For the perfect dirt-like texture, pulse the cookies in short bursts in your food processor rather than continuous processing, which can make them too fine.
- Smooth Filling: Ensure your cream cheese and butter are completely at room temperature to avoid lumps in your filling.
- Decoration Timing: Add decorative elements just before serving if they contain colors that might bleed into the “dirt” (like jelly beans).
- Clean Cuts: Dip your knife in hot water and wipe clean between cuts for picture-perfect servings.
How to Serve
Perfect Pairings
This Easter Bunny Dirt Cake stands beautifully on its own, but pairs wonderfully with a cup of coffee, tea, or a glass of cold milk.
Serving Suggestions
Use a square-edged spatula to cut clean portions. For an extra special presentation, serve on pastel-colored plates alongside fresh berries for a pop of color.
Special Occasions
This is ideal for Easter celebrations, spring-themed birthday parties, or any gathering where you want to bring a smile to everyone’s face.
Make Ahead and Storage
Storing Leftovers
Cover any leftover dirt cake tightly with plastic wrap and store in the refrigerator for up to 3 days. The cookies may soften slightly over time, but the taste remains delicious.
Freezing
While you can freeze the assembled dirt cake (without decorations) for up to 1 month, the texture of the filling may change slightly upon thawing. Wrap tightly in plastic wrap and then aluminum foil before freezing.
Reheating
No reheating needed! Simply remove from the refrigerator about 15 minutes before serving to take the chill off slightly—this allows the flavors to be more pronounced.
FAQs
Can I make this dirt cake without cream cheese?
While cream cheese provides the distinctive tangy flavor and creamy texture, you could substitute mascarpone cheese for a milder flavor profile. However, I wouldn’t recommend skipping it entirely as it’s crucial for the structure and flavor of the filling.
How far in advance can I make this Easter Bunny Dirt Cake?
This dessert is perfect for making ahead! You can prepare it up to 24 hours before your event and keep it refrigerated. Add the decorative elements shortly before serving for the freshest appearance.
Can I use homemade whipped cream instead of whipped topping?
While homemade whipped cream tastes wonderful, it doesn’t have the stability of store-bought whipped topping. If you prefer to use homemade, consider adding a stabilizer like gelatin to help it maintain its structure in the cake.
What’s the best way to create edible grass for decorating?
For homemade edible grass, combine 1 cup of shredded coconut with 2-3 drops of green food coloring in a zip-top bag. Shake until the color is evenly distributed. If you don’t like coconut, green-tinted shredded white chocolate or green sprinkles work wonderfully as alternatives.
Final Thoughts
This Easter Bunny Dirt Cake is more than just a dessert—it’s a memory maker! The combination of creamy filling, chocolate cookie “dirt,” and playful decorations creates a treat that’s sure to become a holiday tradition. Whether you’re hosting a grand Easter celebration or simply want to bring some spring joy to your family dinner, this dirt cake delivers both impressive presentation and delicious flavor with minimal effort.
Print
Easter Bunny Dirt Cake Recipe
- Prep Time: 15 minutes
- Cook Time: 0 minutes
- Total Time: 15 minutes
- Yield: Serves 12 1x
- Category: Desserts
- Method: No-cook
- Cuisine: American
Description
Easter Bunny Dirt Cake is a delightful no-bake dessert that’s perfect for Easter celebrations. This creamy, chocolatey treat combines layers of crushed chocolate sandwich cookies with a rich cream cheese and pudding mixture, topped with festive decorations like chocolate bunnies, edible grass, and jelly beans. It’s simple to make and will surely bring a smile to everyone at your table!
Ingredients
For the Cake Base
- 1 (19-ounce/48 cookies) package chocolate sandwich cookies (like Oreo)
For the Filling
- 1 (8-ounce) package cream cheese, room temperature
- 1/2 cup butter, room temperature
- 1 cup powdered sugar
- 1 (16-ounce) container whipped topping (like Cool Whip), thawed
- 2 (3.9-ounce) packages Instant White Chocolate or Vanilla Pudding
- 3 cups milk
Decorations (Optional)
- Small chocolate bunny candies
- Edible grass (homemade: shredded coconut + green food coloring) OR green sprinkles
- Jelly beans
- Chocolate eggs
Instructions
- Make the Base
Crush 2/3 of the chocolate sandwich cookies, including the filling, using a food processor, blender, or by placing the cookies in a zip-top bag and crushing with a rolling pin. Spread the crumbs evenly into the bottom of a 9×13-inch dish as the base layer. Set aside. - Prepare the Cream Cheese Mixture
Using a stand mixer fitted with the paddle attachment, beat the cream cheese and butter on medium speed until smooth and creamy. Add powdered sugar and mix for another minute until fully combined, scraping down the sides of the bowl as needed. Carefully fold in the whipped topping to complete the creamy filling. Set aside. - Prepare the Pudding
In a large mixing bowl, whisk the dry pudding mix and milk vigorously for 1–2 minutes until it thickens. Once the pudding is ready, gently combine it with the cream cheese mixture until well-blended and smooth. - Assemble the Layers
Spread the cream mixture evenly over the crushed cookie base in the dish. Crush the remaining cookies and sprinkle them across the top of the filling to create the “dirt” layer. - Chill and Decorate
Cover the dish with plastic wrap and refrigerate for at least 3 hours or overnight to allow the dessert to set. Once chilled, decorate with your choice of festive toppings like chocolate bunnies, jelly beans, edible grass, and chocolate eggs for an Easter-themed presentation. - Serve
Keep the dirt cake refrigerated until ready to serve. Slice into squares and enjoy!
Notes
- To crush the cookies, you can use a food processor or blender for a finer texture. Alternatively, place them in a large zip-top bag and crush with a rolling pin for a chunkier consistency.
- This recipe is versatile, so feel free to swap decorations to match other holidays or occasions!
- For a homemade edible grass alternative, mix shredded coconut with a drop or two of green food coloring.
Nutrition
- Serving Size: 1 square
- Calories: 425
- Sugar: 29g
- Sodium: 345mg
- Fat: 22g
- Saturated Fat: 12g
- Unsaturated Fat: 10g
- Trans Fat: 1g
- Carbohydrates: 55g
- Fiber: 2g
- Protein: 4g
- Cholesterol: 40mg

Your email address will not be published. Required fields are marked *