

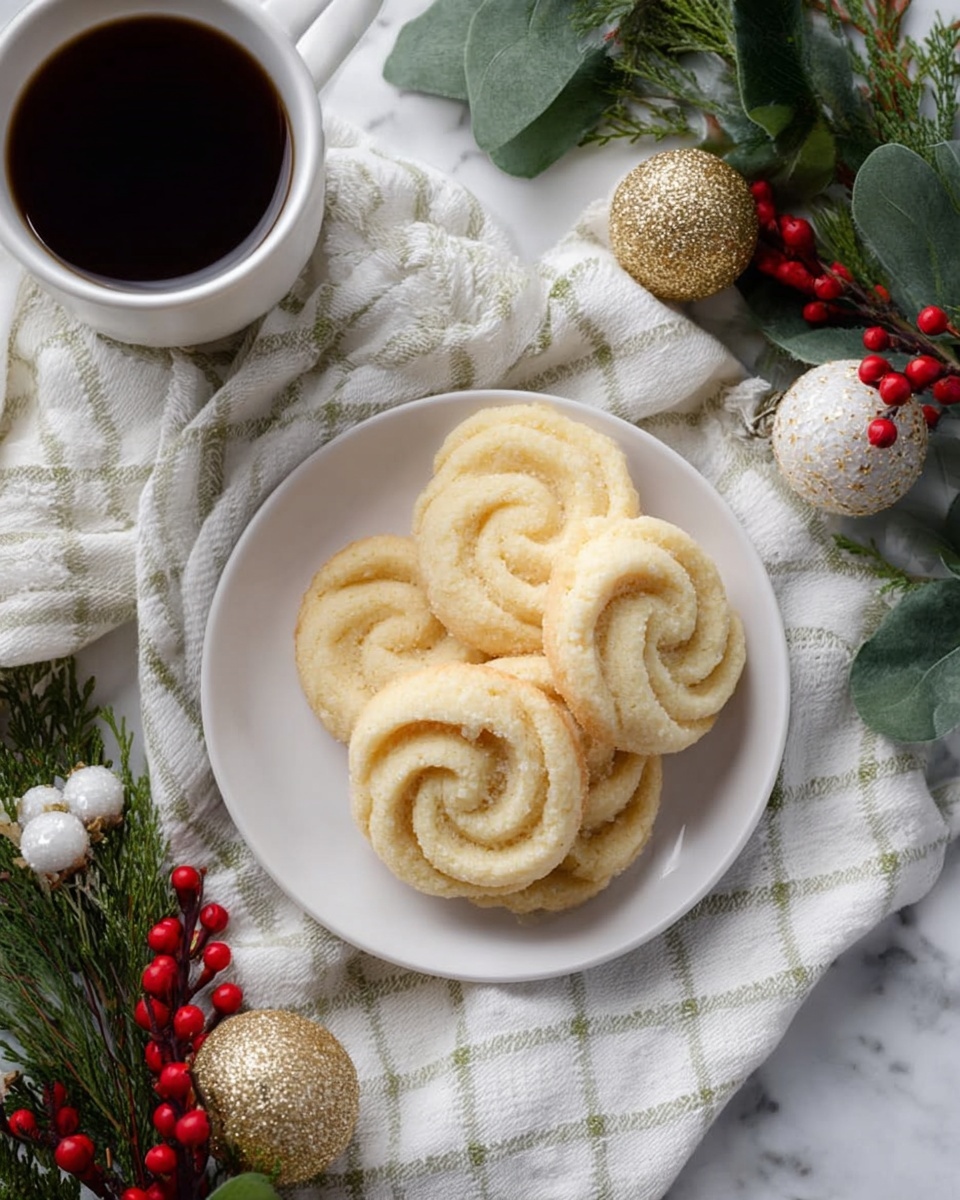
I absolutely love this Danish Butter Cookies Recipe because it’s one of those timeless treats that always bring a little bit of joy to the kitchen. The rich, buttery flavor combined with the subtle zing of lemon zest and those delightful bursts of dried currants create a cookie that’s both classic and a little unexpected. Whether you’re baking for the holidays, a cozy afternoon tea, or just to satisfy your sweet tooth, these cookies always turn out perfectly golden and irresistibly tender.
When I first tried this recipe, I was amazed at how simple ingredients came together to create such an elegant cookie. You don’t need fancy equipment—just some patience and a piping bag—and you’ll find that this Danish Butter Cookies Recipe is incredibly forgiving for bakers of all levels. Plus, they freeze wonderfully, so it’s great to make a batch ahead and enjoy them whenever you want a buttery little treat.
Why You’ll Love This Recipe
- Rich, Buttery Flavor: The butter is the star here, making these cookies incredibly tender and delicious.
- Easy to Customize: Adding lemon zest and currants gives a fresh, slightly tangy twist, but you can swap them out too!
- Perfect for Any Occasion: These cookies are just as great for gifting as they are for a cozy night in.
- Make-Ahead Friendly: You can freeze the dough or the baked cookies, making your baking schedule super flexible.

Ingredients You’ll Need
Gather these ingredients for your Danish Butter Cookies Recipe — each plays a crucial role in creating that signature melt-in-your-mouth texture with a touch of sweetness and a hint of citrus brightness.
- Unsalted Butter: Use good-quality, room temperature butter to get that creamy dough and rich flavor.
- Granulated Sugar: Provides the perfect amount of sweetness and helps create a nice crumb.
- Large Egg: Make sure it’s room temperature to blend smoothly into the batter.
- Finely Grated Lemon Zest: Adds a wonderful fresh zing that brightens the cookies.
- Pure Vanilla Extract: Enhances the overall flavor with warm, sweet notes.
- All-Purpose Flour: The structure of these cookies relies on quality flour—no substitutions here for best results.
- Dried Currants: These tiny bursts of chewy sweetness really elevate the cookie’s texture and flavor.
- Baking Soda: Just a pinch to help the cookies rise slightly and become tender.
- Kosher Salt: Balances the sweetness and intensifies the butter’s flavor.
- Sanding Sugar: Used to give the cookies a lovely sparkling finish and a slight crunch.
Variations
I love tweaking this Danish Butter Cookies Recipe based on the season or mood—don’t hesitate to personalize it! Swapping out currants or adding a little twist can make this classic cookie truly your own.
- Substitute Dried Fruits: I sometimes replace currants with chopped dried cranberries or raisins, which gives a slightly different flavor and texture but still works beautifully.
- Almond or Orange Zest: Adding almond extract or switching lemon zest for orange zest adds a warming or fruity note that’s just divine.
- Chocolate Dip: After baking, dip half the cookie in melted dark or white chocolate and let it set for an extra indulgent treat.
- Gluten-Free Version: I’ve experimented using a gluten-free flour blend with good results, just watch the dough texture—it might need a tad more butter or chilling time.
How to Make Danish Butter Cookies Recipe
Step 1: Cream Butter and Sugar to Perfection
Start by beating the room temperature butter and granulated sugar together with an electric mixer on medium speed. I like to do this for about 3 minutes until it’s combined and really creamy. This step is crucial—you want the butter to be light and fluffy because it gives the cookies their tender crumb. If the butter is too cold, it won’t whip properly, and if it’s too soft, the texture will suffer. Once creamy, add the egg, lemon zest, and vanilla extract, and beat again until everything is well combined.
Step 2: Mix in Dry Ingredients and Currants
Next, gently beat in the flour, baking soda, salt, and dried currants. You want to mix just until everything comes together—overmixing can toughen the dough, and that’s one thing you definitely want to avoid with Danish Butter Cookies. The currants are what give these cookies those delightful little pockets of chewiness, and I always make sure they’re evenly distributed by folding them in carefully.
Step 3: Pipe the Cookies and Chill
Prepare a rimmed baking sheet with parchment paper, and then scoop about one-quarter of the dough into a piping bag fitted with a ½-inch star tip. I love this step because piping gives the cookies that pretty, traditional shape with ridges. Pipe small rings, roughly 1¾ inches in diameter, spaced evenly on the sheet. Pop the sheet into the freezer for about 20 minutes to firm up the dough. This chilling step helps the cookies keep their shape and prevents spreading too much while baking.
Step 4: Sugar-Coat and Bake
Preheat your oven to 350°F (180°C) while the dough chills. Line two more baking sheets with parchment paper. Pour some sanding sugar into a small bowl and quickly dip each cookie ring in the sugar to coat—this gives them that beautiful sparkle and a slight crunch. Arrange the cookies about an inch apart on the baking sheets, pop them back in the freezer to keep firm while you work through the batches, and then bake for 13 to 18 minutes, rotating the sheets halfway through. I usually watch for the edges to turn lightly golden as my cue that they’re done, which keeps them tender, not overbaked.
Step 5: Cool and Store
Once baked, transfer the cookies to a wire rack to cool completely. This is key because they firm up as they cool but stay perfectly soft inside. These cookies keep well in an airtight container at room temperature for up to three days, but honestly, they rarely last that long in my house!
Pro Tips for Making Danish Butter Cookies Recipe
- Use Room Temperature Ingredients: I learned that having butter and eggs at room temp makes mixing smoother and dough come together nicer.
- Don’t Overmix Dry Ingredients: Stir just until combined to keep your cookies tender, not tough.
- Chill the Dough Thoroughly: Freezing helps maintain the cookies’ shape and prevents spreading during baking.
- Watch the Baking Time Closely: Edges turning golden is your sign—too long and they dry out, too short and they don’t set properly.
How to Serve Danish Butter Cookies Recipe
Garnishes
I like to sprinkle a little extra sanding sugar right after baking for an elegant sparkle that makes these cookies feel extra special. Sometimes I add a drizzle of melted dark chocolate or a light dusting of powdered sugar for festive occasions. Fresh lemon zest grated on top just before serving also adds a wonderful fresh aroma.
Side Dishes
These cookies are fantastic paired with a warm cup of tea or coffee—the buttery richness really shines alongside a strong brew. I especially enjoy serving them with a fruit salad or fresh berries to balance out the sweetness during afternoon snack time.
Creative Ways to Present
For holidays or gatherings, I like arranging Danish Butter Cookies Recipe on a tiered cookie stand mixed with fresh sprigs of rosemary or tiny edible flowers for a charming effect. Wrapping small stacks with colorful ribbons makes them perfect little gifts that always impress friends and family.
Make Ahead and Storage
Storing Leftovers
I store leftover Danish Butter Cookies in an airtight container at room temperature, layered with parchment paper to keep them from sticking. They stay fresh and buttery for up to 3 days, although in my experience, they get devoured much faster!
Freezing
One of the best things about this Danish Butter Cookies Recipe is how well it freezes. I usually freeze the shaped dough on the baking sheet and then transfer the frozen rings to a zip-top bag. You can also freeze fully baked cookies between parchment layers. Just make sure to thaw fully before serving for best taste and texture.
Reheating
If you want to enjoy these cookies warm, I pop them in a 300°F (150°C) oven for 5–7 minutes. This refreshes their crisp edges and buttery aroma without drying them out. Microwave is a quick option but can make them a bit soft if heated too long.
FAQs
-
Can I use salted butter instead of unsalted in Danish Butter Cookies Recipe?
It’s best to use unsalted butter here so you can control the saltiness precisely. If you only have salted butter, reduce or omit additional salt and taste your dough to avoid overly salty cookies.
-
What if I don’t have a piping bag or star tip?
No worries! You can shape the dough into small balls or logs and flatten them slightly with a fork or your fingers. While you won’t get the classic ridged look, the cookies will still taste amazing.
-
Can I make the dough ahead of time?
Absolutely! You can prepare the dough and freeze it as shaped rings or in a block wrapped tight. When ready to bake, just thaw enough to pipe or cut, chill briefly if needed, and bake as directed.
-
How do I prevent the cookies from spreading too much?
Keeping the dough chilled before baking and not overmixing the flour helps maintain the cookies’ shape. Also, piping them firmly and freezing before baking sets them well, reducing spread.
-
What makes Danish Butter Cookies different from regular sugar cookies?
Danish Butter Cookies use a higher proportion of butter and often include additions like lemon zest and dried currants. They’re piped for a unique shape and texture — dense yet tender with a crisp edge.
Final Thoughts
This Danish Butter Cookies Recipe holds a special place in my heart because it’s simple, elegant, and so reliably delicious every time I bake it. Sharing these cookies always brings a smile to the table, and I’m confident you’ll enjoy making and eating them just as much as I do. Give this recipe a try—you’ll have buttery, beautiful cookies that feel like a warm hug from Denmark every time.
Print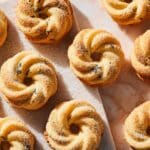
Danish Butter Cookies Recipe
- Prep Time: 30 minutes
- Cook Time: 20 minutes
- Total Time: 50 minutes
- Yield: Approximately 35 cookies 1x
- Category: Dessert
- Method: Baking
- Cuisine: Danish
Description
Delight in these classic Danish Butter Cookies, featuring a rich, buttery dough studded with dried currants and brightened with lemon zest and vanilla. Pipied into charming rings and coated with sanding sugar, these cookies are crisp, tender, and perfect for sharing or gifting.
Ingredients
Cookie Dough
- 1 cup (2 sticks, 1/2 pound, or 227 grams) unsalted butter, room temperature
- 1/2 cup (100 grams) granulated sugar
- 1 large egg, room temperature
- 1 tablespoon finely grated lemon zest
- 1 teaspoon pure vanilla extract
- 2 cups (250 grams) all-purpose flour
- 5 ounces (142 grams) dried currants
- 1/2 teaspoon baking soda
- 1/2 teaspoon kosher salt
Topping
- 1 handful sanding sugar
Instructions
- Prepare the dough: In a large bowl, use an electric mixer on medium speed to beat the unsalted butter and granulated sugar for about 3 minutes until the mixture is creamy and well combined. Add the egg, finely grated lemon zest, and pure vanilla extract, beating until fully incorporated. Gradually beat in the all-purpose flour, dried currants, baking soda, and kosher salt just until the dough comes together.
- Pipe the cookies: Line a rimmed baking sheet with parchment paper. Transfer about one-quarter of the dough to a piping bag fitted with a ½-inch (1.2 cm) star tip. Pipe small rings approximately 1¾ inches (3.6 cm) in diameter onto the prepared baking sheet. Repeat this process with the remaining dough portions. Place the baking sheet in the freezer for about 20 minutes, or until the dough is firm enough to handle.
- Preheat oven and coat cookies: While the dough chills, preheat your oven to 350°F (180°C). Prepare two rimmed baking sheets by lining them with parchment paper. Pour some sanding sugar into a small bowl. Quickly dip each frozen cookie ring into the sanding sugar to coat it, and then transfer the cookies to the prepared baking sheets, spacing them about 1 inch apart. Keep any remaining cookies in the freezer until ready to bake.
- Bake the cookies: Bake the cookies for 13 to 18 minutes, rotating the baking sheets halfway through baking to ensure even browning. The cookies are done when they are golden around the edges. Remove them from the oven and immediately transfer the cookies on their sheets to a wire rack to cool completely.
- Store or serve: These cookies can be made up to 3 days in advance and stored in an airtight container at room temperature. For longer storage, freeze the cookies for up to 2 months, ensuring they are well wrapped to maintain freshness.
Notes
- Make sure the butter and egg are at room temperature for a smooth, creamy dough.
- Freezing the dough before baking helps the cookies hold their shape and develop a crisp texture.
- Rotate baking sheets halfway through baking for even cooking and color.
- You can substitute dried currants with raisins or chopped dried cranberries if preferred.
- Store baked cookies in an airtight container to maintain freshness and crispness.
Nutrition
- Serving Size: 1 cookie (approx. 15g)
- Calories: 90 kcal
- Sugar: 5 g
- Sodium: 60 mg
- Fat: 5 g
- Saturated Fat: 3 g
- Unsaturated Fat: 2 g
- Trans Fat: 0 g
- Carbohydrates: 11 g
- Fiber: 0.3 g
- Protein: 1 g
- Cholesterol: 15 mg

Your email address will not be published. Required fields are marked *