

This incredibly simple Cornflake Cakes recipe transforms basic ingredients into delightful, chocolatey treats that will transport you straight back to childhood. With just a handful of pantry staples and minimal active time, these nostalgic goodies are perfect for making with kids or whipping up when you need a quick sweet fix!
Why You’ll Love This Recipe
- No-Bake Simplicity: These treats require zero oven time – just melt, mix, and set!
- Kid-Friendly Fun: Children absolutely love helping make these, especially when it comes to decorating with sprinkles and mini eggs.
- Versatile Treat: Perfect for Easter celebrations, birthday parties, afternoon snacks, or adding to lunchboxes.
- Satisfying Texture: The delightful combination of crispy cornflakes and smooth chocolate creates an irresistible mouthfeel that’s both crunchy and melt-in-your-mouth.

Ingredients You’ll Need
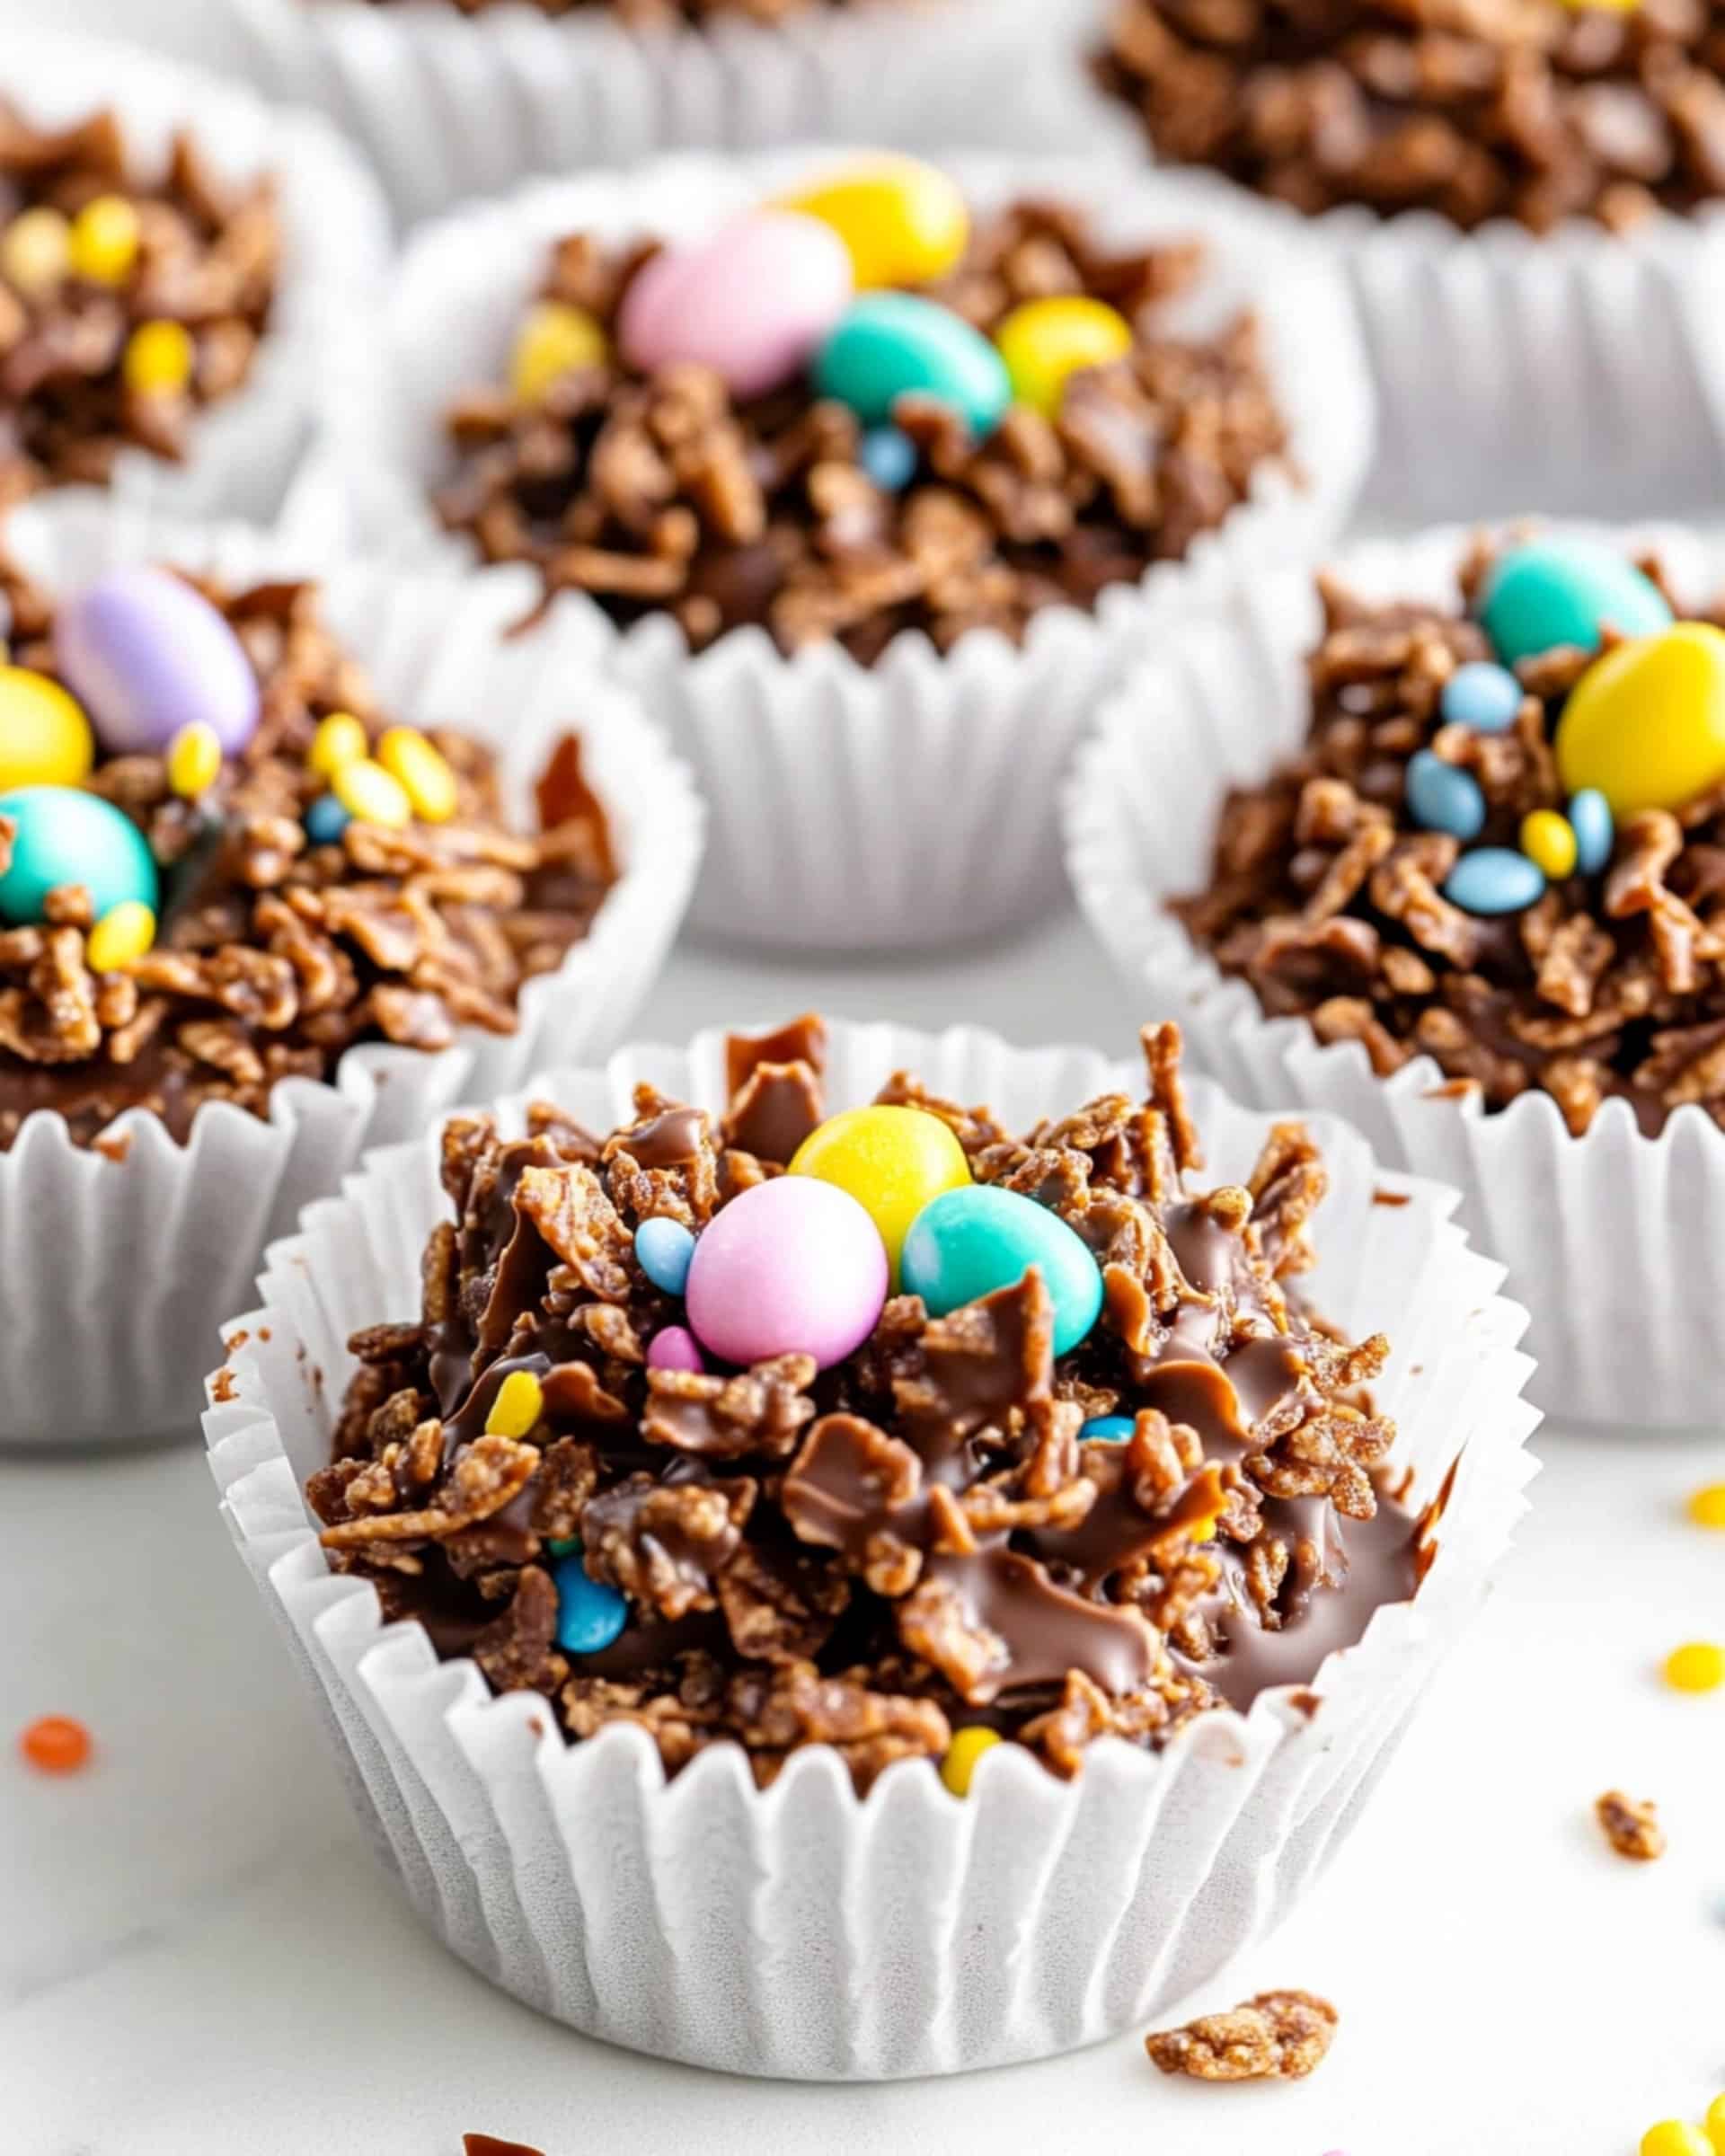
- Cornflakes: The star ingredient providing that essential crunch. Make sure they’re fresh for maximum crispiness!
- Golden Syrup: Adds a distinctive caramel-like sweetness that brings everything together. This gives the cakes their signature gooey binding texture.
- Chocolate: Semi-sweet or dark chocolate works best to balance the sweetness. Higher quality chocolate will definitely elevate the final taste.
- Butter: Creates richness and helps achieve that perfect glossy chocolate coating on every cornflake.
- Sprinkles: These colorful additions make the treats festive and fun. Choose seasonal colors for holidays!
- Mini Eggs: Perfect for Easter-themed cakes, but you can substitute with other small candies depending on the occasion.
Variations
Flavor Twists
- White Chocolate Wonder: Substitute white chocolate for dark/semi-sweet for a creamier, sweeter version.
- Peanut Butter Blast: Add 2 tablespoons of peanut butter to the melted chocolate mixture for a nutty dimension.
- Rocky Road Style: Mix in mini marshmallows and chopped nuts before forming the cakes.
- Fruity Flakes: Add dried cranberries, raisins, or chopped dried apricots for chewy fruit bites.
Seasonal Specials
- Halloween Treats: Use orange and black sprinkles with candy corn decorations.
- Christmas Cornflake Cakes: Add red and green sprinkles with a dusting of edible gold glitter.
- Valentine’s Version: Use pink and red sprinkles with heart-shaped candies on top.
How to Make Cornflake Cakes
Step 1: Prepare Your Workspace
Line a 12-cup muffin tin with large paper liners. Lightly grease a large mixing bowl before adding the cornflakes – this prevents sticking and makes cleanup much easier.
Step 2: Create the Chocolate Mixture
Set up a double boiler by placing a heat-safe bowl over a pot with about an inch of simmering water. Add the butter, chocolate, and golden syrup to the bowl. Melt everything together, stirring occasionally until completely smooth and glossy. Make sure the water doesn’t touch the bottom of your bowl.
Step 3: Combine and Coat
Let the chocolate mixture cool slightly for 1-2 minutes (too hot and it might make the cornflakes soggy). Pour it over the cornflakes and gently fold everything together until each flake is beautifully coated with chocolate.
Step 4: Form the Cakes
Spoon the mixture evenly into the prepared muffin cups. I find it works best to add a base layer to each cup first, then go back and add more to build them up. This ensures you don’t run short on mixture for the last few cakes.
Step 5: Decorate and Set
While the chocolate is still soft, sprinkle your decorations on top. Press mini eggs gently into the center of each cake. Place the entire muffin tin in the refrigerator and let the cakes set for about an hour until firm.
Pro Tips for Making the Recipe
- Don’t Rush the Melting: Melt the chocolate mixture slowly to prevent it from seizing or burning.
- Gentle Mixing: Fold the chocolate into the cornflakes carefully to keep them from crushing completely.
- Working Quickly: Once mixed, the chocolate will start setting, so move efficiently when portioning into the muffin cups.
- Pressing Technique: Use the back of a spoon to gently press the mixture into the cups while still maintaining some height.
- Fun Shapes: For special occasions, try using different shaped silicone molds instead of regular muffin liners.
How to Serve
These versatile treats work beautifully in so many settings:
Everyday Enjoyment
Serve with a glass of cold milk for the perfect after-school treat or afternoon pick-me-up.
Party Presentation
Arrange on a tiered cake stand for birthday parties or holiday gatherings. They look particularly festive on Easter tables with their mini egg decorations.
Gift Giving
Stack a few in a clear cellophane bag tied with a colorful ribbon for a homemade gift that’s sure to please.
Make Ahead and Storage
Storing Leftovers
Keep your cornflake cakes in an airtight container at room temperature for 3-4 days. In warmer weather, store them in the refrigerator to prevent the chocolate from melting.
Freezing
These treats freeze surprisingly well! Place them in a single layer in a freezer-safe container, separating layers with parchment paper. They’ll keep for up to 3 months.
Reheating
No reheating necessary! Simply thaw frozen cakes at room temperature for about 30 minutes before enjoying.
FAQs
Can I use honey instead of golden syrup?
Yes, honey makes a good substitute, though it will change the flavor profile slightly. The texture will be similar, but you’ll miss that distinctive caramel note that golden syrup provides. If you’re in the US where golden syrup is less common, light corn syrup also works well.
Why did my cornflake cakes turn out soggy?
Soggy cakes usually happen when the chocolate mixture is too hot when mixed with the cornflakes. Make sure to let it cool slightly before combining. Also, check that your cornflakes were fresh and crisp to begin with – stale cornflakes absorb moisture more quickly.
How can I make these healthier?
Try using dark chocolate with 70% cocoa content to reduce sugar. You can also reduce the butter slightly and add a tablespoon of nut butter for healthy fats. For toppings, consider using chopped dried fruit instead of candy, or a light sprinkle of coconut flakes.
My chocolate mixture seized up – what happened?
This typically happens when water gets into your chocolate or if it’s heated too quickly. Make absolutely sure your double-boiler setup doesn’t allow steam to escape into the chocolate bowl, and always use dry utensils when stirring the chocolate mixture.
Final Thoughts
These Cornflake Cakes bring together the perfect balance of simplicity and delight. There’s something magical about transforming a breakfast cereal into a treat that brings smiles to faces of all ages. Whether you’re making them with little helpers or preparing a batch for yourself, the crispy, chocolatey goodness of these nostalgic treats is sure to brighten your day. Give them a try – they might just become your new go-to for quick, no-bake treats!
Print
Cornflake Cakes Recipe
- Prep Time: 5 minutes
- Cook Time: 2 minutes
- Total Time: 1 hour 7 minutes
- Yield: 12 servings 1x
- Category: Desserts
- Method: No-cook
- Cuisine: British
Description
This quick and easy Cornflake Cakes recipe combines the crunch of Cornflakes with the rich, chocolatey goodness of melted chocolate, butter, and golden syrup. Perfect as a dessert or a simple snack, these no-bake treats are topped with festive sprinkles and mini eggs, making them great for parties or family gatherings.
Ingredients
For the Cakes
- 5 cups Cornflakes
- 7 ounces semi-sweet or dark chocolate chips/chunks
- 3 tablespoons butter (unsalted)
- 3 tablespoons golden syrup
Garnish
- 3 tablespoons sprinkles (or more, as desired)
- 36 mini eggs
Instructions
- Prepare Muffin Pan and Ingredients
Begin by preheating a 12-tin muffin pan with large liners. Lightly grease a large mixing bowl and add the Cornflakes to the bowl. Set this bowl aside for later use. - Melt Chocolate Mixture
In a heat-safe bowl, melt the unsalted butter, chocolate, and golden syrup over a small pot of boiling water on low heat. Ensure that the water does not touch the bottom of the bowl during this process, which can prevent overheating and splitting of the chocolate mixture. - Combine Chocolate and Cornflakes
Allow the melted mixture to cool for about 1-2 minutes. Then, pour the mixture over the Cornflakes in the prepared bowl and mix gently but thoroughly to coat all the Cornflakes evenly. - Portion and Garnish
Using a large spoon, evenly distribute the Cornflake mixture into the 12 muffin liners. Start with one spoonful per liner and evenly pile additional amounts until the mixture is used up. Top each cake with sprinkles and place three mini eggs on each for decoration. - Set the Cakes
Place the tray into the refrigerator for about 1 hour, or until the cakes have completely hardened. Serve and enjoy!
Notes
- Storage Tip: These Cornflake Cakes can be stored in an airtight container in the fridge for up to a week for optimal freshness.
- Substitutions: You can use any type of chocolate like milk or white chocolate, but semi-sweet or dark chocolate provides a balanced richness.
- For a Nutty Flavor: Add a handful of chopped nuts like almonds or hazelnuts to the Cornflake mixture before setting for an additional crunch.
- If you don’t have golden syrup handy, try substituting with light corn syrup or honey as an alternative.
Nutrition
- Serving Size: 1 Cake
- Calories: 180
- Sugar: 15g
- Sodium: 90mg
- Fat: 9g
- Saturated Fat: 5g
- Unsaturated Fat: 4g
- Trans Fat: 0g
- Carbohydrates: 25g
- Fiber: 2g
- Protein: 2g
- Cholesterol: 8mg

Your email address will not be published. Required fields are marked *