

If you’re searching for a dessert that will blow everyone away—without blowing your entire evening stuck in the kitchen—these Cherry Cheesecake Tacos are about to become your next obsession. Imagine everything you love about a classic cherry cheesecake, but tucked into a golden, crunchy “taco” shell with a sweet, creamy center and the most luscious cherry topping. Not only do they look adorable served up, but they’re just as fun to eat as they are easy to make. This is weeknight dessert magic—no special equipment, no fancy ingredients, and ready before you know it!
Why You’ll Love This Recipe
- Ridiculously Easy: Minimal prep, straightforward ingredients, and only a handful of steps.
- Impossible to Resist: Buttery graham cracker shells, tangy cheesecake filling, and vibrant cherry topping—what’s not to love?
- A Crowd-Pleaser: These mini tacos are cute, handheld, and perfect for sharing, making them a hit with kids and adults alike.
- Perfect for Any Occasion: Serve these at your next family get-together, potluck, or just because you deserve a treat on a busy night.

Ingredients You’ll Need
- Tortillas: The base for your tacos—use soft flour tortillas so they crisp up beautifully in the oven.
- Butter (melted): For brushing on the tortillas, ensuring a golden, flavorful crunch.
- Graham Cracker Crumbs: Adds that signature “cheesecake crust” flavor and texture.
- Cream Cheese (softened): The rich, tangy foundation for your creamy cheesecake filling.
- Powdered Sugar: For sweetness in the cheesecake mixture—keeps everything silky smooth.
- Lemon Zest: Brings a pop of brightness and freshness, balancing the sweetness.
- Vanilla Extract: For depth of flavor in that luscious cream cheese mixture.
- Cherries (halved): Use fresh or frozen—this will become your vibrant, juicy topping.
- Granulated Sugar: Sweetens the cherry topping and helps create that syrupy texture.
- Cornstarch: Thickens the cherry mixture, making it cling perfectly to the tacos.
- Water: Combines with cornstarch for a smooth slurry.
Tip: For the best cream cheese mixture, make sure your cream cheese is fully softened before blending.
Variations
- Berry Swap: Swap the cherries for blueberries, raspberries, or a mixed berry medley.
- Chocolate Drizzle: Drizzle with melted chocolate or hot fudge sauce before serving for a decadent finish.
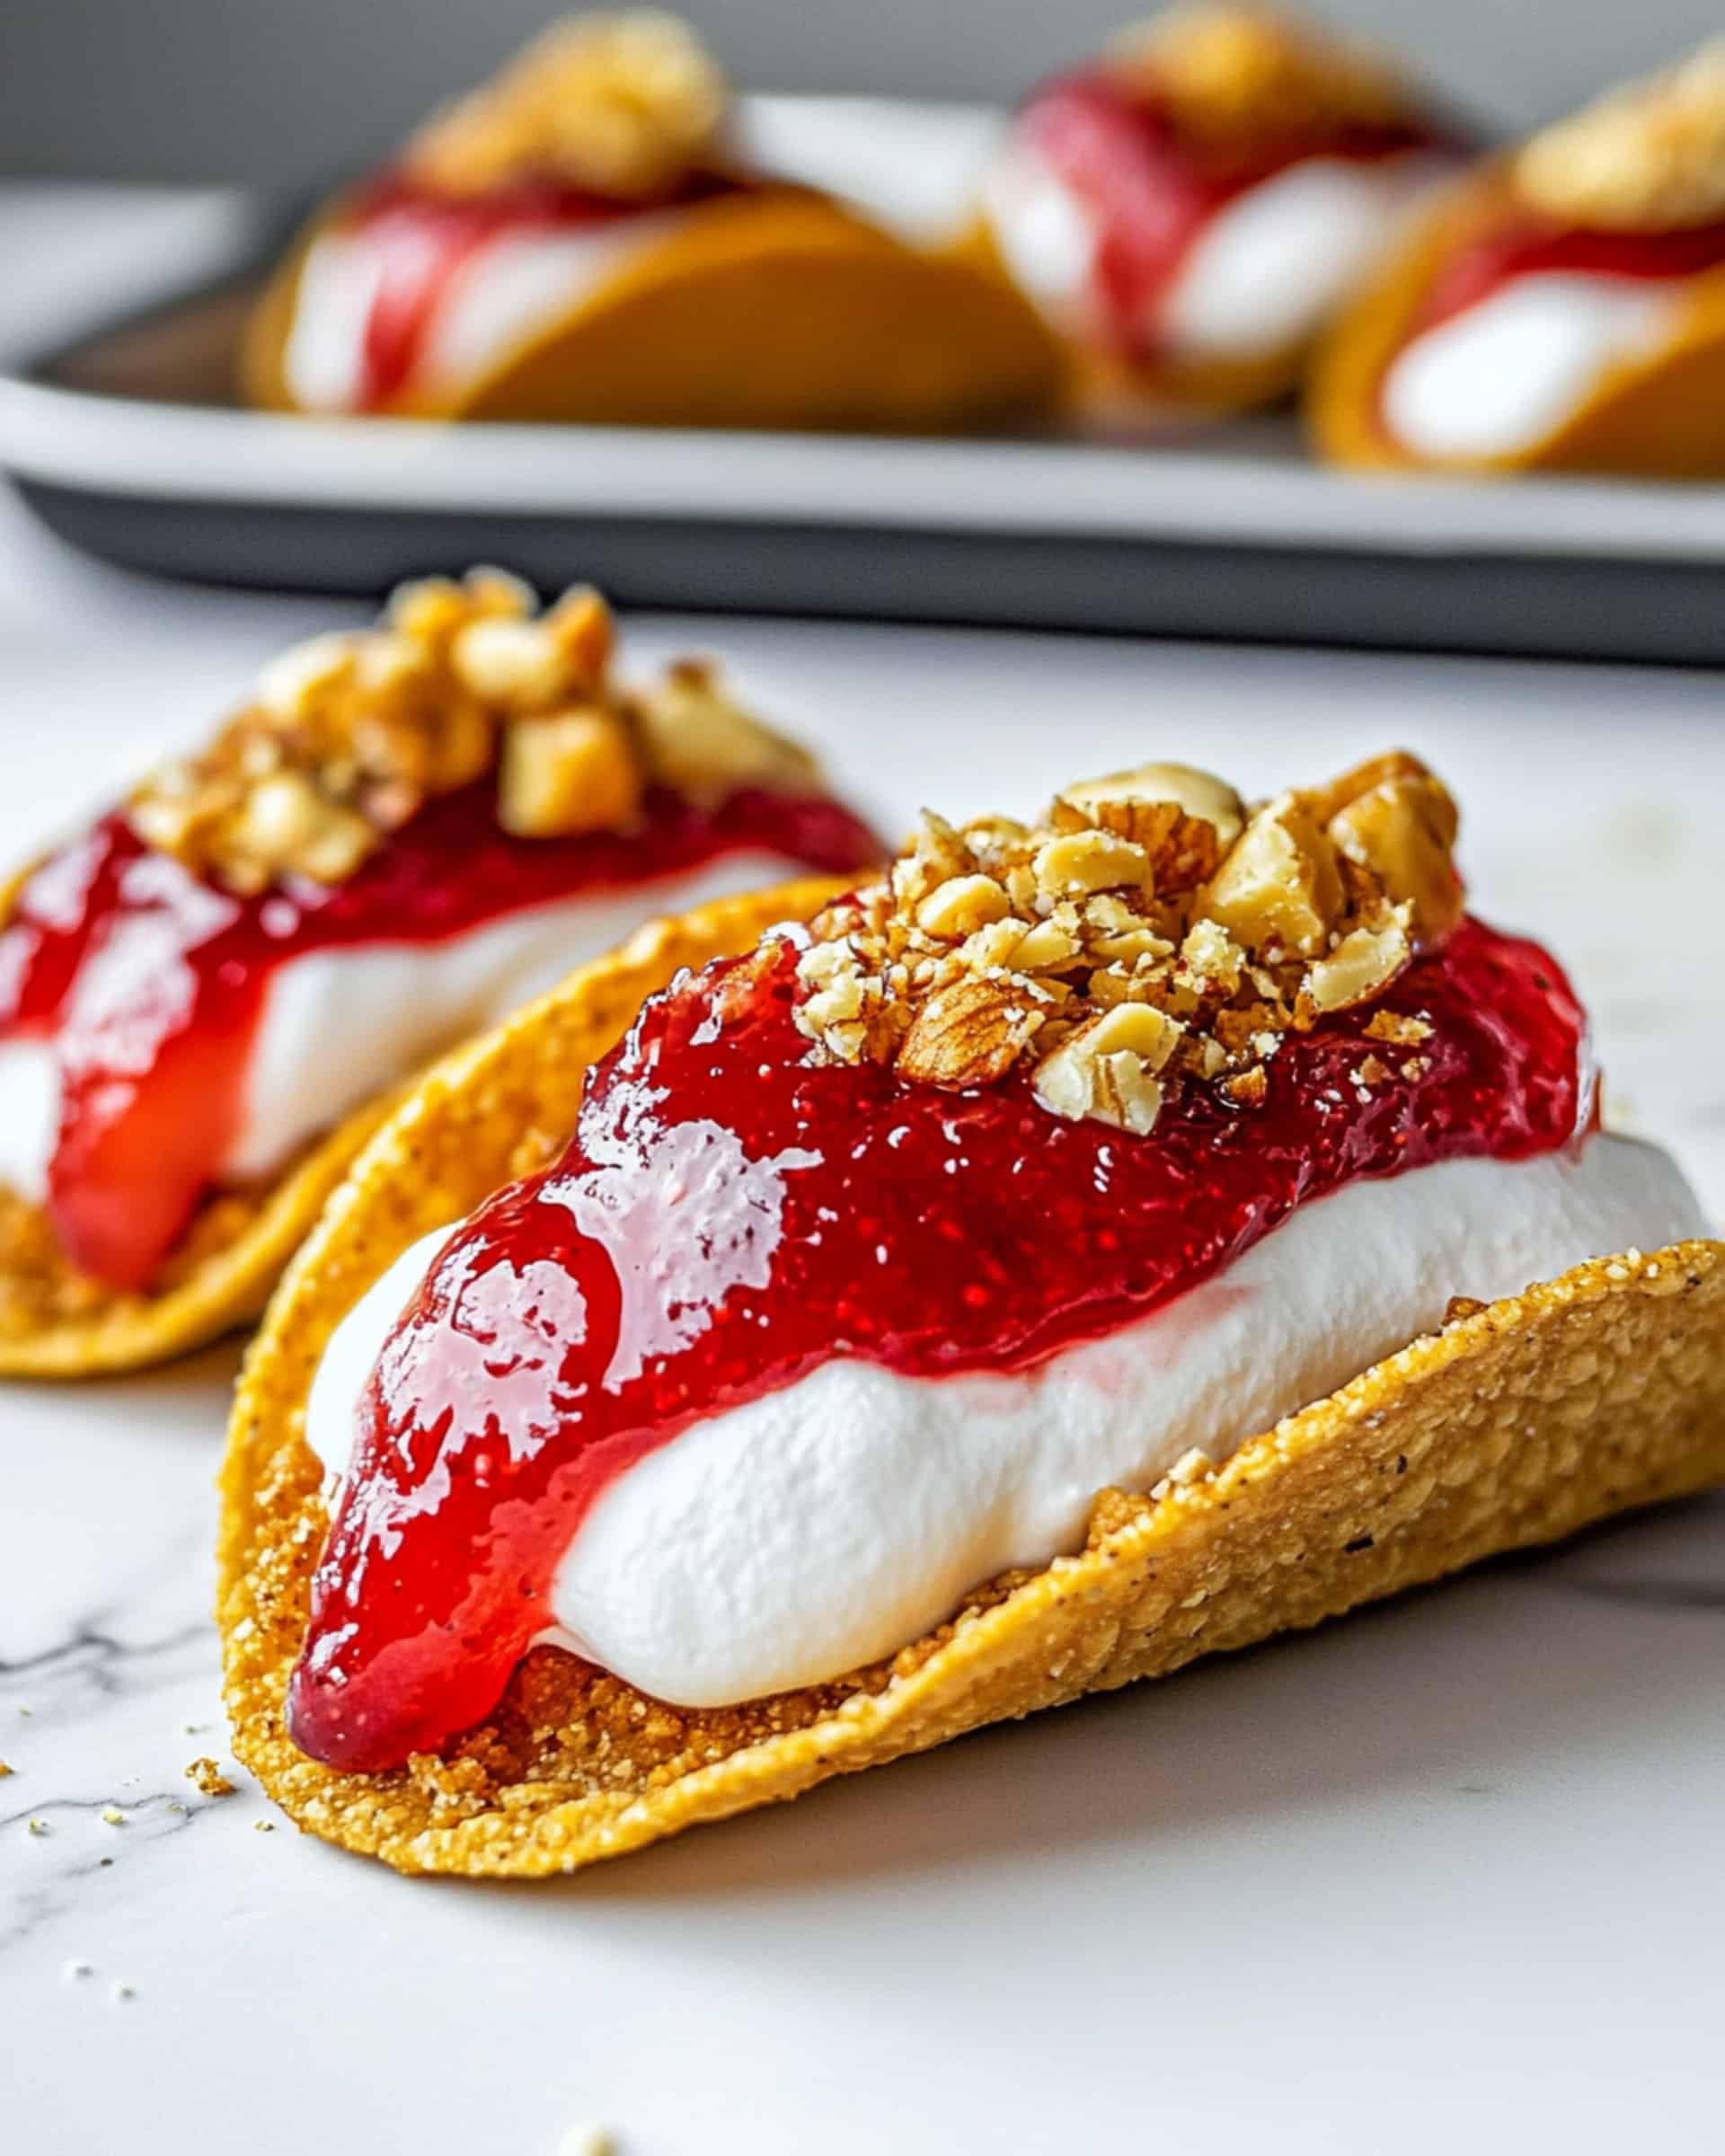
- Nutty Crunch: Sprinkle crushed pistachios, pecans, or walnuts on top for extra texture.
- Gluten-Free: Use gluten-free tortillas and graham crackers for a celiac-friendly treat.
- Spice It Up: Add a pinch of cinnamon to your graham cracker crumbs for warm, spiced undertones.
How to Make Cherry Cheesecake Tacos
Step 1: Prepare the Taco Shells
Preheat your oven to 400°F and flip a muffin tin upside down—this is your secret weapon for perfectly shaped taco shells! Cut circles out of your tortillas using a 4-inch cookie cutter. Dip each circle in melted butter, then press into a bowl of graham cracker crumbs, coating well. Fold them gently in half and nestle each “taco” in between the cups of your upside-down muffin tin. Bake for about 10 minutes until golden and crisp, then let cool.
Step 2: Make the Cherry Topping
Mix the cornstarch and water in a small bowl to create a slurry. In a saucepan over medium heat, combine the slurry, granulated sugar, and cherries. Stir and bring to a gentle boil, simmering until thickened and the cherries have softened to juicy perfection. Let this cherry goodness cool completely.
Step 3: Whip Up the Cheesecake Filling
In a mixing bowl, blend together the softened cream cheese, powdered sugar, lemon zest, and vanilla until super creamy and light. Pop it in the fridge for 30 minutes so it sets into that iconic cheesecake texture.
Step 4: Assemble Your Tacos
Once your shells and fillings are chilled, pipe or spoon the creamy cheesecake into each shell, then top abundantly with your homemade cherry compote. Admire your handiwork—these are as pretty as they are tasty!
Pro Tips for Making the Recipe
- Room Temp Cream Cheese: Let your cream cheese come to room temperature for the smoothest cheesecake blend—no lumps allowed!
- Don’t Overbake the Shells: Watch those tortillas as they bake; they should crisp up but not turn too dark.
- Chill Everything: Give both the cream cheese filling and cherry topping time to cool; this helps the tacos keep their shape when filled.
- Piping Bag Hack: Use a zip-top bag with the corner snipped off to easily pipe the cheesecake filling.
How to Serve
These cherry cheesecake tacos are just begging to be picked up and enjoyed—no fork required! Arrange them artfully on a platter for parties, or serve alongside a mug of coffee or cold milk for an indulgent after-dinner treat.
Try serving with a dusting of powdered sugar, a dollop of whipped cream, or even a few extra fresh cherries scattered on the plate for pops of color.
Make Ahead and Storage
Storing Leftovers
Place any leftover tacos in an airtight container in the fridge. The shells will stay lightly crisp for up to two days, though they do soften slightly as they absorb moisture from the filling.
Freezing
It’s best to freeze the cheesecake filling and cherry topping separately. Tortilla shells can be baked and cooled, then frozen in a single layer. When ready, thaw everything and assemble just before serving.
Reheating
No need to reheat—these tacos are designed to be enjoyed cold or at room temperature, perfect for make-ahead desserts!
FAQs
Can I use canned cherry pie filling instead of making the topping?
Absolutely! If you’re in a hurry, canned cherry pie filling works perfectly. Just spoon it on top instead of the homemade cherry mixture. The result is just as delicious and saves a little time.
What if I don’t have a 4-inch cookie cutter for the tortillas?
No worries! Use any round object of similar size—a bowl, large glass, or even freehand cut with a knife. The idea is just to make taco-sized pieces.
Can I prepare any part of this recipe ahead of time?
Yes—both the cheesecake filling and cherry topping can be made a day ahead and refrigerated. You can even prepare the taco shells earlier the same day; just assemble everything before serving for peak freshness.
Are there nut-free adaptations for this recipe?
Yes! The entire recipe as written does not use nuts, but if you add nuts as a topping, simply leave them off for a nut-free treat.
Final Thoughts
If you love cherry cheesecake but want a dessert that’s quicker, playful, and just as scrumptious, these Cherry Cheesecake Tacos are the answer. With minimal fuss and maximum flavor, they’ll become a new family favorite. Give them a try next time you need to wow your crowd—or just treat yourself to something special and sweet.
Print
Cherry Cheesecake Tacos Recipe
- Prep Time: 15 minutes
- Cook Time: 30 minutes
- Total Time: 45 minutes
- Yield: 8 tacos 1x
- Category: Desserts
- Method: Baking
- Cuisine: American
- Diet: Vegetarian
Description
Cherry Cheesecake Tacos are a delightful dessert combining crisp graham cracker-coated tortilla shells filled with smooth cream cheese filling and juicy cherry topping. This recipe delivers a creative twist on classic cheesecake, served in an easy-to-eat handheld taco form perfect for parties and family treats.
Ingredients
For the Taco Shells
- 6 tortillas (8” each)
- 1/4 cup butter, melted
- 1 cup graham cracker crumbs
For the Cherry Filling
- 1 cup cherries, halved
- 1 tbsp cornstarch
- 2 tbsp water
- 1/4 cup granulated sugar
For the Cheesecake Filling
- 8 oz cream cheese, softened
- 1/4 cup powdered sugar
- 1 tsp vanilla extract
- 1 tsp lemon zest
Instructions
- Prepare the Shells: Preheat your oven to 400°F (200°C). Place a muffin tin upside down on a large baking sheet. Use a 4-inch cookie cutter to cut rounds from the tortillas. Dip each tortilla circle into melted butter and then press into graham cracker crumbs to coat. Fold each coated tortilla circle into a taco shape and position them between the cups of the upside down muffin tin.
- Bake the Shells: Bake the prepared tortillas for 10 minutes or until lightly golden and crisp. Remove from the oven and let them cool completely before filling.
- Make the Cherry Filling: In a small bowl, stir together the cornstarch and water to create a slurry. In a saucepan over medium heat, combine the cornstarch slurry with granulated sugar and cherries. Bring to a boil and simmer until the mixture thickens and cherries soften. Remove from heat and chill the mixture.
- Prepare the Cheesecake Filling: In a mixing bowl, blend softened cream cheese, powdered sugar, vanilla, and lemon zest until light and creamy. Refrigerate for 30 minutes to allow it to firm up.
- Assemble the Tacos: Pipe or spoon the chilled cheesecake filling into each cooled taco shell. Top with a generous spoonful of the cherry mixture. Serve immediately or chill briefly before serving for a firmer texture.
Notes
- For best flavor, use fresh or high-quality canned cherries.
- The taco shells can be made ahead and stored in an airtight container for several hours.
- Try swapping cherries for blueberries or strawberries for a twist.
- Fill the shells shortly before serving to preserve crispness.
Nutrition
- Serving Size: 1 taco
- Calories: 235
- Sugar: 14g
- Sodium: 170mg
- Fat: 11g
- Saturated Fat: 6g
- Unsaturated Fat: 4g
- Trans Fat: 0g
- Carbohydrates: 30g
- Fiber: 1g
- Protein: 3g
- Cholesterol: 28mg

Your email address will not be published. Required fields are marked *