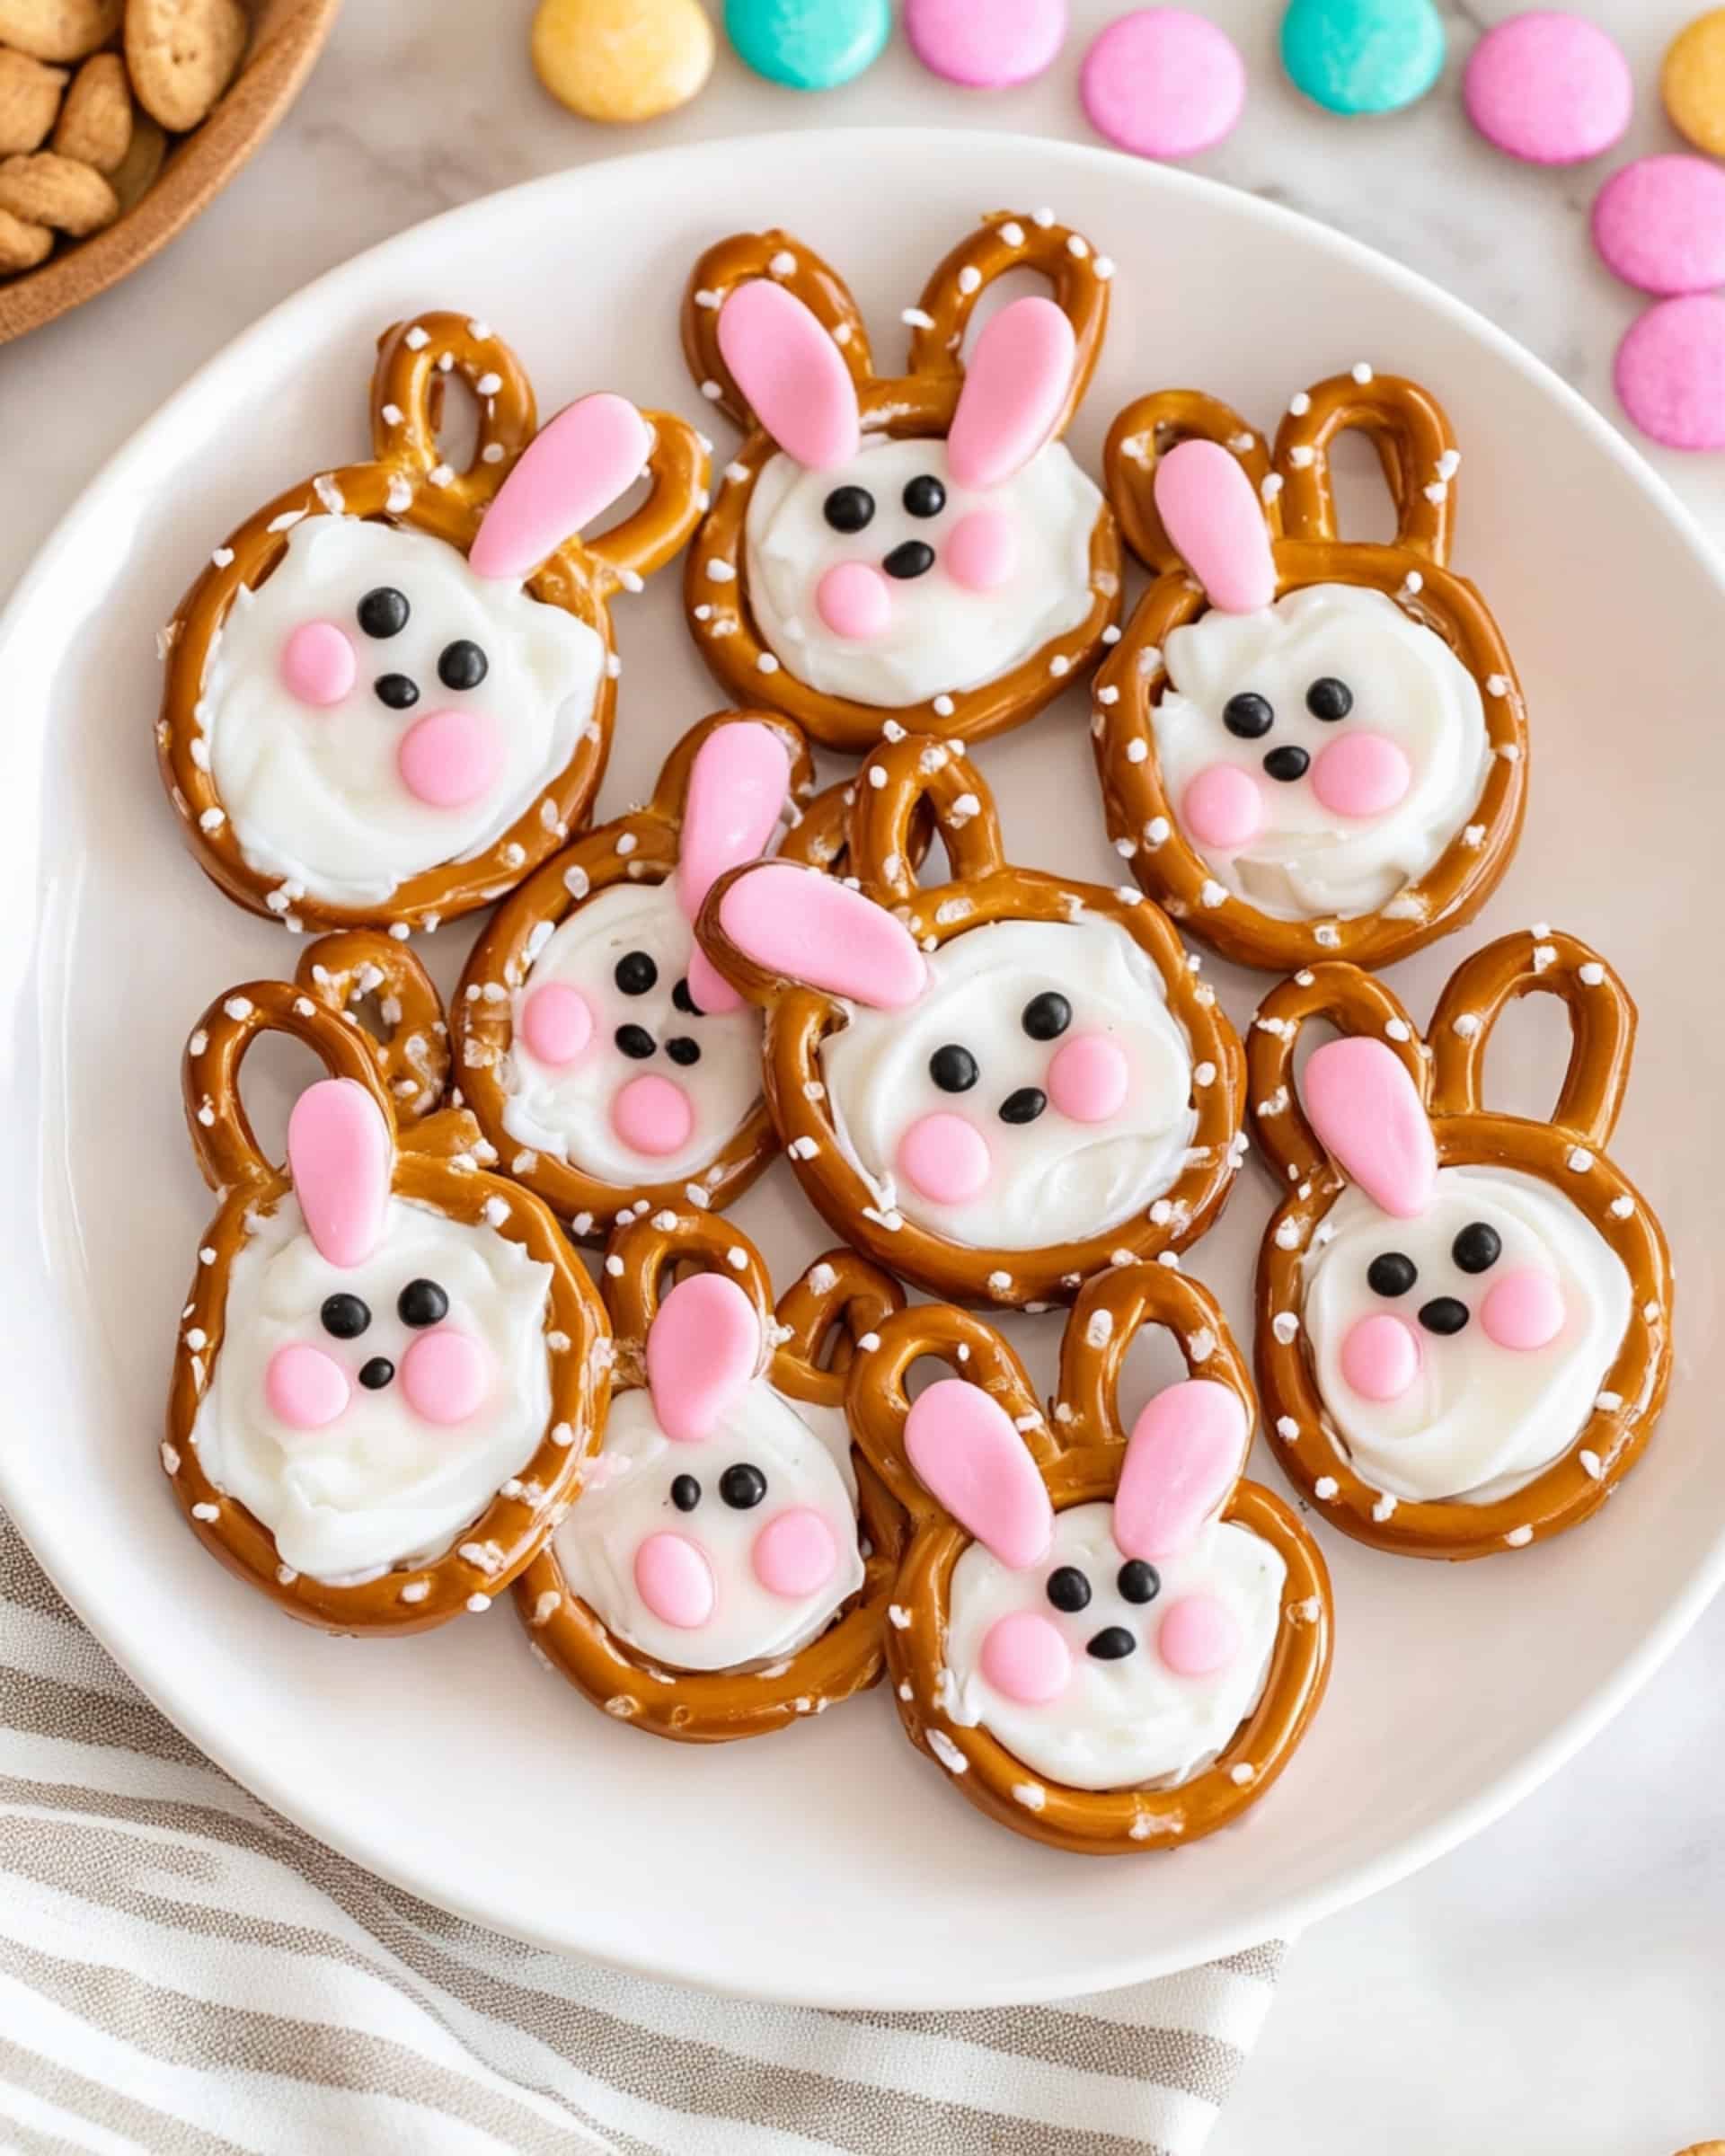
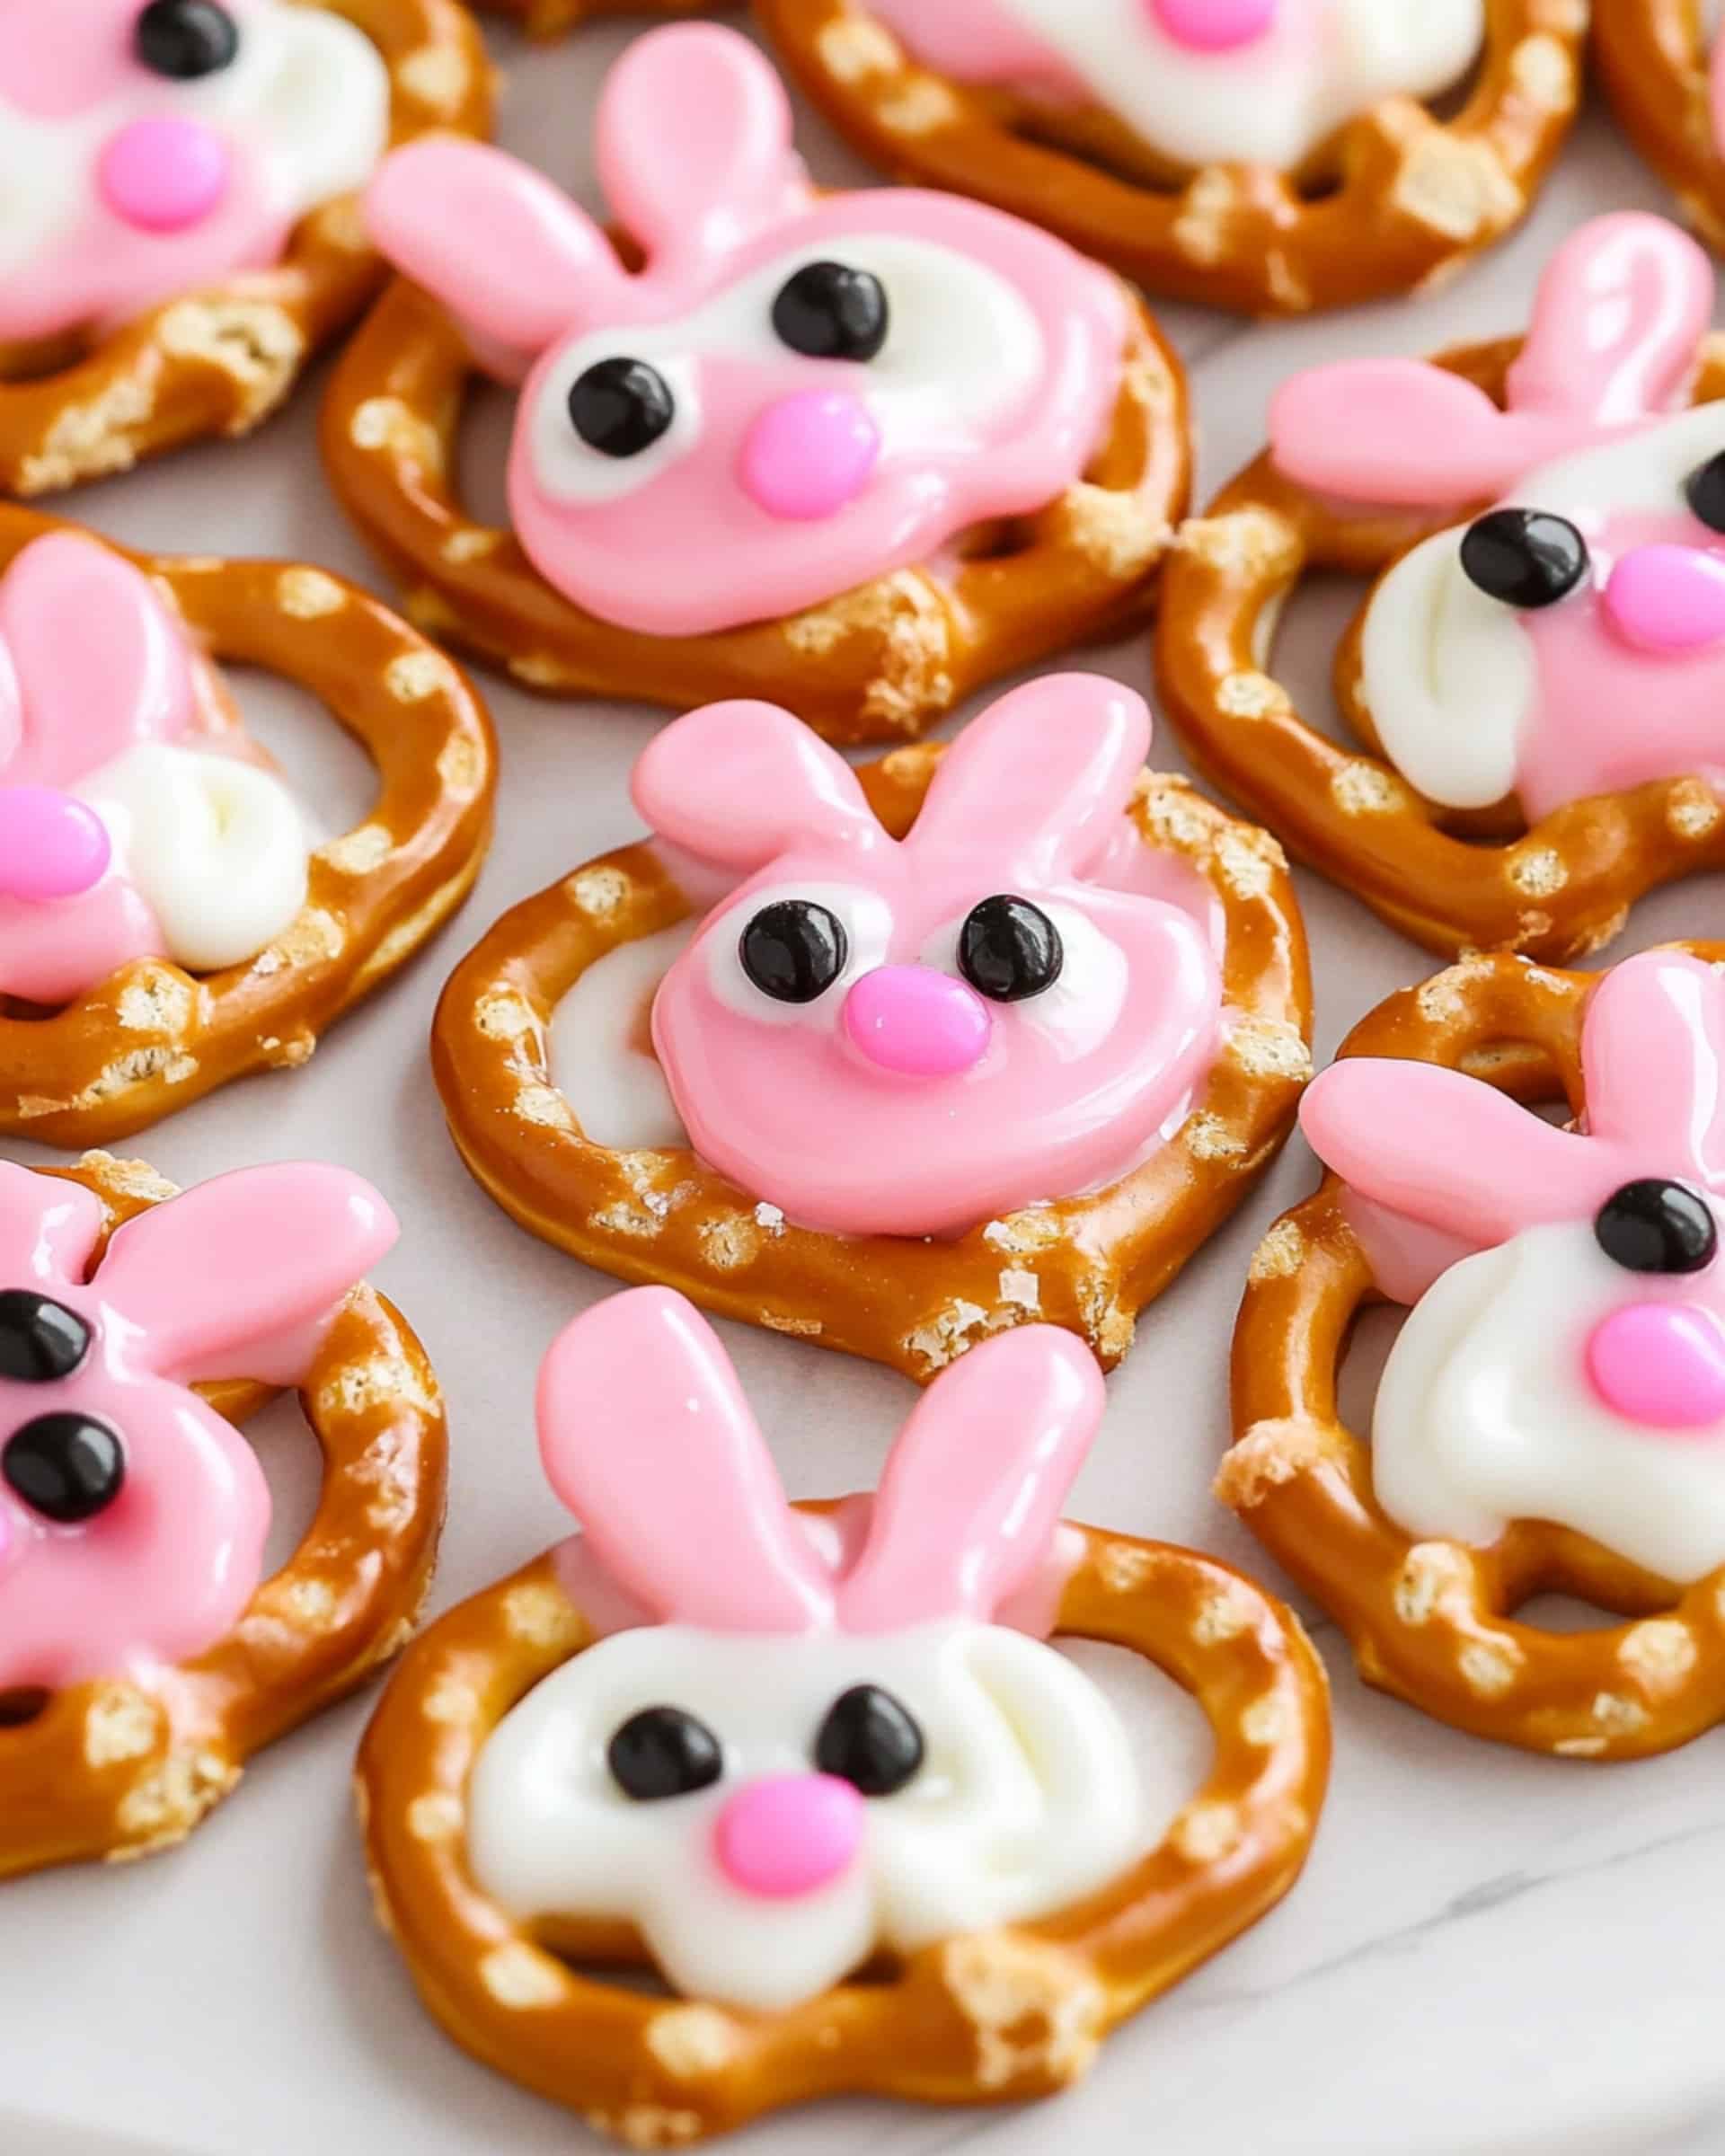
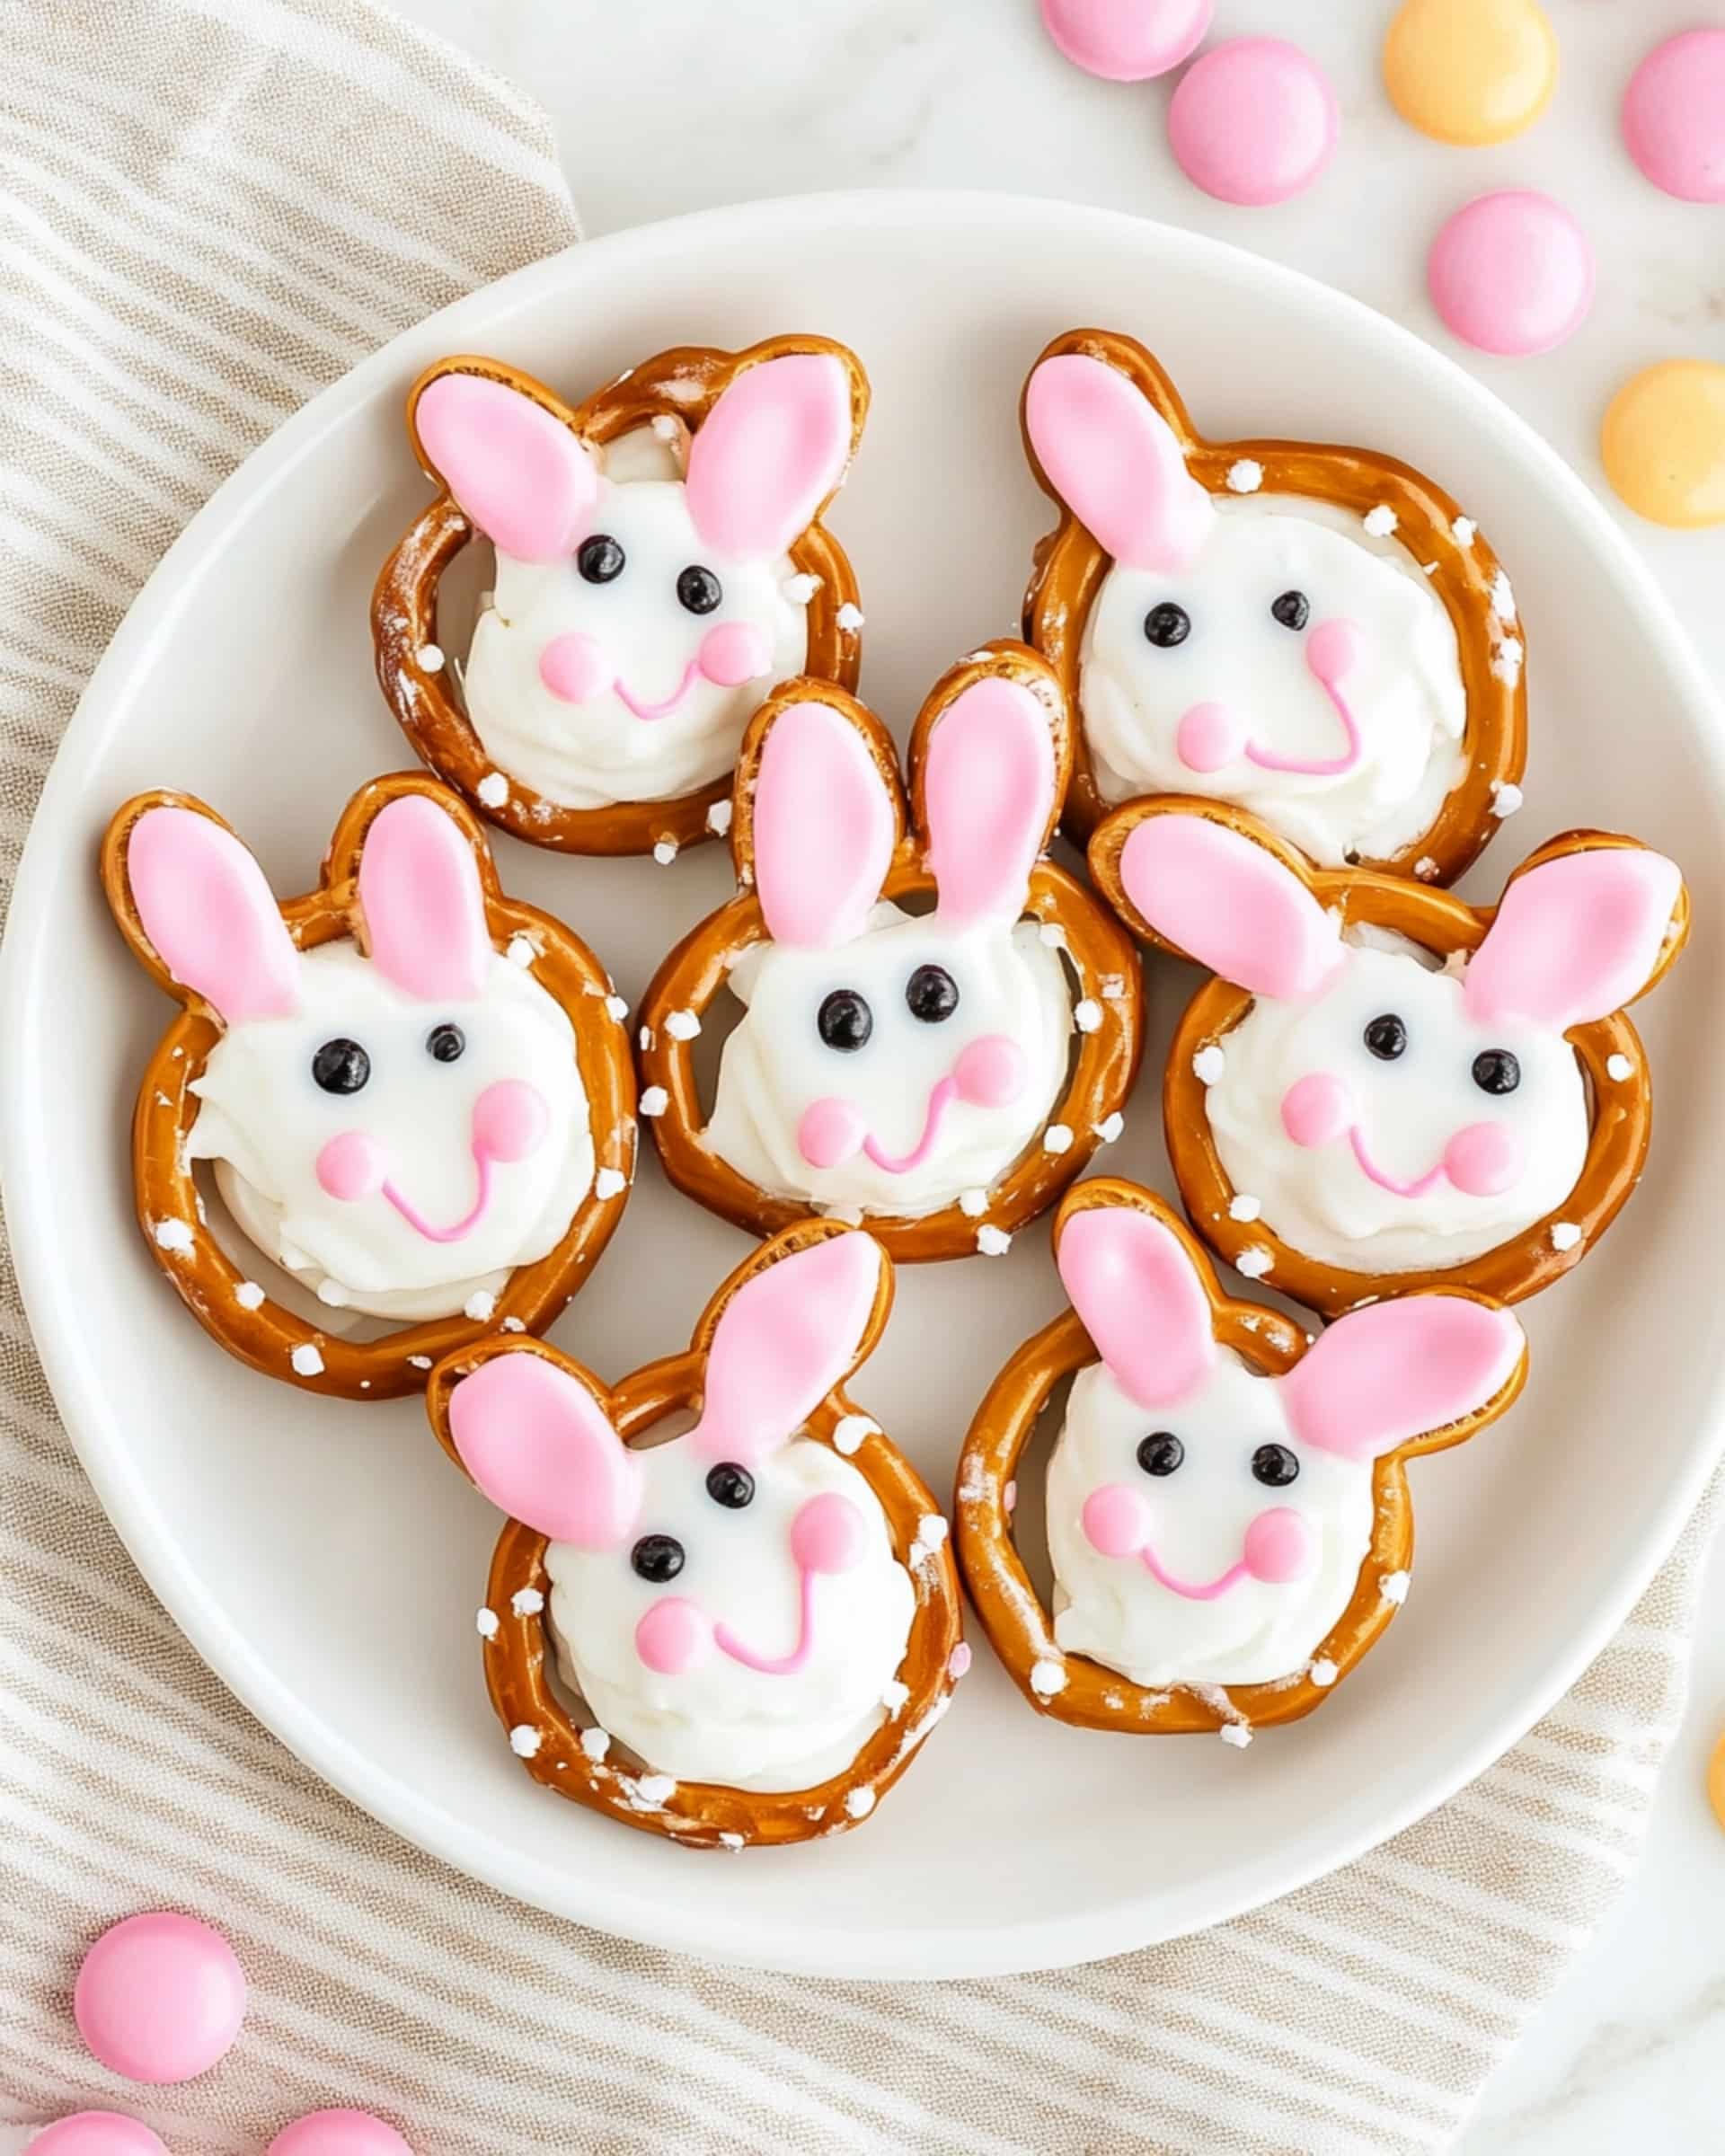
These adorable Bunny Pretzels are the perfect sweet-and-salty treat that will bring smiles to everyone’s face! With just a few simple ingredients and some creative decorating, you’ll transform ordinary pretzels into cute Easter bunnies that are as fun to make as they are to eat. This no-bake recipe comes together in minutes, making it an ideal project for busy holiday preparations or a fun activity with kids.
Why You’ll Love This Recipe
- No Baking Required: This recipe skips the oven completely! Just melt, decorate, and wait for them to set.
- Kid-Friendly Activity: Children love getting creative with the decorating process—it’s like edible art!
- Adorably Festive: These bunny pretzels instantly add charm to any Easter spread or spring celebration.
- Quick Prep: The actual hands-on time is just about 10 minutes, perfect for when you need a last-minute treat.
- Customizable: You can easily adjust the colors or decorating style to match your personal preference or party theme.
Ingredients You’ll Need
- White Chocolate Almond Bark: The foundation of our recipe that fills the pretzel spaces and creates a canvas for our bunny features. Its smooth, creamy texture is perfect for both filling and decorating.
- Pretzel Twists: These provide the perfect shape for our bunny faces and add that delicious salty crunch that balances the sweetness of the chocolate.
- Pink Food Coloring Gel: Used to create the adorable bunny noses and inner ears. Gel coloring works better than liquid as it won’t thin out your chocolate.
- Black Food Coloring Gel: Creates the bunny’s eyes with just a tiny amount needed. The contrast makes the bunnies come to life!
Variations
Color Combinations
Switch up the colors for different holidays or themes! Try pastel blue for baby showers, orange and black for Halloween bunnies, or red and green for Christmas-themed treats.
Chocolate Options
While white chocolate creates the classic bunny look, you could use milk or dark chocolate as the base and then decorate with white chocolate details for a different take.
Sprinkle Addition
Add small sprinkles for extra texture and visual appeal—try tiny nonpareils for the bunny’s cheeks or small colored sprinkles on the ears.
Flavor Enhancements
Add a drop of extract to your melted chocolate—try peppermint for a refreshing twist or almond for a nuttier flavor profile.
How to Make Bunny Pretzels
Step 1: Set Up Your Workspace
Lay out a large piece of parchment paper on a flat surface. Arrange your pretzel twists on the parchment, making sure they’re not touching each other.
Step 2: Fill the Pretzels
Using a spoon, carefully fill the three spaces in each pretzel with melted white chocolate. Make sure the chocolate is level and smooth. Let these set for about 30 minutes until firm.
Step 3: Prepare for Decorating
Once set, gently flip the pretzels over so the smooth, flat side is facing up. This will be the front of your bunny’s face.
Step 4: Color Your Chocolate
Divide your remaining melted white chocolate into two small bowls—about 3 tablespoons in one and 2 tablespoons in the other. Add pink food coloring gel to the larger portion and black food coloring gel to the smaller portion, stirring each until you achieve the desired color.
Step 5: Create the Eyes
Using a clean toothpick, carefully add two small black dots to the lower space of each pretzel to create the bunny’s eyes.
Step 6: Add Nose and Ears
With another clean toothpick, add a small amount of the pink chocolate in the center (between the eyes) to create the nose. Then add small dots of pink to the top two spaces of the pretzel to create the inner ears.
Step 7: Allow to Set
Let your decorated bunny pretzels set for 30 minutes before carefully removing them from the parchment paper.
Pro Tips for Making the Recipe
- Temperature Matters: If your melted chocolate starts to thicken while you’re working, briefly warm it in the microwave for 5-10 seconds and stir well.
- Clean Tools: Always use a fresh toothpick when switching between colors to keep your decorations crisp and colors separate.
- Steady Hand: For the most precise decorating, rest your wrist on the table while applying the details with the toothpick.
- Work in Batches: If making a large quantity, decorate in small batches of 6-8 pretzels at a time so your chocolate doesn’t harden before you’re done.
How to Serve

Presentation Ideas
Arrange your bunny pretzels in a circle on a serving platter with fresh berries or colorful candies in the center for a festive display.
Gifting
Package a few bunny pretzels in clear cellophane bags tied with pastel ribbons for adorable Easter gifts or party favors.
Complement with Drinks
Serve with cold milk for kids or hot coffee for adults—both pair wonderfully with the sweet-salty combo!
Part of a Dessert Spread
Include these as part of a larger Easter dessert table alongside carrot-shaped treats, egg-shaped cookies, or chocolate nests.
Make Ahead and Storage
Storing Leftovers
Store your bunny pretzels in an airtight container at room temperature for up to 2 weeks. Place a piece of parchment paper between layers if you need to stack them.
Freezing
While you can freeze these treats for up to 3 months in a sealed container, the texture of the pretzel may soften slightly upon thawing.
Make Ahead
These pretzels can be made 3-5 days ahead of your event, making them perfect for advance holiday prep.
FAQs
Can I use regular white chocolate chips instead of almond bark?
Absolutely! White chocolate chips will work, but add a teaspoon of shortening or coconut oil per cup of chips to help them melt more smoothly and set with the right consistency. This ensures your decorations will look clean and professional.
Why did my chocolate seize up when I added the food coloring?
Chocolate can seize if even a tiny drop of water gets in. Make sure your tools are completely dry and use gel food coloring rather than liquid drops. If your chocolate does seize, you’ll need to start fresh with new chocolate.
Can I make these without food coloring?
Definitely! You can use edible markers to draw on the features after the white chocolate has completely set. Another option is using small candies like mini chocolate chips for eyes and pink candy melts for the nose and ears.
How can I prevent the pretzels from breaking when I’m handling them?
Work gently and avoid applying pressure when filling the pretzels with chocolate. If you’re making these with kids, you might want to have a few extra pretzels on hand just in case some break during the process.
Final Thoughts
These Bunny Pretzels are more than just a treat—they’re a delightful way to celebrate spring and create memories in the kitchen. The combination of salty pretzels with sweet chocolate makes them irresistible to both kids and adults alike. Whether you’re making them for Easter, a spring celebration, or just because they’re cute, these little bunnies are sure to hop straight into everyone’s hearts! Try them this weekend and watch how quickly they disappear from your serving plate.
Print
Bunny Pretzels Recipe
- Prep Time: 10 minutes
- Cook Time: 1 hour
- Total Time: 1 hour 10 minutes
- Yield: 24 pretzels 1x
- Category: Snacks
- Method: No-cook
- Cuisine: American
Description
These adorable Bunny Pretzels are the perfect fun and festive treat for kids and adults alike! Crunchy pretzel twists are transformed into cute bunny shapes with melted white chocolate and colorful decorations. They’re easy to make and perfect for springtime parties, Easter celebrations, or as delightful homemade gifts!
Ingredients
For the Pretzels
- 3 squares white chocolate almond bark, melted
- 24 pretzel twists
For Decoration
- Pink food coloring gel
- Black food coloring gel
Instructions
- Prepare the Workspace:
Lay out a large piece of parchment paper on a flat surface. Arrange the pretzels on the parchment paper to create your working area. - Fill the Pretzels:
Using a spoon, carefully fill the spaces in the pretzels with melted white chocolate. Let the chocolate set for 30 minutes until firm. - Create the Base for Decoration:
Turn the pretzels over so that the flat and smooth side is facing up. This will act as the front side for decoration. - Color the Chocolate:
Divide the remaining melted chocolate into two small bowls — 3 tablespoons in one and 2 tablespoons in the second. Use pink food coloring gel to dye the larger portion and black food coloring gel to dye the smaller portion. - Add Facial Features:
Using a toothpick, create two small black dots in the lower section of each pretzel for the bunny’s eyes. For the nose, use a clean toothpick to add a small amount of pink-colored chocolate in the center. Also, add pink chocolate to the top spaces of the pretzel to form the bunny ears. - Set the Chocolate:
Allow the decorated pretzels to dry completely for about 30 minutes before carefully removing them from the parchment paper.
Notes
- Line your workspace with parchment paper or a silicone baking mat to make cleanup easier.
- Make sure the pretzels are completely set and dry before removing them, as handling them too soon could damage the decorations.
- If you don’t have food coloring, you can use an edible marker to draw on the features.
Nutrition
- Serving Size: 1 pretzel
- Calories: 90
- Sugar: 8g
- Sodium: 70mg
- Fat: 3g
- Saturated Fat: 2g
- Unsaturated Fat: 1g
- Trans Fat: 0g
- Carbohydrates: 13g
- Fiber: 1g
- Protein: 1g
- Cholesterol: 0mg


