

If you’re a cheesecake lover like me, you’re going to absolutely adore this Blackberry Cheesecake with Blackberry Swirl and Whipped Cream Topping Recipe. It’s creamy, tangy, and bursting with fresh blackberry flavor that shines through every bite. Trust me, the swirl of sweet-tart blackberry sauce mixed with a rich cheesecake and topped with fluffy whipped cream is pure magic—you’ll want to make this for every special occasion or just because it’s Tuesday.
Why You’ll Love This Recipe
- Beautiful Blackberry Swirl: The natural tang of fresh blackberries mingles with the creamy cheesecake, giving it a gorgeous marbled look and bright flavor.
- Perfectly Balanced Texture: Smooth, rich cheesecake meets a crumbly graham crust and airy whipped cream topping for a stunning bite.
- Made From Scratch: No shortcuts here—fresh berry sauce and homemade whipped cream make all the difference.
- Impress Your Guests Easily: Despite looking fancy, this cheesecake is easy to make and will win rave reviews every time.

Ingredients You’ll Need
Let’s break down the essentials. The ingredients play beautifully together—the smooth cream cheese, the crunchy graham crust, the fresh burst of blackberry swirl, and that dreamy whipped cream topping. It’s all about fresh, quality ingredients that complement each other wonderfully.
- Graham Cracker Crumbs: Use finely crushed crumbs for a sturdy, even crust that holds up well.
- Butter: Melted butter binds your crust perfectly and adds richness.
- Sugar: Both in the crust and cheesecake, it balances tartness and sweetness.
- Cream Cheese: Make sure it’s room temperature for a silky-smooth filling.
- Sour Cream: Adds a bit of tang and keeps the cheesecake creamy without being heavy.
- Eggs: They add structure while keeping the filling light and fluffy.
- Vanilla Extract: A splash of vanilla warms up the flavor beautifully.
- Blackberries: Fresh or frozen works—just make sure to mash and strain for that perfect swirl.
- Lemon Juice & Zest: These bright notes cut through sweetness and enhance the berry flavor.
- Cornstarch: Helps thicken the blackberry sauce so it swirls well without running.
- Heavy Cream: Used for the whipped cream topping, it needs to be cold for best results.
- Powdered Sugar: Sweetens the whipped cream without graininess.
Variations
I love that this Blackberry Cheesecake with Blackberry Swirl and Whipped Cream Topping Recipe can adapt effortlessly depending on what you have on hand or your preferences. It’s a great base for experimenting and making it truly your own.
- Use Different Berries: I’ve swapped blackberries for raspberries or blueberries, and it’s just as spectacular. Each berry gives a different tang and color twist!
- Make It Dairy-Free: For a dairy-free version, try using vegan cream cheese and coconut cream for the topping—I’ve done this for friends with allergies, and nobody missed the dairy.
- Add a Nutty Crust: Mix chopped pecans or almonds into the graham crust for an added crunch and toasty flavor—my family goes crazy for this touch.
- Sugar Substitution: Feel free to swap regular sugar for coconut sugar or a sugar substitute to reduce sweetness while keeping texture intact.
How to Make Blackberry Cheesecake with Blackberry Swirl and Whipped Cream Topping Recipe
Step 1: Prep the Crust for a Solid Base
Start by preheating your oven to 325°F and spraying a 9″ springform pan with non-stick spray—this will save you from any tricky cheesecake removal later. Next, mix your graham cracker crumbs, melted butter, and sugar until evenly combined. Press this mixture firmly into the bottom and slightly up the sides of your pan. Baking the crust for 10 minutes sets it nicely and ensures it won’t be soggy underneath all that luscious filling. Let it cool completely before moving on—patience here definitely pays off!
Step 2: Make the Blackberry Swirl Sauce
While the crust cools, toss your blackberries, lemon juice, lemon zest, and sugar into a saucepan. Let the mixture simmer on medium heat for about 20 minutes, stirring and mashing occasionally so it thickens and the berries break down beautifully. Strain the sauce through a fine mesh to remove seeds—that’s the trick I learned the hard way so your swirl stays smooth and seedless! Return the strained sauce to the pan and stir in the cornstarch mixed with a bit of the sauce to help thicken it further. Bring it to a boil and then take it off the heat. Let it cool before swirling into the cheesecake.
Step 3: Whip Up the Cheesecake Filling
To get that perfect creamy filling, beat room-temperature cream cheese until light and fluffy. It takes about 3-4 minutes for me using a mixer. Add the sugar and blend until smooth, scraping the sides to avoid lumps. Mix in sour cream until fully combined. Now, add eggs one at a time—they help keep the mixture airy but provide structure. Stir in vanilla and salt, then mix until just smooth (don’t overmix or you risk cracks!). Pour half the cheesecake batter into your cooled crust.
Step 4: Create the Gorgeous Blackberry Swirl
Drop half of your blackberry sauce over the batter in the pan. Take a knife or skewer and gently swirl the sauce into the cheesecake batter, creating a marbled effect. Repeat by adding the remaining cheesecake batter, top with the rest of the blackberry sauce, and swirl again. This dual swirl adds such a beautiful contrast and tartness that shines through every slice.
Step 5: Bake with Care Using a Water Bath
Wrap the bottom of the springform pan tightly with foil—a must to prevent water from seeping in. Place the cheesecake pan in a larger baking dish and pour in about an inch of hot water to create a gentle water bath. This method keeps the cheesecake moist and prevents cracking. Bake for 1½ hours. The center should still have a slight jiggle but not be liquid—overcooking is the enemy here. Turn off the oven, crack the door, and let the cheesecake rest for an hour inside to finish cooking slowly. Then chill it in the fridge for at least 6 hours or, better yet, overnight. I promise the wait is so worth it.
Step 6: Prepare the Whipped Cream Topping Just Before Serving
When you’re ready to serve, whip cold heavy cream until it just starts thickening, then add powdered sugar and vanilla. Continue beating until stiff peaks form—a chilled mixing bowl and beaters help a lot here. Pipe or spread the whipped cream around the edges of the cheesecake, then sprinkle with fresh blackberries for that final wow factor. Slice, serve, and get ready for compliments!
Pro Tips for Making Blackberry Cheesecake with Blackberry Swirl and Whipped Cream Topping Recipe
- Use Room Temperature Cream Cheese: This prevents lumps and ensures a smooth, creamy filling every time—I always set mine out for about an hour before baking.
- Don’t Skip the Water Bath: This trick keeps your cheesecake moist and crack-free — I learned this the hard way when a cheesecake cracked right before serving!
- Strain the Blackberry Sauce Well: Removing seeds makes the swirl beautiful and silky, without unpleasant crunchy bits.
- Cool Gradually for Best Texture: Leaving the cheesecake to cool slowly in the oven prevents temperature shock and cracking.
How to Serve Blackberry Cheesecake with Blackberry Swirl and Whipped Cream Topping Recipe
Garnishes
I always top this cheesecake with a generous dollop or piped ring of whipped cream and a handful of fresh blackberries. The fresh berries add a lively burst of flavor and a beautiful visual pop. Sometimes I sprinkle a little lemon zest over top for an extra fragrant touch. It just feels elegant without any extra fuss.
Side Dishes
This cheesecake naturally stands out, but I’ve found it pairs beautifully with a hot cup of coffee or tea. If you want to really wow your guests, a small scoop of vanilla bean ice cream or a lightly toasted almond biscotti on the side complement the flavors perfectly.
Creative Ways to Present
For special occasions, I’ve served this cheesecake in mini springform pans for individual portions—it makes such a classy presentation. Another fun idea is layering sliced fresh blackberries and edible flowers on top of the whipped cream for a garden party vibe. If you’re feeling adventurous, drizzle a little melted dark chocolate or a dusting of powdered sugar for an elegant finish.
Make Ahead and Storage
Storing Leftovers
I always store leftover cheesecake in an airtight container in the fridge, and it keeps amazingly fresh for 4-5 days. For best flavor and texture, avoid storing it with the whipped cream topping already applied; instead, keep that separate until serving.
Freezing
If you want to make this ahead of time, you can freeze the cheesecake (without the whipped cream) for up to two months. Wrap it tightly in plastic wrap and aluminum foil to prevent freezer burn. When ready to eat, thaw overnight in the fridge—it’s just as delicious!
Reheating
Reheating cheesecake isn’t usually necessary, but if you want to take the chill off, just let slices sit at room temperature for about 15-20 minutes before serving. This brings out the creamy texture and fruity flavors much better than microwaving (which I don’t recommend as it can ruin the texture).
FAQs
-
Can I use frozen blackberries for this recipe?
Absolutely! Frozen blackberries work just fine, especially if you thaw them before making the swirl sauce. The flavor is just as vibrant, and they break down nicely in the sauce. Just be sure to drain any extra liquid if they’re very wet.
-
Why is the water bath necessary for baking this cheesecake?
The water bath helps the cheesecake bake gently and evenly, preventing cracks and dryness. It keeps the temperature around the cheesecake steady and moist, giving you that smooth, luscious texture without any crumbling.
-
How do I prevent the cheesecake from cracking on top?
Besides using the water bath, avoid overmixing the batter and overbaking the cheesecake. Once the edges are set but the center slightly jiggles, it’s done. Letting it cool slowly in the oven also helps prevent cracks.
-
Can I make the whipped cream topping ahead of time?
You can make it a few hours ahead and keep it chilled, but I recommend making it fresh just before serving. The whipped cream holds best and tastes fluffiest when fresh.
Final Thoughts
This Blackberry Cheesecake with Blackberry Swirl and Whipped Cream Topping Recipe holds a special place in my kitchen because it manages to be elegant yet approachable, simple yet stunning. I used to struggle with cracking cheesecakes and bland fruit sauces until I perfected the water bath and swirling technique here. If you follow these steps, you’ll be rewarded with a dessert that looks like you spent hours making it but tastes like pure love. Go ahead, give it a try—I promise you’ll be baking this one again and again!
Print
Blackberry Cheesecake with Blackberry Swirl and Whipped Cream Topping Recipe
- Prep Time: 30 minutes
- Cook Time: 2 hours
- Total Time: 8 hours 30 minutes
- Yield: 12 servings 1x
- Category: Dessert
- Method: Baking
- Cuisine: American
Description
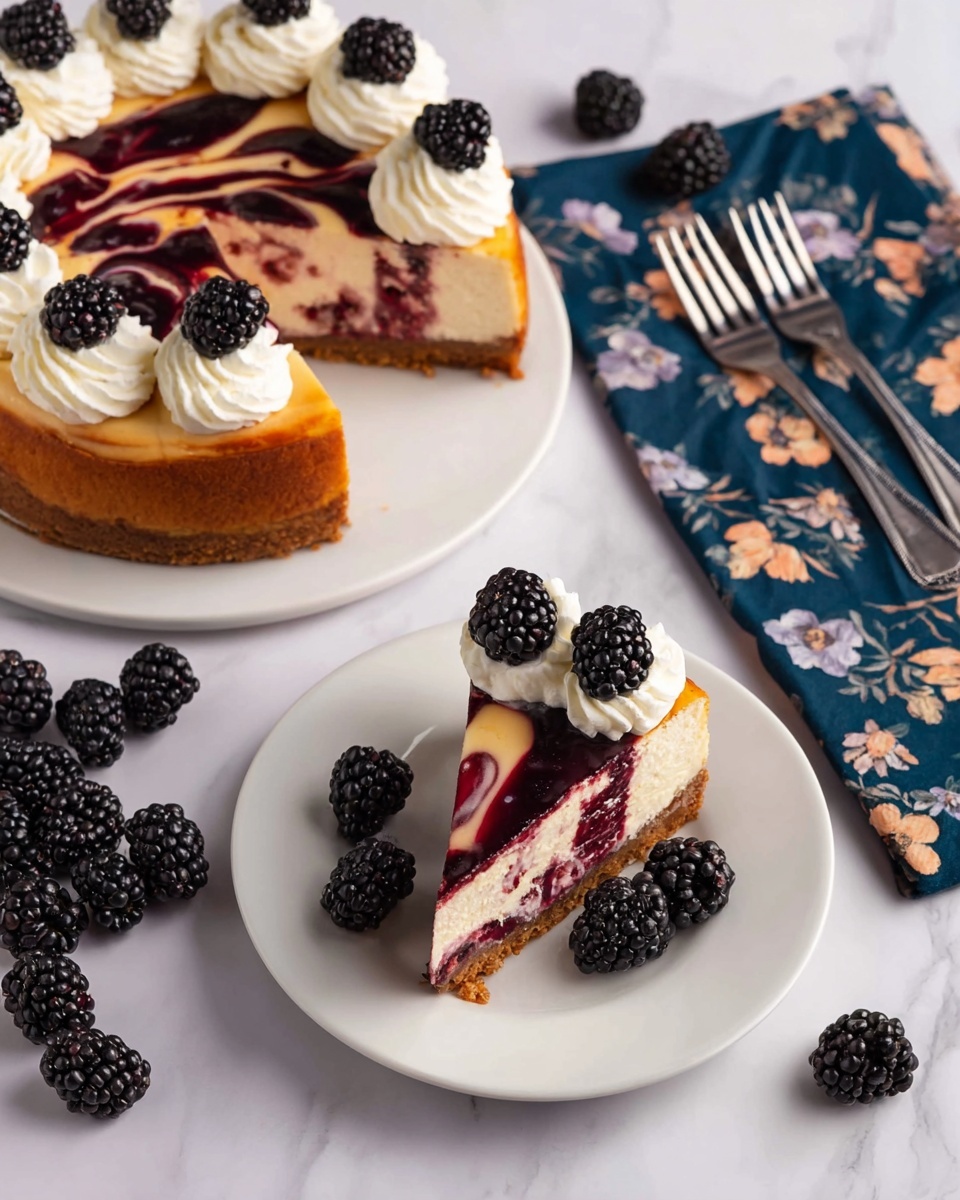
This rich and creamy Blackberry Cheesecake features a buttery graham cracker crust, a smooth cream cheese filling swirled with a tangy homemade blackberry sauce, and a light whipped cream topping adorned with fresh blackberries. Perfect for a special dessert, it combines the sweetness of berries with the velvety texture of classic cheesecake.
Ingredients
For the Crust:
- 1 1/4 cup Graham Cracker Crumbs
- 6 Tablespoons Butter, melted
- 1/4 cup Sugar
For the Cheesecake:
- 32 ounces Cream Cheese (room temperature)
- 1 1/2 cups Sugar
- 1/2 cup Sour Cream
- 4 Large Eggs
- 1 Tablespoon Vanilla Extract
- 1/2 teaspoon Salt
For the Blackberry Swirl:
- 2 1/2 cups Blackberries (fresh or frozen)
- 1/2 cup Sugar
- 1 teaspoon Lemon Juice
- 1/2 teaspoon Lemon Zest
- 1/2 teaspoon Cornstarch
For the Topping:
- 3/4 cup Heavy Cream
- 1/3 cup Powdered Sugar
- 1 teaspoon Vanilla Extract
- Blackberries (fresh, for garnishing)
Instructions
- Prepare the Crust: Preheat your oven to 325°F (163°C). Spray a 9-inch springform pan with non-stick spray. In a bowl, mix the graham cracker crumbs, melted butter, and sugar. Press this mixture evenly into the bottom and slightly up the sides of the pan. Bake for 10 minutes and then allow to cool completely.
- Make the Blackberry Swirl: In a saucepan, combine 2 1/2 cups blackberries, lemon juice, lemon zest, and sugar. Cook over medium heat for 20 minutes, stirring and mashing the berries as they soften. Remove from heat and strain through a fine mesh strainer to remove seeds. Return the strained berry sauce to the pan. In a separate bowl, mix 1/4 cup of the sauce with cornstarch until smooth, then add it back to the saucepan. Bring to a boil briefly, then remove from heat and set aside.
- Mix the Cheesecake Batter: Beat the room temperature cream cheese until light and fluffy (about 3-4 minutes). Gradually add sugar and mix until smooth, scraping down the sides as needed. Blend in sour cream. Add eggs one at a time, then stir in vanilla extract and salt. Mix just until smooth without overmixing to avoid cracking during baking.
- Assemble the Cheesecake: Pour half of the cheesecake batter into the cooled crust. Spoon half of the blackberry sauce over it and gently swirl with a knife to create a marbled effect, avoiding full blending. Repeat with the remaining batter and blackberry sauce to create another swirl on top.
- Bake in Water Bath: Wrap the bottom of the springform pan with foil to prevent leaks. Place the pan inside a larger baking pan and add an inch of hot water to create a water bath. Bake at 325°F for 1 1/2 hours. The cheesecake is done when the center slightly jiggles but the edges are set. If the entire cheesecake jiggles, bake for longer.
- Cool and Chill: Turn off the oven and crack the door open. Let the cheesecake cool in the oven for 1 hour. Then remove from the water bath and refrigerate for at least 6 hours, preferably overnight, to fully set.
- Prepare the Whipped Cream Topping: Just before serving, beat heavy cream until thick. Add powdered sugar and vanilla and continue beating until stiff peaks form. Pipe the whipped cream around the edges of the cheesecake and garnish with fresh blackberries.
- Serve: Slice, serve, and enjoy this creamy, fruity cheesecake masterpiece.
Notes
- Store the cheesecake in an airtight container in the refrigerator for up to 4-5 days.
- You can freeze the cheesecake for up to 2 months; add the whipped cream topping only after thawing.
- Chill the mixing bowl and beaters in the refrigerator for 20 minutes before whipping cream to ensure stiff peaks.
- Do not overmix the cheesecake batter as it may cause cracking during baking.
- Avoid overcooking to prevent cracks; the center should still jiggle slightly when done.
Nutrition
- Serving Size: 1 slice (1/12 of recipe)
- Calories: 450 kcal
- Sugar: 35 g
- Sodium: 320 mg
- Fat: 32 g
- Saturated Fat: 19 g
- Unsaturated Fat: 9 g
- Trans Fat: 0.5 g
- Carbohydrates: 30 g
- Fiber: 3 g
- Protein: 7 g
- Cholesterol: 110 mg

Your email address will not be published. Required fields are marked *