

I absolutely love this Apple Slab Pie Recipe because it’s like the coziest hug in dessert form—warm, comforting, and loaded with tender, juicy apples nestled between buttery, flaky crusts. Whenever I make this for gatherings or weekend treats, it never fails to bring everyone to the table with smiles and seconds on their plates. What makes this recipe truly special is how approachable it is, yet delivers those rich, homemade bakery vibes that everyone craves.
You’ll find that this Apple Slab Pie Recipe works perfectly for fall parties, holiday dinners, or any time you need a dessert that feeds a crowd without a fuss. I’ve learned that the large, rustic rectangle shape makes it easy to slice into generous portions, so it’s ideal when you want to share that homemade goodness with friends and family, and the buttery crust combined with a cinnamon-spiced apple filling hits just the right nostalgic note.
Why You’ll Love This Recipe
- Crowd-Pleasing Size: The slab pie format makes it easy to serve many guests without fuss.
- Perfect Balance of Flavors: Tart apples meet cinnamon and nutmeg, all wrapped in buttery crust.
- Simple Yet Impressive: This Apple Slab Pie Recipe feels fancy but is straightforward to make.
- Great Make-Ahead Option: It keeps well, so you can prep ahead and impress with ease.

Ingredients You’ll Need
Every ingredient in this Apple Slab Pie Recipe plays a crucial role—from the flaky crust to the subtly spiced apple filling. Using fresh, crisp apples really elevates the flavor and texture of the pie, so picking the right kind is key!
- All-purpose flour: The backbone for your crust’s tender, flaky texture and also for thickening the filling.
- Salt: Enhances flavor in the pie crust, balancing the sweetness perfectly.
- Shortening: Adds flakiness to the crust by creating those beautiful layers.
- Cold butter: Importantly cold and cubed for that rich, buttery flavor and flaky crust texture.
- Vegetable oil: Helps keep the dough tender and moist.
- Milk: Combined with lemon juice to create a homemade buttermilk that tenderizes the crust.
- Lemon juice: Adds brightness to the filling and reacts with the baking components for a softer crust.
- Apples: Choose a mix of tart and sweet apples for depth in your filling.
- Sugar: Sweetens the filling just right without overpowering.
- Cinnamon: Classic warming spice that makes the pie feel like fall in every bite.
- Nutmeg: Adds a slightly nutty, aromatic note to complement the cinnamon.
- Egg (for egg wash): Creates a beautiful golden, shiny crust.
- Water: Mixed with egg for the wash to help the crust brown evenly.
Variations
I love making this Apple Slab Pie Recipe my own by swapping in a few variations. Feel free to experiment—you might discover a new family favorite just by switching things up!
- Whole Wheat Crust: I once tried half whole wheat flour in the crust for added nuttiness and found it gave a hearty bite without sacrificing flakiness.
- Adding Walnuts or Pecans: Toasted nuts folded into the filling add a satisfying crunch that my family went crazy for.
- Spice it Up: A pinch of ground cloves or ginger gives a lovely warm twist that’s perfect for winter months.
- Gluten-Free Version: By swapping all-purpose flour for a gluten-free blend, you can still enjoy this pie—just make sure your crust holds together well when rolling.
How to Make Apple Slab Pie Recipe
Step 1: Prepare Your Flaky Pie Crust
Start by mixing your flour and salt in a large bowl—this ensures even seasoning throughout your crust. Then, cut in shortening and cold butter, ideally using a pastry cutter or your fingers, until your mixture looks like small peas. This step is crucial for that flakiness we all love—too warm, and your butter will melt, losing those delicious layers.
Step 2: Make Buttermilk and Form Dough
Whisk together milk and lemon juice to create a homemade buttermilk—this little trick tenderizes the crust beautifully. Add the vegetable oil and milk/lemon mixture into your flour mixture, stirring until soft dough forms. I usually get my hands in here to bring it all together, but try not to overwork the dough to keep it tender. Then, split the dough into two discs and pop them in the fridge for about 30 minutes while you prep the filling.
Step 3: Toss the Apple Filling
Peel and chop your apples into bite-sized pieces and toss them with sugar, flour, cinnamon, and nutmeg. This coating soaks into the apples as the pie bakes, creating a thick, luscious filling that’s bursting with warm spice. I’ve found using a mix of tart and sweet apples gives the filling a wonderful complexity of flavors.
Step 4: Roll Out and Assemble Your Slab Pie
On a lightly floured surface, roll out one disc of dough into a rustic 13×18-inch rectangle—don’t stress about perfection; I love the homemade look it gives. Transfer it carefully to your 10×15-inch jelly roll pan, letting the edges hang over. Sprinkle the crust dust (a mix of flour and sugar) evenly over this bottom layer to absorb juices and add a touch of sweetness. Pour in your apple filling next, then roll out your second dough disc to the same size and place on top.
Step 5: Seal, Vent, and Prep for Baking
Tuck the overlapping edges underneath and crimp them with your fingers or a fork to seal the pie. Cut several slits into the top crust—these vents are important to let steam escape, so your filling doesn’t turn soggy. Brush the entire top crust with egg wash for that gorgeous golden color, and sprinkle with a little sugar for extra sparkle and crunch.
Step 6: Bake Until Golden and Bubbling
Bake at 400°F for 30 minutes, then loosely cover with foil and bake another 20-25 minutes to ensure the top doesn’t get too dark while the filling bubbles up nicely. The smell at this point? Absolutely irresistible! Once out of the oven, let it cool for at least two hours—this waiting is tough, but it helps the filling set so you get clean slices.
Pro Tips for Making Apple Slab Pie Recipe
- Keep Butter and Shortening Cold: I learned this the hard way—warm fat melts into the dough, ruining flakiness, so chill your ingredients and hands if needed when mixing.
- Use a Mix of Apples: Combining tart and sweet apples gives the filling depth and prevents it from becoming overly mushy or too sweet.
- Don’t Skip the Cooling Time: I used to slice it right away, but cooling completely helps the filling set, giving you perfect clean slices every time.
- Watch Your Oven Temperature: Using a pizza stone or preheated baking sheet helps the bottom crust bake evenly and avoid sogginess.
How to Serve Apple Slab Pie Recipe
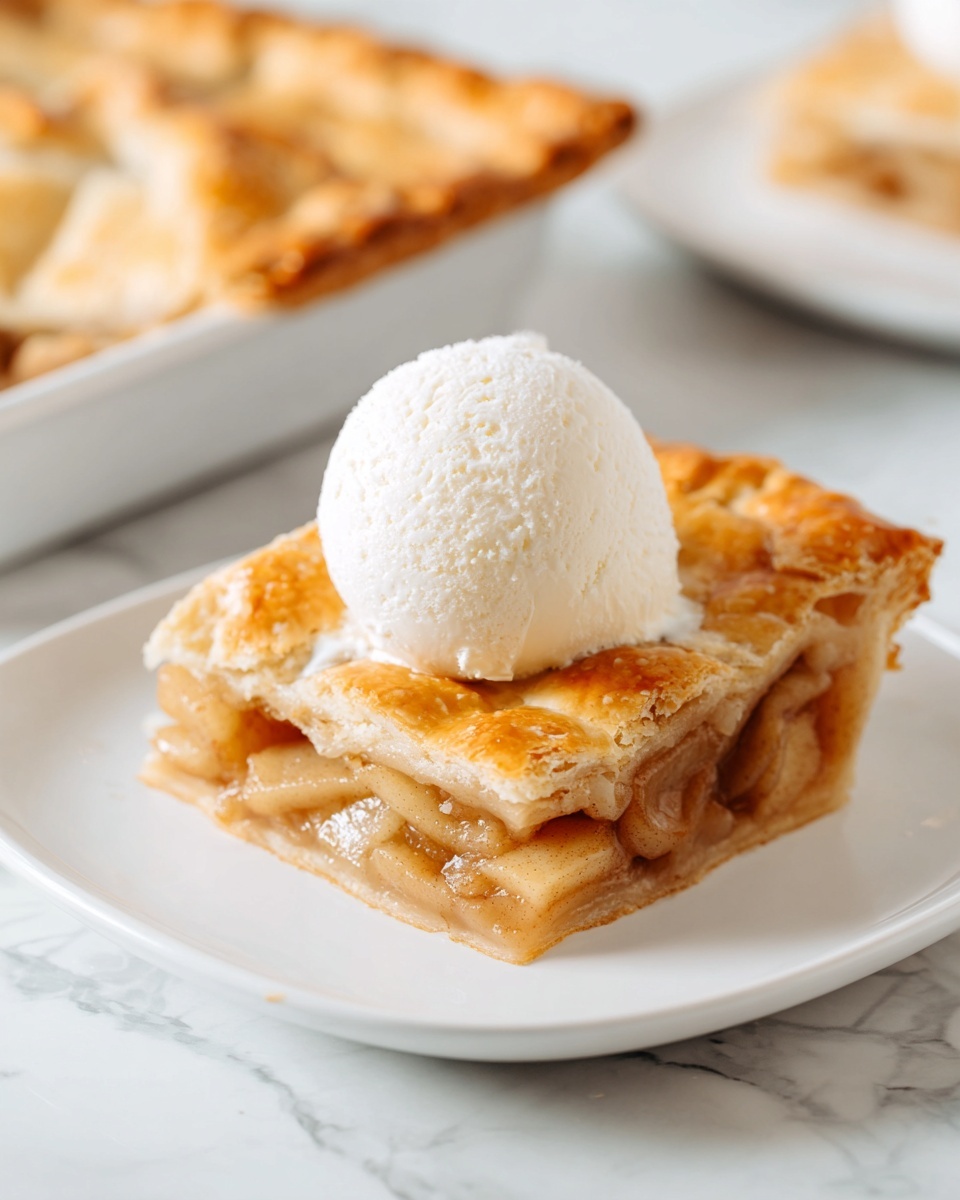
Garnishes
I’m a classic at heart, so I love serving this Apple Slab Pie Recipe with a big scoop of vanilla ice cream melting on top or a dollop of freshly whipped cream for that extra indulgence. A sprinkle of cinnamon or a drizzle of caramel sauce on top adds a lovely finishing touch—especially when serving to guests.
Side Dishes
Pair this pie with warm drinks like spiced cider, chai tea, or a simple cup of coffee to complement its flavors. At family dinners, I often serve it alongside savory dishes like roasted pork or turkey to balance sweet and savory.
Creative Ways to Present
For special occasions, I sometimes top the slab pie with sliced fresh apples arranged in a fan pattern before baking—adds a rustic elegance. Another time, I sprinkled chopped toasted nuts on top just before serving for added texture—guests loved the surprise.
Make Ahead and Storage
Storing Leftovers
Once your Apple Slab Pie Recipe cools down, I recommend covering it tightly with plastic wrap and storing it in the refrigerator. It keeps surprisingly well for up to three days, which makes it perfect if you want to bake in advance or just save some for later.
Freezing
I’ve had success freezing unbaked apple slab pies wrapped securely in plastic and foil—just thaw overnight in the fridge before baking as directions instruct. This makes it a fantastic make-ahead dessert to prep on busy days or for holiday celebrations.
Reheating
To reheat, I pop slices in a 350°F oven for about 10-15 minutes to revive that crisp crust and warm filling without drying it out. Microwaving can work in a pinch but tends to make the crust a little soggy, so the oven is my go-to for leftovers.
FAQs
-
Can I use pre-made pie crusts for this Apple Slab Pie Recipe?
Absolutely! While I prefer homemade dough for that fresh, flaky texture, using store-bought pie crusts saves time and still delivers tasty results. Just be sure to roll them out carefully to the slab’s size and keep the crust chilled before baking.
-
What type of apples is best for the filling?
Using a mix of tart apples like Granny Smith and sweeter varieties like Fuji or Honeycrisp gives the best balance of flavor and texture. This combo keeps your filling flavorful without becoming too mushy or overly sweet.
-
Why do I need to let the pie cool before slicing?
Cooling allows the juices to set and thicken, which means when you slice, you get beautiful clean-cut pieces instead of a runny mess. It’s always tempting to dig in immediately, but trust me—it’s worth the wait.
-
Can I make this pie ahead of time?
Yes! You can assemble it and keep it refrigerated for a few hours before baking or freeze it unbaked for longer prep. Just adjust baking time slightly if it’s chilled or frozen to ensure it’s cooked through.
Final Thoughts
This Apple Slab Pie Recipe holds a special place in my kitchen—it’s simple, yet it fills the room with the warm, inviting aroma of apples and cinnamon that instantly feels like home. I hope you give this a try and experience the ease and joy it brings to baking and sharing with the people you love. Once you make it, I have a feeling this pie will become your go-to dessert for celebrations and everyday indulgences alike.
Print
Apple Slab Pie Recipe
- Prep Time: 45 minutes
- Cook Time: 55 minutes
- Total Time: 3 hours 40 minutes
- Yield: 24 slices 1x
- Category: Dessert
- Method: Baking
- Cuisine: American
Description
This Apple Slab Pie recipe offers a deliciously rustic and large-format dessert perfect for gatherings. It features a flaky, buttery double-crust filled with a sweet and spiced apple filling, baked to golden perfection in a jelly roll pan. The crust is textured and tender, complemented by a cinnamon and nutmeg-spiced apple center that bubbles with flavor. This pie is ideal for slicing into numerous servings and sharing with family and friends.
Ingredients
Pie Crust
- 4 cups all-purpose flour
- 2 teaspoons salt
- 1 1/4 cup shortening
- 1/2 cup cold butter, cut into small cubes
- 1 tablespoon vegetable oil
- 3/4 cup milk
- 1 tablespoon lemon juice
Apple Pie Filling
- 10–12 cups apples (about 4 pounds), peeled and chopped
- 2/3 cup sugar
- 1/4 cup all-purpose flour
- 1 1/2 teaspoons ground cinnamon
- 1/2 teaspoon ground nutmeg
Crust Dust
- 2 tablespoons all-purpose flour
- 2 tablespoons sugar
Egg Wash
- 1 egg, beaten
- 1 tablespoon water
Instructions
- Prepare the Pie Dough: In a large bowl, mix the flour and salt. Cut in the shortening and cold butter with a pastry cutter or two knives until the mixture resembles small peas.
- Mix Wet Ingredients: Combine milk and lemon juice in a small bowl. Add the vegetable oil to this mixture and stir to combine.
- Form the Dough: Add the oil, milk, and lemon juice mixture to the flour mixture. Stir until a soft dough forms, using your hands if necessary to bring it together.
- Chill the Dough: Divide the dough into two equal portions. Flatten each into a disc, wrap in plastic wrap, and refrigerate for about 30 minutes while preparing the filling.
- Prepare the Apple Filling: Peel and chop the apples into small pieces. In a large bowl, combine apples with sugar, flour, cinnamon, and nutmeg. Stir gently to coat evenly.
- Preheat Oven: Preheat your oven to 400°F (204°C). Place a pizza stone on the oven rack if available to preheat.
- Roll Out Bottom Crust: On a lightly floured surface, roll out one dough disc into a rustic 13×18-inch rectangle, approximately 1/8 inch thick.
- Place Bottom Crust: Transfer this dough to a 10×15-inch jelly roll pan, allowing excess dough to hang over the edges.
- Add Crust Dust: Sprinkle the bottom crust evenly with the crust dust mixture made from 2 tablespoons sugar and 2 tablespoons flour.
- Add Filling: Pour the prepared apple filling over the crust evenly.
- Roll Out Top Crust: Roll the second disc into a similar 13×18-inch rectangle and place it over the filling.
- Seal Edges: Fold the edges of both crusts back and tuck into the pan. Use your fingers or a fork to crimp the edges to seal.
- Vent the Pie: Cut slits in the top crust to allow steam to escape while baking.
- Apply Egg Wash: Brush the top crust lightly with the beaten egg and water mixture, then sprinkle with sugar for extra shine and sweetness.
- Bake the Pie: Bake the pie at 400°F for 30 minutes.
- Finish Baking: Loosely cover or tent the pie with foil to prevent over-browning and bake for an additional 20-25 minutes until the crust is golden and the filling is bubbling.
- Cool Before Serving: Let the pie cool for at least 2 hours before slicing to allow the filling to set properly.
Notes
- Storage: Store leftover pie in the pan covered tightly with plastic wrap to keep fresh for up to 3 days.
- Baking Sheets: Use light-colored baking sheets or pans when baking this pie. Dark baking sheets may require adjustments in baking time as they tend to brown faster.
Nutrition
- Serving Size: 1 slice (1/24th of pie)
- Calories: 220
- Sugar: 14 g
- Sodium: 180 mg
- Fat: 12 g
- Saturated Fat: 4 g
- Unsaturated Fat: 7 g
- Trans Fat: 0.2 g
- Carbohydrates: 29 g
- Fiber: 3 g
- Protein: 2 g
- Cholesterol: 25 mg

Your email address will not be published. Required fields are marked *