
I’m so excited to share this delightful Danish Butter Cookies with Chocolate and Sprinkles Recipe with you! These cookies are an absolute game-changer when you want something buttery, tender, and just the right amount of sweet — with that fun twist of chocolate and sprinkles that makes each bite feel like a celebration. Whether you’re baking for a special occasion or just craving a tasty treat, this recipe is straightforward and incredibly rewarding. Stick with me, and you’ll be whipping up these gorgeous cookies that everyone will rave about.
Why You’ll Love This Recipe
- Buttery Perfection: These cookies have that melt-in-your-mouth texture you crave from classic Danish butter cookies.
- Fun and Festive: The addition of chocolate and sprinkles turns simple cookies into a party on your plate.
- Easy to Make: With simple ingredients and clear steps, you’ll have beautiful cookies in under an hour.
- Shape Holds Well: A little chilling step ensures your cookies keep their charming swirl shape and don’t spread too much.

Ingredients You’ll Need
Before you dive into the mixing bowl, let’s talk about the ingredients. Each one plays a crucial role in creating those tender, rich cookies you’ll crave. Plus, a few tips on picking the best versions.

- Unsalted butter: Using room temperature butter helps it cream nicely with sugar, creating that light texture we want.
- Granulated sugar: The classic choice that provides sweetness and a slight crunch.
- Egg: At room temp for easier mixing and better dough texture.
- Vanilla extract: This adds a warm, rich flavor — don’t skip it!
- All-purpose flour: The base of the dough; be sure to measure it properly for consistent results.
- Salt: Just a touch enhances all the flavors perfectly.
- Milk: Helps adjust the dough to the right piping consistency.
- Semi-sweet or milk chocolate: For dipping — choose your favorite brand to tailor the sweetness.
- Sprinkles: These bring personality and color, making the cookies festive and fun.
Variations
I like to play around with these cookies now and then, making them a little different depending on the occasion. You might want to customize them to suit your taste buds — and I totally encourage that! It’s fun to make the recipe your own.
- Chocolate Types: I’ve tried white chocolate or dark chocolate drizzle instead of dipping, and it’s a lovely twist that looks super elegant.
- Sprinkle Mixes: Seasonal sprinkles like red and green for the holidays or pastel for springtime add extra charm.
- Flavor Boost: Adding a pinch of cinnamon or orange zest to the dough adds a new layer of warmth and depth.
- Gluten-Free Version: Substituting all-purpose flour with a gluten-free blend works if you’re careful with the consistency — you might need a bit more milk.
How to Make Danish Butter Cookies with Chocolate and Sprinkles Recipe
Step 1: Cream the Butter and Sugar Until Fluffy
Start by using a stand mixer or hand mixer with a paddle attachment to beat your room temperature butter and granulated sugar together. This step is crucial because it creates a light, airy base that makes the cookies tender. I like to beat it for at least 3 minutes until it looks pale and fluffy — don’t rush this part! It really sets the tone for the dough’s texture.
Step 2: Add Egg and Vanilla for Flavor and Moisture
Once your butter and sugar are wonderfully creamed, add the egg and vanilla extract. Mix on medium speed until everything is fully combined. The egg brings structure, while vanilla adds that cozy, familiar flavor we all love in cookies.
Step 3: Incorporate Dry Ingredients Gently
Lower your mixer speed and gradually introduce the all-purpose flour and salt. The key is not to over-mix here — just combine until you don’t see any flour patches. Overworking your dough can make the cookies tough, and we want them delicate and buttery.
Step 4: Adjust Dough with Milk for Perfect Piping
Next, add the milk a teaspoon or two at a time. The goal is to get a dough that’s thick enough to hold shape but still pipeable through your bag and tip. I usually start with 2 teaspoons and add more only if the dough feels too stiff. You want to avoid it being runny because then the cookies will spread too much.
Step 5: Pipe Perfect Swirls on a Baking Sheet
Transfer your dough to a piping bag fitted with a wide tip, like an Ateco 849 or 826—these make piping those beautiful swirls easy. Pipe about 2-inch swirls spaced 3 inches apart on a plain baking sheet (skip the parchment paper here; the cookies stick better and keep their shape). If your dough feels too stiff, don’t hesitate to add a touch more milk and mix again.
Step 6: Chill Before Baking
This is my favorite little trick: pop the baking sheet in the fridge for 15-20 minutes before baking. This chilling step helps the cookies keep their pretty shape and prevents them from spreading too much in the oven. When I skip this, the cookies get a bit flat, and that delicate swirl disappears.
Step 7: Bake Until Golden
Preheat your oven to 350°F. Bake the chilled cookies for about 15 minutes, or until the edges start turning a beautiful golden brown. Keep a close eye in the last few minutes so they don’t overbake — you want the centers tender, not dry.
Step 8: Cool and Prepare Chocolate Dip
Once baked, let the cookies rest on the sheet for about 10 minutes to set, then transfer them to a wire rack to cool completely. While they’re cooling, melt your chocolate. I like to chop it and microwave in 20-second bursts, stirring between each, so it melts evenly without burning. Alternatively, use a double boiler for smoother melting.
Step 9: Dip and Decorate
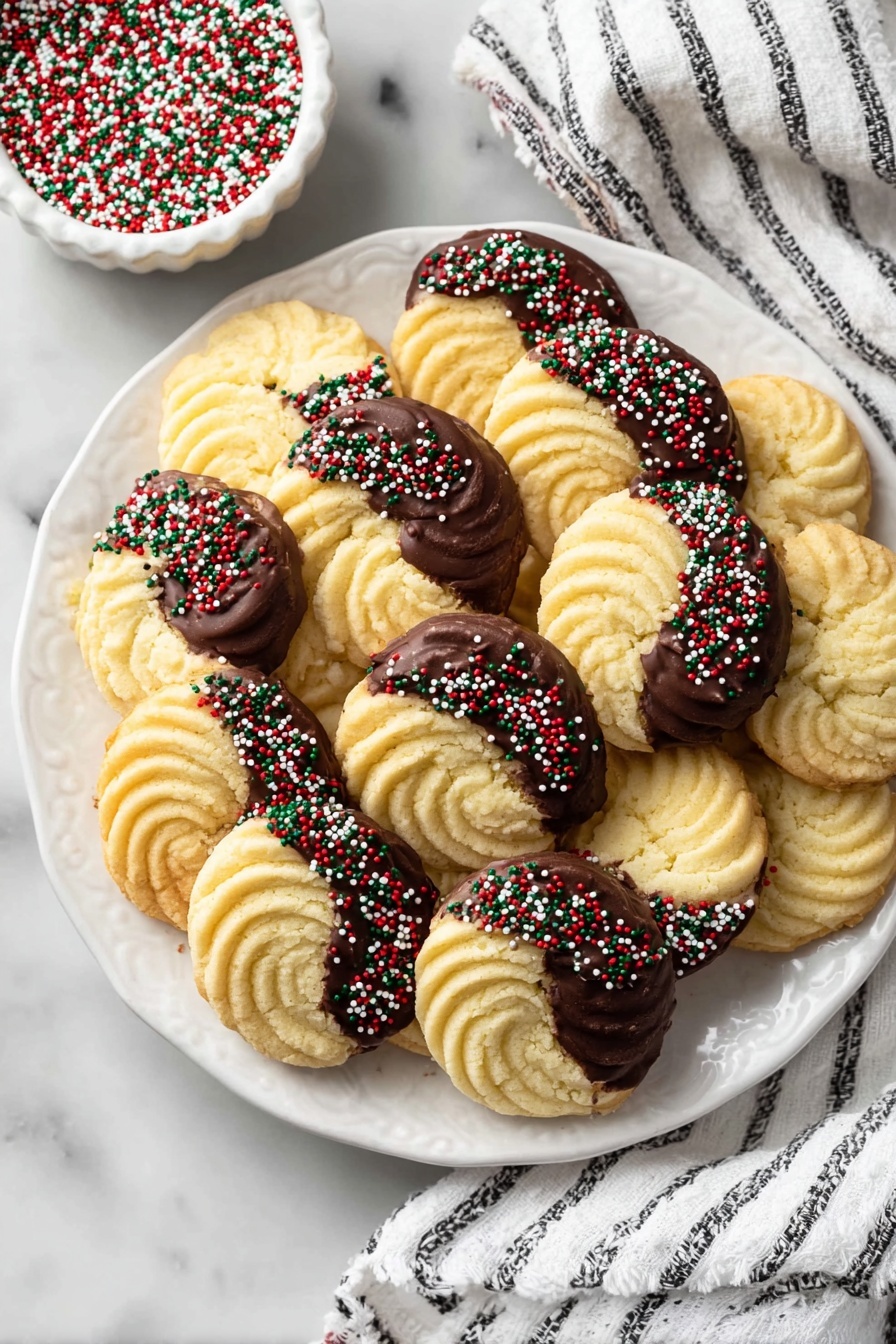
Dip about two-thirds of each cookie into the melted chocolate area, letting excess drip off. Place them back on parchment paper, then sprinkle your colorful decorations over the chocolate before it sets. It’s such a fun way to make every cookie feel special and festive!
Pro Tips for Making Danish Butter Cookies with Chocolate and Sprinkles Recipe
- Use Room Temperature Ingredients: Butter and egg at room temp make mixing easier and create a fluffier dough.
- Chill Before Baking: Refrigerating the piped cookies is key to keeping that classic swirl shape intact.
- Piping Tip Choice Matters: I swear by wide tips like Ateco 849 — smaller tips need more milk, which makes cookies spread more.
- Don’t Use Parchment for Piping: Pipe directly onto a clean baking sheet; the dough grips better and shapes won’t flatten out.
How to Serve Danish Butter Cookies with Chocolate and Sprinkles Recipe

Garnishes
I personally love finishing these cookies with rainbow sprinkles or festive nonpareils for a bit of crunch and color. Sometimes I swap for crushed nuts like pistachios or toasted coconut flakes to give a grown-up twist. The key is to add garnish while the chocolate is still wet — that way it sticks perfectly.
Side Dishes
Pair these cookies with a warm cup of vanilla or cinnamon-spiced tea, or maybe a frothy cappuccino. They also go wonderfully with a scoop of classic vanilla ice cream, turning your treat into a dessert experience.
Creative Ways to Present
For parties, I like arranging these cookies in decorative tins lined with doilies or clear cellophane bags tied with ribbons. They make the perfect homemade gift too! Stacking a few on a colorful plate with a small bowl of extra sprinkles for dipping makes for an interactive and fun setup.
Make Ahead and Storage
Storing Leftovers
I keep my leftover Danish Butter Cookies with Chocolate and Sprinkles in an airtight container at room temperature. They stay fresh and crisp for up to a week, although I have to admit, my family rarely lets them last that long!
Freezing
If you want to save some for later, these cookies freeze beautifully. I like to freeze them AFTER they’ve been dipped and decorated—just place them in a single layer on parchment paper until firm, then transfer to an airtight freezer bag. They keep well for up to 3 months.
Reheating
To reclaim that fresh-baked vibe, let frozen cookies thaw at room temperature, then warm in a 300°F oven for 5-7 minutes. This crisped them up nicely without melting the chocolate decorations.
FAQs
-
Can I use salted butter instead of unsalted in this Danish Butter Cookies with Chocolate and Sprinkles Recipe?
You can, but I recommend reducing or skipping added salt if using salted butter to avoid the cookies turning out too salty. Unsalted butter gives you better control over the salt balance in the dough.
-
Is it necessary to chill the cookies before baking?
Yes! Chilling the piped dough helps the cookies keep their signature swirl shape and prevents them from spreading too much during baking. It also results in a better texture overall.
-
Can I substitute sprinkles with other toppings?
Absolutely. Sprinkles are optional and fun, but you can use chopped nuts, shredded coconut, or even sea salt flakes to customize the look and flavor of your cookies.
-
How do I know when the Danish butter cookies are done baking?
Look for golden edges around the cookies while the centers still look slightly pale—that means they’re perfectly baked to a tender, buttery finish without getting dry.
Final Thoughts
I absolutely love how this Danish Butter Cookies with Chocolate and Sprinkles Recipe turns out every single time. These buttery, tender swirls dipped in chocolate and decorated with colorful sprinkles have become a staple in my kitchen — they’re perfect for sharing, gifting, or just treating yourself. When I first tried this recipe, I struggled to get that perfect swirl shape, but once I learned the chilling trick and the right piping tips, it all came together beautifully. I can’t wait for you to try it, and trust me, once you do, your family will be begging you to make these again and again.
Print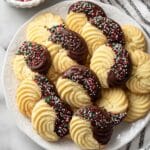
Danish Butter Cookies with Chocolate and Sprinkles Recipe
- Prep Time: 20 minutes
- Cook Time: 15 minutes
- Total Time: 55 minutes
- Yield: 22 cookies 1x
- Category: Dessert, Cookies
- Method: Baking
- Cuisine: Danish
Description
Classic Danish Butter Cookies characterized by a rich, buttery flavor and delicate crisp texture. Made with simple ingredients including butter, sugar, and flour, these cookies are piped into elegant swirls and lightly baked to golden perfection. They are dipped in melted chocolate and garnished with colorful sprinkles for a festive touch, perfect for gifting or enjoying with tea or coffee.
Ingredients
Cookie Dough
- 1 cup unsalted butter, room temperature
- ⅔ cup granulated sugar
- 1 large egg, room temperature
- 1 teaspoon vanilla extract
- 2 cups all-purpose flour
- ¼ teaspoon salt
- 2 teaspoons milk
Decoration
- 3 oz semi-sweet or milk chocolate, chopped
- 3 tablespoons sprinkles
Instructions
- Cream Butter and Sugar: Using a stand mixer fitted with a paddle attachment or a hand mixer, beat 1 cup of unsalted butter and ⅔ cup granulated sugar together for several minutes until the mixture becomes light, fluffy, and airy, ensuring a smooth base for your cookie dough.
- Add Egg and Vanilla: Mix in 1 large room temperature egg and 1 teaspoon vanilla extract until the ingredients are fully combined, incorporating air and moisture into the batter.
- Combine Dry Ingredients: Add 2 cups all-purpose flour and ¼ teaspoon salt to the wet mixture. Mix on low speed just until the flour is incorporated, avoiding overmixing to keep the dough tender.
- Add Milk for Consistency: Stir in 2 teaspoons of milk to achieve a pipeable dough consistency that holds its shape but is not runny. Add more milk cautiously if the dough feels too stiff.
- Pipe the Cookies: Transfer the dough into a piping bag fitted with a large piping tip (preferably Ateco 849 or Ateco 826). Pipe 2-inch swirls directly onto an unlined baking sheet, spacing them about 3 inches apart to allow room for slight spreading.
- Chill the Dough: Place the baking sheet with piped cookies into the refrigerator for 15-20 minutes to firm up the dough, helping the cookies maintain their shape during baking.
- Preheat Oven: Set your oven to 350°F (175°C) ensuring it reaches the correct temperature before baking the cookies.
- Bake: Bake the cookies for approximately 15 minutes or until the edges turn a delicate golden brown, indicating they are cooked through and crisp.
- Cool in Pan: Remove the baking sheet from the oven and allow the cookies to cool on the sheet for about 10 minutes, letting them set before transferring.
- Transfer to Wire Rack: Carefully move the cookies to a wire rack to cool completely, preventing condensation which could soften them.
- Melt Chocolate: While the cookies cool, melt 3 oz chopped chocolate in a heatproof bowl in the microwave using 20-second increments, stirring thoroughly after each until smooth, or use a double boiler method for gentle melting.
- Dip and Decorate: Dip about two-thirds of each cookie into the melted chocolate halfway, then place them on parchment paper. Immediately sprinkle with 3 tablespoons of sprinkles. Allow the chocolate to set and dry completely at room temperature.
Notes
- Use a wide piping tip like Ateco 849 or Ateco 826 for easier piping and better dough shape retention during baking.
- If a large piping tip is unavailable, a Wilton 1M can be used, but additional milk might be necessary to thin the dough, which could cause more spreading.
- Pipe dough directly onto unlined baking sheets rather than parchment paper to prevent sticking.
- If the dough is too stiff to pipe, return it to the bowl and add 1-2 teaspoons of milk to loosen it before trying to pipe again.
- Refrigerating piped cookies before baking is essential to help them keep their shape and prevent excessive spreading.
Nutrition
- Serving Size: 1 cookie
- Calories: 110
- Sugar: 6g
- Sodium: 30mg
- Fat: 7g
- Saturated Fat: 4.5g
- Unsaturated Fat: 2g
- Trans Fat: 0g
- Carbohydrates: 11g
- Fiber: 0.3g
- Protein: 1g
- Cholesterol: 25mg

Your email address will not be published. Required fields are marked *