

If you’ve ever dreamed of baking the ultimate fruit dessert, look no further because this Perfect Apple Pie Recipe will quickly become your go-to. I absolutely love how this pie balances sweet and spice with a wonderfully flaky crust that holds all that tender, caramelized apple filling just right. Whether you’re a baking novice or a seasoned pro, I’ll walk you through every step, sharing my tips and tricks so you can nail it every time—plus, it’s just downright delicious!
Why You’ll Love This Recipe
- Classic Flavor with a Twist: The mix of Granny Smith, Gala, and Golden Delicious apples creates a rich and complex sweetness that’s just perfect.
- Foolproof Filling Technique: Cooking the apple filling before baking locks in the perfect tender-crisp texture you’ll adore.
- Flaky, Golden Crust: Chilling the pie before baking ensures a crust that’s crispy on the edges and tender in the middle.
- Easy to Customize: Lattice top, whole crust, extra spices—you get to make it your own and it’ll taste amazing every time.

Ingredients You’ll Need
When I shop for this Perfect Apple Pie Recipe, I focus on picking fresh apples and quality spices—those little details really lift the flavor. You’ll want good pie dough, but if you’re short on time, store-bought crust works too. Here’s the rundown of why each ingredient matters:
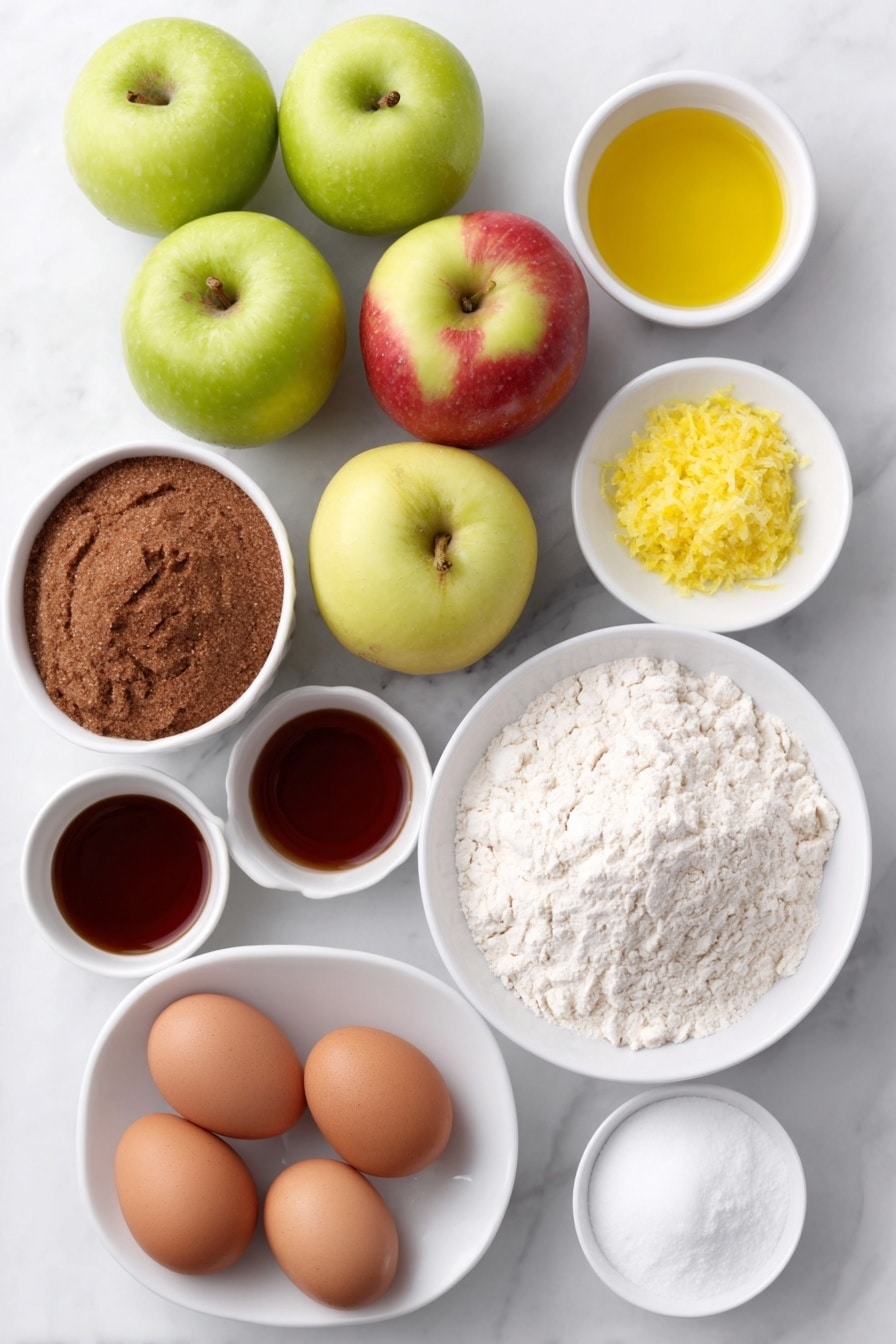
- Pie dough: Homemade or store-bought, you want it cold and ready to give you that flaky, buttery crust.
- Lemon zest & juice: Adds a bright tang that keeps the apples from browning and adds a subtle layer of flavor.
- Apples (Granny Smith, Gala, Golden Delicious): I love combining tart and sweet apples to get balanced flavor and texture.
- Brown sugar: Adds warmth and depth, helping the filling turn beautifully caramelized.
- Granulated sugar: Balances the sweetness without overpowering the natural apple flavor.
- All-purpose flour: Helps thicken the filling so it’s luscious and not runny.
- Kosher salt: Just a pinch to bring out all the flavors.
- Cinnamon, nutmeg, cardamom (optional): The cozy spices that make an apple pie smell like home.
- Vanilla extract: A subtle boost that rounds out the spice mix perfectly.
- Milk and beaten egg: For brushing the crust to achieve that beautiful golden glow and a touch of shine.
- Raw sugar for topping: Adds a delightful crunchy texture on top when baked.
Variations
I always encourage you to make this Perfect Apple Pie Recipe your own. Over time, I’ve experimented with different spices and toppings, and honestly, it’s fun to change it up based on what’s in season or what my family craves.
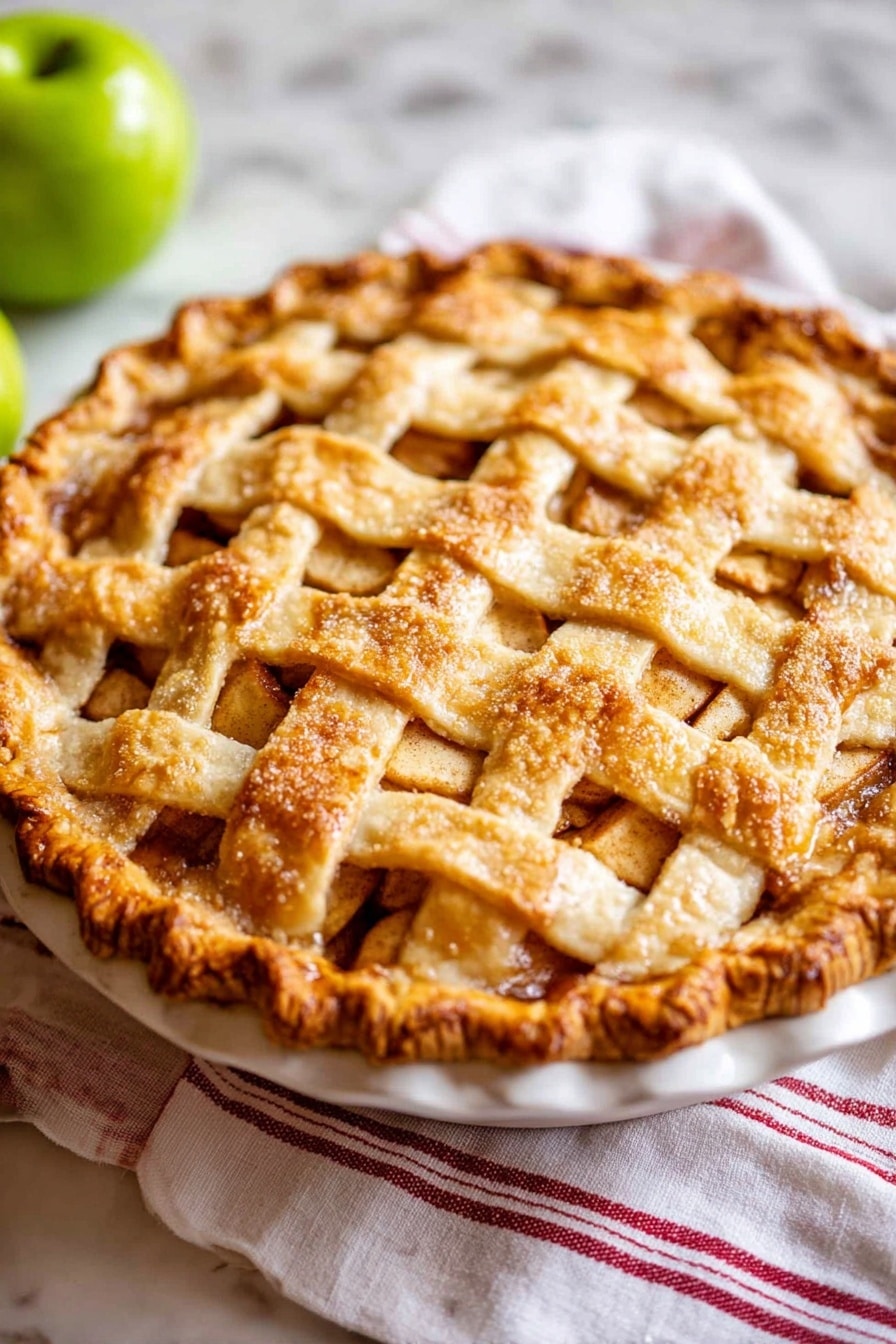
- Lattice crust: I love the rustic charm it adds and you can see the bubbling apple filling through the gaps—it’s beautiful for guests.
- Spice it up: Sometimes I add a pinch of cloves or allspice to deepen the flavor, especially in cooler months.
- Gluten-free crust: Use your favorite gluten-free dough recipe if you’re catering to dietary needs—my family can’t tell the difference!
- Apple blend: Feel free to swap apples depending on what’s freshest; just keep a mix of tart and sweet for balance.
How to Make Perfect Apple Pie Recipe
Step 1: Prepare Your Fruit Like a Pro
Start by peeling and slicing your apples with care. I do one apple at a time—peel, slice thinly, then immediately toss into your skillet with lemon juice. This stops them browning and gives a nice fresh zing. Use a microplane to zest your lemon right into the pan—that little bit of zest adds so much subtle brightness you’ll notice without overpowering. Stir gently so you don’t mush the slices.
Step 2: Cook the Filling to Perfection
Once your apples are ready, add the sugars, flour, salt, and spices to the pan. I stir everything gently and cook covered on medium heat for about 20 minutes, stirring every few minutes. This step softens the apples just enough, letting them soak in the flavors while keeping a slight bite that won’t turn to mush later in the pie. Keep an eye on the pan so nothing sticks, adding a splash of water if needed. I promise this cooked filling is the magic that makes this recipe perfect.
Step 3: Chill Your Filling and Roll Out Dough
After cooking, spread the filling evenly in a pan to cool quickly in the fridge or freezer—you want it completely cold before assembling. While it’s chilling, roll out your dough and line your pie dish, letting the excess hang over the edges. This cooling step is key for that bakery-quality crust everyone raves about!
Step 4: Assemble Your Pie Like a Boss
Now, scrape the chilled filling into your pie shell, scraping in every drop of that caramel-y sauce. Top it with your second crust—whether that’s a beautiful lattice or just a plain sheet—and crimp the edges to seal in all the goodness. If you’re skipping the lattice, poke a few vents for steam to escape. Chill the entire pie again for 20-30 minutes—it really helps with flaky, tender crust edges.
Step 5: Bake to Golden Perfection
Preheat your oven to a hot 425°F with a baking sheet on the center rack. Just before baking, brush your crust with a mixture of milk and beaten egg for shine and golden color, then sprinkle raw sugar on top for that perfect crunch. Bake for 15 minutes, then lower the oven to 350°F. Protect the crust edges with a foil shield to prevent burning, and bake for another 40-45 minutes until bubbly and golden. Waiting for the pie to cool—about 4 hours—is a challenge, but trust me, the filling sets beautifully and slices cleanly when you do.
Pro Tips for Making Perfect Apple Pie Recipe
- Keep Apples Fresh: Peeling and slicing one apple at a time into lemon juice is my secret to apples that stay bright and don’t turn brown prematurely.
- Control Texture: I check the filling’s softness by tasting after 20 minutes—some prefer their apples firmer, others softer, so adjust the cooking time as you like.
- Chill for Flaky Crust: After assembling, chilling the entire pie before baking really helps lock in the layers of flakiness that make people say, “Wow, did you buy this?”
- Protect Your Edges: Using a foil guard mid-bake prevents burnt crust edges while letting the filling bubble perfectly—don’t skip this step!
How to Serve Perfect Apple Pie Recipe
Garnishes
I’m a simple gal when it comes to garnishes—vanilla ice cream is my absolute fave, melting slowly over a warm slice. I sometimes drizzle a little caramel sauce on top for an extra indulgence. Fresh whipped cream or a sprinkle of chopped toasted pecans also add nice texture and creaminess.
Side Dishes
This pie goes perfectly with a hot cup of coffee or spiced chai. For a heartier meal, pair it after roasted turkey or pork for a classic fall feast that everyone will remember.
Creative Ways to Present
For dinner parties, I love serving individual mini apple pies using the same filling with cute ramekins topped with lattice crusts. You can even add cinnamon sugar on top for sparkle. Alternatively, presenting the pie with a small side bowl of extra caramel sauce lets guests customize their experience.
Make Ahead and Storage
Storing Leftovers
After serving, I usually keep leftovers covered tightly with plastic wrap on the counter for up to two days. The pie tastes fantastic at room temperature or slightly warmed.
Freezing
I’ve successfully frozen the cooked apple filling alone in ziplock bags for up to three months. It’s a lifesaver for quick pies or other desserts later. You can also freeze the whole unbaked pie wrapped tightly, then bake it straight from frozen—just add extra baking time.
Reheating
To reheat leftover slices, I pop them in the oven at 350°F for about 15 minutes. This revives the crust’s crispiness and warms the filling just right. Avoid microwaving if you want to keep that lovely crust texture.
FAQs
-
Can I make the apple pie filling ahead of time?
Absolutely! You can prepare the filling and let it cool completely, then refrigerate it for a day or freeze it for up to three months. This makes assembling the pie quick and easy whenever you’re ready to bake.
-
What’s the best type of apple for this pie?
I like a mix of tart Granny Smith, sweet Gala, and mellow Golden Delicious apples. This combo gives you depth of flavor and a great balance between sweet and tart. But feel free to adjust based on your local orchard’s best picks!
-
How do I prevent the crust edges from burning?
After 15 minutes of baking at high heat, cover the pie edges with a foil shield or a pie crust protector. This keeps the edges from getting too dark while the rest of the pie finishes baking perfectly.
-
Can I use frozen pie dough for this recipe?
Yes! Just thaw your dough in the fridge overnight and handle it cold for best results. The key is to keep it chilled before baking so the crust ends up flaky and not tough.
Final Thoughts
This Perfect Apple Pie Recipe is close to my heart because it’s the one that always impresses friends and family—really, the way the filling melts just so and the crust bakes golden is magical. I hope you enjoy making it as much as I do. It’s a recipe worth sharing, baking, and savoring, so be sure to have vanilla ice cream ready because your first bite is going to feel like fall itself on your plate!
Print
Perfect Apple Pie Recipe
- Prep Time: 20 minutes
- Cook Time: 1 hour 20 minutes
- Total Time: 5 hours 40 minutes
- Yield: 10 servings 1x
- Category: Baking
- Method: Baking
- Cuisine: American
Description
This classic apple pie recipe features a homemade double pie crust filled with a perfectly spiced apple mixture. Using a blend of Granny Smith, Gala, and Golden Delicious apples, the filling is gently cooked on the stovetop with warm spices like cinnamon, nutmeg, and optional cardamom, then baked to golden perfection. The pie is finished with a glossy egg or milk wash and a sprinkle of raw sugar for a delightful crunch. A true comforting dessert best served cooled and enjoyed with vanilla ice cream.
Ingredients
Pie Crust
- 2 sheets homemade double pie crust dough
Apple Filling
- 5 pounds apples (about 11 large; mix of Granny Smith, Gala, Golden Delicious), peeled and sliced 1/8 inch thick
- 1/4 teaspoon lemon zest
- 2 tablespoons lemon juice (juice from half a lemon)
- 3/4 cup packed brown sugar
- 3/4 cup granulated sugar
- 5 tablespoons all-purpose flour
- 1/4 teaspoon kosher salt
- 1 1/2 teaspoons ground cinnamon
- 3/4 teaspoon ground nutmeg
- 1/2 teaspoon ground cardamom (optional)
- 1 teaspoon vanilla extract
- 1 tablespoon milk (for brushing pie crust)
- 1 tablespoon beaten egg (optional, for brushing pie crust)
- 1 tablespoon raw sugar (for topping pie)
Instructions
- Choose and prepare apples: Use about 5 pounds of apples (approximately 11 large), combining varieties such as Granny Smith, Gala, and Golden Delicious for balanced flavor. Peel and slice each apple into 1/8 inch pieces, immediately adding them to a skillet containing the lemon zest and juice to prevent browning. Stir occasionally to coat the apples well.
- Make the filling: On medium heat, add brown sugar, granulated sugar, flour, kosher salt, cinnamon, nutmeg, and optional cardamom to the apples in the skillet. Gently stir to combine without breaking the apples. Cover with a lid and cook for 20 minutes, stirring every 3 minutes to prevent sticking and ensuring the apples become fork tender but still hold shape. Add water sparingly if sticking occurs.
- Finish filling and cool: Remove from heat, stir in vanilla extract, and transfer the filling with all juices to a pan with a lip. Spread evenly and cool completely in the refrigerator or freezer for about 30 minutes until chilled.
- Prepare pie crust: Roll out one sheet of pie dough into a 9-inch deep pie dish, letting excess hang over edges. Scrape the chilled apple filling into the crust, including all syrupy drippings.
- Top crust: Cover with the second pie crust sheet. If desired, create a lattice pattern or cover whole. Trim and fold edges under, then crimp for a finished look. Vent with slits if using whole crust.
- Chill assembled pie: Refrigerate or freeze the assembled pie for 20-30 minutes to firm up the crust and ensure flakiness.
- Preheat oven and prep for baking: Place a baking sheet on the center rack and preheat oven to 425°F (220°C) for at least 20-25 minutes, ensuring the oven and baking sheet are very hot before baking.
- Glaze and add sugar: Brush the pie crust with milk, beaten egg, or a combination for browning and shine. Sprinkle raw sugar evenly over the top.
- Bake first phase: Place the pie on the preheated baking sheet and bake at 425°F for 15 minutes until the edges start to brown.
- Protect crust and reduce temperature: Make a pie shield from foil by cutting a center circle large enough to expose filling but shield the crust edges. Remove pie from oven, tent the edges with the foil shield, and reduce oven temperature to 350°F (175°C).
- Bake second phase: Return pie to the oven and bake for another 40-45 minutes at 350°F until crust is golden brown and filling is bubbly (visible through lattice, if used).
- Cool pie: Transfer pie to a wire rack and cool completely for about 4 hours. This resting period is crucial for the filling to set and avoid hot liquid spills when sliced.
- Serve: Slice the cooled pie and serve. For an indulgent treat, pair with vanilla ice cream and optionally caramel sauce.
- Store leftovers: Keep pie covered at room temperature for up to 2 days, then refrigerate thereafter.
Notes
- After cooling, the apple pie filling can be frozen in a large ziplock bag for up to 3 months to use later in pies, cobblers, or apple crisps.
- Using a mixture of apple varieties provides the best flavor and texture balance.
- Cooking apples on the stovetop before baking ensures they are tender yet maintain shape, avoiding overly mushy texture after baking.
- Chilling the assembled pie enhances crust flakiness and prevents shrinking during baking.
- Using a foil pie shield protects the crust edges from burning during the longer bake at reduced temperature.
- Allowing the pie to cool fully before slicing prevents hot juice spills and improves filling consistency.
Nutrition
- Serving Size: 1 slice (1/10th of pie)
- Calories: 370
- Sugar: 32g
- Sodium: 130mg
- Fat: 12g
- Saturated Fat: 3.5g
- Unsaturated Fat: 7g
- Trans Fat: 0g
- Carbohydrates: 59g
- Fiber: 4g
- Protein: 2g
- Cholesterol: 25mg

Your email address will not be published. Required fields are marked *