
If you love the cozy, spicy warmth of gingerbread but want a fun, bite-sized treat that’s easy to make and perfect for sharing, you’re going to adore this Gingerbread Truffles Recipe. I absolutely love how these truffles combine the crisp snap of gingerbread cookies with the creamy smoothness of cream cheese, all dipped in luscious chocolate. Trust me, once you make these, they’ll become a holiday staple you’ll find yourself craving year-round.
Why You’ll Love This Recipe
- No-Bake Simplicity: You don’t need an oven, so these truffles come together quickly and easily.
- Perfect Balance of Flavors: Spicy gingerbread paired with rich cream cheese and silky chocolate hits all the right notes.
- Customizable Coatings: Use white or dark chocolate, and add crushed cookies for texture and extra flair.
- Make-Ahead Friendly: These keep beautifully in the fridge or freezer, ready whenever you need a festive treat.

Ingredients You’ll Need
One of the things I love about this Gingerbread Truffles Recipe is how simple and accessible the ingredients are, yet they come together to create such indulgent bites. You’ll want crunchy gingersnap cookies for that perfect texture, creamy softened cream cheese, and of course, chocolate for dipping—and I’ll share tips on picking the best options.

- Crunchy gingersnap cookies: These add that classic gingerbread spice and crunch—choose a sturdy kind to hold up well in the truffles.
- Cream cheese: Soften it well beforehand for smoother mixing—don’t skip this or the texture won’t be silky.
- Vanilla extract: Just a splash brightens the flavor and balances the spices.
- White chocolate wafers or almond bark: These melt easily and add a creamy sweetness perfect for some of the truffles.
- Dark chocolate wafers or chopped dark chocolate: I love the contrast of bittersweet chocolate—it balances the spices beautifully.
- Extra crushed cookies for garnish: Adds a fun crunch and looks pretty when sprinkled on top of the chocolate coating.
Variations
One thing I love about this Gingerbread Truffles Recipe is how easy it is to customize. Over the years, I’ve tried a few variations that really add a personal touch, and I encourage you to experiment too—tweak the coatings or mix-ins to suit your taste or dietary needs.
- Spiced Up: Sometimes I add a pinch of cinnamon or nutmeg to the cookie crumbs to amp up the warm gingerbread flavor even more.
- Dairy-Free Version: You can swap cream cheese with a firm dairy-free alternative, and use vegan chocolate to make these friendly for everyone.
- Drizzled Chocolate: Instead of fully dipping, try drizzling melted white chocolate over dark chocolate-coated truffles (or vice versa) for a pretty presentation.
- Festive Mix-ins: Chopped crystallized ginger or a sprinkle of coarse sea salt on top adds a special kick that always delights my family.
How to Make Gingerbread Truffles Recipe
Step 1: Crush the Gingersnap Cookies
Start by pulsing about 6 cups of crunchy gingersnap cookies in your food processor until you have fine crumbs. If you don’t have a processor, no worries—you can toss the cookies in a ziplock bag and crush them with the back of a measuring cup. I’ve found that the finer the crumbs, the smoother your truffle texture will be, so take your time here.
Step 2: Mix with Cream Cheese and Vanilla
Transfer the cookie crumbs to a mixing bowl. Add 1 cup of softened cream cheese and half a teaspoon of vanilla extract. Mix everything by hand until smooth and fully combined. If the mixture feels too sticky, just chill it for about 30 minutes—this firms it up perfectly and makes rolling easier.
Step 3: Form and Chill the Truffles
Line a baking sheet with parchment paper. Use a small cookie scoop or a tablespoon to scoop up the mixture, then roll it gently between your palms into 1-inch balls. Placing the balls on the sheet evenly spaced helps them chill consistently. Pop the tray into the freezer for 15 minutes or into the fridge for about an hour until firm.
Step 4: Melt the Chocolate for Dipping
While your truffles chill, melt your chocolate coatings. Place white chocolate wafers or chopped almond bark into a heat-safe bowl. Microwave at 50% power, stirring every 20 seconds until smooth—watch carefully so it doesn’t burn. Repeat with dark chocolate. Having two bowls lets you dip half in white and half in dark for variety (which my family loves).
Step 5: Dip and Decorate Your Truffles
Remove your chilled truffles from the fridge. Using dipping tools or two forks, dunk each truffle into the melted chocolate, swirl to coat evenly, then gently tap off the excess against the bowl’s edge. Place the coated truffles back on the parchment-lined tray. Sprinkle some with extra crushed cookie crumbs immediately—this adds lovely texture and a pretty finishing touch.
Step 6: Let the Chocolate Set and Serve
Allow your truffles to set at room temperature, or speed things up by chilling them in the fridge for 15 minutes. Once chocolate is firm, your truffles are ready to enjoy. Serve immediately or store in an airtight container lined with parchment paper for up to a week. I learned this little parchment trick stops them from sticking together!
Pro Tips for Making Gingerbread Truffles Recipe
- Proper Cookie Crushing: Crushing your cookies finely ensures the truffles are smooth and not crumbly—don’t rush this step!
- Softening Cream Cheese: Letting cream cheese soften at room temperature makes mixing easier and prevents lumps—trust me, it makes a huge difference.
- Melting Chocolate Slowly: Use low power and stir frequently when microwaving chocolate to avoid burning and getting grainy chocolate.
- Storage Smart: Store your truffles with parchment paper between layers to prevent sticking and preserve their shape beautifully.
How to Serve Gingerbread Truffles Recipe

Garnishes
I love topping these truffles with a sprinkle of crushed gingersnap cookies or a light dusting of cinnamon—it not only adds texture but also makes them look extra special. For holiday parties, adding edible gold glitter or colored sugar sprinkles elevates their festive vibe instantly.
Side Dishes
These gingerbread truffles are perfect alongside a hot cup of spiced cider, a frothy chai latte, or a rich dark coffee. I often serve them as dessert bites after a holiday meal, and they pair wonderfully with sharp cheeses or fresh fruit on a dessert platter.
Creative Ways to Present
When I’m gifting these, I arrange truffles in little cupcake liners inside decorative tins or boxes. Another trick is to display them on a festive serving tray layered with fresh pine needles or sprigs of rosemary for a touch of greenery—your guests will be impressed before even taking a bite.
Make Ahead and Storage
Storing Leftovers
I store leftover gingerbread truffles in an airtight container in the fridge, layered with parchment paper to keep them from sticking. They stay fresh and delicious for up to a week, which is handy because these tend to disappear fast in my house!
Freezing
If you want to make these ahead of time, they freeze really well. I place them in a single layer on a baking sheet to freeze first, then transfer them to a ziplock bag or airtight container with parchment layers. They’ll keep for up to 3 months—just thaw in the fridge before serving.
Reheating
Since these are no-bake truffles, reheating isn’t really necessary. If your chocolate loses some shine or firmness, just let them come to room temperature for 10-15 minutes before serving—it refreshes their texture beautifully.
FAQs
-
Can I use other types of cookies instead of gingersnap for this Gingerbread Truffles Recipe?
Absolutely! While gingersnap cookies give the characteristic spicy kick, you can experiment with other crunchy cookies like speculoos or gingerbread cookies—just keep in mind that softer cookies will make the truffles less firm.
-
Why does the cream cheese need to be softened?
Softened cream cheese blends smoothly with the cookie crumbs, ensuring the truffle mixture is creamy and easy to roll. If it’s too cold or hard, lumps will form and the texture won’t be as pleasant.
-
What’s the best way to melt chocolate without losing its shine?
Melting chocolate gently at 50% power in short bursts, stirring frequently, helps prevent burning or graininess. Avoid overheating and never add water, as this can cause the chocolate to seize.
-
How long can I store Gingerbread Truffles in the fridge?
Properly stored in an airtight container with parchment paper layers, these truffles keep beautifully in the fridge for up to 1 week.
-
Can I freeze these truffles, and how do I thaw them?
Yes! Freeze them in a single layer first, then transfer to a sealed container. Thaw in the fridge overnight or for a few hours until softened—then enjoy as if freshly made.
Final Thoughts
This Gingerbread Truffles Recipe has been such a joyful discovery for me. It’s one of those desserts that feels fancy but is effortless to make, and the feedback from friends and family has always been amazing. Whether you’re making them for holiday celebrations or simply to treat yourself on a chilly day, these truffles hit that perfect spot of cozy, sweet, and just a little bit indulgent. I hope you enjoy making and sharing them as much as I do!
Print
Gingerbread Truffles Recipe
- Prep Time: 10 minutes
- Cook Time: 0 minutes
- Total Time: 1 hour 10 minutes
- Yield: 36 truffles 1x
- Category: Dessert
- Method: No-Cook
- Cuisine: American
Description
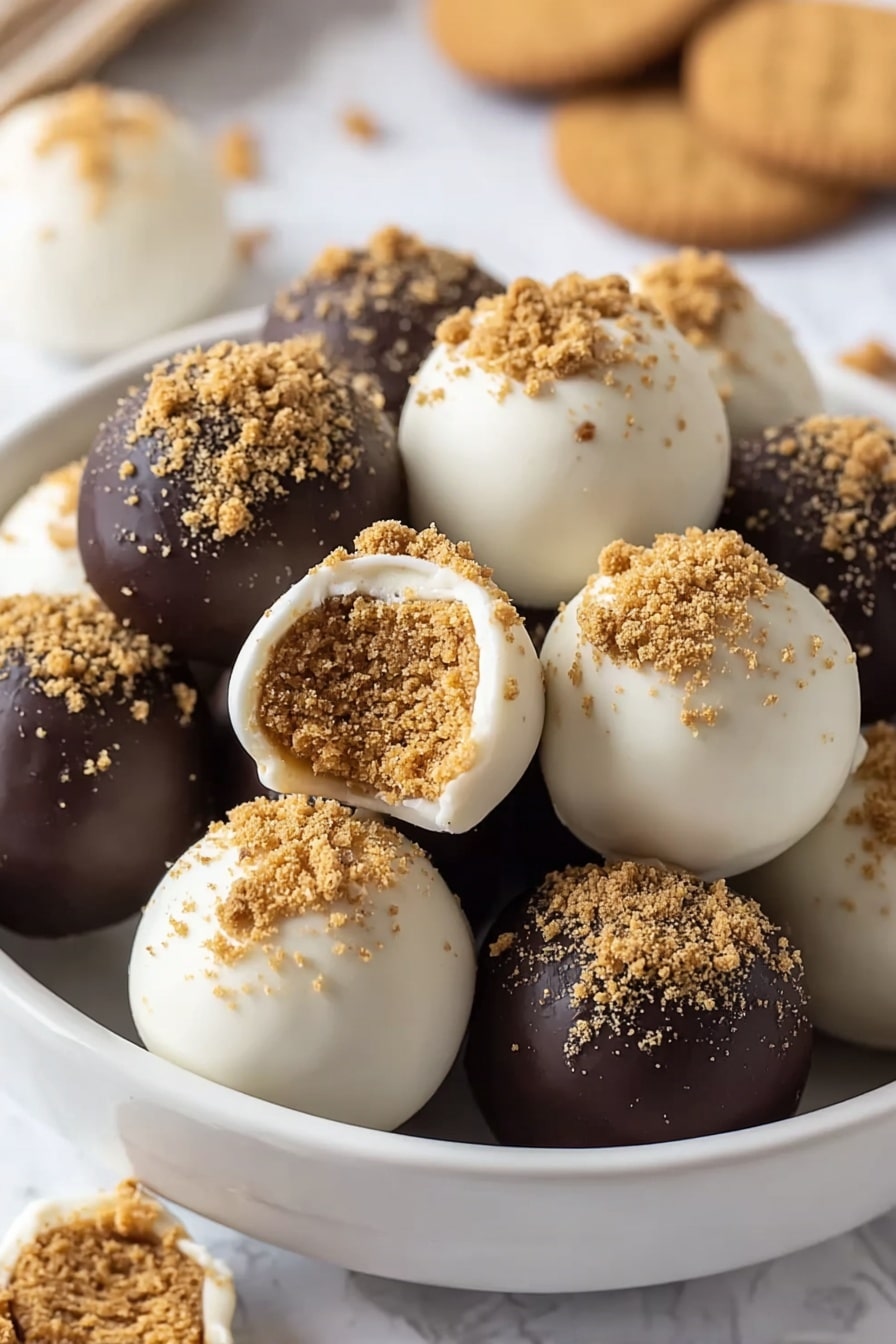
These Gingerbread Truffles are a festive, no-bake treat perfect for the holiday season. Combining crunchy gingersnap crumbs with creamy vanilla-flavored cream cheese, these truffles are dipped in rich white and dark chocolate, then garnished with crushed cookies for an extra crunch. They make a delightful, easy-to-make dessert or gift that can be stored in the refrigerator or freezer.
Ingredients
Truffle Mixture
- 6 cups (about 425 g) crunchy gingersnap cookies
- 1 cup (8 oz or 226 g) cream cheese, softened
- ½ teaspoon vanilla extract
Chocolate Coating
- 8 ounces (225 g) white chocolate wafers or chopped almond bark
- 8 ounces (225 g) dark chocolate wafers or chopped dark chocolate
Garnish
- A few extra cookies crushed, for garnish
Instructions
- Prepare Cookie Crumbs: Place the gingersnap cookies in a food processor and pulse until fine crumbs form. Alternatively, place the cookies in a ziplock bag and crush them using the back of a measuring cup until finely ground.
- Mix Dough: Transfer the cookie crumbs to a bowl, add the softened cream cheese and vanilla extract. Mix thoroughly by hand until the mixture is smooth and fully combined. Then, refrigerate the dough for 30 minutes to firm up.
- Form Truffles: Line a baking sheet with parchment or wax paper. Remove the dough from the refrigerator and use a small cookie scoop to portion out 1-inch balls. Roll the scooped mixture between your hands for smooth, even balls. Place the balls on the lined baking sheet.
- Chill Truffles: Transfer the baking sheet to the freezer for 15 minutes to firm the truffles quickly. Alternatively, refrigerate them for 1 hour if preferred.
- Melt Chocolate: Place the white chocolate or almond bark in a heat-safe glass bowl and microwave at 50% power, stirring every 20 seconds until smooth and melted. Repeat the process separately with the dark chocolate in another bowl.
- Dip Truffles: Remove the truffles from the fridge. Using dipping tools or two forks, dip each truffle into the melted chocolate to coat evenly. Tap off any excess chocolate against the side of the bowl before placing the truffle back on the baking sheet. Immediately sprinkle with crushed cookie crumbs if desired. Repeat with all remaining truffles.
- Set Chocolate: Allow the chocolate coating to harden at room temperature or speed up the process by placing the truffles back into the refrigerator for 15 minutes.
- Storage: Serve the truffles immediately or store them between layers of parchment paper in an airtight container. They can be refrigerated for up to 1 week or frozen for up to 3 months.
Notes
- For best texture, use crunchy gingersnap cookies, though leftover gingerbread cookies can be used for a softer result.
- If you encounter difficulty melting chocolate, consult a chocolate melting guide for tips.
- Freeze the truffles in an airtight container to keep them fresh for up to 3 months.
Nutrition
- Serving Size: 1 truffle
- Calories: 120
- Sugar: 12g
- Sodium: 70mg
- Fat: 7g
- Saturated Fat: 4.5g
- Unsaturated Fat: 2.0g
- Trans Fat: 0g
- Carbohydrates: 13g
- Fiber: 0.5g
- Protein: 1.5g
- Cholesterol: 15mg

Your email address will not be published. Required fields are marked *