

If you’re craving a sweet, crunchy treat that’s packed with nostalgia and full of flavor, you’ve got to try my Homemade Peanut Brittle Recipe. This is the kind of candy that reminds me of cozy family gatherings and simple pleasures. It’s crunchy, buttery, and just the right amount of sweet with roasted peanuts for that amazing texture. I absolutely love how this turns out every single time, and I bet you’ll feel the same way once you make it. Stick with me and I’ll walk you through everything you need to know to get this classic treat just right!
Why You’ll Love This Recipe
- Simple Ingredients: You probably already have everything in your pantry—no fancy stuff needed.
- Classic Flavor: It’s buttery, sweet, and perfectly crunchy, just like the peanut brittle you remember from childhood.
- Great for Gifts: Once you make this, you’ll want to wrap it up for friends and family because it’s that good.
- No Candy-Making Fear: I’ll share my personal tricks so you don’t get stuck on tricky steps like sugar crystallization.

Ingredients You’ll Need
What I love about this Homemade Peanut Brittle Recipe is how straightforward the ingredients are. Each one plays a key role in creating that perfect crispy, buttery candy. Grab good quality peanuts and unsalted butter if you can — it really makes a difference!
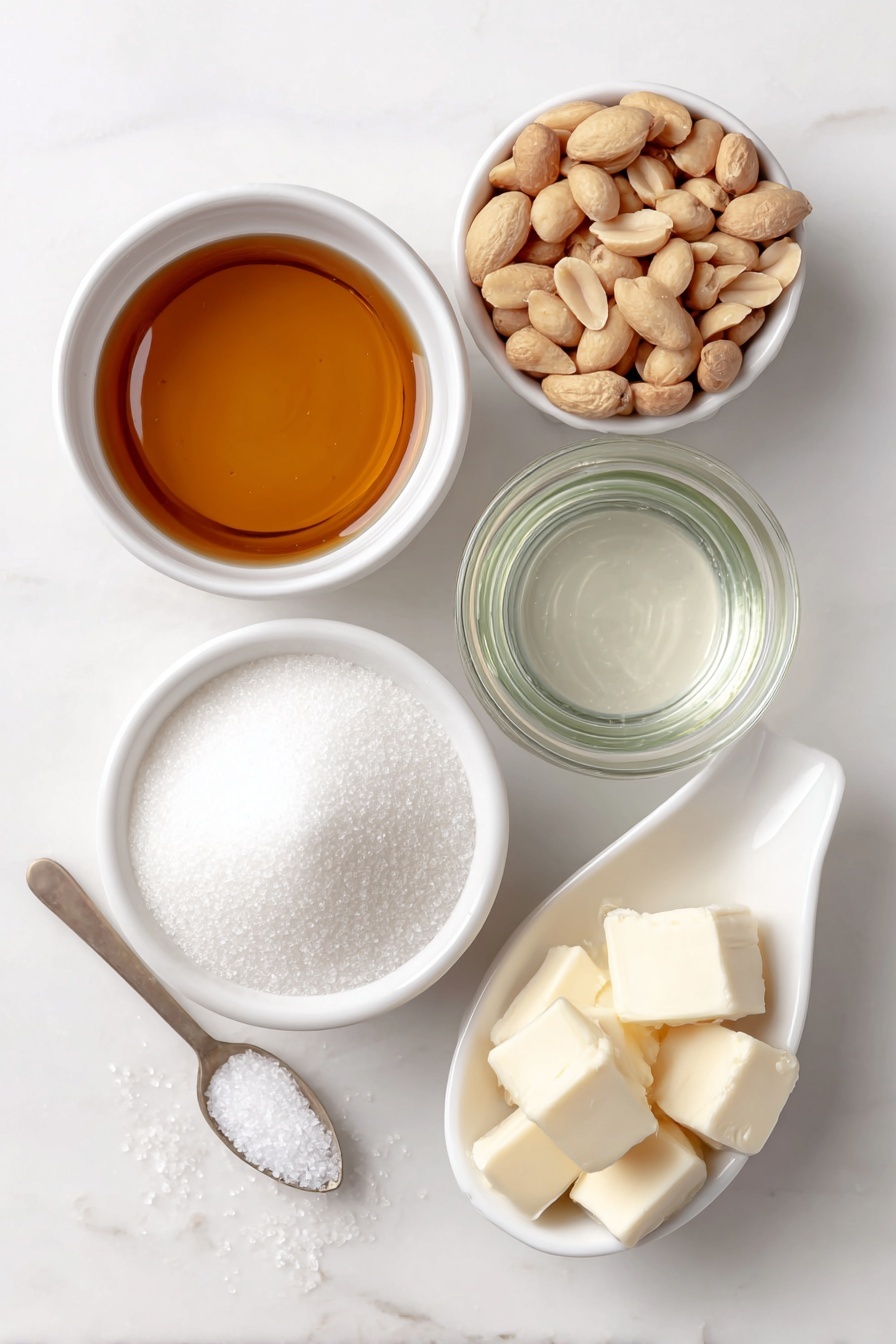
- White sugar: The base of sweetness—make sure it’s granulated for even cooking.
- Light corn syrup: Helps prevent the sugar from crystallizing so your brittle stays smooth.
- Water: Just enough to help dissolve the sugar at the start.
- Salt: Enhances all the flavors and balances the sweetness.
- Peanuts: I like raw or roasted peanuts, but roasted bring a deeper flavor.
- Unsalted butter: Adds richness and helps smooth out the texture—don’t skip it!
- Baking soda: This little magic ingredient creates those tiny bubbles that make the brittle light and crunchy.
Variations
My favorite part about this Homemade Peanut Brittle Recipe is how easy it is to tweak for different tastes. Don’t hesitate to make it your own with these ideas.
- Macadamia Nut Brittle: I swapped peanuts for macadamia nuts once, and wow—super-rich and perfect for holiday gifts.
- Spicy Twist: Try adding a pinch of cayenne or chili powder for a subtle heat that surprises your taste buds.
- Nut-Free Version: You can substitute nuts with seeds like pumpkin or sunflower for a nut-free crunch.
- Chocolate Drizzle: Drizzle melted dark chocolate over the cooled brittle for an extra indulgent finish.
How to Make Homemade Peanut Brittle Recipe
Step 1: Prep Your Workspace and Ingredients
First things first—measure out everything before you start. Candy-making moves fast once the sugar hits the heat. Also, grease a large rimmed baking sheet or line it with a silicone baking mat to prevent sticking—I discovered the silicone mat tip after dealing with sticky brittle on baking sheets multiple times!
Step 2: Cook the Sugar Mixture
Combine the sugar, corn syrup, water, and salt in a heavy saucepan over medium heat. Stir just until the sugar dissolves, then let it come to a boil. You’ll see it bubbling, and this usually takes around 5 minutes. Resist the urge to stir here or you might get grainy brittle. This part always made me nervous until I learned letting it bubble undisturbed is key to smooth candy.
Step 3: Add Peanuts and Monitor Temperature
Stir in the peanuts and clip on your candy thermometer. Keep cooking, stirring gently every now and then, until you reach 300 to 310°F (that’s the hard crack stage). It’s important to get this right because if it’s too low, your brittle will be soft, and too high can burn it. I always keep a close eye on the thermometer, and if you don’t have one, digital candy thermometers are a game changer!
Step 4: Stir in Butter and Baking Soda, Then Spread Fast
Once off the heat, quickly add the butter and baking soda. You’ll notice it foams up—that’s exactly what you want! Immediately pour it onto your prepared baking sheet. Using two forks, lift and pull the mixture into a rough 12×14-inch rectangle to get that classic brittle shape. This goes fast, so work quickly before the candy hardens. I remember the first time I waited too long and it got stubborn to spread, so don’t make the same mistake.
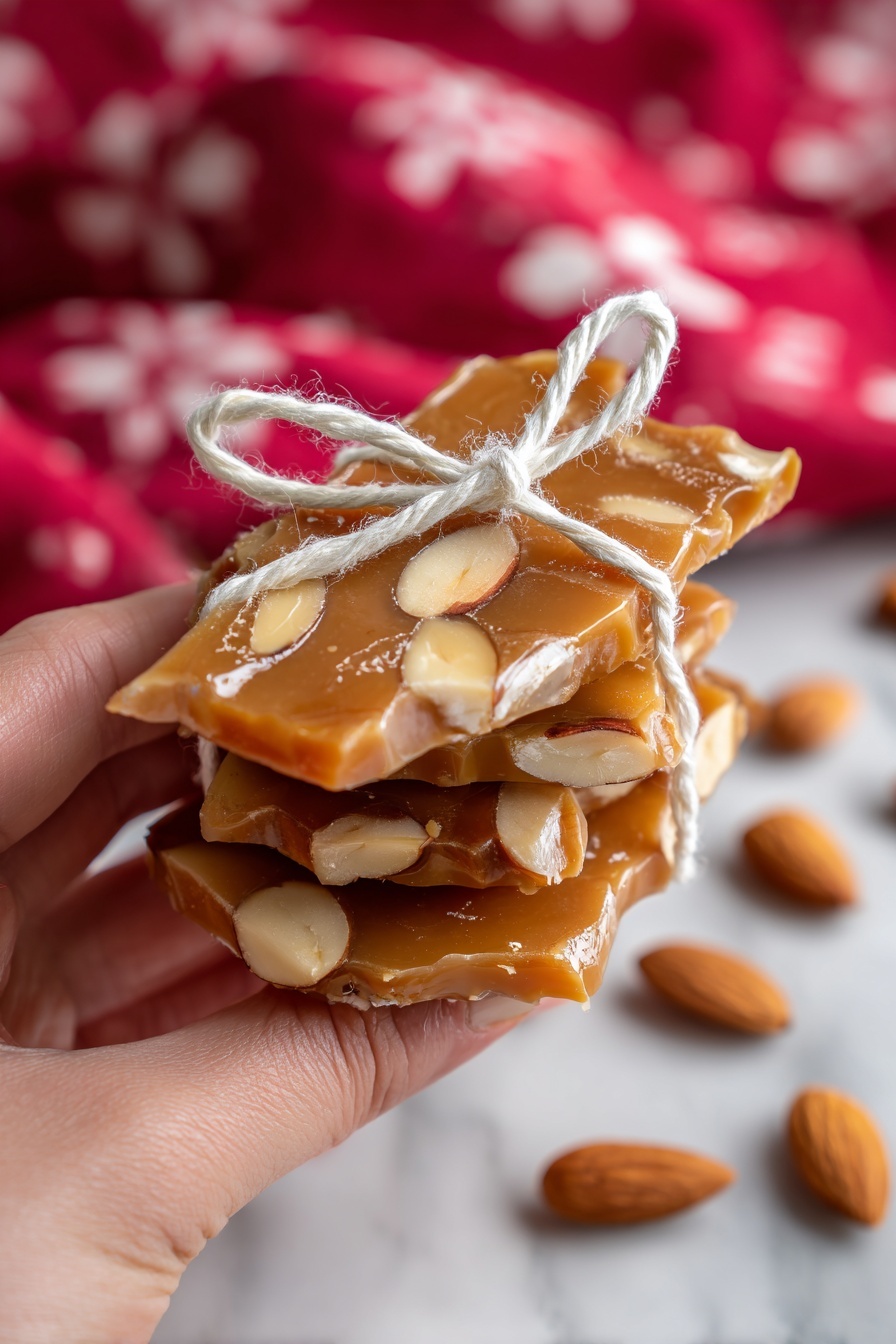
Step 5: Let It Cool and Break Into Pieces
Let your peanut brittle sit at room temperature until completely firm, at least 30 minutes. When ready, use a mallet or simply your hands to break it into shards or chunks. It’s incredibly satisfying to hear those crackles! Now it’s ready to enjoy or gift.
Pro Tips for Making Homemade Peanut Brittle Recipe
- Have All Ingredients Ready: Candy making doesn’t wait—measure and prep before heating anything.
- Use a Reliable Candy Thermometer: I learned the hard way that guessing candy stages leads to disappointing brittle.
- Don’t Over-stir: Stirring too much during the boiling stage causes graininess; a few gentle stirs after peanuts are added is enough.
- Work Quickly When Spreading: The mixture hardens fast, so pouring and pulling should be done immediately for best texture.
How to Serve Homemade Peanut Brittle Recipe
Garnishes
I actually keep it simple with this brittle—those roasted peanuts are the star. But if I’m feeling fancy, I might sprinkle a tiny pinch of flaky sea salt right after spreading while still warm. It brings out the caramel notes beautifully without overpowering.
Side Dishes
This brittle is fantastic on its own, but if you want to pair it, I like serving it with a warm cup of coffee or herbal tea. For parties, it also goes great alongside soft cheeses or fresh fruit platters, offering a sweet crunch contrast.
Creative Ways to Present
I once packaged large shards of peanut brittle in clear cellophane bags tied with festive ribbons for a holiday gift. It was a hit! You can also break the brittle into smaller bite-sized pieces and put them in a decorative jar or tin. Either way, it looks irresistible, and everyone appreciates homemade treats like this.
Make Ahead and Storage
Storing Leftovers
Peanut brittle stays fresh best in an airtight container at room temperature, away from humidity. I usually store mine in a sealed cookie tin or a glass jar with a tight lid. It keeps its crunchiness beautifully for up to two weeks.
Freezing
Freezing peanut brittle isn’t something I often do, but it does freeze well! Just wrap pieces tightly in plastic wrap and place them in an airtight container or freezer bag. When you’re ready to enjoy, just thaw at room temperature. The texture remains crisp and delicious.
Reheating
Since peanut brittle is best served cool and crunchy, I don’t typically reheat it. But if you want to freshen it up after freezing, letting it sit at room temperature for a bit will bring back that perfect crispiness without any extra steps.
FAQs
-
Can I use other nuts besides peanuts in this recipe?
Absolutely! I’ve had great luck using macadamia nuts, almonds, or pecans. Just keep the same quantity, and adjust cooking times slightly if nuts are larger to get that perfect roast.
-
What happens if my brittle turns out grainy?
Graininess usually comes from sugar crystallizing too early. To avoid this, use light corn syrup and don’t stir the sugar mixture once it starts boiling. Make sure your cooking pot is super clean and wipe down any sugar crystals on the sides with a wet pastry brush during cooking.
-
Do I really need a candy thermometer?
While some experienced candy makers eyeball it, I highly recommend a candy thermometer. Hitting the hard crack stage (300-310°F) is crucial to getting snappy brittle, and a thermometer takes the guesswork out.
-
Can I make this recipe without corn syrup?
Corn syrup helps prevent crystallization and gives smooth texture—in its absence, using honey or glucose syrup might work, but the texture could be a bit different. I found that skipping corn syrup sometimes leads to grainy brittle, so I personally stick with it.
-
How do I store peanut brittle to keep it crunchy?
Store peanut brittle in a cool, dry place in an airtight container. Moisture is the enemy—avoid storing it in humid areas like the fridge or near the stove. Proper storage keeps it crunchy for weeks!
Final Thoughts
Making this Homemade Peanut Brittle Recipe has become one of my favorite kitchen traditions because it’s both nostalgic and incredibly rewarding. I love sharing it with friends and family—they always go crazy for the perfect crunch and sweet buttery flavor. If you’re hesitant about candy-making, don’t be—follow the steps, keep a thermometer handy, and you’ll soon have a batch you’re proud of. Trust me, once you make your first batch, you’ll want to make it again and again. So grab your ingredients and get ready for a kitchen treat that’s as fun to make as it is to eat!
Print
Homemade Peanut Brittle Recipe
- Prep Time: 10 mins
- Cook Time: 15 mins
- Total Time: 55 mins
- Yield: 1 pound candy (about 16 servings) 1x
- Category: Candy
- Method: Stovetop
- Cuisine: American
Description
This classic Mom’s Best Peanut Brittle recipe delivers a perfectly crunchy and sweet candy loaded with roasted peanuts. Made by boiling sugar syrup to the hard crack stage and then quickly mixing in butter and baking soda, this peanut brittle is a nostalgic treat perfect for snacking or gifting.
Ingredients
Main Ingredients
- 1 cup white sugar
- ½ cup light corn syrup
- ¼ cup water
- ¼ teaspoon salt
- 1 cup peanuts
- 2 tablespoons unsalted butter
- 1 teaspoon baking soda
Instructions
- Prepare Ingredients and Pan: Measure out all ingredients before starting to cook. Grease a large rimmed baking sheet or line it with a silicone baking mat to prevent sticking, and set aside.
- Make Sugar Syrup: Combine the white sugar, light corn syrup, water, and salt in a heavy 2-quart saucepan set over medium heat. Stir the mixture gently until the sugar completely dissolves and it comes to a boil, which should take about 5 minutes.
- Add Peanuts and Cook to Hard Crack Stage: Stir in the peanuts, attach a candy thermometer to the saucepan, and continue cooking the mixture. Stir occasionally but avoid over-stirring to prevent graining. Cook until the temperature reaches between 300°F and 310°F (150°C to 155°C), the hard crack stage.
- Finish the Brittle Mixture: Remove the saucepan from heat. Quickly stir in the unsalted butter and baking soda. The mixture will foam slightly.
- Pour and Shape: Immediately pour the hot mixture onto the prepared baking sheet. Use two forks quickly to lift and pull the mixture into a roughly 12 by 14-inch rectangle, spreading it evenly.
- Cool and Break: Allow the brittle to cool completely and become firm, which takes at least 30 minutes. Once cooled, use a mallet to break it into bite-sized pieces.
- Serve and Enjoy: Your peanut brittle is ready to enjoy as a sweet crunchy treat or gift to loved ones.
Notes
- Using a silicone baking mat on the baking sheet can help prevent sticking and make it easier to remove the brittle.
- For a unique twist, substitute macadamia nuts for peanuts to create a gourmet version perfect for gift-giving.
- Ensure the mixture reaches the proper hard crack temperature for the correct brittle texture.
- Work quickly when pouring and shaping as the mixture hardens fast.
Nutrition
- Serving Size: 1 piece (about 28g)
- Calories: 150
- Sugar: 20g
- Sodium: 50mg
- Fat: 7g
- Saturated Fat: 3g
- Unsaturated Fat: 4g
- Trans Fat: 0g
- Carbohydrates: 20g
- Fiber: 1g
- Protein: 3g
- Cholesterol: 10mg

Your email address will not be published. Required fields are marked *