

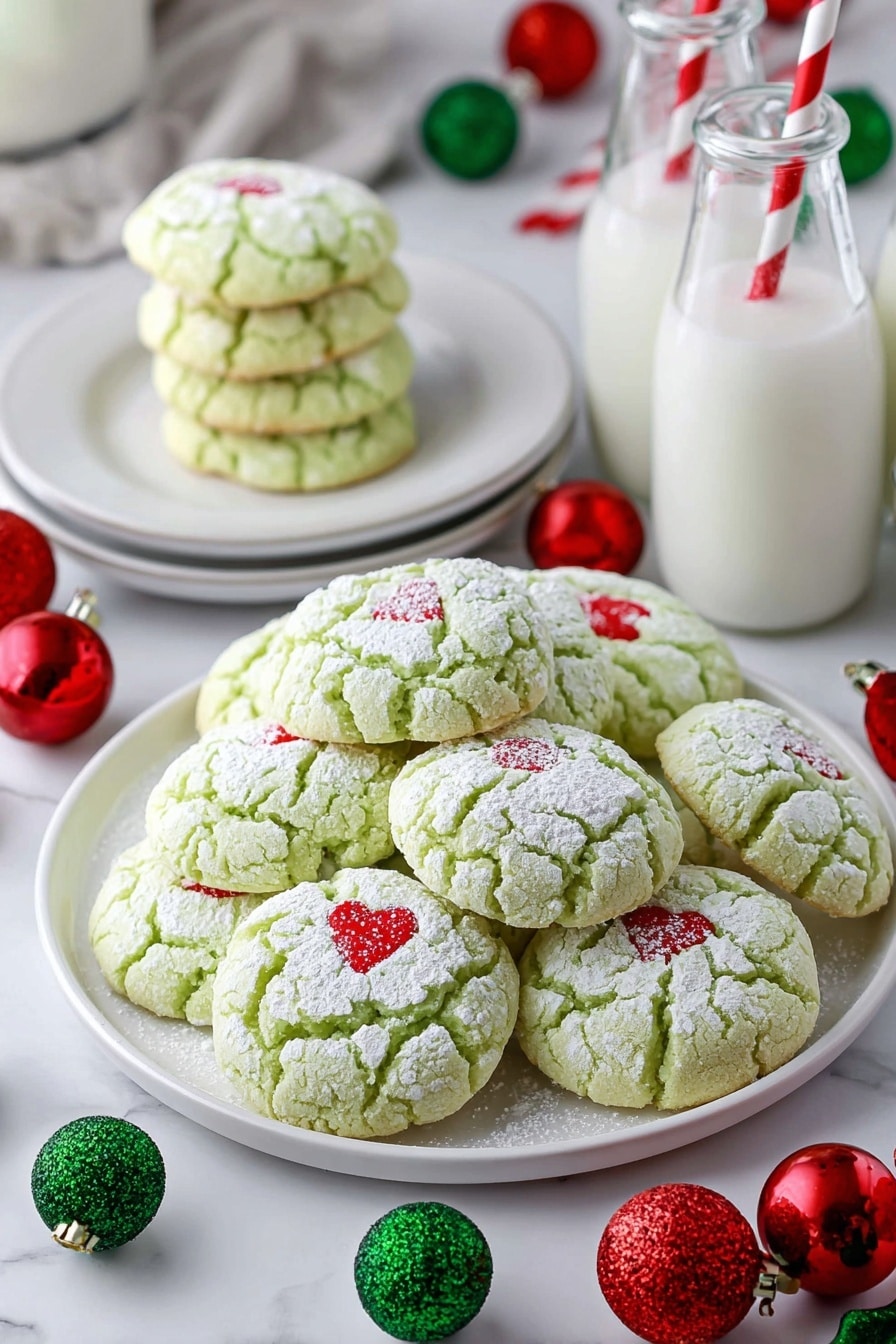
If you’re on the hunt for a festive twist to your cookie game this holiday season, you’re in for a treat! This Grinch Peppermint Cookies Recipe is one of my all-time favorites to whip up when I want something bright, cheerful, and packed with minty, buttery goodness. I absolutely love how these cookies come out soft, slightly chewy, and bursting with that classic peppermint flavor that instantly puts a smile on your face. Trust me, once you make them, you’ll find yourself reaching for these green delights all season long!
Why You’ll Love This Recipe
- Super Easy to Make: Using a white cake mix keeps the cookie dough simple, so no fussing over complex measurements.
- Festive and Fun: The bright green color paired with peppermint just screams Christmas and makes cookie trays pop.
- Soft and Chewy Texture: These cookies aren’t your usual crunchy kind—they stay soft and tender, perfect for dunking in milk.
- Customizable Finish: The heart sprinkles add charm but you can get creative with toppings to fit any occasion.

Ingredients You’ll Need
Pulling the ingredients together for this Grinch Peppermint Cookies Recipe is a breeze, and they all work in harmony to create that perfect balance of flavor and texture. One tip? Use gel food coloring for the brightest green without watering down your dough!
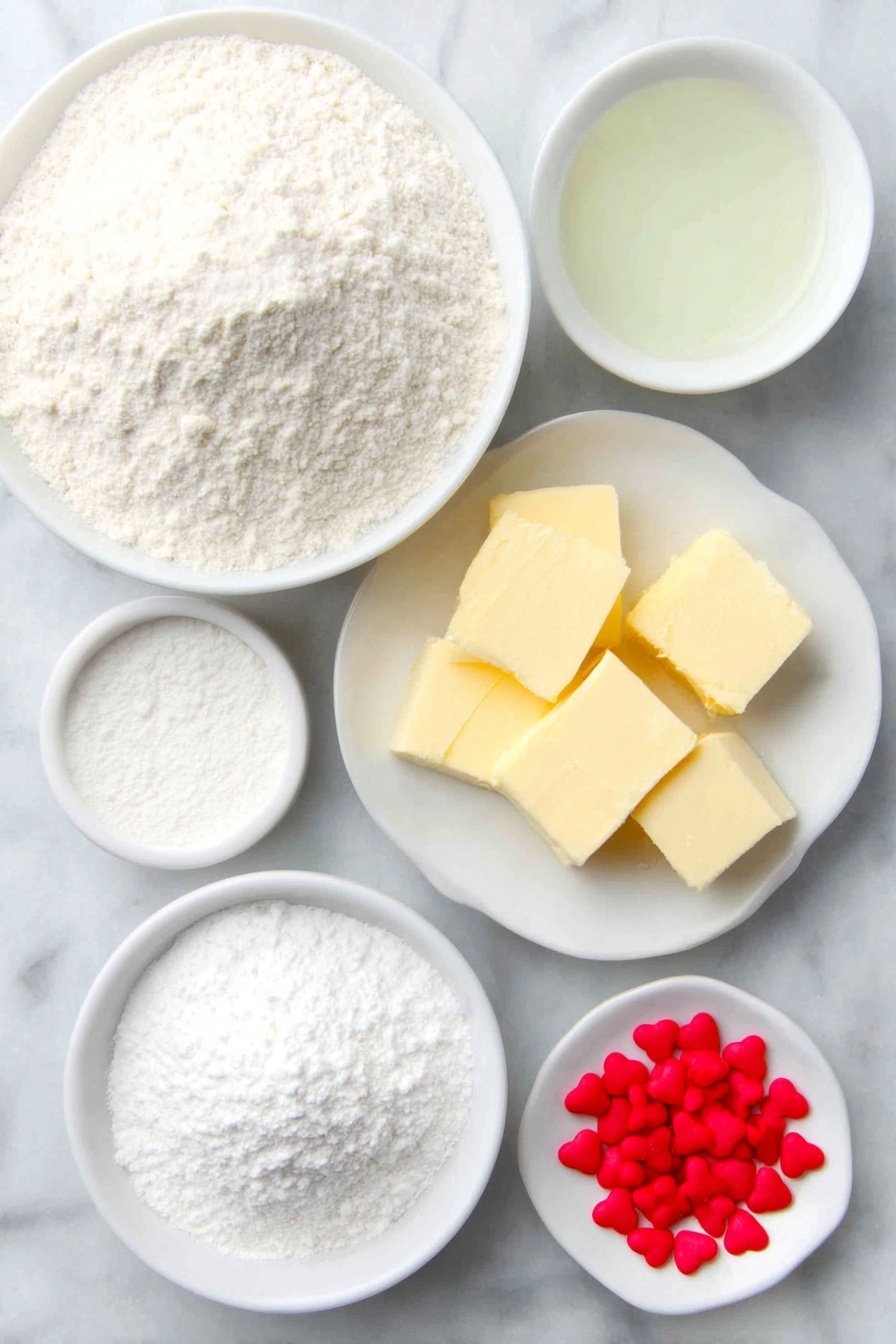
- White cake mix: The base of these cookies, it keeps things simple and adds a tender crumb texture.
- Unsalted butter: Make sure it’s softened to room temperature for easier mixing and rich flavor.
- Large eggs: Room temperature eggs help make the dough smoother and the cookies rise nicely.
- Peppermint extract: The star flavor! I prefer peppermint, but mint extract is a fine substitute.
- Vanilla extract: Just a touch enhances the overall flavor without overpowering the peppermint.
- Green gel food coloring: This is how you get that signature Grinch-green without running into runny batter issues.
- Powdered sugar: For dusting the dough balls—keeps them from sticking and adds a subtle sweetness.
- Cornstarch: Mixed with powdered sugar, it helps prevent the cookie dough from clumping while keeping cookies soft.
- Red heart-shaped sprinkles (or cinnamon hearts): They add that festive pop right on top, making the cookies irresistible.
Variations
I love experimenting with this Grinch Peppermint Cookies Recipe depending on the season or mood. It’s really flexible, so feel free to make it your own—whether you swap out toppings or tweak extracts, it’ll always turn out festive and fabulous.
- Chocolate Drizzle: I once drizzled melted white chocolate on top and it was a total hit—adds a sweet contrast to the mint.
- Valentine’s Day Twist: Replace the green with pink food coloring and use heart-shaped sprinkles for a cute, romantic vibe.
- Gluten-Free Version: Use a gluten-free white cake mix and it works beautifully without sacrificing texture.
- Extra Minty: For peppermint fanatics, try adding a little crushed peppermint candy into the powdered sugar coating.
How to Make Grinch Peppermint Cookies Recipe
Step 1: Mix the Base Ingredients
First things first: preheat your oven to 375°F and line a large baking sheet with parchment paper. Then, grab your mixer (I use my stand mixer) and blend together the white cake mix, softened butter, and eggs until the dough looks well combined. This step is key—you want everything smooth, but the batter will still be thick and sticky, so don’t worry if it feels a little dense.
Step 2: Add Peppermint, Vanilla, and Color
Next, stir in the peppermint and vanilla extracts. Now, here’s where the magic happens: add green gel food coloring bit by bit until you get the perfect Grinch green—you might want a few tablespoons, depending on your shade preference! Mix on low speed just to combine it all evenly without overworking the dough.
Step 3: Prepare the Powdered Sugar Coating
In a small bowl, whisk together powdered sugar and cornstarch. This mixture not only keeps your hands from sticking (trust me, I discovered this the hard way!) but also adds a light sweetness and helps your cookie balls hold their shape while baking.
Step 4: Form and Coat Cookie Dough Balls
Using a 1 ½ tablespoon cookie scoop or a spoon, scoop the sticky dough and roll it gently in the powdered sugar-cornstarch mixture to fully coat. This step takes a little patience because the dough clings, but it’s worth it! Place the coated dough balls about 1 inch apart on your prepared baking sheet so they have room to spread a bit.
Step 5: Bake and Sprinkle
Bake for 10 to 12 minutes. You’ll know they’re ready when the edges are set and the tops look dry but not browned. Right after pulling them out, gently press a red heart-shaped sprinkle or cinnamon heart onto each cookie—this final touch not only makes them festive but adds a sweet surprise in every bite.
Step 6: Cool and Enjoy
Let the cookies cool on the baking sheet for about 5 minutes to firm up, then transfer them to a wire rack to cool completely. This keeps them from getting soggy on the bottom and maintains their soft, chewy texture.
Pro Tips for Making Grinch Peppermint Cookies Recipe
- Use Gel Food Coloring: It gives vibrant color without thinning out your dough, unlike liquid food coloring.
- Don’t Skip the Powdered Sugar-Coating: This step prevents sticky dough buildup and helps maintain cookie shape.
- Add Sprinkles Right Away: Press your heart sprinkles immediately after baking while cookies are still warm so they stick perfectly.
- Watch the Bake Time Closely: Overbaking can dry these soft cookies out, so set a timer and pull them as soon as edges are set.
How to Serve Grinch Peppermint Cookies Recipe
Garnishes
I usually keep it simple with red heart-shaped sprinkles right on top—it gives that perfect pop of color against the green. Sometimes, if I’m feeling fancy, I dust a little powdered sugar for a “snowy” effect or swap out hearts for mini crushed candy canes for an extra minty crunch.
Side Dishes
These cookies go wonderfully with a cozy cup of hot cocoa or peppermint tea. I also love serving them alongside a platter of cheese and fruits at holiday gatherings—it contrasts nicely with the sweetness, balancing out the spread.
Creative Ways to Present
For a festive party, I like to arrange these cookies in a wreath shape on a large platter with fresh holly or sprigs of pine tucked around the edges—it looks stunning and makes the cookies feel even more special. Another fun idea is stacking them with layers of peppermint bark between for an indulgent treat display.
Make Ahead and Storage
Storing Leftovers
I store leftover Grinch Peppermint Cookies in an airtight container at room temperature. They usually stay soft and delicious for up to 4 days, but honestly, they rarely last that long in my house!
Freezing
If I want to make these ahead, I freeze the fully cooled cookies in a zipper bag with parchment paper between layers to prevent sticking. They keep beautifully in the freezer for up to 2 months—perfect for holiday prep!
Reheating
To enjoy frozen cookies, I thaw them overnight in the fridge or at room temperature for a few hours, then warm them for just 10-15 seconds in the microwave or a few minutes in a low oven to revive that fresh-baked softness.
FAQs
-
Can I use regular peppermint extract instead of mint extract?
Absolutely! Peppermint extract is actually my preferred choice because it has that classic candy-cane flavor that really makes these cookies pop. Mint extract is a fine alternative if that’s what you have on hand, but the flavor will be slightly different—still delicious though.
-
Why is my cookie dough sticky and hard to handle?
The dough for this Grinch Peppermint Cookies Recipe is naturally thick and sticky due to the cake mix base and butter. Rolling the dough balls in the powdered sugar and cornstarch mixture keeps it from sticking to your hands and helps the cookies hold their shape while baking. Don’t skip this step!
-
Can I make these cookies gluten-free?
Yes! Using a gluten-free white cake mix works perfectly in this recipe. Just double-check other ingredients like sprinkles for gluten content if that’s a dietary concern for your household.
-
What’s the best way to get the vibrant green color?
Gel food coloring is your best bet because it adds intense color without making the dough too wet. Add it gradually until you reach your desired Grinch-green shade!
-
How long do the cookies stay fresh?
Stored in an airtight container at room temperature, they stay soft and fresh for about 4 days. Beyond that, freezing is a great option to preserve freshness.
Final Thoughts
This Grinch Peppermint Cookies Recipe has become a holiday staple in my kitchen—and I can’t recommend it enough if you want something easy, festive, and irresistibly tasty. They’re so much fun to make and share, especially with kids who adore the bright green color and cute heart sprinkles. If you’re looking for a Christmas cookie that stands out on any dessert table, give these a try—you’ll love how they brighten up the season!
Print
Grinch Peppermint Cookies Recipe
- Prep Time: 15 minutes
- Cook Time: 10 minutes
- Total Time: 25 minutes
- Yield: 30 cookies 1x
- Category: Dessert
- Method: Baking
- Cuisine: American
Description
These festive Grinch Cookies are soft, peppermint-flavored treats with a vibrant green color and a charming red heart on top. Made with white cake mix and infused with peppermint and vanilla extracts, they’re perfect for holiday celebrations or any time you want a fun, minty cookie. The cookies are rolled in a sweet powdered sugar and cornstarch coating before baking, creating a delicate outer texture with a moist interior.
Ingredients
Cookie Dough
- 15.25 ounces (432 g) white cake mix
- 8 tablespoons unsalted butter, softened
- 2 large eggs, room temperature
- 2 teaspoons peppermint extract or mint extract
- ½ teaspoon vanilla extract
- Green gel food coloring, to desired color
Coating
- ¼ cup (32 g) powdered sugar
- 3 tablespoons cornstarch
Topping
- Red heart-shaped sprinkles or cinnamon hearts
Instructions
- Preheat and prepare: Preheat your oven to 375°F (190°C). Line a large baking sheet with parchment paper and set aside for easy cleanup.
- Mix the wet and dry ingredients: In a mixing bowl, use a hand-held or stand mixer to blend together the white cake mix, softened butter, and eggs until thoroughly combined and smooth.
- Add flavor and color: Stir in the peppermint (or mint) extract, vanilla extract, and green gel food coloring. Mix on low speed until just combined; the dough will be thick and sticky.
- Prepare the coating: In a small bowl, whisk together the powdered sugar and cornstarch until well mixed.
- Shape and coat the dough: Using a 1 1/2 tablespoon cookie scoop, portion out dough balls. Roll each ball in the powdered sugar and cornstarch mixture to coat completely. Place the coated dough balls about 1 inch apart on the prepared baking sheet.
- Bake the cookies: Bake for 10 to 12 minutes, or until the edges are set and the tops appear dry.
- Add the heart topping: Immediately after removing the cookies from the oven, press a red heart-shaped sprinkle gently into the center of each cookie so it adheres.
- Cool: Allow the cookies to cool on the baking sheet for 5 minutes, then transfer them to a wire rack to cool completely before serving or storing.
Notes
- Store the cookies in an airtight container at room temperature for up to 4 days.
- To freeze, let cookies cool completely, then place them in an airtight freezer-safe Ziploc bag. Freeze for up to 2 months. Thaw at room temperature or in the fridge overnight.
- If you don’t have red heart sprinkles, cinnamon hearts make a flavorful alternative.
- Leftover Valentine’s Day sprinkles work perfectly for decorating these cookies.
- Using green gel food coloring helps achieve a vibrant color without altering the dough consistency.
Nutrition
- Serving Size: 1 cookie
- Calories: 90
- Sugar: 8g
- Sodium: 110mg
- Fat: 4.5g
- Saturated Fat: 2.7g
- Unsaturated Fat: 1.5g
- Trans Fat: 0g
- Carbohydrates: 12g
- Fiber: 0.3g
- Protein: 1g
- Cholesterol: 20mg

Your email address will not be published. Required fields are marked *