If you’re looking for a show-stopping centerpiece that’s juicy, flavorful, and honestly easier than it sounds, you’re going to want to try this Buttermilk Brined Roast Turkey Recipe. I absolutely love how this turkey turns out every single time—thanks to the tangy buttermilk brine and a touch of hot sauce that gives it the perfect kick. When I first tried this technique, I was shocked at how moist and tender the meat stayed, even after hours in the oven. Stick with me, and I’ll share all my tips so your turkey comes out golden, bursting with flavor, and ready to impress your holiday guests—or just a cozy Sunday dinner!
Why You’ll Love This Recipe
- Effortless Brining: No boiling or cooling your brine—just mix buttermilk and hot sauce, and your turkey is ready to soak up flavor overnight.
- Tender, Juicy Meat: The buttermilk’s acidity gently tenderizes the turkey, giving you moist results every time.
- Flavor Packed: Between the hot sauce kick, butter, and herb stuffing, each bite is bursting with layers of deliciousness.
- Simple to Follow: Even if you’re new to roasting turkeys, the step-by-step method I share will help you nail this recipe stress-free.
Ingredients You’ll Need
These ingredients work beautifully together to infuse your turkey with moisture and just the right amount of savory and tangy flavor. A fresh turkey works best here, and grabbing a good quality buttermilk and a bold seasoning mix really makes a difference.
- Fresh turkey: I recommend a 15-20 pound fresh or fully defrosted turkey for even brining and roasting.
- Buttermilk: This is the secret ingredient that tenderizes and adds richness—don’t substitute!
- Hot sauce: I used Frank’s for that nice tang and mild heat, but feel free to pick your favorite brand.
- Salted butter: Room temperature so it spreads easily and adds beautiful browning and flavor.
- All-purpose seasoning blend: Something like a Creole blend works wonders here for a punch of spices.
- Onion, lemon, orange: These aromatics go in the cavity and infuse the meat with fresh citrus and sweetness.
- Garlic bulb: Adds a lovely mellow garlic flavor without overpowering.
- Fresh thyme, rosemary, sage: The classic herbs that bring that irresistible roast turkey aroma.
Variations
I love how flexible this Buttermilk Brined Roast Turkey Recipe is, so I often tweak it depending on the season or who’s coming over. Feel free to personalize it to your taste or dietary needs—this recipe is forgiving and always delicious!
- Spicy Variation: I once added a teaspoon of smoked paprika and a dash of cayenne to the seasoning blend for an extra smoky, spicy twist that my spice-loving family adored.
- Herb-Only Version: If you want something lighter, just pack the cavity with fresh herbs and skip the hot sauce for a milder, aromatic bird.
- Non-Dairy Version: While I haven’t swapped the buttermilk personally, some friends have experimented with dairy-free kefir—just adjust the acidity carefully.
- Smaller Turkey or Chicken: The brine time can be shortened for smaller birds—around 12 hours—and the roasting time adjusted accordingly.
How to Make Buttermilk Brined Roast Turkey Recipe
Step 1: Prep Your Turkey and Brine
First things first, remove the gizzards and turkey neck from the cavity—don’t throw them away! Save them for gravy or stock if you like. Next, mix the buttermilk and hot sauce in a large brining bag or a stockpot. Place your turkey breast side down in the brine, making sure it’s fully submerged. Pop it in the fridge and let it soak overnight, about 24 hours. This slow soak is the secret to a juicy, flavorful bird—trust me, it’s worth the wait.
Step 2: Season and Roast
After your turkey has soaked, carefully remove it and let most of the brine drip off—but don’t rinse it! Leaving a thin coat of buttermilk helps with tenderness and flavor. Place the turkey on a roasting pan and let it come to room temperature for about 30 minutes. Meanwhile, preheat your oven to 325°F. Now, smear that beautiful salted butter all over the skin—this will help you get golden, crispy skin. Sprinkle your all-purpose seasoning blend generously on top.
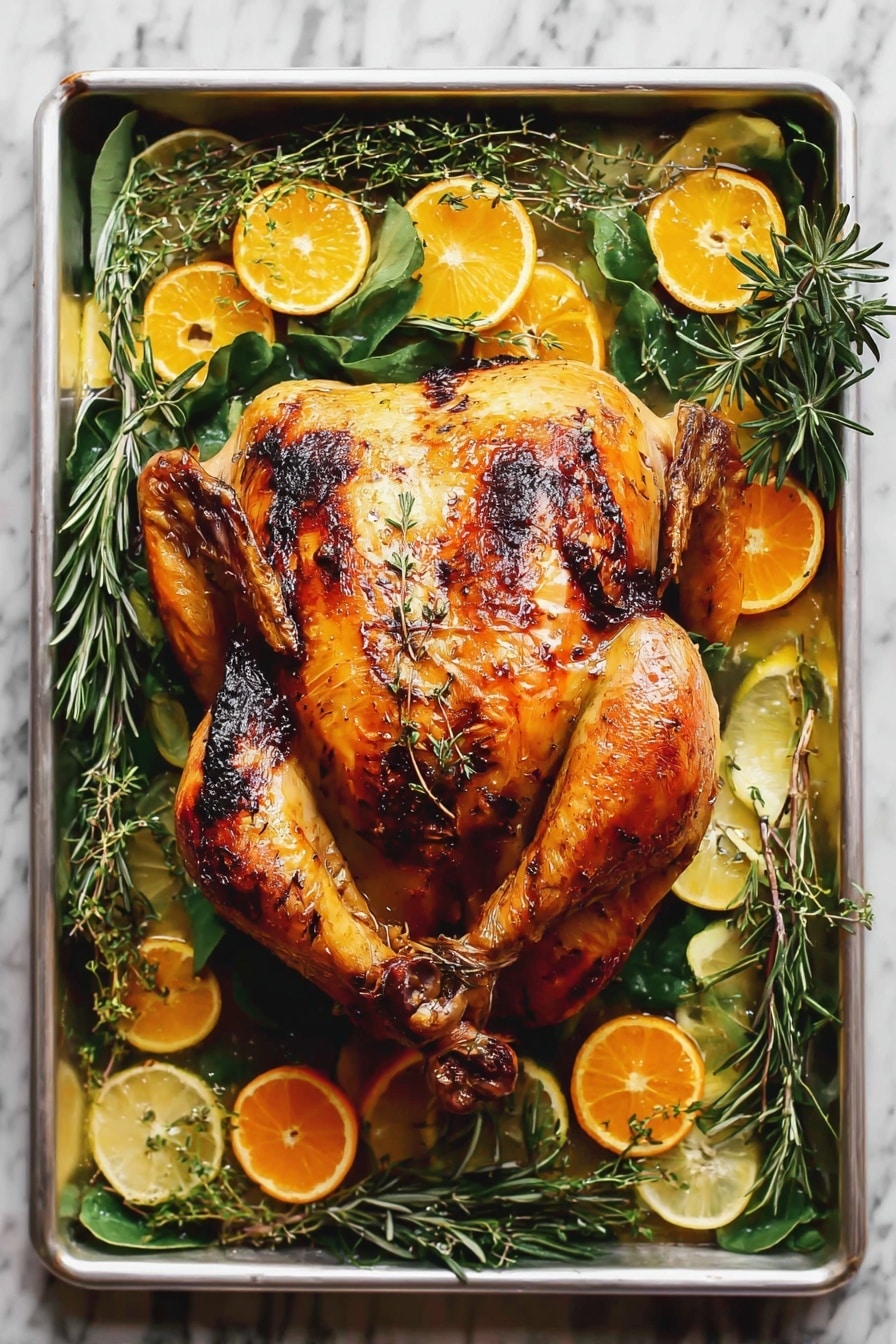
If you’d like, stuff the cavity with onion, lemon, orange, garlic, thyme, rosemary, and sage. This little herb and citrus bouquet adds such wonderful aroma and subtle flavors throughout the roasting process. Pour a bit of water, broth, or wine into the bottom of the roasting pan to catch those delicious drippings (great for making gravy later!).
Step 3: Baking Your Turkey to Perfection
Cover the turkey loosely with foil and bake for 1 hour. After that, remove the foil to let the skin crisp up, and continue roasting for another 2-3 hours. The key here is to monitor the internal temperature—aim for 180°F inserted into the thickest part of the thigh. I use a meat thermometer for accuracy; it really takes the guesswork out. When your turkey hits temperature, take it out and let it rest for about 20 minutes before carving. Resting helps those juices redistribute, so each slice is juicy and tender.
Pro Tips for Making Buttermilk Brined Roast Turkey Recipe
- Patience on Brining: Don’t rush the 24-hour brine; it’s the step that transforms a dry turkey into a juicy, tender delight.
- Room Temp Before Roasting: Letting the turkey lose its chill before roasting ensures even cooking and crispier skin.
- Use a Meat Thermometer: I can’t stress this enough—internal temperature is your best friend to avoid over or undercooking.
- Don’t Skip the Resting: Resting after roasting locks in the juices, making every bite incredibly moist and flavorful.
How to Serve Buttermilk Brined Roast Turkey Recipe

Garnishes
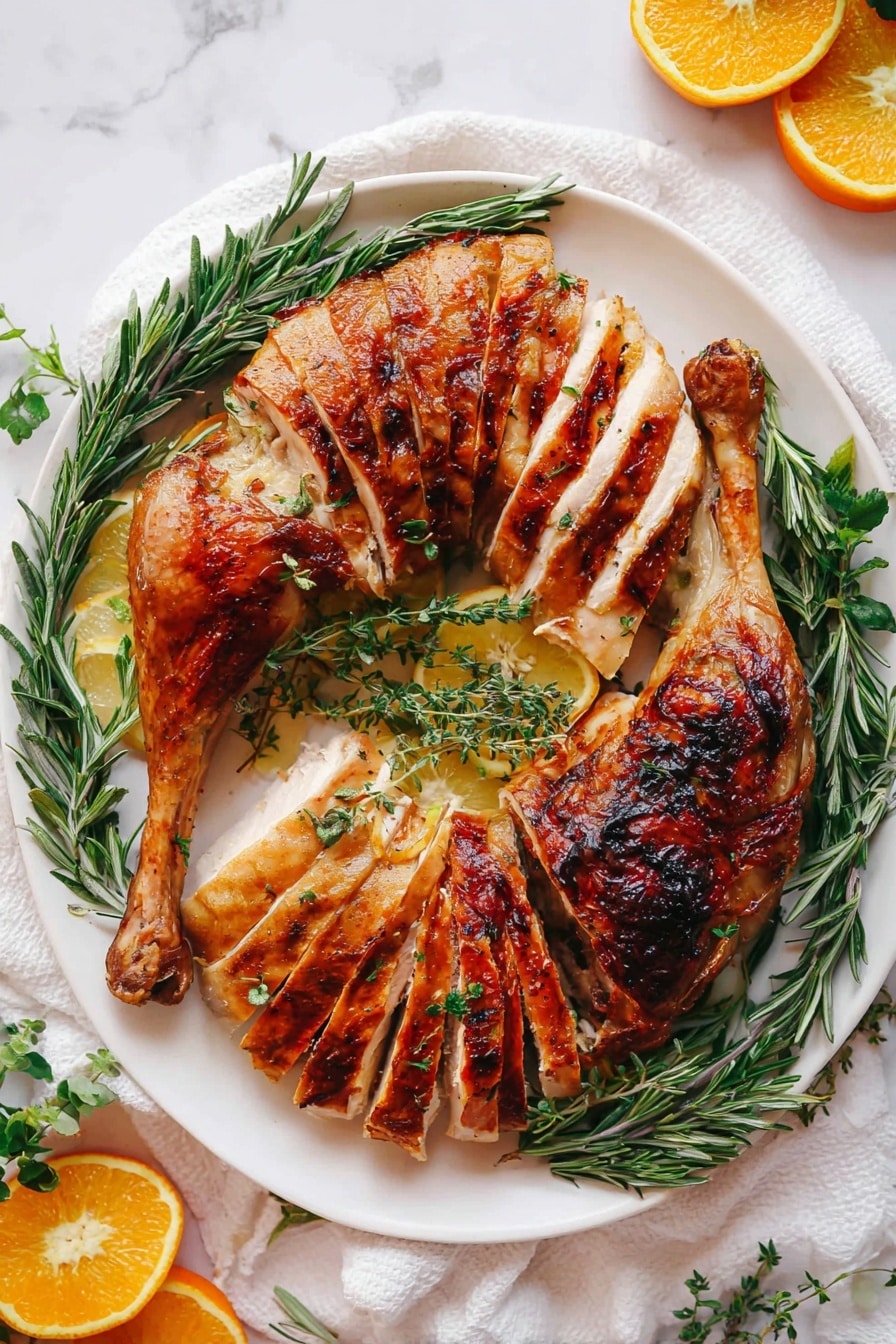
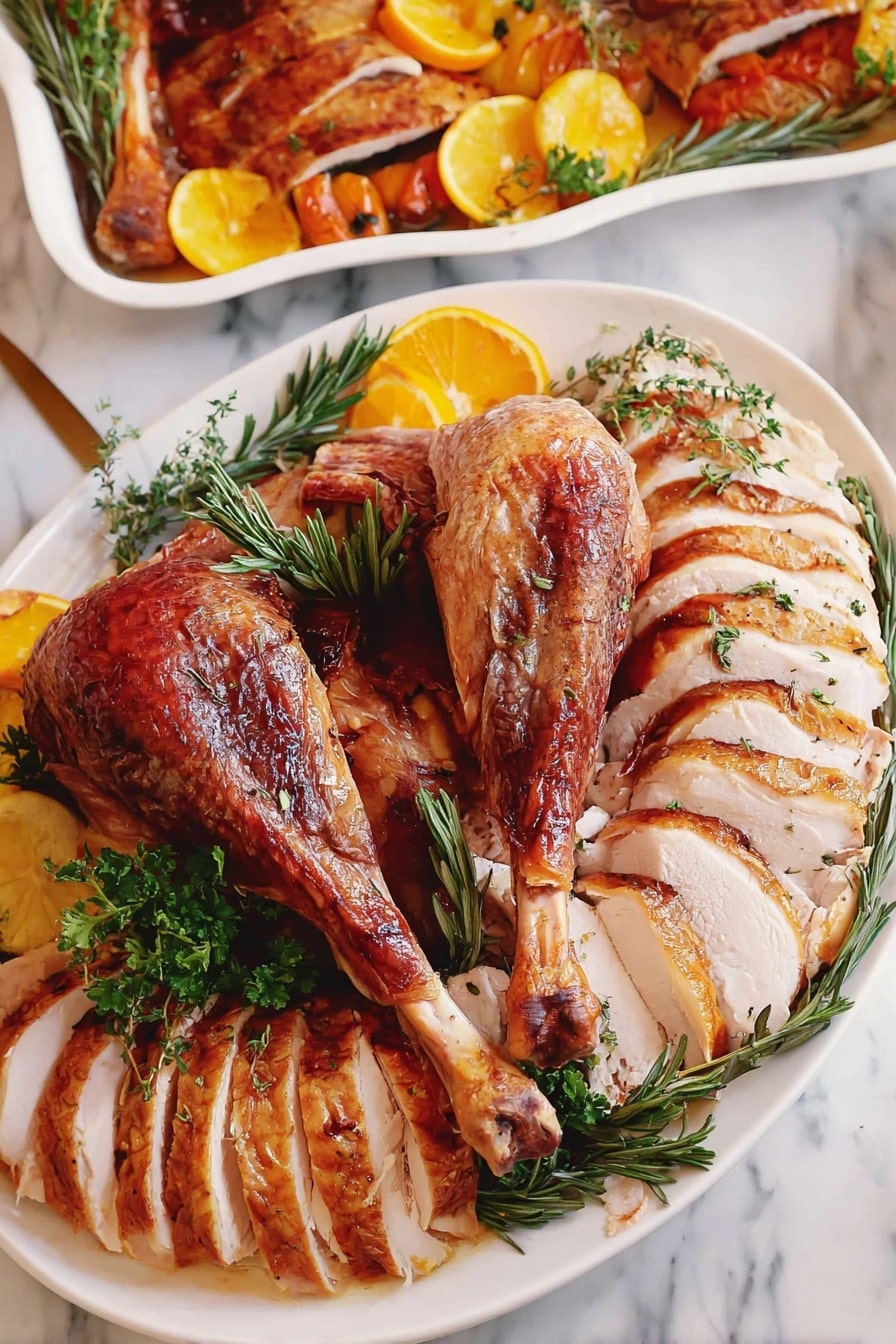
I like to dress up my turkey platter with fresh herb sprigs—rosemary and thyme from the brine work perfectly—and a few slices of roasted citrus fruits. The colors pop and the aroma is inviting. A light drizzle of pan drippings on the carved slices brings everything together beautifully.
Side Dishes
My go-to side dishes for this turkey are creamy mashed potatoes, roasted Brussels sprouts with a balsamic glaze, and a sweet potato casserole with a crunchy pecan topping. These sides balance the tangy richness of the turkey and make the whole meal feel indulgent but balanced.
Creative Ways to Present
For special occasions, I’ve served this turkey rustic-style on a large wooden cutting board with a scattering of fresh herbs and whole garlic cloves. Another fun idea is to arrange the carved slices on a vibrant platter lined with kale or arugula—this adds freshness and a pop of color that guests always comment on!
Make Ahead and Storage
Storing Leftovers
I like to slice leftover turkey and store it in an airtight container in the fridge, separated by parchment paper to keep slices from sticking. It stays fresh for up to 4 days, which means plenty of delicious turkey sandwiches and salads.
Freezing
Freezing works great if you want to save some for later. Just wrap the turkey tightly in plastic wrap and aluminum foil, or use a vacuum sealer. It can keep in the freezer for up to 3 months without losing quality.
Reheating
When reheating, I prefer using a low oven (around 300°F) covered with foil to keep the turkey moist—it usually takes about 20 minutes depending on the amount. You can add a splash of broth to the reheating dish to prevent dryness, and it always tastes nearly as good as freshly roasted.
FAQs
-
Can I use frozen turkey for this buttermilk brine?
It’s best to use a fresh or fully thawed turkey for this recipe. The buttermilk brine needs to penetrate the meat evenly, which can’t happen properly if the bird is still frozen. So plan ahead and allow plenty of time for thawing in the fridge.
-
Why do you use buttermilk instead of a traditional saltwater brine?
Buttermilk adds acidity that tenderizes the turkey more gently, resulting in an incredibly moist and soft texture. Plus, it adds a subtle tang and richness that plain saltwater can’t match. It also eliminates the need to boil a brine, which saves time and makes the process simpler.
-
Can I brine the turkey for less than 24 hours?
While 24 hours gives the best flavor and tenderness, you can brine for 12 hours if you’re short on time. Just know that the turkey may not be quite as flavorful or juicy. I recommend aiming for full 24 hours whenever possible for optimal results.
-
How do I know when the turkey is done?
The most reliable way is using a meat thermometer. Your turkey is cooked through when the internal temperature in the thickest part of the thigh reaches 180°F. This ensures the meat is fully cooked but still juicy.
Final Thoughts
This Buttermilk Brined Roast Turkey Recipe has become my family’s absolute favorite way to enjoy turkey, especially during holidays or big gatherings. It’s straightforward, fuss-free, and delivers a bird that’s juicy, flavorful, and irresistibly golden brown. Honestly, if I only had to recommend one turkey recipe for you to try, this would be it. So go ahead—grab that buttermilk, get your hands on a fresh turkey, and give it a whirl. I promise you’ll be amazed how simple it is to make a turkey that steals the show every time.
Print
Buttermilk Brined Roast Turkey Recipe
- Prep Time: 1440 min
- Cook Time: 240 min
- Total Time: 1680 min
- Yield: 12 servings 1x
- Category: Main Course
- Method: Baking
- Cuisine: American
Description
This Buttermilk Brined Turkey recipe combines a flavorful and tenderizing buttermilk and hot sauce brine with an aromatic herb and citrus stuffing to deliver a moist, juicy turkey with a crispy, seasoned skin. The turkey is brined for 24 hours and then roasted to perfection in the oven, making it an effortless yet impressive centerpiece for any holiday or special occasion.
Ingredients
Turkey and Brine
- 1 15-20 lbs fresh defrosted turkey (such as Jennie-O)
- 1 gallon buttermilk
- 1/2 cup hot sauce (such as Frank’s)
Seasoning and Aromatics
- 1 stick salted butter (room temperature)
- 2 tbsp your favorite all purpose seasoning (such as a Creole blend)
- 1 onion
- 1 lemon
- 1 orange
- 1 bulb garlic
- 2 sprigs fresh thyme
- 2 sprigs fresh rosemary
- 2 sprigs fresh sage
Additional
- Water, broth, or wine (to fill the bottom of roasting pan)
Instructions
- Prepare the Turkey: Remove the gizzards and turkey neck from the cavity and set aside for later use or discard.
- Make the Brine: In a large brining bag or stockpot, combine the buttermilk and hot sauce. Add the turkey breast side down, ensuring it is fully submerged. Cover and refrigerate for 24 hours to allow the flavors to penetrate and tenderize the meat.
- Preheat Oven and Prep Turkey: After brining, remove the turkey from the brine and wipe off excess liquid, leaving a thin coat of buttermilk on the surface. Place the turkey on a roasting pan and let it come to room temperature while you preheat your oven to 325°F (163°C).
- Season the Turkey: Smear the softened salted butter all over the turkey’s skin, then evenly sprinkle your favorite all-purpose seasoning blend over it to create a flavorful crust.
- Stuff the Cavity: Optionally stuff the turkey’s cavity with the onion (quartered), lemon (halved), orange (halved), garlic bulb (halved horizontally), and fresh herb sprigs (thyme, rosemary, sage) to infuse aromatic flavor during roasting.
- Prepare Roasting Pan: Pour water, broth, or wine into the bottom of the roasting pan to catch drippings and prevent burning during cooking.
- Roast Covered: Loosely cover the turkey with aluminum foil and place it in the preheated oven. Bake for 1 hour to start cooking evenly without over-browning.
- Continue Roasting Uncovered: Remove the foil and continue roasting the turkey for an additional 2 to 3 hours. Roast until the internal temperature reaches 180°F (82°C) when measured in the thickest part of the thigh, ensuring the turkey is fully cooked.
- Rest the Turkey: Remove the turkey from the oven and let it rest for 20 minutes before carving. This rest period allows the juices to redistribute, resulting in moist, tender meat.
Notes
- This buttermilk brined turkey recipe is the easiest way to brine a turkey, saving time and effort while producing moist, flavorful, and beautiful results.
- The use of buttermilk and hot sauce enhances both tenderness and flavor without the need to boil or cool the brine.
- You can use any favorite seasoning blend; a Creole blend adds a nice depth of flavor.
- Resting the turkey after roasting is crucial to keep the meat juicy.
- Ensure the turkey is completely defrosted before starting the brine for best results.
Nutrition
- Serving Size: 1 slice (approx. 6 oz cooked turkey)
- Calories: 350 kcal
- Sugar: 1 g
- Sodium: 600 mg
- Fat: 18 g
- Saturated Fat: 7 g
- Unsaturated Fat: 9 g
- Trans Fat: 0 g
- Carbohydrates: 2 g
- Fiber: 0.5 g
- Protein: 38 g
- Cholesterol: 125 mg


