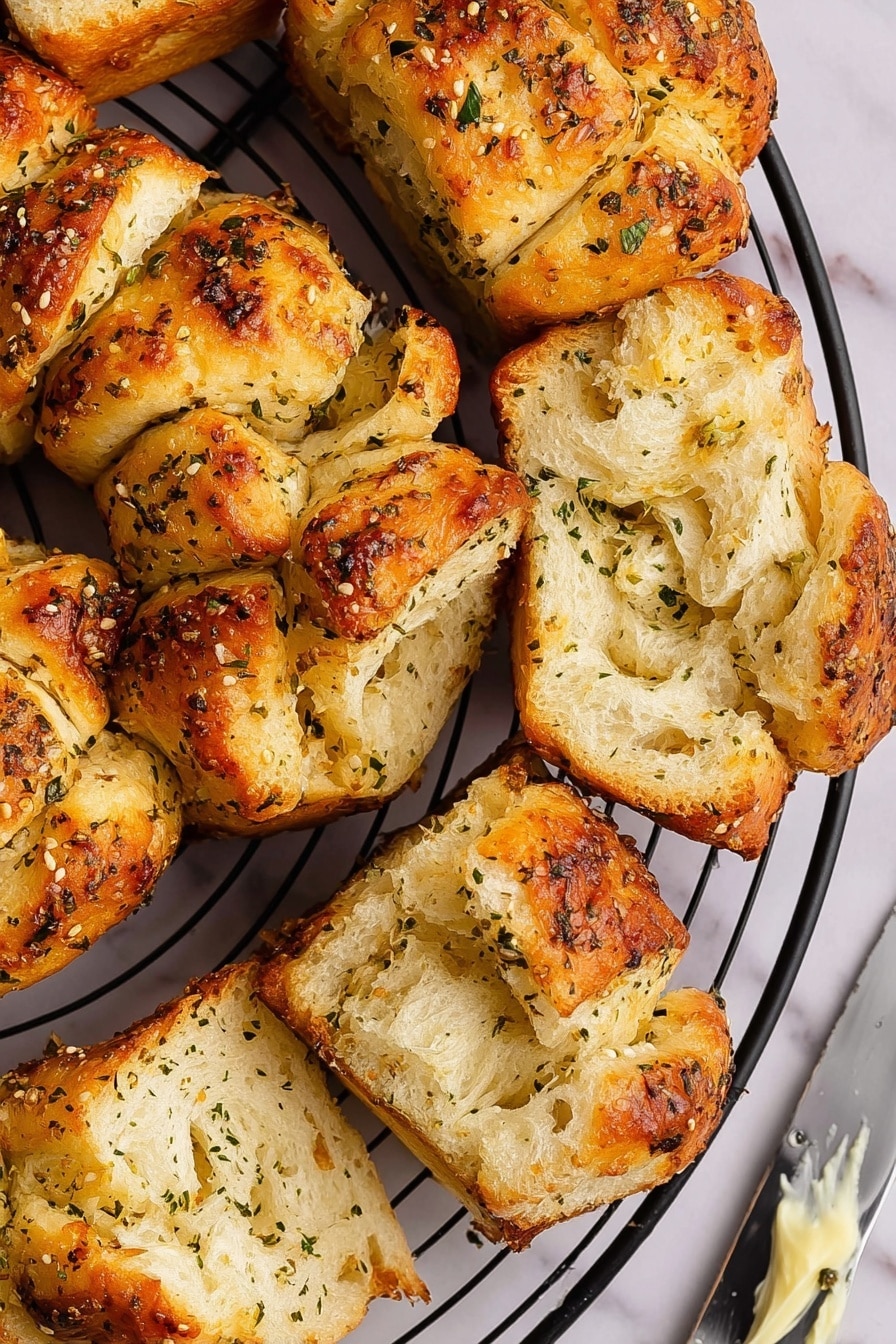
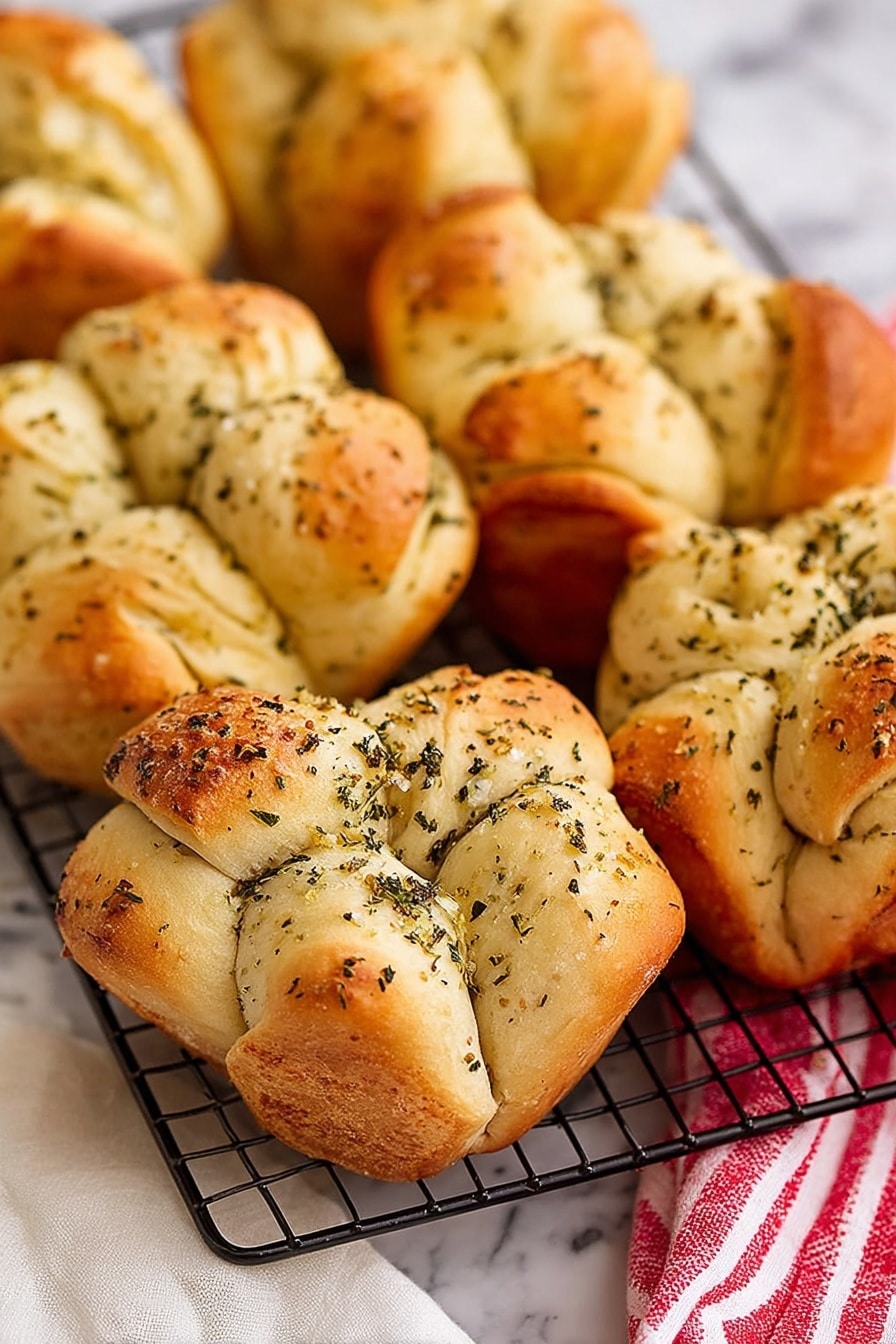
If you’re anything like me, you know that sometimes you just want a super tasty, flaky bread treat without fussing over kneading or hours of rising time. That’s why I absolutely love this Garlic Herb Pull-Apart Rolls Recipe—it’s quick, effortless, and downright addictive. Picture buttery, garlicky bites of savory goodness that pull apart easily, perfect for dunking in soups or serving alongside your favorite meal. Trust me, once you try this, you’ll keep coming back for more!
Why You’ll Love This Recipe
- Speedy & Simple: Uses refrigerated biscuit dough to cut prep time dramatically, but tastes homemade.
- Flavorful Garlic-Herb Blend: A powerful combo of Italian seasoning, basil, and garlic powder makes every bite bursting with savory goodness.
- Perfectly Pull-Apart: Easy to serve and share, these rolls bring everyone to the table faster.
- Kid-Friendly Crowd Pleaser: My family goes crazy over this recipe—never a crumb left!
Ingredients You’ll Need
I like how the flavors here are simple yet so complementary—you don’t need fancy or fresh herbs to get that aromatic punch. Plus, the refrigerated biscuit dough keeps things super easy when you’re short on time!
- Refrigerated biscuit dough: Pick flaky layers style for the best tenderness and pull-apart texture.
- Unsalted butter: Melt it just right to coat every piece and build richness without excess saltiness.
- Salt: Just the right amount to balance the butter and herbs and bring out all the flavors.
- Dried Italian seasoning: A handy mix of oregano, thyme, rosemary, and more adds depth quickly.
- Dried basil: Adds a sweet herbaceous note to complement the garlic and Italian seasoning.
- Garlic powder: The secret weapon here; it gives that garlicky jolt without overpowering.
Variations
One of the things I love about this Garlic Herb Pull-Apart Rolls Recipe is how easy it is to tweak to your liking. Whether you’re into adding cheese, swapping herbs, or making it gluten-free, you can personalize this recipe without losing its magic.
- Cheesy twist: I add shredded mozzarella or parmesan right into the butter mixture some days—makes the rolls extra gooey and irresistible.
- Spicy kick: Toss in a pinch of red pepper flakes to the garlic herb mix for a subtle heat that wakes up the palate.
- Fresh herbs: If you have fresh basil or parsley on hand, chop and sprinkle over the rolls right after baking for a burst of fresh color and flavor.
- Gluten-free option: Use gluten-free biscuit dough if you can find it—I’ve had good success with some brands that keep the pull-apart texture intact.
How to Make Garlic Herb Pull-Apart Rolls Recipe
Step 1: Prep Your Oven and Dough
Start by preheating your oven to 350°F (175°C). While it’s warming up, open up that can of flaky layers refrigerated biscuit dough. Separate each biscuit and then cut them into quarters—you want bite-sized pieces that are perfect for pulling apart once baked. I usually toss them into a large bowl at this stage so they’re ready for the next step.
Step 2: Mix the Garlic Herb Butter
In a small bowl, whisk together your melted butter, salt, dried Italian seasoning, dried basil, and garlic powder. This mix is where all the flavor magic happens—I like to make sure the butter is warm enough to melt the herbs in slightly but not so hot that it cooks them. This way, the aromas really come alive and evenly coat every biscuit piece.
Step 3: Coat the Biscuit Pieces
Pour the garlic herb butter over the bowl of biscuit quarters and gently stir until every piece is well coated. You’ll notice the buttery mixture clings to the biscuits, promising that beautiful golden finish after baking. This is a perfect time to really get your hands in there—just be gentle so you don’t smash the dough.
Step 4: Fill the Muffin Tin and Bake
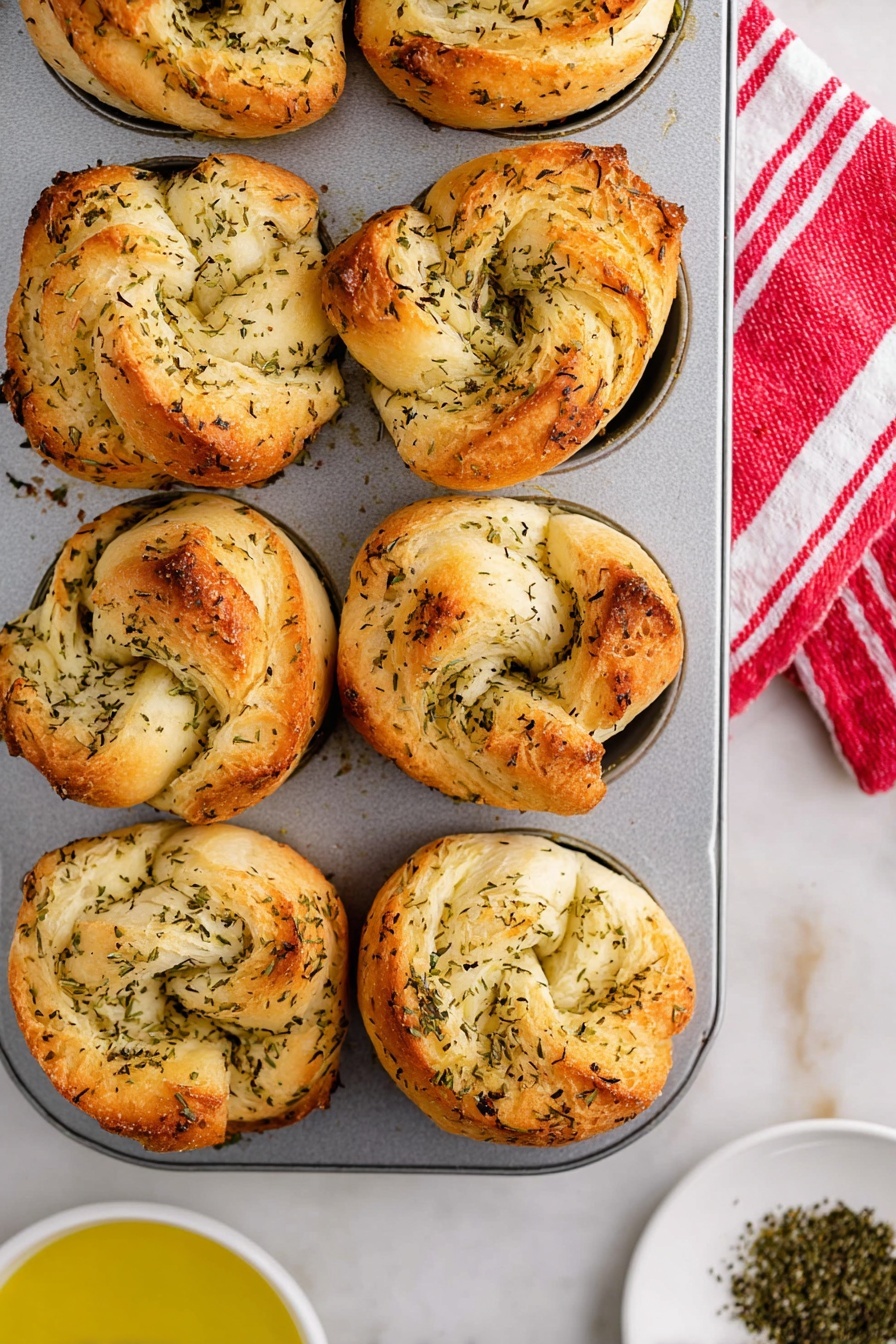
Divide the coated biscuit pieces evenly into six wells of a muffin tin. Spreading them out nicely helps them cook evenly and pull apart effortlessly. Pop the tin in your preheated oven and bake for 16 to 18 minutes until the tops are golden brown and the inside is fully cooked. When you take them out, let them cool for about 5 minutes—that little rest time helps the rolls set up just right before you dig in.
Pro Tips for Making Garlic Herb Pull-Apart Rolls Recipe
- Use Flaky Layers Dough: I learned this trick after trying several varieties—flaky layers dough never disappoints in producing soft, tender pull-apart rolls.
- Don’t Skip the Coat: Make sure every biscuit piece is thoroughly coated with the garlic herb butter for consistent flavor and a gorgeous golden finish.
- Timing is Key: Watch the baking time closely; a minute or two over can make the rolls a bit too firm, so go for that perfect golden soft look.
- Allow to Rest Before Serving: Letting the rolls cool for a few minutes in the tin helps them pull apart more easily and prevents burning your fingers.
How to Serve Garlic Herb Pull-Apart Rolls Recipe

Garnishes
I love to sprinkle a little extra dried parsley or even some finely grated parmesan right on top of the rolls as soon as they come out of the oven. It adds a fresh color pop and boosts the savory flavors without overpowering that buttery-herb goodness.
Side Dishes
These pull-apart rolls pair beautifully with soups (tomato basil and creamy chicken noodle are my favorites), hearty salads, or even alongside pasta dishes like spaghetti or lasagna. My family especially loves these rolls at holiday dinners to sop up all the gravy and sauces!
Creative Ways to Present
For special occasions, I like to bake the biscuit pieces in a bundt pan to get a fun, round loaf of pull-apart rolls that’s perfect for sharing. You can also drizzle a little melted garlic butter over the top right before serving for an extra indulgent touch guests will love.
Make Ahead and Storage
Storing Leftovers
After they cool completely, I store any leftovers in an airtight container at room temperature, and they stay soft and delicious for a day or two. If you want to extend the life, refrigeration is fine but may dry them out a bit, so warming is important before eating.
Freezing
I’ve frozen these rolls successfully by placing them in freezer-safe bags once cooled. When you want to enjoy them later, just thaw at room temperature and warm gently in the oven—it almost tastes like fresh-baked again, which is fantastic for planning ahead.
Reheating
To reheat, I unwrap the rolls and warm them in a 300°F oven for about 5-7 minutes until soft and warm all the way through. If you want to reintroduce a bit of that garlic butter flavor, brushing a little melted butter on top before warming works wonders.
FAQs
-
Can I make this Garlic Herb Pull-Apart Rolls Recipe from scratch without biscuit dough?
Absolutely! While the shortcut version uses refrigerated biscuit dough for convenience, you can make a similar pull-apart roll dough from scratch using basic bread ingredients—flour, yeast, water, butter, and the garlic herb seasonings. Just allow adequate rising time, and you’ll get delicious homemade rolls that pull apart just as well.
-
Can I use fresh herbs instead of dried in this recipe?
Yes! Fresh herbs like basil, parsley, or thyme can add a wonderful bright flavor. Use about three times the amount of fresh herbs compared to dried since fresh herbs are less concentrated. I usually sprinkle fresh herbs on top after baking rather than mixing them in, to maintain their vibrant flavor.
-
How can I make these rolls vegan?
Try using a vegan biscuit dough if you can find one, and substitute the unsalted butter with a plant-based margarine or coconut oil. Make sure any seasoning blends you use don’t contain animal products. The recipe stays just as flavorful with these swaps!
-
What’s the best way to serve these rolls warm?
I recommend serving these rolls fresh from the oven or warmed slightly if previously cooled. Wrapping them in a kitchen towel keeps them soft, and serving with softened butter or extra garlic herb butter on the side delights everyone at the table.
Final Thoughts
This Garlic Herb Pull-Apart Rolls Recipe quickly became one of my go-to comfort food staples because it’s just so easy to make and always impresses. I love how it hits that perfect balance of buttery, garlicky, and herbaceous, plus it’s fun to share around the table. Give it a try—you won’t believe how fast these rolls disappear once you serve them, and I’m sure it’ll become a favorite in your home, just like it is in mine!
Print
Garlic Herb Pull-Apart Rolls Recipe
- Prep Time: 10 minutes
- Cook Time: 18 minutes
- Total Time: 28 minutes
- Yield: 6 rolls 1x
- Category: Bread
- Method: Baking
- Cuisine: American
- Diet: Vegetarian
Description
These Shortcut Garlic Herb Pull-Apart Rolls are a quick and easy way to enjoy warm, buttery rolls infused with Italian herbs and garlic. Using flaky refrigerated biscuit dough, these rolls come together in under 30 minutes, perfect for a flavorful side dish or snack.
Ingredients
Main Ingredients
- 1 (16.3-ounce) can flaky layers refrigerated biscuit dough
- 1/4 cup unsalted butter (melted)
- 1/2 teaspoon salt
- 1 teaspoon dried Italian seasoning
- 1 teaspoon dried basil
- 1 teaspoon garlic powder
Instructions
- Preheat Oven: Preheat your oven to 350°F (175°C) to prepare for baking the rolls.
- Prepare Biscuit Dough: Open the can of biscuit dough and separate each biscuit. Cut each biscuit into quarters and place all the pieces into a large mixing bowl.
- Make Herb Butter Mixture: In a small bowl, combine the melted butter, salt, dried Italian seasoning, dried basil, and garlic powder. Stir well to create an evenly mixed herb butter.
- Coat Dough Pieces: Pour the herb butter mixture over the biscuit pieces in the large bowl. Toss and stir gently to ensure all pieces are evenly coated with the flavorful butter blend.
- Fill Muffin Tin: Evenly divide the coated biscuit pieces into 6 wells of a muffin tin, allowing room for the dough to rise and bake.
- Bake: Place the muffin tin in the preheated oven and bake for 16 to 18 minutes, or until the rolls are golden brown and cooked through.
- Cool and Serve: Allow the rolls to cool in the pan for about 5 minutes before carefully removing. Serve the pull-apart rolls warm to enjoy their soft, buttery, and aromatic qualities.
Notes
- For extra garlic flavor, add a pinch of fresh minced garlic to the butter mixture.
- You can sprinkle some grated Parmesan cheese over the rolls before baking for a cheesy twist.
- If you want crispier edges, bake a couple of minutes longer but watch carefully to prevent burning.
- These rolls are best served fresh but can be reheated in the oven for a few minutes to regain softness.
Nutrition
- Serving Size: 1 roll
- Calories: 241
- Sugar: 5 g
- Sodium: 665 mg
- Fat: 14 g
- Saturated Fat: 7 g
- Unsaturated Fat: 2.3 g
- Trans Fat: 0.3 g
- Carbohydrates: 27 g
- Fiber: 0.3 g
- Protein: 4 g
- Cholesterol: 20 mg


