
If you love the cozy flavors of fall and crave something that feels both classic and a little bit special, you’re going to flip for this Caramel Apple Cheesecake Recipe. I absolutely love how the sweet caramel and tart apples come together with creamy cheesecake—it’s like a warm hug in dessert form! Whether you’re thinking about a holiday treat or just want to impress your next dinner guests, this recipe is fan-freaking-tastic and totally doable.
Why You’ll Love This Recipe
- Perfect balance of flavors: The blend of tart apples, gooey caramel, and creamy cheesecake is simply irresistible.
- Family-friendly crowd-pleaser: I discovered this trick when I needed a dessert everyone adored, from picky kids to dessert-savvy adults.
- Easy steps, stunning result: You don’t have to be a pro baker to nail this, and I share all the practical tips you need.
- Make-ahead friendly: You can prep the cheesecake base in advance, making party day less stressful.

Ingredients You’ll Need
This Caramel Apple Cheesecake Recipe uses wholesome ingredients that work beautifully together—the kind you’ll want to keep on hand for fall baking and beyond. Choosing fresh apples and quality cream cheese really makes a difference in the final taste.
- Apples: I like Granny Smith for tartness that contrasts the sweet caramel, but Honeycrisp works great too.
- Cream cheese: Full-fat for the creamiest, dreamiest cheesecake texture.
- Caramel sauce: Homemade if you’re up for it, but a high-quality store-bought version saves time.
- Sugar: A mix of granulated and brown sugar enhances the flavor depth in the filling.
- Vanilla extract: Pure vanilla is a must here for that warm, comforting base note.
- Eggs: Room temperature eggs whip in easier and help your cheesecake set perfectly.
- Pie crust: Use your favorite recipe or store-bought pie dough; I’ll share tips for both!
Variations
One of the things I love about this Caramel Apple Cheesecake Recipe is how easy it is to make it your own. I sometimes swap apples for pears or add a sprinkle of chopped toasted pecans on top for an extra little crunch.
- Variation: For a gluten-free version, just swap the pie crust for a gluten-free variety or make a nut-based crust—I’ve tried it and it’s delicious.
- Variation: Add a splash of cinnamon or pumpkin pie spice to the cheesecake batter for a deeper fall vibe.
- Variation: Drizzle with salted caramel sauce right before serving for a luxurious touch.
How to Make Caramel Apple Cheesecake Recipe
Step 1: Prepare Your Crust
I recommend making your pie crust or unwrapping that store-bought dough first. Roll it out to about 12 inches, then carefully fit it into your springform pan or pie dish. Using your fingers, press it gently up the sides; don’t worry if it’s a bit uneven—that adds character! Chill the crust in the fridge for at least 30 minutes. This helps it stay firm and prevents shrinking during baking.
Step 2: Mix the Cheesecake Filling
In your mixing bowl, beat softened cream cheese until smooth and creamy—no lumps! That step is key for silky texture. Then add sugar, eggs, vanilla, and a pinch of salt. I like to scrape the bowl a few times to make sure everything’s fully incorporated. Once your filling is perfectly smooth, set it aside while you prep the apples.
Step 3: Prepare the Caramel Apple Topping
Peel and dice your apples small—about half-inch chunks work great so they spread evenly without weighing down the cheesecake. Warm your caramel sauce gently and toss the apples with it. This coats every bite and adds such a rich, sweet note. Let the mixture cool so the apples don’t get too soft before baking.
Step 4: Assemble and Bake
Pour the cheesecake filling evenly over your chilled crust, then spoon the caramel apple mixture on top. I like to gently push some pieces into the batter so every slice has plenty of apples. Bake at 325°F (163°C) for about 50-60 minutes. The center should still wobble slightly when you shake the pan—that’s perfect! After baking, cool the cheesecake to room temperature, then chill in the fridge for at least 4 hours or overnight.
Pro Tips for Making Caramel Apple Cheesecake Recipe
- Use room temp ingredients: I learned this makes a smoother batter and helps everything blend beautifully without lumps.
- Don’t overbake: I can’t tell you how many times I baked mine too long—the wobble in the center is your friend!
- Chill thoroughly: Overnight chilling improves texture and flavor, let it be your patience reward.
- Caramel temperature: Cool warm caramel apples before adding to batter to prevent soggy spots.
How to Serve Caramel Apple Cheesecake Recipe
Garnishes
I love topping mine with a sprinkle of chopped toasted pecans and an extra drizzle of caramel drizzle just before serving. A dollop of whipped cream adds a light, airy contrast I find irresistible. If you want a little extra flair, a pinch of flaky sea salt on top really elevates the flavors.
Side Dishes
This cheesecake pairs beautifully with a warm cup of spiced apple cider or your favorite hot tea. For a hosted event, I’ve also served it alongside cinnamon spiced nuts or a light fresh fruit salad to balance the richness.
Creative Ways to Present
I once experimented by making these into individual mini cheesecakes in muffin tins for a party—super cute and wildly popular! You could also add caramel apple slices fanned on each piece or place a sprinkle of edible gold leaf for an elegant holiday centerpiece.
Make Ahead and Storage
Storing Leftovers
I store leftover cheesecake tightly covered in the refrigerator. It keeps its flavor and texture beautifully for up to 4 days. I’ve found that keeping it in the coldest part of the fridge makes a real difference in quality.
Freezing
This recipe freezes well if you wrap each slice individually in plastic wrap and then foil. When I’ve made an extra batch, freezing helps it stay fresh for up to 2 months, and I usually let slices thaw in the fridge overnight before serving.
Reheating
I generally prefer cheesecake cold, but if you want a warm slice, I recommend using the microwave for just 15–20 seconds—any longer and it starts to melt. Trust me, a quick warm-up enhances that gooey caramel feel.
FAQs
-
Can I use any type of apple for this recipe?
Absolutely! I usually recommend tart varieties like Granny Smith to balance the sweetness, but sweeter apples like Honeycrisp or Fuji work well if you prefer a milder flavor. Just make sure the apples are firm and fresh for the best texture.
-
Can I make this caramel from scratch?
Yes, you can make your own caramel sauce with sugar, butter, and cream for the freshest flavor. That said, a high-quality store-bought caramel works perfectly and saves time—whichever suits your kitchen pace!
-
How do I prevent the crust from getting soggy?
Chilling the crust before adding the filling and then pre-baking it for 10 minutes makes a big difference. This sets a barrier so the crust stays crisp even with the moist apple and caramel topping.
-
Can I make this cheesecake in advance?
Definitely! I actually recommend making it a day ahead so the flavors have time to meld and the texture firms up. Just keep it refrigerated and covered tightly until serving.
Final Thoughts
I can’t tell you how many times this Caramel Apple Cheesecake Recipe has been requested by my family and friends—it’s truly become a staple in my kitchen for fall and holiday celebrations. It’s one of those desserts that’s comforting, elegant, and surprisingly easy to make when you follow some simple tips. Give it a try the next time you want to treat yourself or impress a crowd—I promise it won’t disappoint!
Print
Caramel Apple Cheesecake Recipe
- Prep Time: 2 hr 40 min
- Cook Time: 18 min
- Total Time: 3 hr
- Yield: 24 mini pecan pies 1x
- Category: Dessert
- Method: Baking
- Cuisine: American
- Diet: Vegetarian
Description
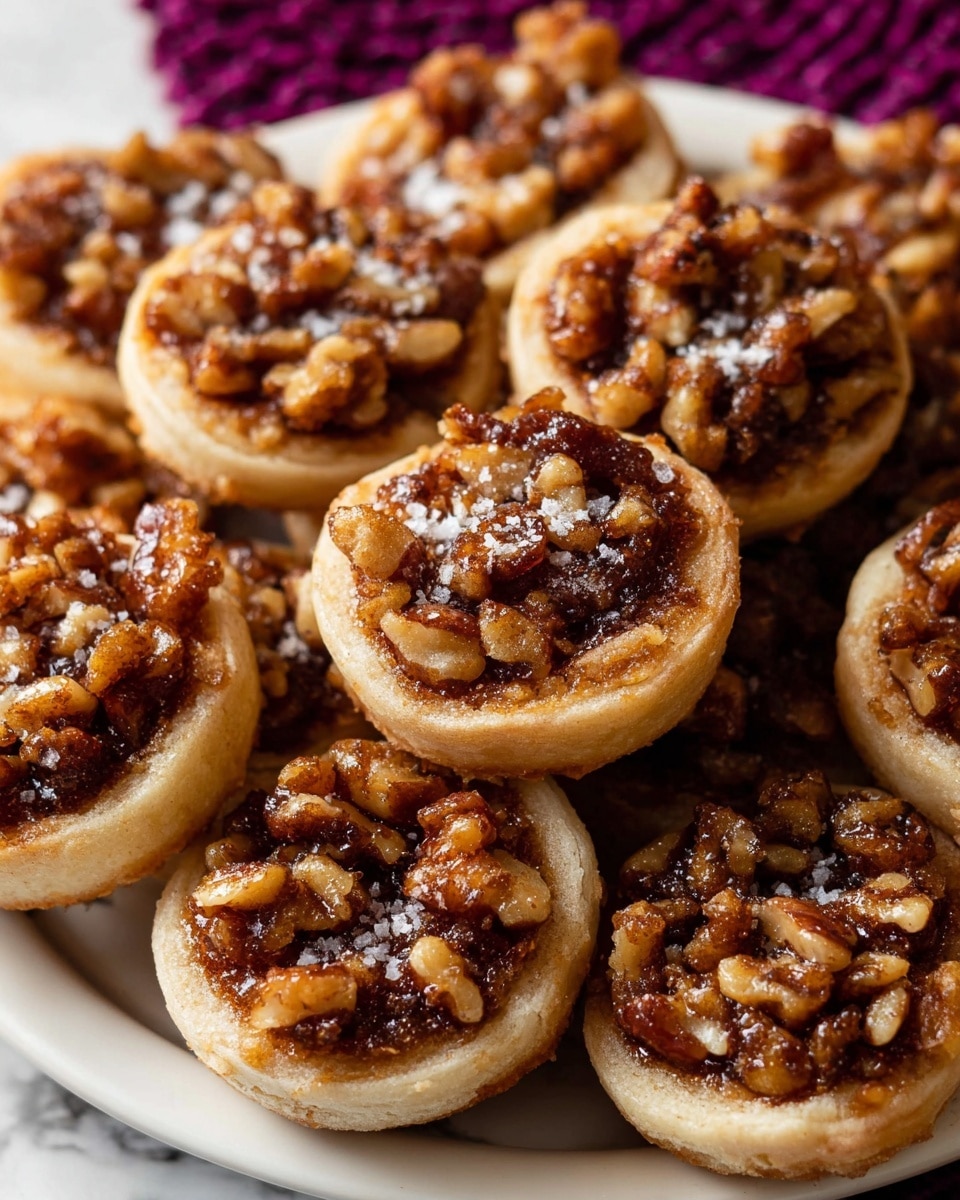
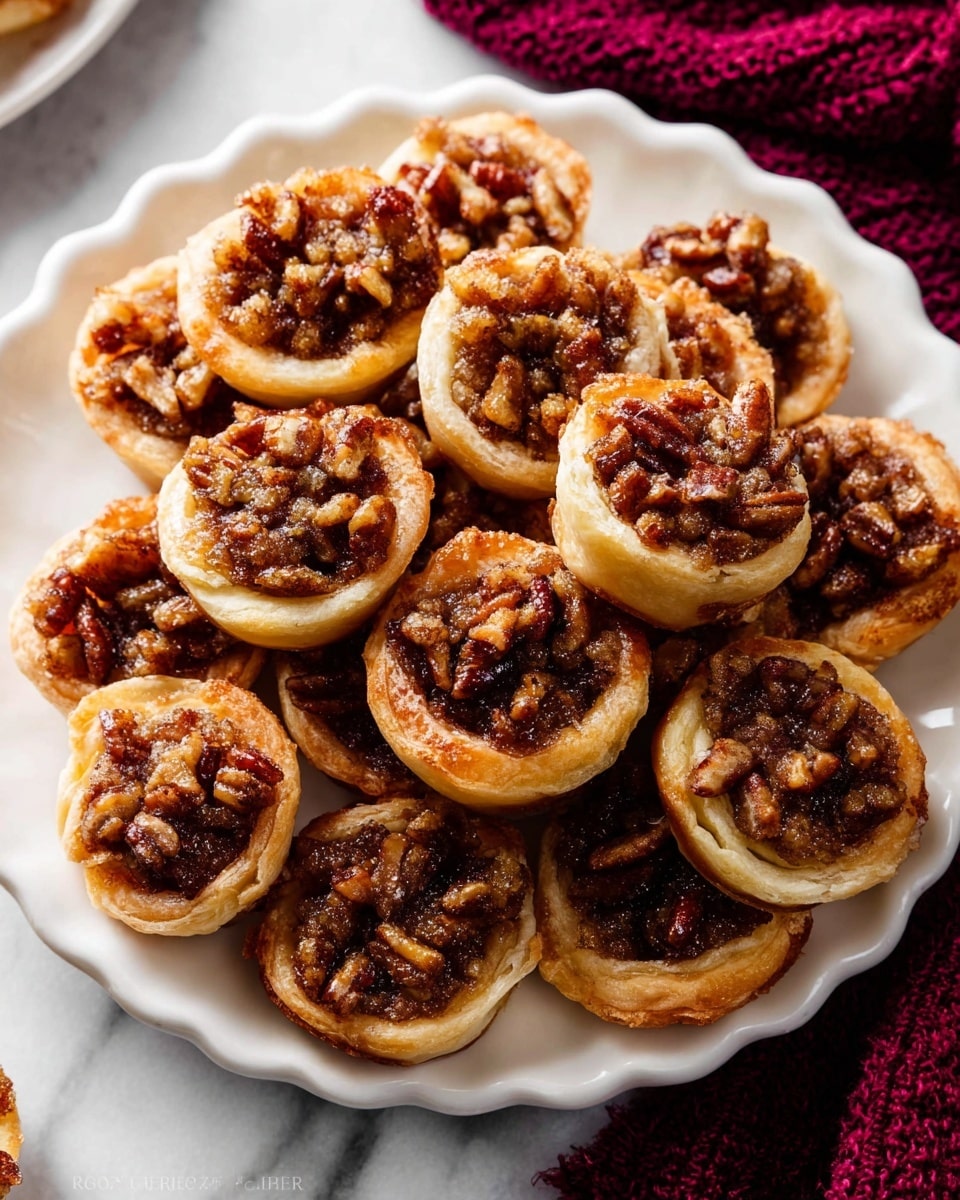
Delightfully rich and buttery mini pecan pies baked in a mini muffin pan, featuring a crisp homemade or all-butter pie crust filled with a gooey, spiced pecan filling topped with a sprinkle of coarse sea salt. Perfect bite-sized treats for holidays or special occasions.
Ingredients
Pie Crust
- 1 unbaked pie crust (homemade or store-bought all butter pie crust)
Filling
- 3 Tablespoons (43g) unsalted butter
- 1/2 cup (100g) packed dark brown sugar
- 1 large egg
- 1 teaspoon pure vanilla extract
- 1/4 teaspoon ground nutmeg
- 1/2 teaspoon ground cinnamon
- 3/4 cup (100g) chopped pecans
- Coarse sea salt or flaky sea salt for sprinkling
Instructions
- Prepare the Pie Dough: Make or have your pie dough ready and well chilled in the refrigerator for at least 2 hours or overnight. This chilling is essential to handle the dough easily and prevent shrinking during baking.
- Roll and Cut Dough Rounds: On a floured surface, roll out the dough into a 12-inch circle. Using a 2.75-inch (7cm) cookie cutter, cut out approximately 24 rounds. Re-roll scraps as needed, working quickly to keep dough cold and manageable.
- Fit Dough into Mini Muffin Pan: Grease a 24-count mini muffin pan with nonstick spray. Place each dough round into the muffin cups, pressing the dough to line the bottom and up the sides. Refrigerate the filled pan for 5–10 minutes to help the dough maintain its shape as the oven preheats.
- Pre-Bake the Crusts: Preheat the oven to 325°F (163°C). Bake the mini crusts for 7 minutes to partially cook and set the crust, preventing sogginess from the filling later. After pre-baking, increase oven temperature to 350°F (177°C).
- Prepare the Filling: In a small bowl, melt the unsalted butter either in the microwave or on the stove, then let it cool slightly. In a medium bowl, whisk together the dark brown sugar, egg, vanilla extract, nutmeg, and cinnamon until combined. Gradually whisk in the melted butter, and finally fold in the chopped pecans.
- Fill the Mini Pies: Spoon 1 to 2 teaspoons of the pecan filling into each pre-baked crust. Sprinkle each filled pie with a pinch of coarse sea salt to enhance flavor.
- Bake the Filled Mini Pies: Bake at 350°F (177°C) for 16 to 18 minutes. Watch carefully and remove from oven once the crusts start to brown slightly and the filling is set but still gooey.
- Cool and Serve: Allow the mini pies to cool completely in the pan to firm up. Use a spoon to gently remove them. Serve plain or topped with whipped cream if desired.
- Storage: Store leftovers covered at room temperature or in the refrigerator for up to 3 days to maintain freshness.
Notes
- Make pie dough a day ahead and chill to improve handling and texture.
- If using a standard 12-count muffin pan, double the filling and dough accordingly to make 12 larger mini pies.
- Coarse sea salt sprinkled on top offsets the sweetness and adds a pleasing texture contrast.
- Don’t overbake; the filling should be set but still slightly soft in the center when done.
- These pies are excellent served with a dollop of whipped cream or vanilla ice cream for added indulgence.
Nutrition
- Serving Size: 1 mini pecan pie
- Calories: 150 kcal
- Sugar: 13 g
- Sodium: 50 mg
- Fat: 9 g
- Saturated Fat: 3.5 g
- Unsaturated Fat: 5 g
- Trans Fat: 0 g
- Carbohydrates: 17 g
- Fiber: 1 g
- Protein: 2 g
- Cholesterol: 30 mg

Your email address will not be published. Required fields are marked *