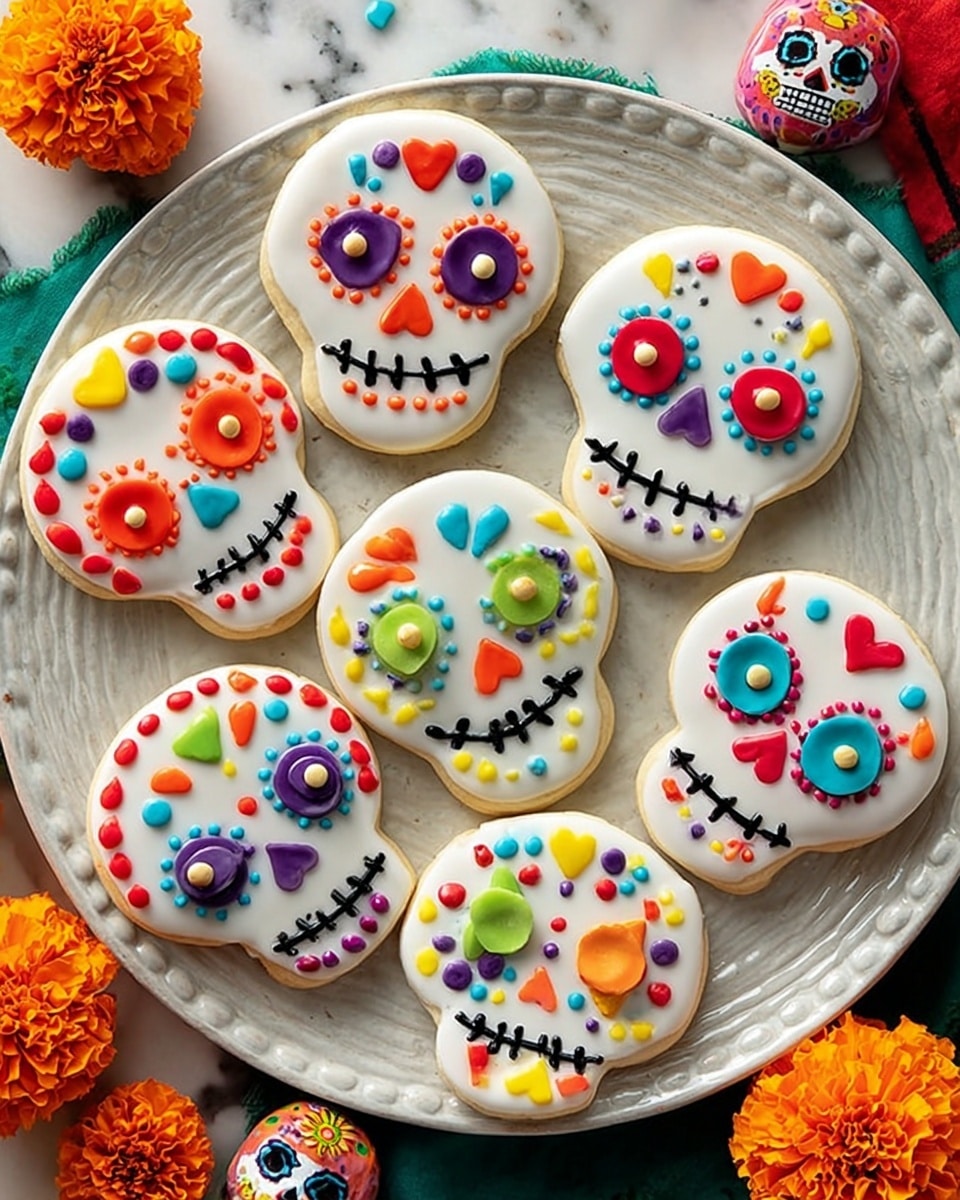
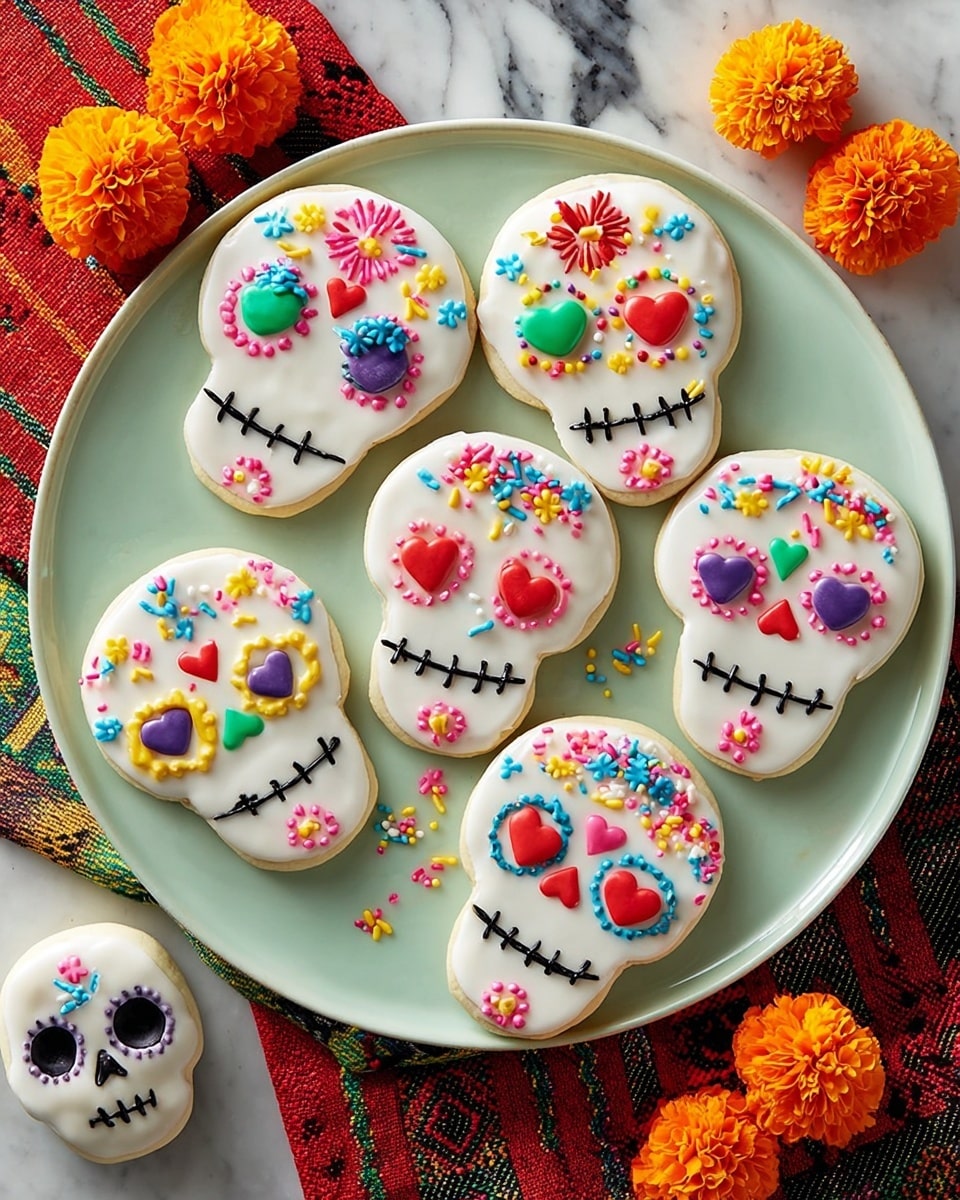
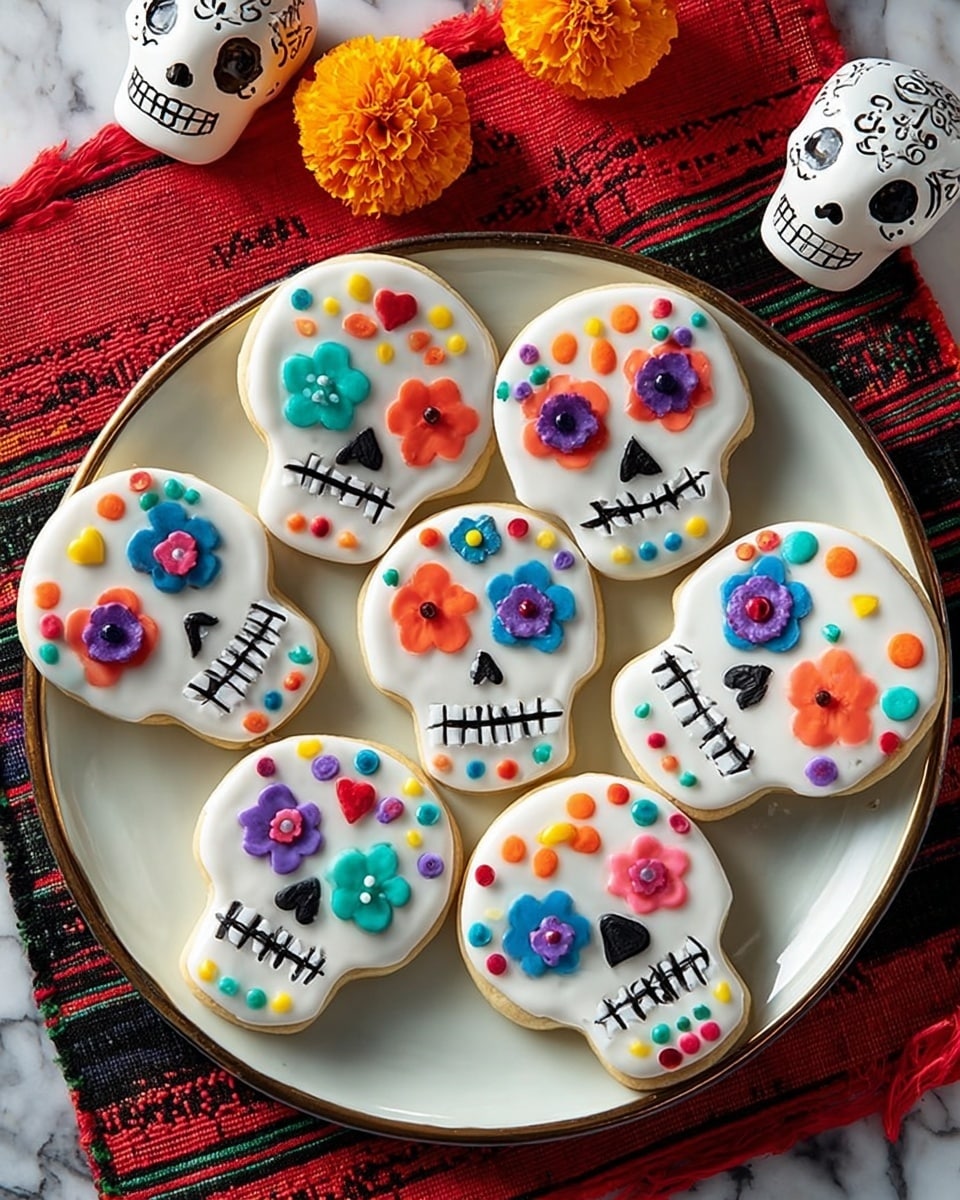
If you’ve ever wanted to celebrate Dia de los Muertos with something truly special, this Day of the Dead Cookies Recipe is going to blow you away. These skull-shaped sugar cookies are not only visually stunning but also melt-in-your-mouth delicious. I absolutely love how this recipe balances a tender, almond-flavored cookie with a sweet, glossy candy coating that you can customize with colorful decorations. Stick around because I’m sharing all my little tricks to help you create the most festive and tasty treats.
Why You’ll Love This Recipe
- Tradition Meets Flavor: This cookie recipe honors the Day of the Dead celebration with classic festive shapes and flavors that everyone adores.
- Perfect Texture: The almond paste adds a moist, tender crumb that stands out from your average sugar cookie.
- Endless Decoration Fun: You can get super creative decorating with candy melts and colorful candies, making each cookie a mini artwork.
- Great for Beginners and Pros: Whether you’re new to cookie decorating or a seasoned pro, the steps are clear and doable.
Ingredients You’ll Need
The magic of this Day of the Dead Cookies Recipe lies in its simple yet thoughtful ingredients. Using almond paste lifts these cookies from ordinary to unforgettable, while the white candy melts make decorating a breeze. Here’s a quick peek at the key players you’ll want to grab before baking day.
- Butter: Full-fat and softened for the best creamy consistency and flavor.
- Confectioners’ sugar: This keeps the dough silky smooth and sweet without grittiness.
- Almond paste: The secret ingredient – adds moisture and a subtle, nutty depth.
- Egg: Make sure it’s at room temperature so it blends evenly into the batter.
- Milk (2%): Keeps the dough tender; I don’t recommend swapping for skim or non-dairy if you want the best texture.
- Vanilla extract: Pure is best for a clean, rich flavor.
- All-purpose flour: The sturdy base to hold these cookies firm yet tender.
- Salt: Just a pinch to balance and enhance sweetness.
- White candy coating melts: These melt smoothly and harden quickly, perfect for that iconic shiny skull look.
- Optional decorations: Jumbo sprinkles, peppermint candies, or even candy-coated sunflower seeds for a pop of color and fun.
- Black paste food coloring: For those cute skull mouths and detailing you’ll want to pipe on after dipping.
Variations
One of my favorite things about this Day of the Dead Cookies Recipe is how easy it is to personalize. Whether you want to swap decorations or tweak the flavors, making it your own is totally encouraged!
- Almond-Free Version: When a friend of mine had a nut allergy, I swapped the almond paste for an extra two tablespoons of softened butter, and the cookies still came out tender and delicious.
- Chocolate-Coated Skulls: Instead of white candy melts, try dipping in dark or milk chocolate for a richer finish—my family goes crazy for this twist.
- Spiced Up: Add a teaspoon of cinnamon or a pinch of ground clove into the dough for a subtle autumnal vibe that works wonderfully with the almond flavor.
- Vegan Adaptation: I haven’t personally tested this fully vegan, but you can experiment with dairy-free butter and milk along with egg substitutes—it’s worth a try for plant-based celebrations.
How to Make Day of the Dead Cookies Recipe
Step 1: Creaming Together the Base
Start by beating the softened butter and confectioners’ sugar until light and fluffy—this takes about 3 to 4 minutes with a stand mixer, but using a hand mixer works just fine. I discovered this step is critical because properly creamed butter helps ensure the cookies have that tender and airy texture. Then add the almond paste—breaking it up into small pieces first helps the mixer work it in evenly. Follow with the egg, milk, and vanilla extract until everything is just combined. Your kitchen’s gonna smell amazing here!
Step 2: Mixing and Chilling the Dough
Whisk together the flour and salt in a separate bowl, then gradually add it to your wet mixture. It’s easy to overmix here, so stop as soon as the dough comes together—a few streaks of flour are okay. I used to over-mix and ended up with tough cookies, so this little restraint will pay off. Wrap the dough in plastic wrap and pop it in the fridge for at least an hour. Chilling firms the dough so it’s easier to roll and cut shapes without losing definition.
Step 3: Rolling and Cutting the Cookies
On a lightly floured surface, roll out your chilled dough to about 1/4 inch thickness. When I first tried this recipe, I found rolling evenly was a challenge—using a rolling pin with thickness guides or gently checking with a ruler helped me nail it every time. Use a 5-inch skull-shaped cookie cutter (get the good, sturdy kind for clean edges) to cut out your festive shapes. Place them about an inch apart on ungreased cookie sheets—you don’t need greasing because these cookies spread very little.
Step 4: Baking to Perfection
Bake at 375°F for 7 to 9 minutes or until the edges are just firm and the cookies look set. Keep a close eye starting at 7 minutes—the difference between chewy and overbaked is minimal here. I’ve learned that letting the cookies rest on the hot pan for 2 minutes before transferring them to a wire rack helps them firm up without breaking.
Step 5: Dipping and Decorating
Once cooled, it’s time to make these cookies shine! Melt your white candy coating melts following the package instructions—you can usually do this in the microwave with short bursts, stirring in between. Dip the tops of each cookie into the melted candy and let excess drip off before setting them on waxed paper. The candy coating hardens quickly and creates a smooth, glossy surface ripe for decorating. Use your jumbo sprinkles, candy pieces, and other colorful bits to personalize each cookie immediately while the coating is wet. For the finishing touch, tint some white candy coating black with paste food coloring and pipe mouths onto the skulls—don’t worry if your piping isn’t perfect, it adds character!
Pro Tips for Making Day of the Dead Cookies Recipe
- Room Temperature Ingredients: Getting the egg and butter to room temp is key—I learned this the hard way when my dough was lumpy before.
- Almond Paste Prep: Break up the almond paste into small chunks before adding—it mixes in more evenly and keeps your dough smooth.
- Work Quickly Decorating: The candy coating sets fast, so have your sprinkles and candies ready before you dip each cookie.
- Use Waxed Paper: I always line my workspace with waxed paper when dipping to keep things mess-free and help with easy cookie transfer.
How to Serve Day of the Dead Cookies Recipe

Garnishes
For me, adding colorful, festive toppings like jumbo rainbow sprinkles or peppermint candies not only makes these cookies pop visually but also adds fun textures. I love layering different candies so each cookie feels special—sometimes I mix in bright Skittles or little Twizzlers Rainbow Twists to bring in unexpected pops of color.
Side Dishes
I’ve found serving these cookies alongside warm Mexican hot chocolate or cinnamon-spiced coffee really elevates the experience. On cooler evenings, a platter of these cookies with a side of fresh fruit and nutty cheeses makes a lovely dessert board too.
Creative Ways to Present
For celebrations, I like arranging these cookies standing up on a platter lined with colorful tissue paper or in glass jars decorated with ribbon and papel picado-inspired wrapping. Another fun idea I discovered is to stack a few cookies with little wooden sticks, turning them into edible lollipops that kids adore!
Make Ahead and Storage
Storing Leftovers
I usually store leftover cookies in an airtight container lined with parchment paper to prevent sticking. They stay fresh for up to a week at room temperature, and the candy coating helps keep them from going soft. I learned this the hard way when uncoated cookies lost their crispiness pretty fast!
Freezing
Freezing fully baked and decorated cookies works well if you layer them carefully with parchment paper in a sealed container. Just thaw at room temperature, and the candy coating should remain intact. I recommend freezing uncoated cookies if you want to decorate fresh later, which is a huge time-saver before a big party.
Reheating
These cookies are best enjoyed room temperature, but if you like them a bit softer, gently warming them in the microwave for 5-7 seconds does the trick without melting the candy too much. I usually avoid reheating too aggressively to keep the decorations looking perfect.
FAQs
-
Can I use regular sugar instead of confectioners’ sugar in the Day of the Dead Cookies Recipe?
It’s best to use confectioners’ sugar here because it dissolves smoothly into the butter, giving the dough a silky texture. Regular granulated sugar might leave your dough grainy and could affect the tenderness of the cookies.
-
What if I don’t have a skull-shaped cookie cutter?
You can get creative! Use any large cookie cutter you have and decorate with Day of the Dead inspired designs using the candy melts and decorations. Alternatively, use a knife to freehand cut skull shapes—it’s a fun way to add a personal touch.
-
How do I prevent the candy coating from melting the cookie surface?
Make sure your cookies are completely cooled before dipping. Also, dip quickly and allow excess coating to drip off so you don’t get soggy cookies. Using quality candy melts helps too since they set quickly and have a stable texture.
-
Can I bake the cookies ahead and decorate later?
Absolutely! Baking the cookies a day or two in advance and storing them in an airtight container is a great strategy. Just decorate them close to serving time for the freshest look and best candy coating texture.
-
What’s the best way to pipe the black mouths on the cookies?
I recommend using a small piping bag or a clean plastic sandwich bag with a tiny corner snipped off. Practice your piping on parchment paper first to get comfortable with the flow. If you don’t have black candy coating, you can mix white melts with black food coloring or use black decorating gel.
Final Thoughts
This Day of the Dead Cookies Recipe holds a special place in my heart because it’s not just a recipe—it’s a celebration on a plate. I love sharing these cookies with family and friends while honoring a rich tradition in such a joyful and tasty way. If you’re looking for a cookie that’s both stunning to look at and a delight to eat, I can’t recommend these enough. Give it a try and watch your loved ones light up with every colorful, sweet bite!
Print
Day of the Dead Cookies Recipe
- Prep Time: 20 minutes (plus 1 hour chilling and additional time for decorating)
- Cook Time: 7-9 minutes per batch
- Total Time: 2 hours including chilling, baking, and cooling
- Yield: 1 dozen cookies 1x
- Category: Dessert, Cookies
- Method: Baking
- Cuisine: Mexican
Description
Celebrate the Day of the Dead with these festive and delicious skull-shaped cookies. These butter-rich cookies are infused with almond paste for extra flavor, then dipped in white candy coating and beautifully decorated with colorful candies and black icing to bring the iconic sugar skulls to life. Perfect for adding a touch of tradition and fun to your holiday celebrations.
Ingredients
Cookie Dough
- 1–1/4 cups butter, softened
- 1–3/4 cups confectioners’ sugar
- 2 ounces almond paste
- 1 large egg, room temperature
- 1/4 cup 2% milk
- 1 teaspoon vanilla extract
- 4 cups all-purpose flour
- 1/2 teaspoon salt
Decoration
- 2 packages (12 ounces each) white candy coating melts
- Optional decorations: Jumbo sprinkles, peppermint candies, candy-coated sunflower kernels, Skittles, Twizzlers Rainbow Twists, Good & Plenty candies
- Black paste food coloring
Instructions
- Prepare the dough: In a large bowl, cream the softened butter and confectioners’ sugar together until the mixture is light and fluffy, about 3-4 minutes. Add the almond paste and continue beating until combined. Next, beat in the large egg, 2% milk, and vanilla extract to form a smooth batter.
- Combine dry ingredients: In a separate bowl, whisk together the all-purpose flour and salt. Gradually add this flour mixture to the creamed wet ingredients, mixing well until a cohesive dough forms. Cover the dough and refrigerate for 1 hour to firm up.
- Roll and cut cookies: On a lightly floured surface, roll out the chilled dough to about 1/4-inch thickness. Use a floured 5-inch skull-shaped cookie cutter to cut out shapes. Place the cutouts 1 inch apart on ungreased baking sheets.
- Bake: Preheat your oven to 375°F (190°C). Bake the cookies for 7-9 minutes or until they become firm to the touch. After baking, let cookies stand on the baking sheets for 2 minutes to set before transferring them to wire racks to cool completely.
- Melt candy coating: In a large, shallow, microwave-safe dish, melt the white candy coating melts according to package directions, heating in short increments and stirring frequently to avoid scorching.
- Dip cookies: Dip the top side of each cooled cookie into the melted white candy coating, allowing any excess to drip off. Place the coated cookies on waxed paper to set.
- Decorate: While the candy coating is still wet, apply optional decorations such as jumbo sprinkles, peppermint candies, candy-coated sunflower kernels, Skittles, Twizzlers Rainbow Twists, or Good & Plenty candies to customize each skull.
- Color black icing: Tint any remaining white candy coating with black paste food coloring to create black icing. Using a piping bag, pipe mouth designs and other details on the skull cookies.
- Set and serve: Allow the candy coating and icing decorations to fully set at room temperature before serving or packaging the cookies.
Notes
- Ensure butter and egg are at room temperature to create a smooth dough.
- Chilling the dough helps prevent spreading during baking, keeping cookie shapes sharp.
- Use a variety of small colorful candies to make your Day of the Dead cookies vibrant and festive.
- Work with small amounts of melted candy coating at a time to prevent hardening while decorating.
- Store cookies in an airtight container at room temperature for up to 5 days.
- For a stronger almond flavor, you can add a few drops of almond extract in addition to the almond paste.
Nutrition
- Serving Size: 1 cookie
- Calories: 250
- Sugar: 20g
- Sodium: 85mg
- Fat: 14g
- Saturated Fat: 8g
- Unsaturated Fat: 5g
- Trans Fat: 0g
- Carbohydrates: 27g
- Fiber: 1g
- Protein: 3g
- Cholesterol: 35mg


Your email address will not be published. Required fields are marked *