
If you’re on the hunt for a spooky, fun twist on a classic favorite, you’re going to flip over this Air Fryer Witch Finger Chicken Tenders Recipe. It’s one of those recipes that’s not only irresistibly crispy and flavorful but also brings a playful, slightly creepy vibe to your plate — perfect for Halloween or anytime you want to wow your guests with something different. I absolutely love how this recipe combines easy prep, quick cooking in the air fryer, and a fun presentation that kids and adults alike go crazy for. Stick around and I’ll walk you through every step to make sure your witch fingers come out perfectly eerie and delicious!
Why You’ll Love This Recipe
- Crispy & Juicy: The air fryer makes these tenders perfectly crispy on the outside while keeping the chicken juicy inside.
- Fun & Festive: The almond “fingernail” detail adds a spooky Halloween touch that’s sure to impress your guests or kids.
- Quick & Easy: Ready in about 22 minutes, this recipe is perfect for last-minute party snacks or weeknight dinners.
- Customizable Flavor: You can adjust the seasoning to your liking or make it kid-friendly by dialing down the spices.

Ingredients You’ll Need
The magic of this Air Fryer Witch Finger Chicken Tenders Recipe lies in simple pantry staples that pack a flavorful punch together. I recommend using fresh chicken tenders if you can — they cook up tender and are easy to shape into spooky little fingers.
- Chicken tenders or breasts: Fresh is best; I slice breasts into finger shapes myself to get the perfect size.
- All-purpose flour: Acts as the first coating to help the batter stick evenly.
- Eggs: Beaten eggs create that essential sticky layer to hold on the breadcrumbs.
- Panko breadcrumbs: These add crispiness and texture that you just can’t beat in the air fryer.
- Garlic powder: Adds a mild savory flavor without overpowering the chicken.
- Onion powder: Deepens the seasoning mix and complements the garlic.
- Paprika: Brings a subtle smokiness and beautiful color.
- Salt and pepper: To season everything perfectly—don’t skip or skimp here!
- Whole almonds: These are your secret weapon — they become the creepy fingernails pressed right onto each chicken finger.
- Cooking spray or oil: Keeps the tenders from sticking and promotes crispiness in the air fryer.
Variations
I love how versatile this Air Fryer Witch Finger Chicken Tenders Recipe is — you can really make it your own. Over the years, I’ve tried swapping seasonings and even cooking methods to suit different occasions and tastes.
- Spicy Variation: I add a pinch of cayenne pepper to the breadcrumbs for a little heat, which my spice-loving friends adore.
- Gluten-Free Version: Swap all-purpose flour for almond or chickpea flour, and use gluten-free panko to keep it crispy without gluten.
- Cheesy Twist: Mixing in some grated Parmesan cheese with the breadcrumbs adds an extra layer of savory goodness.
- Herb-Infused: Fresh herbs like thyme or rosemary in the breadcrumb mix can make these fingers taste super fresh and fancy for a party.
How to Make Air Fryer Witch Finger Chicken Tenders Recipe
Step 1: Prep Your Chicken Fingers
Start by slicing chicken breasts into finger-shaped strips if you’re not using pre-cut tenders. I like to aim for about 1-inch wide and 4 inches long — this lets them cook evenly and feel “finger-like.” Give your pieces a light seasoning of salt and pepper to make sure every bite is tasty. This little seasoning step early on is a game-changer for flavor!
Step 2: Set Up Your Breading Station
Next, grab three shallow bowls. In the first, put your all-purpose flour. The second should hold your beaten eggs, which help the coating stick. The third will be your breadcrumb mixture – toss in panko breadcrumbs mixed with garlic powder, onion powder, paprika, salt, and pepper. I discovered that pre-mixing the spices into the breadcrumbs ensures every bite is flavorful—no bland spots here!
Step 3: Dredge and Doll Up
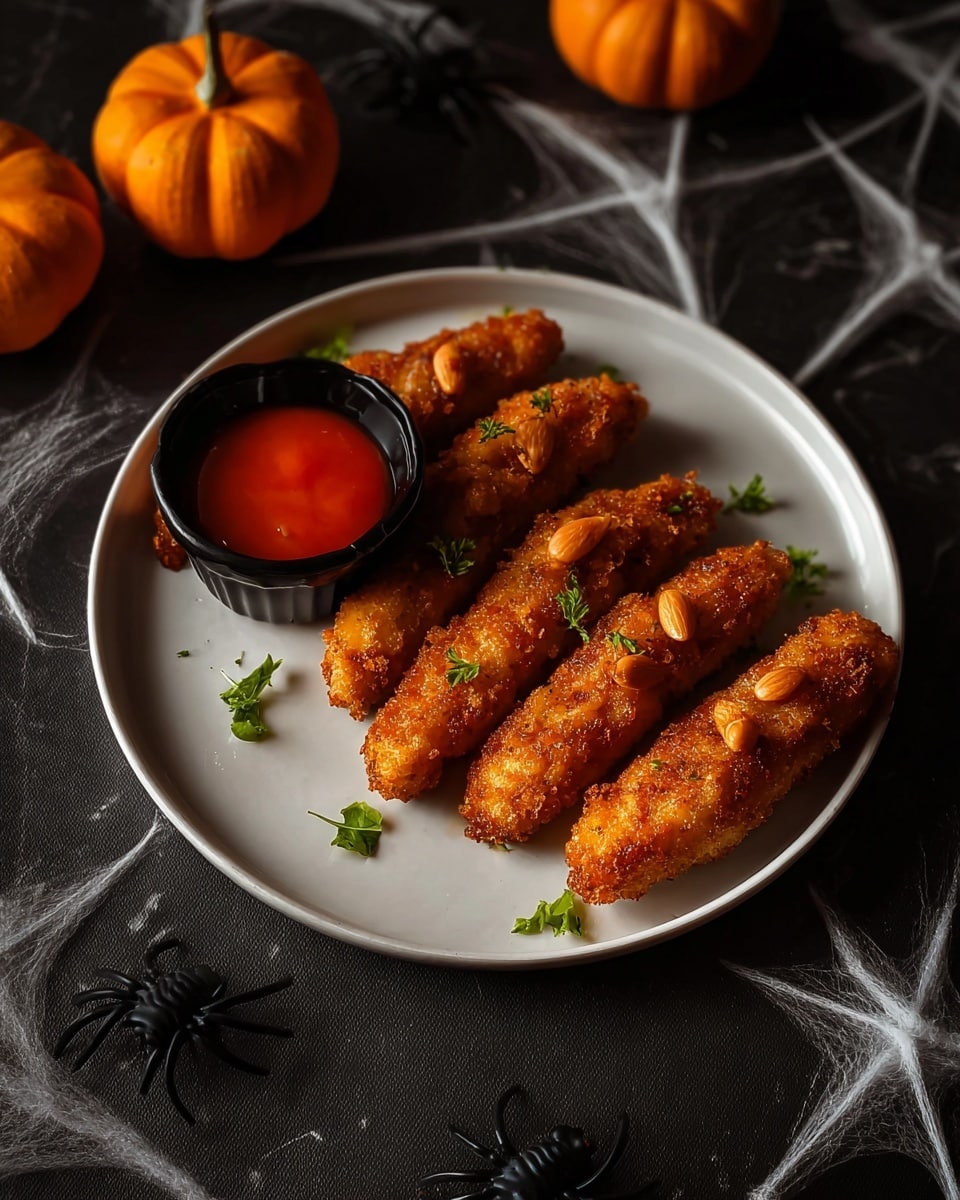
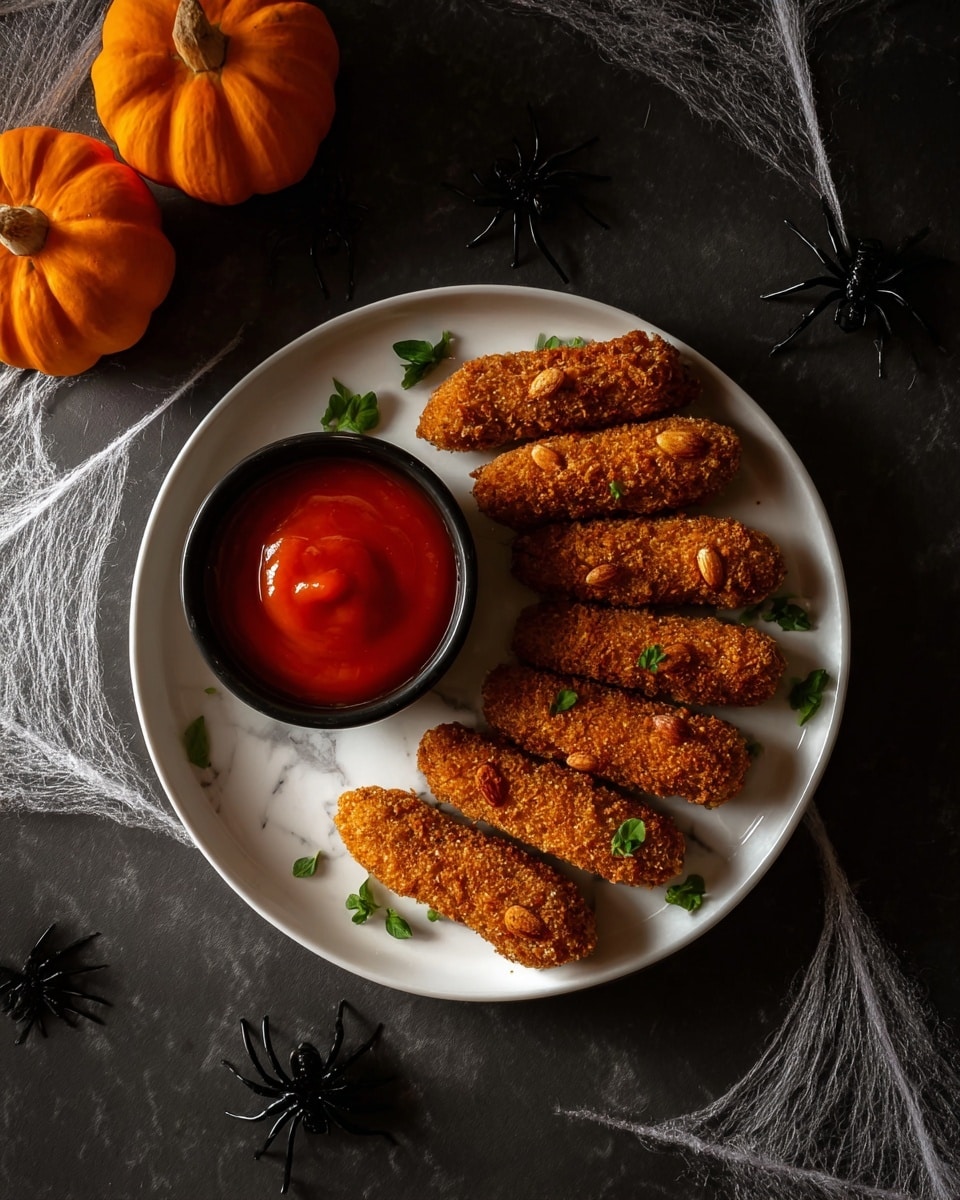
Here’s where the fun really starts. Coat each chicken finger first in the flour, then dip into the eggs, and finally press into the seasoned panko breadcrumbs. Don’t be shy about pressing the breadcrumbs firmly so they stick well — this helps get that irresistible crunch. Now, for the signature “witch finger” look, press a whole almond firmly into the tip of each chicken finger. The almond acts like a spooky fingernail, and I swear it takes your Halloween game to the next level.
Step 4: Air Fry to Perfection
Preheat your air fryer to 375°F (190°C). Spray the basket with a little cooking spray or brush some oil to prevent sticking. Place the coated chicken tenders in a single layer — don’t overcrowd them, so each one gets crispy all around. Spray the tops lightly with cooking oil for an extra-golden crust. Air fry for 10 to 12 minutes, flipping halfway through. You’ll know they’re done when they’re golden brown and reach an internal temperature of 165°F. I find flipping at the halfway mark helps avoid any soggy spots and keeps the coating evenly crispy.
Pro Tips for Making Air Fryer Witch Finger Chicken Tenders Recipe
- Cut Evenly: Make sure all chicken fingers are about the same size so they cook evenly in the air fryer.
- Pat Dry: Pat the chicken dry before breading to help the coating stick better and stay crispy.
- Don’t Skip The Flip: Turning halfway through cooking ensures both sides get that golden crunch.
- Almond Placement: Press the almond gently so it stays put but doesn’t break the breadcrumb coating.
How to Serve Air Fryer Witch Finger Chicken Tenders Recipe
Garnishes
I like to serve these witch fingers with a side of warm marinara sauce — it adds a tangy color contrast and works great for dipping. For a fun Halloween presentation, sprinkle a little chopped fresh parsley or chives around the plate to look like “witch grass.” Red sriracha mixed with mayo also makes a great “bloody” dip that always gets a few laughs at the table.
Side Dishes
My go-to sides with these tenders are crispy roasted potatoes or sweet potato fries for that extra crunch. A fresh green salad or some roasted veggies help balance the richness. If you’re hosting a party, some cheesy stuffed mushrooms or garlic knots complement these wicked fingers beautifully.
Creative Ways to Present
For Halloween, I once served these on a platter lined with celery sticks to look like a “witch’s hand” resting on a bed of green. Adding a little fake spider web decoration around the plate was a hit with the kids! You could also arrange the fingers in a circle with a “blood” dipping sauce bowl in the middle for dramatic effect.
Make Ahead and Storage
Storing Leftovers
I keep my leftover witch finger tenders in an airtight container in the fridge for up to 3 days. To preserve their crispiness, I recommend reheating them in the air fryer rather than the microwave. That little extra effort keeps them tasting fresh and crunchy.
Freezing
This recipe freezes beautifully. After you’ve breaded the chicken fingers, flash freeze them on a baking sheet for an hour before transferring to a freezer bag. When you’re ready to eat, air fry them straight from frozen—just add a couple of minutes to the cooking time.
Reheating
To reheat, pop the chicken fingers back into the air fryer at 375°F for 3-5 minutes until warmed through and crispy again. This method is hands-down the best to avoid soggy leftovers.
FAQs
-
Can I use chicken breasts instead of tenders for this recipe?
Absolutely! Just slice the chicken breasts into finger-like strips that are roughly the same size as tenders. This helps them cook evenly and still look like spooky witch fingers.
-
Do I have to use almonds for the fingernails?
While almonds provide the perfect nail shape and crunch, you can substitute with sliced olives or pumpkin seeds if you want to try a different “fingernail” look or have nut allergies.
-
Is it better to bake or air fry these chicken tenders?
Air frying is my favorite because it gives a crispy exterior without needing as much oil, and it cooks quicker. However, you can bake them at 400°F for about 15-20 minutes, flipping halfway, if you don’t have an air fryer.
-
How can I make these chicken tenders extra crispy?
One trick I learned is to spray both the basket and the tenders lightly with cooking oil before air frying. Also, using panko breadcrumbs instead of regular breadcrumbs really amps up the crunch factor.
Final Thoughts
This Air Fryer Witch Finger Chicken Tenders Recipe has become a household favorite—whether it’s a spooky Halloween night or just a fun dinner with the kids. I love how easy it is to throw together and how it brings a smile (and sometimes a scream!) to the table. You’ll enjoy watching the whole family dive into these crisp, juicy fingers, especially with that playful almond “nail” detail that makes them extra special. So next time you want a quick, delicious, and delightfully eerie meal, I highly recommend giving this recipe a go—you won’t be disappointed!
Print
Air Fryer Witch Finger Chicken Tenders Recipe
- Prep Time: 10 minutes
- Cook Time: 12 minutes
- Total Time: 22 minutes
- Yield: 4 servings 1x
- Category: Snack
- Method: Air Frying
- Cuisine: American
Description
Crunchy and spooky Air Fryer Witch Finger Chicken Tenders, perfect for Halloween or any fun meal. Tender chicken strips are coated in seasoned panko breadcrumbs, topped with almond “fingernails,” and air fried to a crispy golden perfection, served best with marinara dipping sauce.
Ingredients
Chicken
- 1 lb chicken tenders or breasts, sliced into finger-shaped strips
Breading
- 1/2 cup all-purpose flour
- 2 eggs, beaten
- 1 cup panko breadcrumbs
- 1/2 tsp garlic powder
- 1/2 tsp onion powder
- 1/2 tsp paprika
- Salt and pepper, to taste
Finishing Touch
- 12–16 whole almonds (for fingernails)
- Cooking spray or oil, for spraying basket and tenders
Instructions
- Prepare Chicken: Slice the chicken into finger-shaped strips and season lightly with salt and pepper. This creates the base shape for the witch finger tenders.
- Set Up Breading Stations: Arrange three shallow bowls: one with flour, the second with beaten eggs, and the third with panko breadcrumbs mixed with garlic powder, onion powder, paprika, salt, and pepper for seasoning.
- Bread the Chicken: Dredge each chicken strip first in the flour to coat lightly, then dip into the beaten eggs, and finally press into the seasoned breadcrumb mixture ensuring an even coating for maximum crispiness.
- Add Almond ‘Nails’: Press one whole almond onto the tip of each breaded chicken strip to mimic a fingernail, enhancing the spooky and fun presentation.
- Preheat the Air Fryer: Set your air fryer to 375°F (190°C) and let it preheat for a few minutes to ensure even cooking.
- Prepare for Cooking: Spray the air fryer basket with cooking spray or lightly brush with oil to prevent sticking. Similarly, spray the chicken tenders lightly to promote browning and crisping.
- Air Fry the Tenders: Place the chicken fingers in a single layer in the air fryer basket, avoiding overcrowding. Cook for 10 to 12 minutes, flipping halfway through the cooking time to ensure even crispness on all sides.
- Serve: Once golden and cooked through, transfer the witch finger tenders to a serving plate. Serve warm with marinara sauce or your favorite dipping sauce to complement the flavor.
Notes
- For best results, slice chicken tenders into uniform sizes to ensure even cooking.
- Adjust seasoning in the breadcrumb mix to your taste preference.
- Don’t overcrowd the air fryer basket to allow proper air circulation and crispiness.
- If you prefer spicier fingers, add cayenne pepper or chili powder to the breadcrumb mixture.
- Serve immediately for the crispiest texture, as the coating can soften over time.
- To keep tenders warm, place them on a baking sheet in a 200°F oven until all are cooked.
Nutrition
- Serving Size: 1 serving (approximately 4 fingers)
- Calories: 320
- Sugar: 1 g
- Sodium: 420 mg
- Fat: 12 g
- Saturated Fat: 3 g
- Unsaturated Fat: 7 g
- Trans Fat: 0 g
- Carbohydrates: 25 g
- Fiber: 2 g
- Protein: 30 g
- Cholesterol: 85 mg

Your email address will not be published. Required fields are marked *