
If you’re looking for a spooky, delicious, and surprisingly easy treat to wow guests this season, you’re going to adore this Halloween Graveyard Pudding Cups Recipe. Trust me, I’ve made these a bunch of times for parties and family gatherings, and every single time they get devoured — it’s like the chocolatey, creamy version of Halloween fun in a cup. Keep reading because I’m spilling all the secrets for making them perfect and stress-free.
Why You’ll Love This Recipe
- Super Simple: This recipe comes together in under 15 minutes, perfect for last-minute Halloween fun.
- Kid-Friendly and Fun: Decorating with cookie “tombstones” and gummy worms is a hoot for kids (and adults too).
- Creamy, Chocolatey Delight: The mousse-like pudding combined with crunchy Oreos is a texture party in every bite.
- Always Impresses: Whether for a party or a family treat, these pudding cups vanish fast — trust me!

Ingredients You’ll Need
The magic in this Halloween Graveyard Pudding Cups Recipe lies in simple ingredients that pack a ton of flavor and texture. Plus, I’ll share a few tips to get the best out of each one so your cups come out looking and tasting amazing.
- Heavy whipping cream: This is the base that whips up light and fluffy, giving the mousse its creamy texture — don’t substitute with half and half or it won’t hold peaks.
- Semi-sweet chocolate wafers or chips: Look for quality chocolate with good melting properties; it gives just the right bittersweet balance.
- Oreo cookies: Crushed Oreos provide the “dirt” for the graveyard effect — feel free to mix in some double stuff for more creaminess.
- Milano double chocolate cookies: These are my go-to for tombstones because of their sturdy shape and rich flavor.
- Black frosting or edible marker: To write “RIP” on the Milano cookies — this adds a fun, spooky touch that’s surprisingly easy.
- Gummy worms (optional): For an extra creepy crawlie vibe, these little guys are always a hit, especially with kids!
Variations
I love making this Halloween Graveyard Pudding Cups Recipe my own by swapping a few ingredients or adding personal touches. You should absolutely play around and find your favorite spin!
- Dairy-Free Version: I’ve done this with coconut whipped cream and dairy-free chocolate chips for a vegan-friendly option — still creamy and delicious!
- Pumpkin Spice Twist: Mixing a little pumpkin puree and spice into the whipped cream adds a seasonal kick that’s perfect if you like your treats extra festive.
- Different Tombstone Cookies: If you can’t find Milano cookies, did I mention Nilla Wafers or graham crackers with a little icing work just fine?
- Extra Crunch: Toss in some crushed pretzels or nuts into the “dirt” layer for a salty surprise I personally can’t get enough of.
How to Make Halloween Graveyard Pudding Cups Recipe
Step 1: Create Your Tombstones
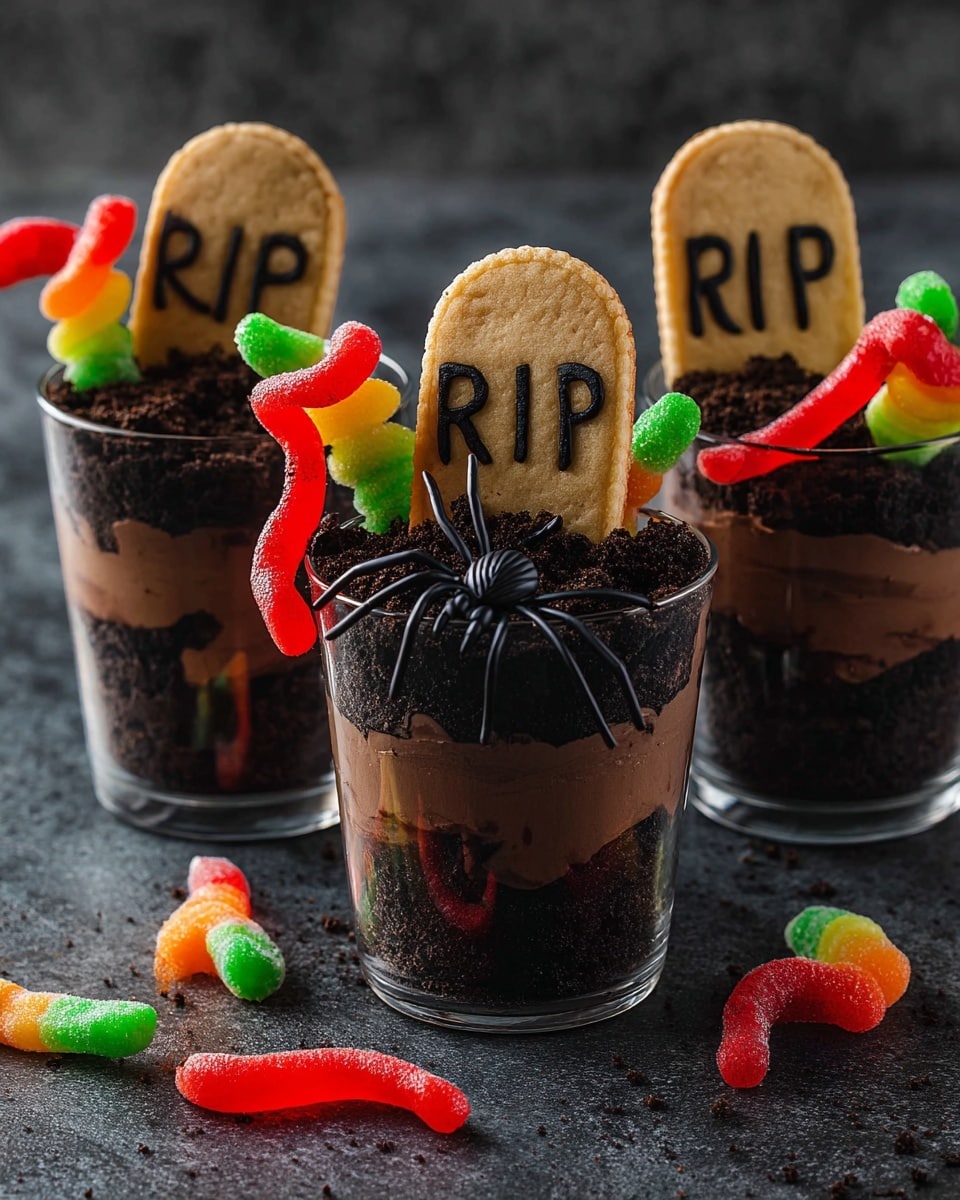
Start by grabbing those Milano double chocolate cookies. Use your black frosting or edible marker to carefully write “RIP” on each cookie — it’s easier than it sounds and adds so much personality to your graveyard scene. Set these aside; these will become your eerie little tombstones.
Step 2: Whip the Heavy Cream to Stiff Peaks
This is where the pudding’s creamy texture shines. Using a chilled bowl and beaters, whip your heavy cream until it holds stiff peaks. You’ll know you’re there when the peaks stand straight up and don’t flop over when you lift the beaters. This cream will lighten up your chocolate for that mousse-like texture.
Step 3: Melt the Chocolate Carefully
Microwave your semi-sweet chocolate wafers in short bursts (30 seconds at 50% power), stirring in between until mostly melted—this prevents scorching. Let it cool for about 10 minutes to avoid scrambling the cream when mixed. This trick helped me avoid a gloopy mess the first time I tried this recipe.
Step 4: Fold Chocolate into Whipped Cream
Now gently fold your melted chocolate into the whipped cream. Patience is key here — fold slowly so you keep all that airy volume, creating a luscious mousse. This makes all the difference between a heavy pudding and light, dreamy cups your guests will rave about.
Step 5: Layer Your Graveyard Cups
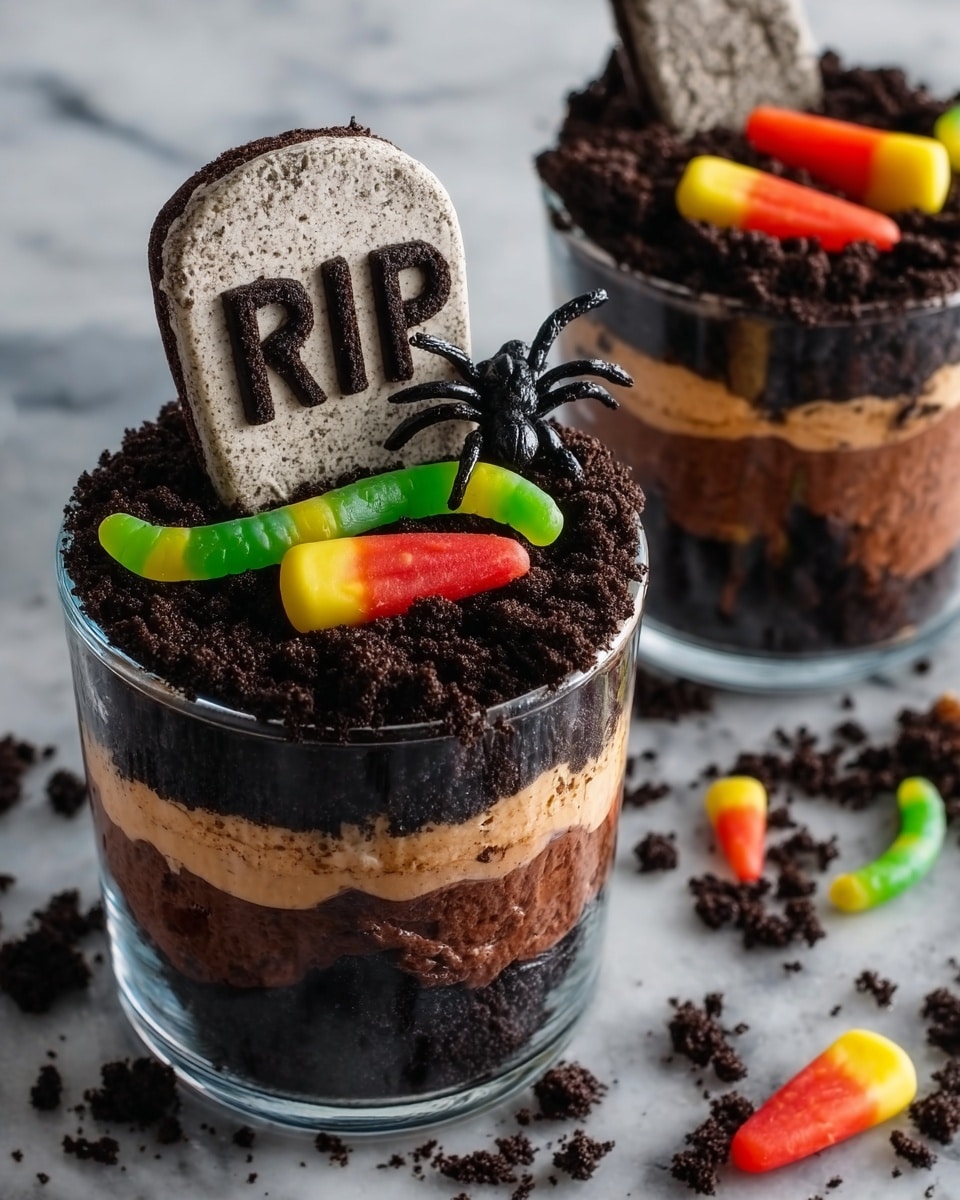
Grab clear cups to show off those layers — once layered with crushed Oreo cookies (“dirt”) and your gorgeous chocolate mousse, it’s basically a mini graveyard in a cup. Start with 3-4 tablespoons of crushed Oreos at the bottom, then spoon in a layer of mousse, repeat, and finish with Oreos piled to the rim.
Step 6: Chill and Decorate
Pop your cups in the fridge for at least 2 hours to let the mousse set perfectly. Just before serving, gently stick in your “RIP” tombstones and wiggle in a few gummy worms if you want that extra spooky look. The first time I added gummy worms, my kids absolutely lost it—they couldn’t wait to dig in!
Pro Tips for Making Halloween Graveyard Pudding Cups Recipe
- Use a chilled bowl for whipping cream: It helps the cream whip faster and achieve stiffer peaks, saving you time and effort.
- Cool melted chocolate before folding: Adding chocolate while still warm can flatten the whipped cream, so patience here really pays off.
- Gently fold, don’t stir vigorously: This keeps the mousse light and fluffy instead of dense and heavy.
- Make the tombstones ahead: Writing “RIP” can be done a day in advance — just store them in an airtight container to avoid smudging.
How to Serve Halloween Graveyard Pudding Cups Recipe
Garnishes
I always go with the classic gummy worms because they add that playful creepy-crawly vibe, but fresh whipped cream dollops on top make these cups feel extra indulgent. Sometimes I toss on a few mini chocolate chips or crushed peppermint bark for a festive twist depending on the season.
Side Dishes
These pudding cups stand perfectly as a dessert on their own, but I like to serve them alongside a plate of caramel apples or spiced pumpkin muffins for a complete Halloween-themed spread. They’re also great with a cup of warm apple cider or hot chocolate if you’re hosting an autumn gathering.
Creative Ways to Present
One of my favorite ideas is using miniature clear plastic buckets or mason jars instead of simple cups — it adds a rustic, festive feel. For parties, setting up a “decorate your own graveyard pudding cup” station is an absolute hit, letting everyone add gummy worms, candy bones, or extra cookie crumbs for personalized spooky cups!
Make Ahead and Storage
Storing Leftovers
I store leftover pudding cups covered tightly with plastic wrap in the fridge — they keep wonderfully for 2-3 days without any sogginess. Just be sure to add your cookie tombstones fresh before serving so they stay crisp.
Freezing
While I haven’t frozen these often, you can freeze them without the cookie toppings for up to a month. When thawing, do so in the refrigerator overnight and add your crunchy toppings fresh before serving to keep that signature graveyard texture.
Reheating
Since this is a chilled dessert, reheating isn’t really recommended. Just keep them cold and enjoy fresh — if you want to refresh the mousse texture, a quick gentle whisk can help if it’s been sitting too long before serving.
FAQs
-
Can I use regular chocolate chips instead of chocolate wafers for this Halloween Graveyard Pudding Cups Recipe?
Absolutely! Semi-sweet or dark chocolate chips work just fine. The key is to melt them gently and cool them before folding into the whipped cream to avoid melting it too much.
-
How far ahead can I prepare these pudding cups?
You can assemble the pudding cups up to 24 hours in advance and keep them refrigerated. Just add your cookie tombstones and gummy worms right before serving to keep everything looking fresh and crunchy.
-
Can I make this Halloween Graveyard Pudding Cups Recipe gluten-free?
Yes! Substitute gluten-free chocolate cookies and tombstone cookies to keep it gluten-free, and make sure your chocolate is also gluten-free certified.
-
What if I don’t have an edible marker or black frosting?
No worries! You can use a bit of melted chocolate piped with a toothpick or even write “RIP” on paper slips and stick them behind the cookies for the same spooky effect.
Final Thoughts
This Halloween Graveyard Pudding Cups Recipe will quickly become your go-to festive dessert once you see how easy and delightful it is. I love how it brings everyone to the table — kids, grown-ups, chocoholics, and fun-loving eaters alike. If you want a treat that checks all the boxes: tasty, quick, and totally Instagram-worthy, give this one a try. I promise, you’ll be tempted to keep it around year-round — but hey, spooky season only comes once a year, so let’s make it count!
Print
Halloween Graveyard Pudding Cups Recipe
- Prep Time: 10 minutes
- Cook Time: 0 minutes
- Total Time: 2 hours 10 minutes
- Yield: 6 servings 1x
- Category: Dessert
- Method: No-Cook
- Cuisine: American
Description
This Halloween Graveyard Pudding Cups recipe features a delicious chocolate mousse layered with crushed Oreo cookies to create a spooky graveyard effect. Topped with ‘RIP’ tombstone cookies and optional gummy worms, these pudding cups are perfect for a festive and eerie treat that’s both visually appealing and delightfully creamy.
Ingredients
For the Mousse
- 2 cups heavy whipping cream
- 6 oz semi-sweet chocolate wafers or chocolate chips
For the Graveyard Decoration
- 24 Oreo cookies (crushed)
- 6 Milano double chocolate cookies
- Black frosting or edible marker
- Gummy worms (optional)
Instructions
- Prepare Tombstone Cookies: Use black frosting or an edible marker to write “RIP” on 6 Milano double chocolate cookies to simulate tombstones. Set these decorated cookies aside for later use.
- Whip Heavy Cream: In a clean bowl, whip the 2 cups of heavy whipping cream until stiff peaks form, ensuring a light and airy texture for the mousse.
- Melt Chocolate: Place the 6 oz of semi-sweet chocolate wafers or chips in a microwave-safe bowl. Microwave at 50% power for 30 seconds intervals, stirring after each interval, until the chocolate is mostly melted. Allow the chocolate to cool for 10 minutes before combining.
- Make Chocolate Mousse: Slowly fold the cooled melted chocolate into the whipped cream gently until a smooth mousse forms, making sure not to deflate the whipped cream.
- Layer Crumbs and Mousse: Crush the Oreo cookies into fine crumbs. Sprinkle 3-4 tablespoons of the crushed Oreo crumbs evenly into the bottom of 6 clear 9 oz cups.
- Add Mousse Layer: Spoon a layer of the chocolate mousse over the Oreo crumbs in each cup.
- Repeat Layers: Repeat the layering by adding another 3-4 tablespoons of crushed Oreo crumbs followed by another mousse layer to fill the cups.
- Top with Crumbs: Finish by adding more crushed Oreo crumbs on top until it reaches the edge of the cup, mimicking dirt.
- Chill: Refrigerate the pudding cups for 2 hours to set the mousse and allow flavors to meld and the texture to firm up.
- Decorate and Serve: Before serving, insert one ‘RIP’ tombstone cookie into the center of each pudding cup. Optionally, add gummy worms to enhance the spooky graveyard effect. Serve with extra whipped cream and chocolate if desired.
Notes
- Make sure to cool the melted chocolate before folding it into the whipped cream to prevent the cream from melting.
- Use clear cups to showcase the layered effect of the pudding and Oreo crumbs for a creepy graveyard look.
- Gummy worms are optional but add fun and an eerie touch to the presentation.
- The mousse can be made a day ahead and refrigerated for convenience.
- For a dairy-free version, consider coconut whipped cream and dairy-free chocolate chips.
Nutrition
- Serving Size: 1 cup (about 9 oz)
- Calories: 420
- Sugar: 32g
- Sodium: 120mg
- Fat: 32g
- Saturated Fat: 20g
- Unsaturated Fat: 10g
- Trans Fat: 0g
- Carbohydrates: 25g
- Fiber: 2g
- Protein: 5g
- Cholesterol: 110mg

Your email address will not be published. Required fields are marked *