

Halloween is the perfect excuse to get a little creative in the kitchen, and I absolutely love how this Vampire Bite Halloween Cupcakes Recipe turns out every single year. These cupcakes aren’t just your average spooky treat — they have this insanely delicious red velvet flavor with a creamy, “bloody” filling that oozes out when you bite into them. I promise, whether you’re baking for a party or just to delight the family, these cupcakes will steal the show and maybe a few screams, too!
Why You’ll Love This Recipe
- Show-Stopping Presentation: Those “vampire bite” marks dripping with red icing always get a wow from guests.
- Perfectly Moist Cupcakes: The red velvet base with buttermilk keeps these cupcakes tender and delicious every time.
- Decadent Cream Cheese Filling: The creamy “blood” center adds a fun surprise that’s bursting with flavor.
- Fun and Easy to Customize: You can easily swap fillings or colors to make these your own spooky creation.

Ingredients You’ll Need
The ingredients for this vampire-themed cupcake recipe are mostly pantry basics that combine perfectly to create a vibrant red velvet cupcake with creamy, luscious frosting and filling. A couple of fun extras like red gel icing and food coloring bring the “bite” effect to life, so make sure you grab everything before you start baking.
- All-purpose flour: The sturdy base that keeps the cupcakes tender yet structured.
- Cocoa powder: Just enough to give that classic red velvet flavor without overpowering.
- Baking soda: For that perfect lift and a light texture.
- Salt: Balances out the sweetness and enhances flavor.
- Butter: I always use unsalted to control the saltiness exactly.
- Sugar: Sweetens the cupcakes – regular granulated is perfect here.
- Eggs: They add structure and richness; large eggs work best.
- Buttermilk: Adds moisture and a slight tang, crucial for red velvet’s signature taste.
- Vinegar: Reacts with baking soda for extra lift and subtle tanginess.
- Red food coloring: This is the heart of the “vampire bite” look—gel coloring works best for vivid, deep red hues.
- Vanilla extract: Gives a warm background flavor that rounds out the cupcakes.
- Cream cheese: For the rich, tangy filling that mimics “blood” perfectly.
- Powdered sugar: Used in both filling and frosting to keep everything silky smooth.
- Heavy cream: Whipped into the filling and frosting for lightness and fluffiness.
- Unsalted butter (frosting): Creamy base for the “skin-tone” frosting.
- Peach or ivory food coloring: Tints the frosting to a creepy “skin” shade.
- Red gel icing or syrup: For those dramatic dripping vampire bite marks.
- Toothpick: Essential for making the bite puncture holes.
Variations
I love experimenting with this Vampire Bite Halloween Cupcakes Recipe depending on my mood or the crowd. It’s really fun to swap things up and make them your own, whether you prefer a fruity twist or a different kind of spooky vibe.
- Fruit Filling Swap: I’ve replaced the cream cheese “blood” with raspberry jam once, and my family went crazy for the fresh, tart surprise inside.
- Vegan Version: Try using plant-based butter and cream cheese alternatives along with flax eggs for an allergy-friendly treat.
- Extra Scary: Adding candy vampire fangs on top really amps up the creep factor for parties!
- Less Sweet Frosting: I sometimes tone down the powdered sugar slightly and add a pinch of salt for balance.
How to Make Vampire Bite Halloween Cupcakes Recipe
Step 1: Prep and Mix Your Dry Ingredients with Care
Start by preheating your oven to 350°F and lining a muffin pan with festive cupcake liners. Sifting the flour, cocoa powder, baking soda, and salt together is a little extra step I love taking because it ensures even distribution and keeps your cupcakes light and crumbly — trust me, it makes a difference.
Step 2: Cream Butter and Sugar Until Fluffy
Using softened butter, beat it with sugar until it turns pale and fluffy – this usually takes about 3-4 minutes with an electric mixer. I learned that this step is the secret weapon for cupcakes that rise nicely and have that tender crumb you want. Then, add the eggs one at a time, mixing well after each addition to keep the batter smooth.
Step 3: Alternate Adding Dry Ingredients and Buttermilk
Next, alternate adding your sifted dry ingredients and the buttermilk to the butter mixture, starting and ending with the dry ingredients. This helps maintain a good batter consistency and balances moisture. After that, gently mix in the vinegar, red food coloring, and vanilla extract. The vinegar working with the baking soda will give your cupcakes that classic red velvet tang and perfect rise.
Step 4: Bake and Cool Completely
Fill your cupcake liners about two-thirds full for perfect dome shapes and bake for 18–20 minutes. I always test with a toothpick — you want it to come out clean with a few moist crumbs. Cool them thoroughly before adding the filling — this prevents any sogginess and helps the filling stay put inside.
Step 5: Prepare the “Bloody” Cream Cheese Filling
Beat cream cheese and powdered sugar until super smooth, then carefully fold in whipped heavy cream to lighten it up. I add a bit of red food coloring here for that dramatic “blood” effect inside the cupcakes. Be gentle folding so the filling stays fluffy and not runny.
Step 6: Core Each Cupcake and Fill
Using a small spoon or cupcake corer, gently remove the center from each cupcake without breaking the edges. Spoon in your red filling — this is the moment you start feeling like a real Halloween wizard! Pop the filling in just until it’s flush with the surface.
Step 7: Make Skin-Tone Frosting and Decorate
Whip your frosting by creaming butter first, then adding powdered sugar gradually until silky smooth. Mix in heavy cream to get a spreadable texture and tint with peach or ivory food coloring for a spooky “skin” look. Frost your cupcakes smoothly—this even, almost eerie finish makes the bite marks really pop.
Step 8: Create Vampire Bite Marks
Here’s the fun part: use a toothpick to poke two small holes close together on the frosted cupcake to mimic vampire puncture wounds. Then, carefully dab red gel icing or syrup into those punctures and let it drip slightly for a realistic bloody bite effect. I’ve found this simple step really creates a “wow” moment, especially on Halloween night.
Pro Tips for Making Vampire Bite Halloween Cupcakes Recipe
- Chill Before Filling: I discovered this trick when cupcakes became soggy from filling—pop them in the fridge first for firmer, neater results.
- Use Gel Food Coloring: It provides a deep red that’s both vibrant and natural-looking, unlike liquid coloring that can thin batter.
- Smooth Frosting Surface: Use an offset spatula to get that skin-like smoothness, making the vampire bite effect stand out more.
- Avoid Overfilling the Center: Too much filling can overflow when you frost—less is definitely more here for a clean look.
How to Serve Vampire Bite Halloween Cupcakes Recipe
Garnishes
I love topping these cupcakes with tiny edible vampire fang candies for a festive touch. For an extra creepy factor, sprinkle a little edible glitter or use small candy blood drops around the bites. It’s simple but makes them pop, especially for a Halloween crowd.
Side Dishes
Pair these cupcakes with a vibrant punch, like a deep red cranberry or pomegranate drink to complement the vampire theme. For savory bites, I like serving them alongside spiced popcorn or mini sliders to balance out the sweetness.
Creative Ways to Present
One year, I arranged them on a platter lined with fake spider webs and scatter red gumdrops as “blood droplets” around the edges—guests were amazed! You can also serve them on a tiered stand with flickering LED candles for spooky ambiance that’s sure to impress.
Make Ahead and Storage
Storing Leftovers
After frosting, I store leftover cupcakes in an airtight container in the fridge to keep the cream cheese filling fresh. They usually stay perfect for 3-4 days, and I always recommend letting them come to room temperature before serving so the frosting softens nicely.
Freezing
If you want to freeze them, I suggest doing so before filling and frosting. Wrap each cupcake tightly in plastic wrap and store in a freezer-safe container for up to 2 months. When thawing, let them sit overnight in the fridge, then add frosting and filling fresh for best results.
Reheating
Since these cupcakes are best enjoyed chilled, I don’t recommend reheating. Instead, allow refrigerated cupcakes to warm a bit at room temperature for 20-30 minutes, which brings out the flavor and softens the frosting without melting anything.
FAQs
-
Can I make these Vampire Bite Halloween Cupcakes recipe dairy-free?
Absolutely! Swap regular butter and cream cheese with dairy-free alternatives like vegan butter and cashew-based cream cheese. Also, use a non-dairy milk mixed with a little vinegar as a buttermilk substitute. With these swaps, you’ll still get the rich flavor with no dairy involved.
-
What’s the best type of red food coloring to use?
I highly recommend gel food coloring because it’s more concentrated and won’t thin out your batter or frosting. It gives you that vibrant, deep red that’s perfect for the vampire bite look without affecting texture.
- Can I make the cupcakes ahead of time?
Yes! You can bake and cool the cupcakes a day ahead. Store them in an airtight container at room temperature if unfilled, or in the fridge once filled and frosted. Just add the finishing touches, like the gel “bite marks,” closer to serving time for the freshest effect.
- How do I prevent the filling from leaking out?
The key is chilling the cupcakes before inserting the filling and using just the right amount—not too much. Also, folding whipped cream gently into the cream cheese filling creates a stable yet creamy center that holds well without spilling over.
Final Thoughts
I used to struggle with Halloween desserts that looked good but lacked flavor, but this Vampire Bite Halloween Cupcakes Recipe solved all that. It’s fun, flavorful, and just spooky enough to thrill both kids and adults alike. Trust me when I say these cupcakes will become your go-to for every Halloween bash—you’ll enjoy the process as much as the reactions when people dig into that “bloody” surprise. So go ahead and give it a try; I can’t wait to hear how your batch turns out!
Print
Vampire Bite Halloween Cupcakes Recipe
- Prep Time: 15 minutes
- Cook Time: 20 minutes
- Total Time: 45 minutes
- Yield: 12 cupcakes 1x
- Category: Dessert
- Method: Baking
- Cuisine: American
Description
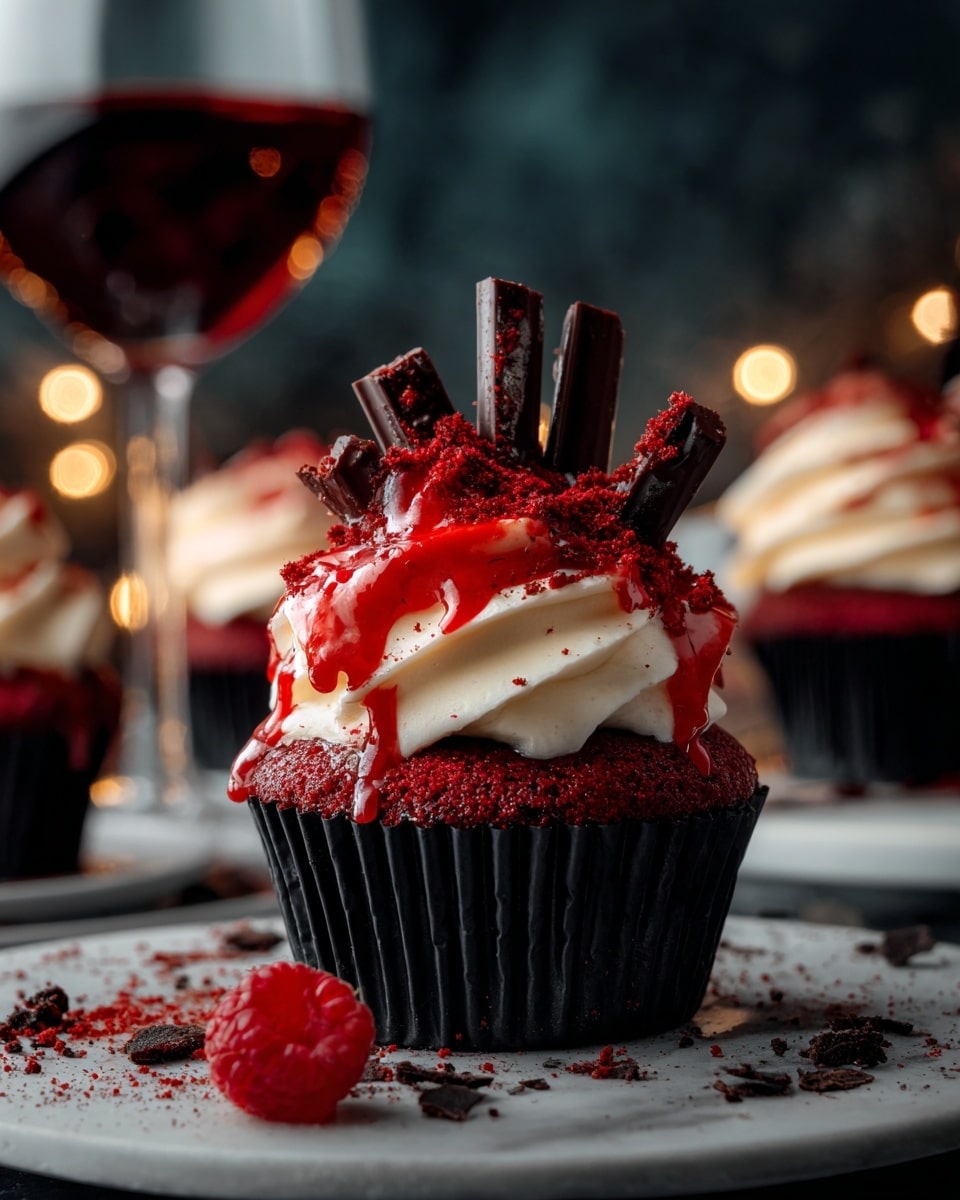
These Vampire Bite Halloween Cupcakes are a spooky and delicious treat perfect for Halloween parties. Moist red velvet cupcakes filled with a creamy, blood-red cream cheese filling and topped with skin-tone frosting create an eerie skin effect. The final touch is the realistic vampire bite marks made with red gel icing, complete with dripping ‘blood’ for a chillingly fun presentation.
Ingredients
Cupcake Batter
- 1 1/2 cups all-purpose flour
- 2 tablespoons cocoa powder
- 1 teaspoon baking soda
- 1/2 teaspoon salt
- 1/2 cup butter
- 1 cup sugar
- 2 large eggs
- 1 cup buttermilk
- 1 teaspoon vinegar
- 2 tablespoons red food coloring
- 1 teaspoon vanilla extract
Cream Cheese Filling
- 4 oz cream cheese
- 1/2 cup powdered sugar
- 1/2 cup heavy cream
- Red food coloring (gel recommended)
Frosting
- 1 cup unsalted butter
- 3 cups powdered sugar
- 3–4 tablespoons heavy cream
- Peach or ivory food coloring
Decoration
- Red gel icing or syrup (for vampire bite effect)
- Toothpick (for making puncture marks)
- Optional: candy vampire fangs or extra red gel drips
Instructions
- Preheat and Prepare Pan: Preheat your oven to 350°F (175°C) and line a muffin pan with cupcake liners to prepare for baking.
- Sift Dry Ingredients: Sift together the all-purpose flour, cocoa powder, baking soda, and salt to ensure even distribution and no lumps.
- Cream Butter and Sugar: Using a mixer, cream the butter and sugar until the mixture is pale and fluffy, which helps incorporate air into the batter for a lighter cupcake.
- Add Eggs: Add the eggs one at a time to the creamed butter and sugar, mixing well after each addition to fully incorporate them.
- Combine Wet and Dry Ingredients: Alternate adding the sifted dry ingredients with the buttermilk to the batter, starting and ending with dry ingredients. Mix until just combined.
- Add Vinegar, Food Coloring, and Vanilla: Stir in vinegar, red food coloring, and vanilla extract to achieve the classic red velvet color and flavor.
- Fill and Bake: Fill each cupcake liner about 2/3 full with batter and bake for 18–20 minutes until a toothpick inserted into the center comes out clean. Remove from oven and cool completely.
- Prepare Filling: Beat the cream cheese and powdered sugar until smooth and creamy. In a separate bowl, whip the heavy cream until soft peaks form, then gently fold it into the cream cheese mixture. Tint the filling with red gel food coloring to mimic a ‘bloody’ look.
- Core Cupcakes and Fill: Using a small knife or cupcake corer, remove the center of each cooled cupcake and spoon the red cream cheese filling into the hollowed section.
- Make Frosting: Whip the butter until creamy. Gradually add powdered sugar, mixing well after each addition. Add heavy cream to reach a smooth, spreadable consistency. Tint the frosting with peach or ivory food coloring to resemble skin tone.
- Frost Cupcakes: Frost the cupcakes smoothly with the skin-tone frosting to create a smooth surface that looks like skin.
- Create Vampire Bite Marks: Use a toothpick to poke two small holes close together on each cupcake to simulate puncture wounds. Apply red gel icing or syrup into the holes and allow it to drip slightly for a realistic vampire bite effect.
- Optional Decoration: For added scariness, add candy vampire fangs near the bite marks or extra drips of red gel ‘blood’ around the cupcakes.
Notes
- For best results, chill the cupcakes before filling to prevent the filling from making the cupcakes soggy.
- Using red gel icing creates the most realistic and vivid blood drips for the vampire bite effect.
- As a fruity alternative filling, you can substitute the cream cheese mixture with raspberry jam or strawberry coulis to maintain the red ‘bloody’ theme.
Nutrition
- Serving Size: 1 cupcake
- Calories: 350 kcal
- Sugar: 30 g
- Sodium: 210 mg
- Fat: 20 g
- Saturated Fat: 12 g
- Unsaturated Fat: 6 g
- Trans Fat: 0.2 g
- Carbohydrates: 38 g
- Fiber: 1 g
- Protein: 4 g
- Cholesterol: 65 mg

Your email address will not be published. Required fields are marked *