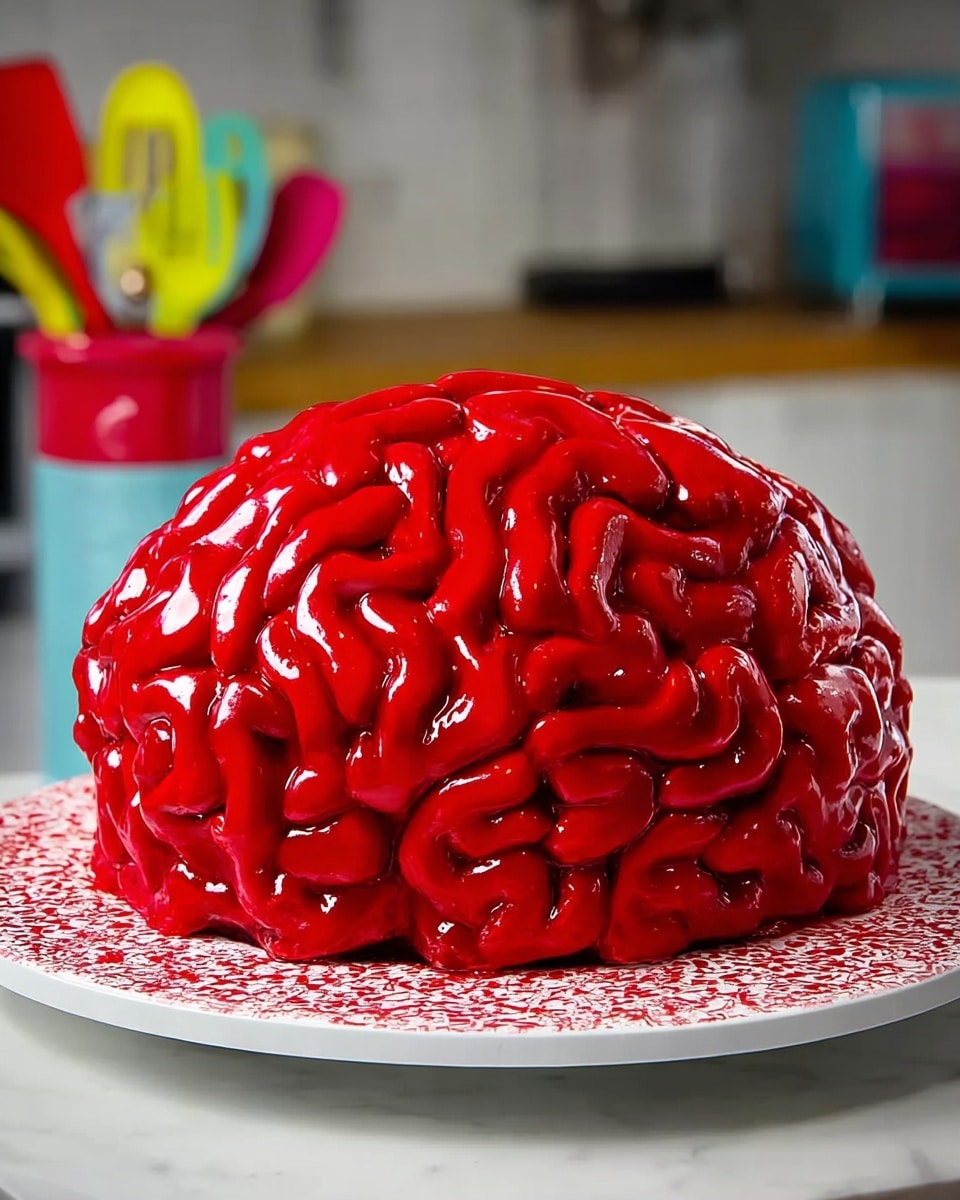
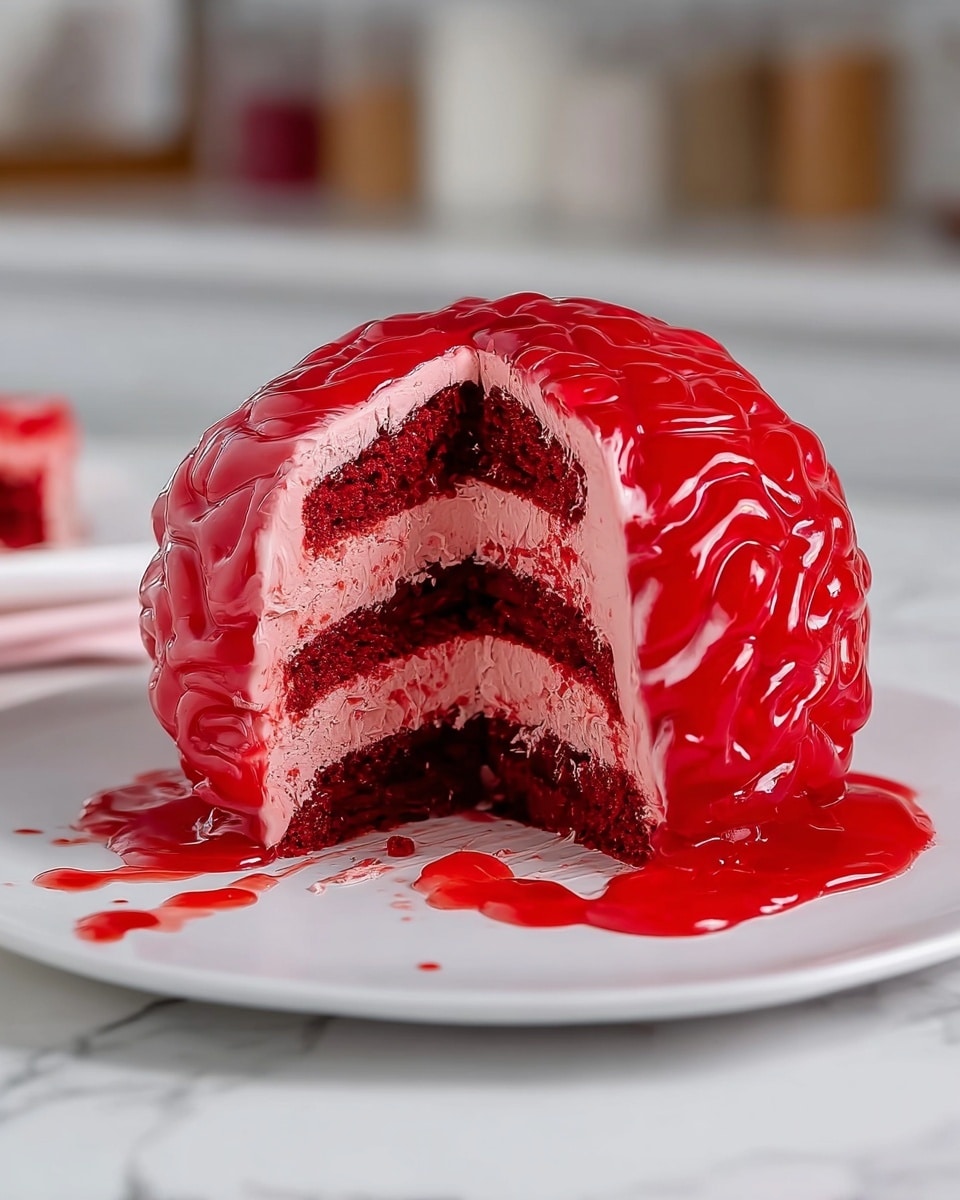
If you’re on the hunt for a show-stopping Halloween dessert, or just want to wow your friends with a touch of spooky fun, I’ve got the perfect recipe for you. This Brain Cake Recipe is a total game changer—moist red velvet cake layers stacked with luscious pink buttercream and oozing with raspberry jam “blood” for that creepy, edible effect. Trust me, once you try this, you’ll find it hard to go back to ordinary cakes.
Why You’ll Love This Recipe
- Perfectly Moist Layers: The combination of buttermilk and oil keeps the cake ultra tender every single time.
- Fun and Festive: The brain shape and raspberry jam “blood” create a spooky, edible masterpiece that’s sure to impress your guests.
- Rich, Creamy Frosting: The pink buttercream strikes a perfect balance of tangy cream cheese and sweet powdered sugar.
- Approachable Technique: You don’t have to be a pro baker to pull off this cool Brain Cake Recipe—I’ll guide you every step of the way!
Ingredients You’ll Need
For this Brain Cake Recipe, each ingredient plays a vital role in creating a moist, flavorful cake with that classic red velvet look and a frosting that’s anything but boring. I always recommend using room temperature eggs and dairy for the best texture.
- Cake Flour: Gives the cake that tender crumb and avoids heaviness.
- Unsweetened Cocoa Powder: This adds depth to the red velvet flavor without overpowering it.
- Baking Soda: Provides just the right amount of lift for lightness.
- Fine Salt: Balances sweetness and enhances flavors.
- Unsalted Butter: I love using room temperature to ensure it creames smoothly with sugar.
- Granulated Sugar: Sweetens while helping create cake structure.
- Large Eggs: Bind everything together and add richness.
- Buttermilk: Adds tanginess and tenderizes the crumb—key to that velvet texture.
- Vegetable or Canola Oil: Keeps the cake moist for days (trust me!).
- Vanilla Extract or Bean Paste: Real vanilla makes a huge flavor difference here.
- White Vinegar: Helps intensify the red color and react with baking soda.
- Red Gel or Liquid Food Coloring: For that vivid, bloody red that screams Halloween.
- Unsalted Butter (for frosting): Soft but firm ensures easy spreading.
- Full-Fat Cream Cheese: Brings tang and creaminess to the frosting.
- Powdered Sugar: Sweetens and thickens the buttercream.
- Heavy Whipping Cream: Helps achieve a silky frosting texture.
- Seedless Raspberry or Strawberry Jam: The secret “blood” that oozes from the cake layers.
- Water: Thins the jam slightly for easier spreading.
Variations
I love how versatile this Brain Cake Recipe is—whether you want to make it kid-friendly, dairy-free, or dive into more dramatic sculpting techniques. Feel free to make it your own and have fun with it!
- Dairy-Free: I once swapped cream cheese frosting for a coconut cream frosting and it turned out beautifully while keeping that tangy balance.
- Flavored Jam: Try blueberry or cherry jam instead of raspberry for a different but equally eerie “blood” effect.
- Mini Brains: Make smaller cakes or cupcakes using this recipe for a fun Halloween party platter—I’ve done this and the kids couldn’t get enough!
- Vegan Version: Use flax eggs and plant-based butter and cream cheese alternatives; you’ll still get a great texture and flavor.
How to Make Brain Cake Recipe
Step 1: Prepare Your Cake Batter
Start by preheating your oven to 350°F (175°C) and greasing your cake pans. In a medium bowl, whisk together the cake flour, cocoa powder, baking soda, and salt. In your mixer bowl, cream the room temperature butter with sugar until light and fluffy—this took a few minutes for me but it’s worth the wait to get that perfect crumb! Next, add your eggs one at a time, mixing well after each addition. Then, alternate adding the dry ingredients with the buttermilk, starting and ending with the dry mixture.
Step 2: Add Color and Final Wet Ingredients
Mix in the vegetable oil, vanilla extract, white vinegar, and your red gel or liquid food coloring until the batter is a vivid red. I learned that gel coloring works best since it packs more color without watering down the batter. Pour evenly into your prepared pans.
Step 3: Bake and Cool Your Cake Layers
Bake for about 27 minutes or until a toothpick inserted in the center comes out clean. Let the cakes cool in pans for 10 minutes before transferring to wire racks to cool completely. Cooling completely is a must—you’ll avoid your frosting melting and sliding off!
Step 4: Make the Pink Buttercream Frosting
In your mixer, combine the room temperature unsalted butter and cream cheese until smooth and creamy. Add vanilla extract, salt, and gradually beat in powdered sugar. Finally, add heavy whipping cream and a small squirt of red gel food coloring to achieve a lovely soft pink color. This frosting is just dreamy—rich but never too sweet.
Step 5: Assemble the Brain Cake with Jam “Blood”
Mix the seedless raspberry or strawberry jam with water (and extra red food coloring if you want it darker). Slice your cooled cakes horizontally to create multiple layers. Spread a thin layer of jam mixture onto each cake layer for that oozing blood effect, then add a thick layer of buttercream. Stack the layers, then crumb coat the entire cake with more frosting, chilling briefly before a final smooth coat.
To shape the cake like a brain, use a serrated knife to carve a rounded dome, then pipe or sculpt frosting ridges for the characteristic gyri—don’t worry, I’ll share my best tricks below.
Your email address will not be published. Required fields are marked *


