
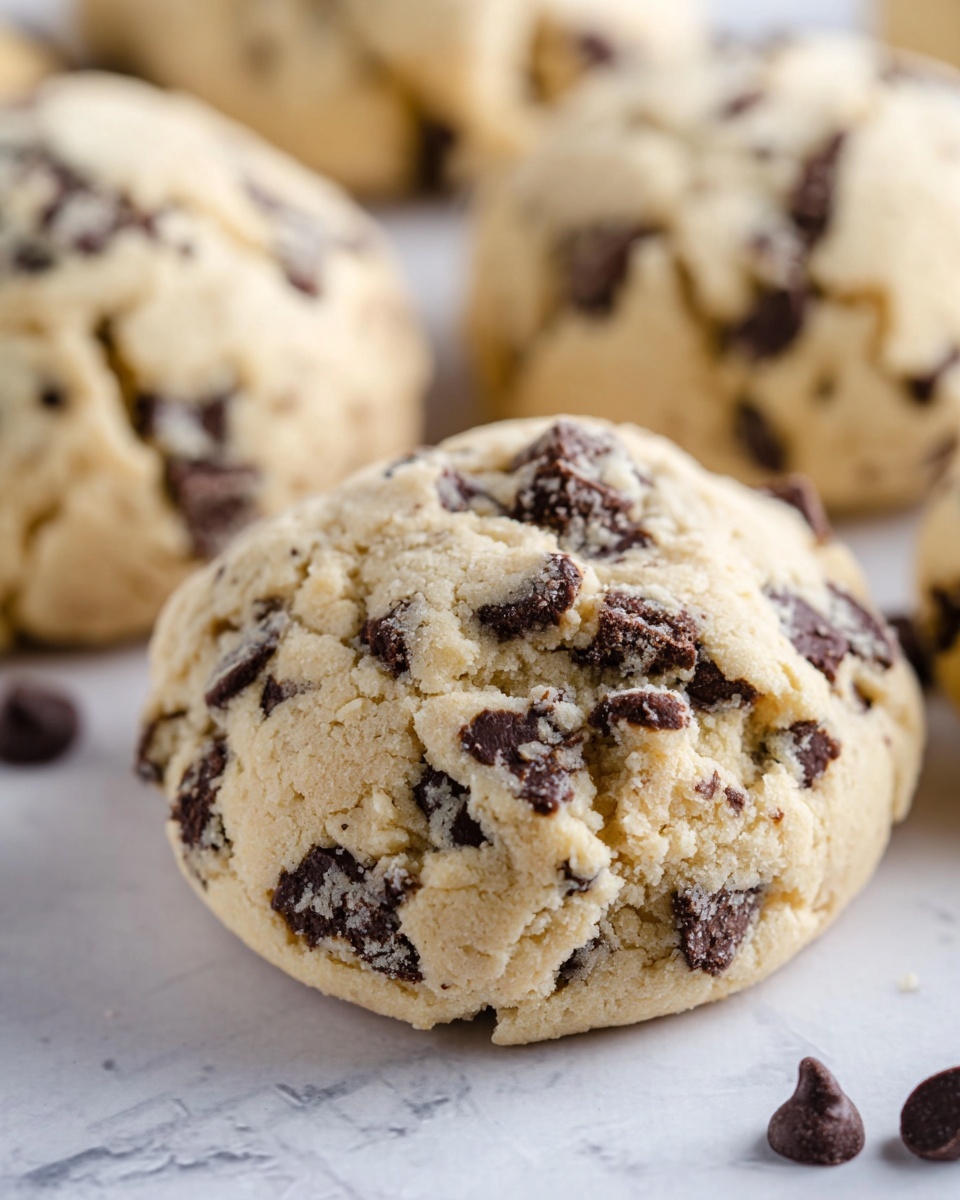
If you’re on the hunt for a cookie that’s both classic and a little extra special, you have to try my Buttermilk Chocolate Chip Cookies Recipe. I absolutely love how these cookies come out — soft, pillowy, with just the right tang from the buttermilk and rich bursts of melty chocolate in every bite. Honestly, once you try this recipe, your cookie game will never be the same. So, let me show you exactly how to make these beauties that have become a family favorite around here.
Why You’ll Love This Recipe
- Unique Tangy Twist: Thanks to buttermilk, these cookies have a subtle tang that balances the sweet chocolate perfectly.
- Supremely Soft Texture: The buttermilk and brown sugar combination keeps the cookies unbelievably soft and chewy.
- Big, Decadent Chocolate Chunks: Using chunks instead of chips means each bite is loaded with melty chocolate goodness.
- Easy to Make: Simple ingredients and straightforward steps make this recipe approachable for any home baker.

Ingredients You’ll Need
These ingredients work together beautifully — the buttermilk adds moisture and tang, while the brown sugar gives a deep caramel flavor that you just don’t get with plain white sugar. Be sure to use good-quality butter and a mix of chocolate chunks if you want the best results.
- All-purpose flour: The base of the cookie; spoiling this will affect texture, so measure it correctly.
- Baking soda: Gives the cookies the right lift; make sure it’s fresh for maximum rise.
- Salt: Enhances the flavor and balances sweetness perfectly.
- Butter (room temperature): Softened butter is easier to cream and helps with that melt-in-your-mouth texture.
- Dark brown sugar: Adds moisture and a subtle molasses flavor that’s essential here.
- Sugar: For sweetness and structure; I like using a mix for balanced flavor.
- Egg: Binds everything together and adds richness.
- Buttermilk: The star ingredient! This adds tang and tenderizes the dough beautifully.
- Chocolate chunks: I personally love mixing milk and dark chocolate chunks — it gives a layered chocolate flavor and amazing texture.
Variations
While the Buttermilk Chocolate Chip Cookies Recipe is perfect as is, I love to switch things up depending on the mood or occasion. It’s so satisfying to make it your own by experimenting with different add-ins or tweaks.
- Nutty Upgrade: I add chopped toasted pecans or walnuts sometimes — it gives a lovely crunch and nutty flavor that pairs well with the tangy dough.
- Spiced Version: I’ve tried adding a pinch of cinnamon and a dash of vanilla extract to deepen the flavor, and it totally transforms the cookies into cozier treats.
- Gluten-Free Alternative: Swap in a gluten-free flour blend with xanthan gum to enjoy these cookies without wheat — just watch the texture and adjust the flour amount.
- Milk-Free Version: Use a dairy-free butter and plant-based buttermilk substitute like a mix of almond milk and lemon juice.
How to Make Buttermilk Chocolate Chip Cookies Recipe
Step 1: Mix Your Dry Ingredients
Start by whisking the all-purpose flour, baking soda, and salt together in a medium bowl. This way, your leavening and seasoning get evenly distributed and your cookies bake uniformly. I usually set this aside while I tackle the wet ingredients so everything stays ready to combine when needed.
Step 2: Cream the Butter and Sugars
In your stand mixer fitted with the paddle attachment, cream the room-temperature butter with the dark brown sugar and sugar until the mixture is light and fluffy. This step is key because it traps air, helping your cookies rise and stay soft. Don’t rush this part—I usually give it around 3 to 5 minutes.
Step 3: Add the Egg and Alternate Dry Ingredients with Buttermilk
Once the butter and sugars are creamed, toss in the egg and beat at medium speed for about 30 seconds until it’s well mixed. Then, switch the mixer to low, add half the dry ingredients, followed by the buttermilk slowly streaming in, and finish with the remaining dry ingredients. This slow incorporation keeps the dough tender without overmixing. Pro tip: add the buttermilk slowly so the dough stays silky.
Step 4: Fold in Chocolate Chunks and Chill
Using a rubber spatula, fold in the chocolate chunks gently. Resist the urge to overmix here—that just makes cookies tough. Then cover your dough tightly with plastic wrap and refrigerate it for at least 2 hours. Honestly, I love letting it rest overnight because it deepens the flavors and makes the dough easier to handle.
Step 5: Scoop and Bake
When you’re ready, preheat your oven to 350°F and line two cookie sheets with parchment paper. Using a 3.25-ounce cookie scoop (I grabbed a #10 scoop), overfill it and then mound the dough to form a big ball—think slightly smaller than a tennis ball. You’ll get 9 generous cookies. Place three dough balls per sheet on the middle rack, bake for 12 minutes, and let them spread and get gorgeously golden. For a less gooey cookie, add 3 more minutes. Let the first batch cool on the sheet while you bake the rest. Trust me, this little patience step makes all the difference.
Pro Tips for Making Buttermilk Chocolate Chip Cookies Recipe
- Chill Your Dough Overnight: I discovered this trick when I noticed fresher, more developed flavors and much easier scooping after chilling the dough for longer.
- Use a Cookie Scoop for Consistency: Using a standard scoop means all cookies bake evenly and look professional—plus, no dough-guesswork!
- Don’t Overmix Once Dry Ingredients Are Added: It’s tempting, but overmixing leads to dense, tough cookies rather than soft, tender ones.
- Watch Your Bake Time Closely: I almost always set a timer and peek early to avoid overbaking—the cookies keep cooking a bit after coming out of the oven.
How to Serve Buttermilk Chocolate Chip Cookies Recipe
Garnishes
I like to sprinkle a tiny pinch of flaky sea salt on the cookies right when they come out of the oven—it intensifies the chocolate and adds a subtle crunch that my family goes crazy for. Sometimes, a quick dusting of powdered sugar is fun for a special occasion too.
Side Dishes
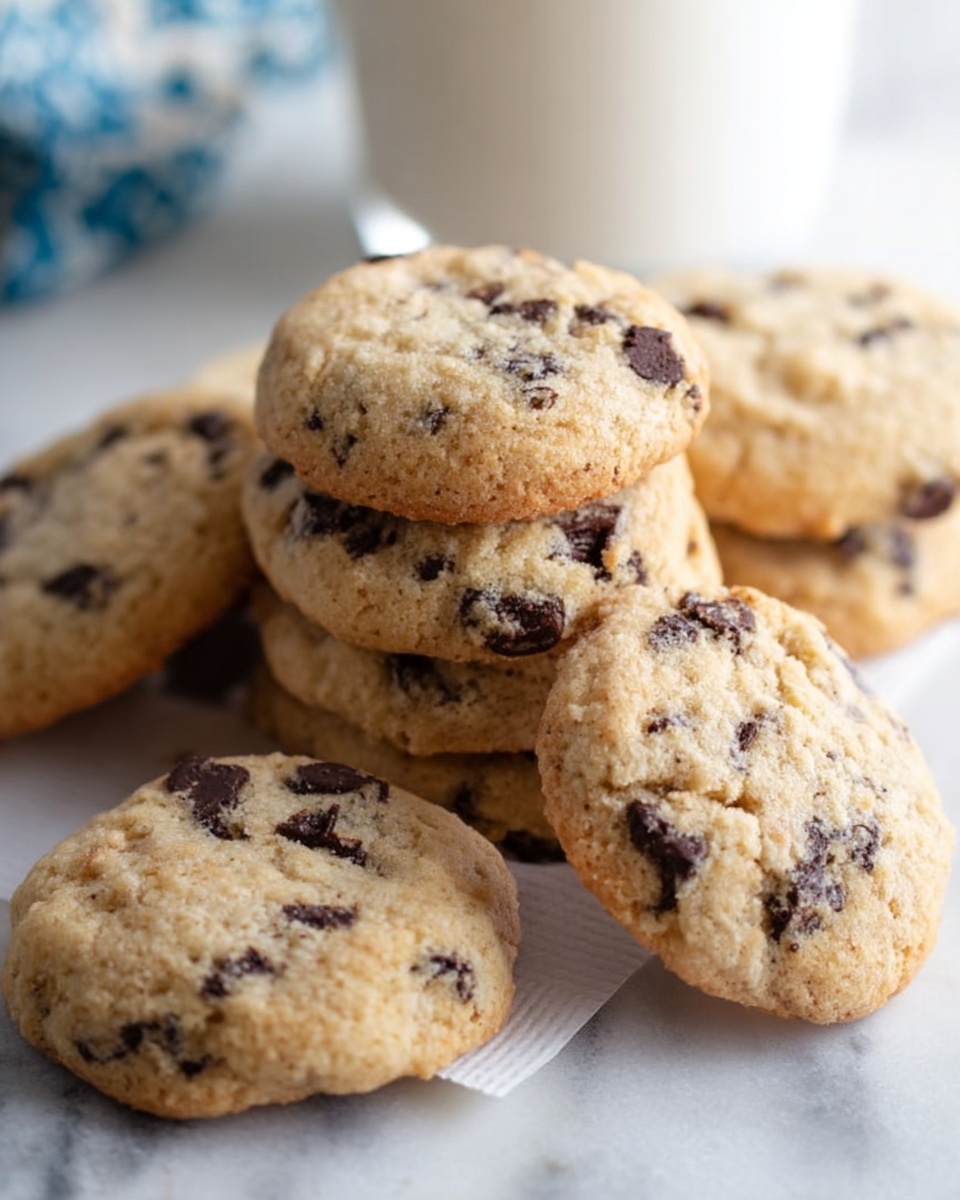
These cookies are naturally best enjoyed on their own with a cold glass of milk. But if you’re feeling adventurous, I love pairing them with vanilla ice cream for an easy, dreamy dessert or a cup of strong coffee to balance the sweetness.
Creative Ways to Present
For birthdays or holidays, I sometimes stack these cookies into a cookie tower tied with a pretty ribbon or place them on a decorative platter surrounded by fresh berries and mint. It turns simple cookies into a festive centerpiece that impresses every time.
Make Ahead and Storage
Storing Leftovers
Once cooled completely, I store leftover cookies in an airtight container at room temperature. They stay soft and fresh for up to 4 days, but honestly, they rarely last that long around here!
Freezing
I often freeze leftover dough balls individually wrapped in plastic wrap and then placed in a freezer bag. When I want fresh cookies, I bake them straight from frozen, adding a couple of extra minutes to the baking time. This is a lifesaver when unexpected cookie cravings hit.
Reheating
To bring cookies back to life, I pop them in a preheated oven at 300°F for about 5 minutes or microwave briefly (around 10 seconds) just to warm the chocolate and soften the cookie without drying it out. It’s like they were freshly baked!
FAQs
-
Can I substitute buttermilk in this recipe?
Absolutely! If you don’t have buttermilk on hand, you can make a quick substitute by adding 1/2 tablespoon of lemon juice or white vinegar to 1/2 cup of milk. Let it sit for 5 minutes before using. This will mimic the acidity and texture of buttermilk, ensuring your cookies stay tender and flavorful.
-
Why do these cookies call for chilling the dough?
Chilling the dough allows the flour to fully hydrate and the butter to firm up, which prevents the cookies from spreading too thin during baking. It also helps develop deeper flavors. From my experience, overnight chilling yields the best texture and taste.
-
Can I use chocolate chips instead of chunks?
You can, but I recommend chunks because they melt more unevenly, giving you pockets of melty chocolate. Chips tend to keep their shape and won’t provide the same gooey surprise, though they still work well if that’s what you have.
-
How do I prevent my cookies from spreading too much?
Make sure your butter is just softened, not melted, and chill your dough as suggested. Using parchment paper helps too, and avoid placing the cookie sheets on the bottom oven rack where it’s hotter. These steps keep the cookies thick and perfectly shaped.
Final Thoughts
This Buttermilk Chocolate Chip Cookies Recipe is one I keep coming back to not just because the cookies taste amazing, but because it’s so satisfying to bake and share. I love how simple ingredients come together to create that perfect chewy, comforting cookie with a hint of something unexpected from the buttermilk. Whether you’re baking for your family, friends, or just for yourself, I promise this recipe will become your go-to. Give it a try—you’ll be amazed at how a little buttermilk boosts your classic chocolate chip cookie to a whole new level of deliciousness!
Print
Buttermilk Chocolate Chip Cookies Recipe
- Prep Time: 15 Minutes
- Cook Time: 15 Minutes
- Total Time: 2 hours 30 Minutes
- Yield: 9 large cookies 1x
- Category: Dessert
- Method: Baking
- Cuisine: American
Description
These Buttermilk Chocolate Chip Cookies are soft, rich, and full of melty chocolate chunks, combining the tangy depth of buttermilk with classic brown and white sugars for a perfectly balanced, chewy texture. Chilled dough ensures the cookies bake evenly and develop a tender crumb with delightful gooey centers, ideal for a comforting homemade treat.
Ingredients
Dry Ingredients
- 3 cups all-purpose flour
- 1 teaspoon baking soda
- 1 teaspoon salt
Wet Ingredients & Mix-ins
- 1 cup butter, room temperature
- 1 cup dark brown sugar
- 1/2 cup sugar
- 1 large egg
- 1/2 cup buttermilk
- 2 cups chocolate chunks (milk and dark chocolate mix preferred)
Instructions
- Prepare dry ingredients. In a medium mixing bowl, whisk together all-purpose flour, baking soda, and salt until well combined. Set this dry mixture aside for later use.
- Cream butter and sugars. Using a stand mixer fitted with a paddle attachment, cream together room temperature butter, dark brown sugar, and sugar until light and fluffy, about 2-3 minutes. Add the egg and beat on medium speed for 30 seconds to incorporate.
- Combine wet and dry ingredients. Reduce the mixer speed to low and gradually add half of the dry mixture, mixing just until incorporated. Slowly stream in the buttermilk, then add the remaining dry ingredients. Finish by folding in the chocolate chunks gently with a rubber spatula to evenly distribute.
- Chill the dough. Cover the dough bowl tightly with plastic wrap and refrigerate for at least 2 hours, preferably overnight, to let the flavors meld and the dough to firm up for better shaping.
- Preheat oven and prepare baking sheets. When ready to bake, preheat your oven to 350°F (175°C). Line two cookie sheets with parchment paper to prevent sticking and ensure even baking.
- Scoop and shape cookies. Using a 3.25-ounce cookie scoop (#10 scoop), overfill the scoop with dough and mound it into a ball slightly smaller than a tennis ball, resulting in approximately 9 large cookies total.
- Bake the cookies. Place three dough balls per sheet tray on the middle rack in the preheated oven. Bake for 12 minutes until the cookies spread and edges turn lightly golden. For less gooey cookies, extend baking time by 3 additional minutes.
- Cool between batches. Allow cookies to cool on the baking sheet for a few minutes before transferring them to a cooling rack. Reuse the sheet for subsequent batches of cookie dough to maintain baking efficiency.
Notes
- Chilling the dough is essential for preventing excessive spreading and developing rich flavor and texture.
- Adjust chocolate chunk ratios or types to suit your personal taste preference.
- For firmer cookies, bake slightly longer; for softer centers, stick to the shorter baking time.
- If you don’t have buttermilk, you can substitute with 1/2 cup milk plus 1 teaspoon lemon juice or vinegar, let it sit for 5 minutes before using.
- Cookies keep well in an airtight container for up to 5 days or freeze dough balls for later baking.
Nutrition
- Serving Size: 1 large cookie
- Calories: 270
- Sugar: 18g
- Sodium: 180mg
- Fat: 13g
- Saturated Fat: 8g
- Unsaturated Fat: 4g
- Trans Fat: 0.2g
- Carbohydrates: 34g
- Fiber: 2g
- Protein: 3g
- Cholesterol: 40mg

Your email address will not be published. Required fields are marked *