

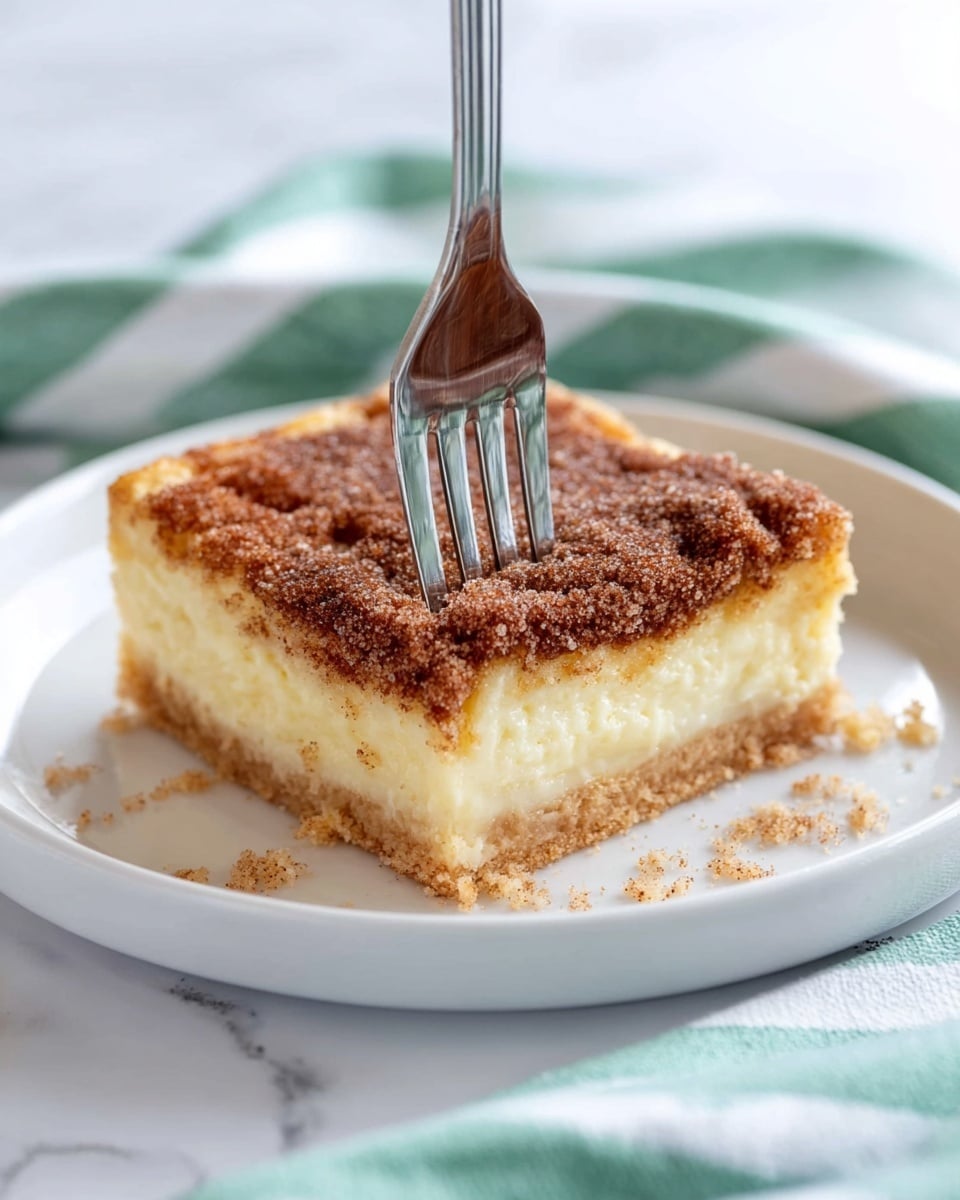
I absolutely love this Sopapilla Cheesecake Bars Recipe because it’s such a simple yet show-stopping dessert that always impresses guests and satisfies sweet cravings. The layers of buttery crescent roll dough sandwiching a rich, creamy cheesecake filling, all topped with that irresistible cinnamon-sugar crust, truly make it a family favorite in my house.
You’ll find that this recipe works perfectly for potlucks, holiday dinners, or any time you want a dessert that feels a little fancy but doesn’t require a ton of effort. When I first tried this, I struggled to find an easy cheesecake bar that wasn’t dense or dry—this one nails that soft, flaky texture every time!
Why You’ll Love This Recipe
- Simplicity: Uses just a few pantry staples and canned crescent rolls for an easy, no-fuss dessert.
- Texture Contrast: Flaky, buttery crust pairs perfectly with smooth cheesecake filling and a crunchy cinnamon topping.
- Versatility: Great for casual family dinners or dressed up for special occasions like holidays and parties.
- Crowd-Pleaser: My family goes crazy for these bars every time—they’re always the first to disappear!

Ingredients You’ll Need
Each ingredient in this Sopapilla Cheesecake Bars Recipe plays a simple but important role in creating the perfect layered treat. I recommend using full-fat cream cheese for that rich, smooth filling and refrigerated crescent rolls for that buttery crust that browns beautifully.
- Refrigerated crescent rolls: The easy, flaky dough that forms both the base and the crumbly top layer. Make sure they’re fresh for best puff and texture.
- Cream cheese: I always use full-fat, room temperature cream cheese so the filling is creamy and spreads evenly without lumps.
- Vanilla extract: Adds a subtle but essential warmth and sweetness to the cheesecake layer.
- Egg: Helps bind the cream cheese filling and adds richness.
- Sugar: Sweetens the filling and the cinnamon topping to balance flavors.
- Unsalted butter: Melted and poured on top for that golden, cinnamon-sugar crust that’s irresistibly crispy.
- Ground cinnamon: Essential for that classic sopapilla flavor, paired with sugar for the crunchy topping.
Variations
I love that the Sopapilla Cheesecake Bars Recipe is so adaptable—you can easily tweak it to suit your taste or dietary needs. Don’t hesitate to add your favorite extras or make it your own with a few simple twists.
- Fruit Twist: I sometimes spread a thin layer of strawberry or raspberry jam under the cream cheese for a fruity surprise that my kids adore.
- Chocolate Chip Upgrade: Adding mini chocolate chips into the cream cheese filling gives it a fun chocolate crunch which is always a hit.
- Gluten-Free Version: You can try using gluten-free crescent dough or a pre-made gluten-free pastry crust as a base for a similar effect.
- Lower Sugar: For a lighter option, reduce the sugar topping or swap to a sugar substitute and keep the cream cheese filling less sweet to balance.
How to Make Sopapilla Cheesecake Bars Recipe
Step 1: Prepare the Bottom Crescent Roll Layer
Start by preheating your oven to 350°F. Unroll one can of refrigerated crescent rolls and gently press it into the bottom of a 13×9 baking dish. Don’t forget to press the perforations closed so it bakes into one solid layer. This base will give you that buttery, flaky crust we all love.
Step 2: Make the Cream Cheese Filling
Use an electric mixer to beat the room temperature cream cheese with 1 cup of sugar until super smooth. Then mix in the egg and vanilla extract until combined fully. This filling should be creamy and spread easily without lumps. When I first tried this, beating the cream cheese thoroughly made all the difference in texture.
Step 3: Layer and Seal
Spread the cream cheese mixture evenly over the bottom crescent layer. Now unroll the second can of crescent rolls and carefully place it on top over the cream cheese, pinching the seams closed where needed. This seals in the filling and ensures a beautiful layered bar.
Step 4: Add Butter and Cinnamon Sugar Topping
Pour the melted butter evenly over the surface of the top crescent layer. Mix the remaining 1/3 cup sugar with cinnamon and sprinkle that all over the butter. This topping is what gives the bars their signature crunchy, sweet sopapilla finish.
Step 5: Bake and Cool
Bake for about 25-30 minutes. You’ll know it’s ready when the bars are golden brown on top and the filling has set—give the pan a gentle shake to check for wobbliness. Cool the bars for 15-20 minutes before cutting so the layers settle nicely and don’t fall apart when sliced.
Pro Tips for Making Sopapilla Cheesecake Bars Recipe
- Room Temperature Cream Cheese: I always let the cream cheese soften before mixing to avoid lumps and get a silky smooth filling.
- Seal the Crescent Seams: Pinch the perforations well so the layers don’t separate while baking. It keeps the bars looking neat.
- Even Butter Pour: Pour melted butter slowly in a thin stream over the top for an even coating that crisps the cinnamon sugar perfectly.
- Don’t Overbake: Watch the edges and golden color carefully – overbaking dries out the cheesecake layer, so pull it just as it sets.
How to Serve Sopapilla Cheesecake Bars Recipe
Garnishes
I usually dust the top with a little extra powdered sugar for a pretty finish. Sometimes, I add a drizzle of honey or a dollop of whipped cream for extra indulgence. Fresh berries on the side add a bright counterpoint to the rich flavors.
Side Dishes
Pairing these bars with a scoop of vanilla ice cream or a cup of strong coffee is my go-to. I’ve also served them alongside a fresh fruit salad for a delightful brunch spread—totally delicious and balanced!
Creative Ways to Present
For birthdays or gatherings, I cut the bars into cute bite-sized squares and serve on a decorative platter with fresh mint leaves. Another fun tip: drizzle melted chocolate or caramel over individual bars for a decadent twist that wows your guests!
Make Ahead and Storage
Storing Leftovers
These bars store beautifully in the fridge in an airtight container for up to 5 days. I like to let them cool completely before wrapping to keep the cinnamon sugar topping crisp as long as possible.
Freezing
If I have extras, I freeze them in portions wrapped tightly in plastic wrap and foil. They freeze well up to 2 months and thaw quickly on the counter or overnight in the fridge without losing their texture.
Reheating
I usually rewarm leftovers with a quick zap in the microwave at 50% power for 5-10 seconds. This helps keep the cheesecake filling soft but keeps the crunchy topping intact. Sometimes an extra minute in a toaster oven revives the crust even more.
FAQs
-
Can I use homemade crescent roll dough instead of store-bought?
Absolutely! While refrigerated crescent rolls save time, if you have your own dough, it can work beautifully—the key is having a buttery, flaky dough that rolls out easily and bakes crisply.
-
How do I prevent the cream cheese filling from leaking out?
Make sure to pinch the seams of the crescent roll dough firmly when adding the top layer to seal the filling inside. Also, spreading the filling evenly and stopping just short of the edges helps keep it contained while baking.
-
Can I make these bars ahead of time?
Yes! You can assemble them ahead, cover tightly, and bake right before serving, or bake completely and store in the fridge—just rewarm slightly before serving for best flavor and texture.
-
What’s the best way to cut these bars cleanly?
Use a sharp knife and let the bars cool completely before slicing. For cleaner cuts, wipe your knife between cuts to prevent sticking, which keeps each piece looking neat.
-
Can I add other flavors to the cheesecake filling?
Definitely! You can mix in citrus zest, a touch of almond extract, or even swirl in some fruit preserves to personalize the flavor while keeping the classic texture.
Final Thoughts
This Sopapilla Cheesecake Bars Recipe is one of those go-to desserts that feels like a special treat but couldn’t be easier to pull off. I love how the simple ingredients come together to make something elegant, homey, and incredibly tasty. If you’re looking for a dessert that’ll get compliments and vanish off the plate fast, give this a try—you’ll be making it again and again, just like I do.
Print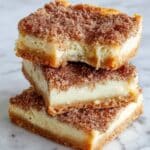
Sopapilla Cheesecake Bars Recipe
- Prep Time: 10 minutes
- Cook Time: 25 minutes
- Total Time: 35 minutes
- Yield: 12 bars 1x
- Category: Dessert
- Method: Baking
- Cuisine: American
- Diet: Vegetarian
Description
Sopapilla Cheesecake Bars are an easy and delicious dessert featuring layers of buttery crescent rolls filled with a creamy vanilla-flavored cream cheese mixture, topped with a cinnamon sugar crust. Perfectly golden and slightly sweet, these bars combine the flavors of classic sopapillas and cheesecake in a convenient baked treat.
Ingredients
Crust and Topping
- 2 8–ounce cans refrigerated crescent rolls
- 4 tablespoons unsalted butter, melted
- 2 teaspoons ground cinnamon
- 1/3 cup sugar
Filling
- 2 8–ounce packages cream cheese, at room temperature
- 1 1/2 teaspoons vanilla extract
- 1 large egg
- 1 cup sugar
Instructions
- Preheat Oven: Preheat your oven to 350 degrees Fahrenheit to ensure the bars bake evenly and achieve a golden crust.
- Prepare Bottom Layer: Unroll one can of crescent roll dough and lay it evenly on the bottom of a 13×9 glass or metal baking dish. Carefully stretch the dough to cover the entire bottom and press the perforations to seal the seams, creating a solid crust base.
- Make Cream Cheese Filling: In a medium bowl, beat the cream cheese and 1 cup of sugar using an electric mixer until the mixture is smooth and creamy. Add in the egg and vanilla extract, then mix well to combine all ingredients uniformly.
- Spread Filling: Evenly spread the cream cheese mixture over the bottom layer of dough in the baking dish, ensuring smooth coverage.
- Add Top Dough Layer: Unroll the second can of crescent roll dough and gently place it on top of the cream cheese layer. Pinch the seams together carefully to seal the top layer with the filling beneath.
- Apply Topping: Pour the melted butter evenly over the top dough layer. In a small bowl, combine the remaining 1/3 cup sugar with ground cinnamon and sprinkle this cinnamon sugar mixture evenly over the buttered surface.
- Bake: Bake the bars in the preheated oven for 25-30 minutes or until they appear set when gently shaken and the top is golden brown.
- Cool and Serve: Allow the bars to cool for 15-20 minutes before cutting and serving to let the filling set perfectly.
- Storage and Reheating: Store any leftover bars in the refrigerator. To rewarm, microwave on 50% power for 5 to 10 seconds.
Notes
- Sopapilla Cheesecake Bars combine the flaky, buttery layers of crescent rolls with a smooth cream cheese filling and a cinnamon sugar topping for a crowd-pleasing dessert.
- Ensure the cream cheese is at room temperature for a smooth filling mixture.
- Pressing the perforations in the dough layers helps prevent gaps and leaking filling.
- Allow the bars to cool fully before cutting to maintain clean slices.
- Reheating briefly in the microwave softens the bars without drying them out.
Nutrition
- Serving Size: 1 bar (1/12th of recipe)
- Calories: 280 kcal
- Sugar: 20 g
- Sodium: 290 mg
- Fat: 18 g
- Saturated Fat: 10 g
- Unsaturated Fat: 6 g
- Trans Fat: 0.3 g
- Carbohydrates: 24 g
- Fiber: 0.5 g
- Protein: 5 g
- Cholesterol: 60 mg

Your email address will not be published. Required fields are marked *