
I absolutely love this Melt-in-Your-Mouth Danish Butter Cookies Recipe because it hits that perfect balance between buttery richness and tender, crumbly texture. Whenever I bake these cookies, the aroma fills my kitchen and transports me to a cozy afternoon in Denmark. They’re simple yet feel so special, making them perfect for gifting during holidays or just indulging with a cup of tea on a quiet weekend.
You’ll find that these cookies are delightfully crisp around the edges but almost melt on your tongue the moment you bite in. What makes this Melt-in-Your-Mouth Danish Butter Cookies Recipe truly shine is the thoughtful blend of all-purpose and cake flours, which I learned really enhances the tenderness without losing that satisfying crunch. Trust me, once you make these, they’ll become your go-to for every occasion when you want to impress effortlessly.
Why You’ll Love This Recipe
- Buttery Perfection: The use of European salted butter delivers rich flavor and a smooth texture that everyone notices.
- Tender yet Crisp: Combining all-purpose and cake flours creates that signature Danish cookie crunch with a melt-in-the-mouth feel.
- Simple Ingredients: You only need pantry staples, but the results are anything but ordinary.
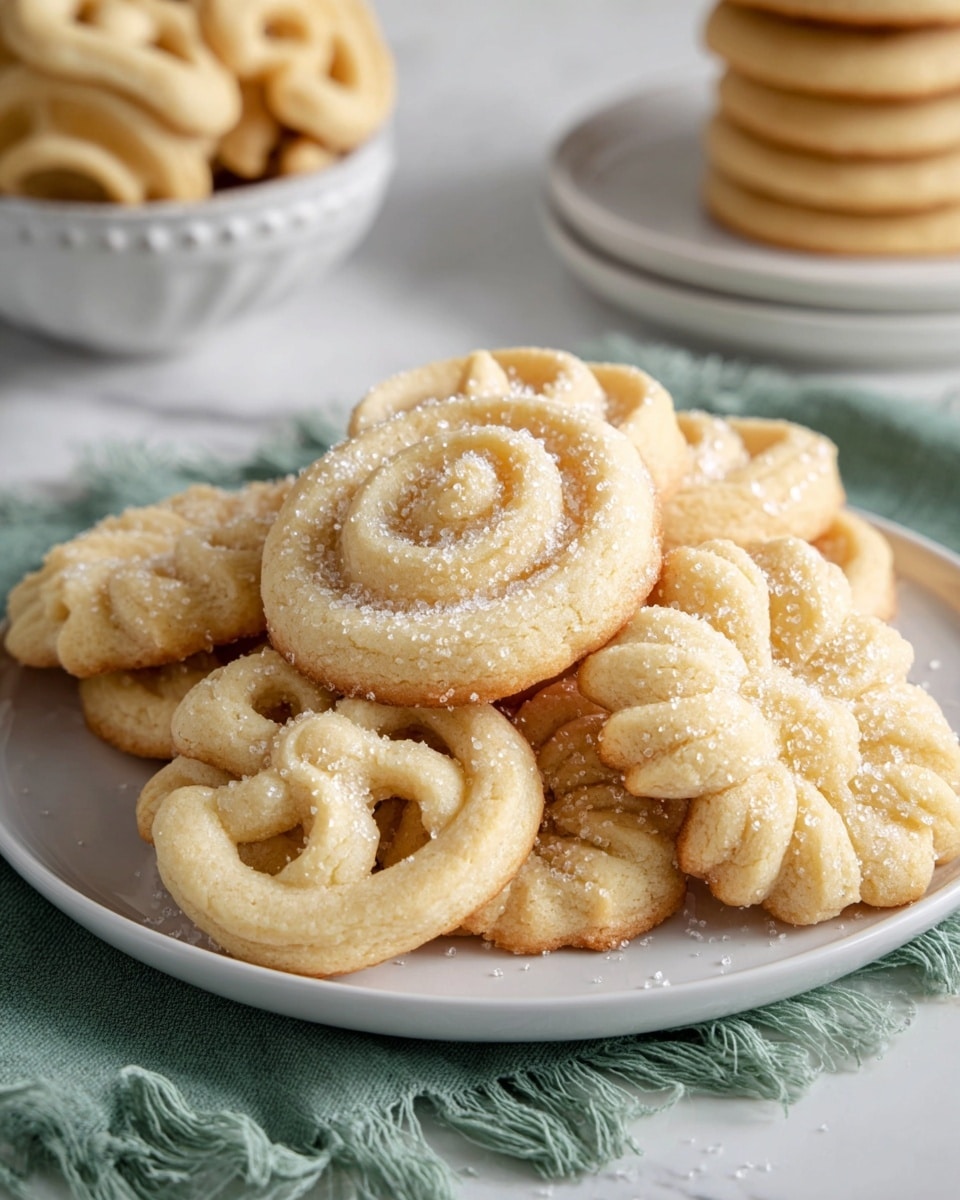
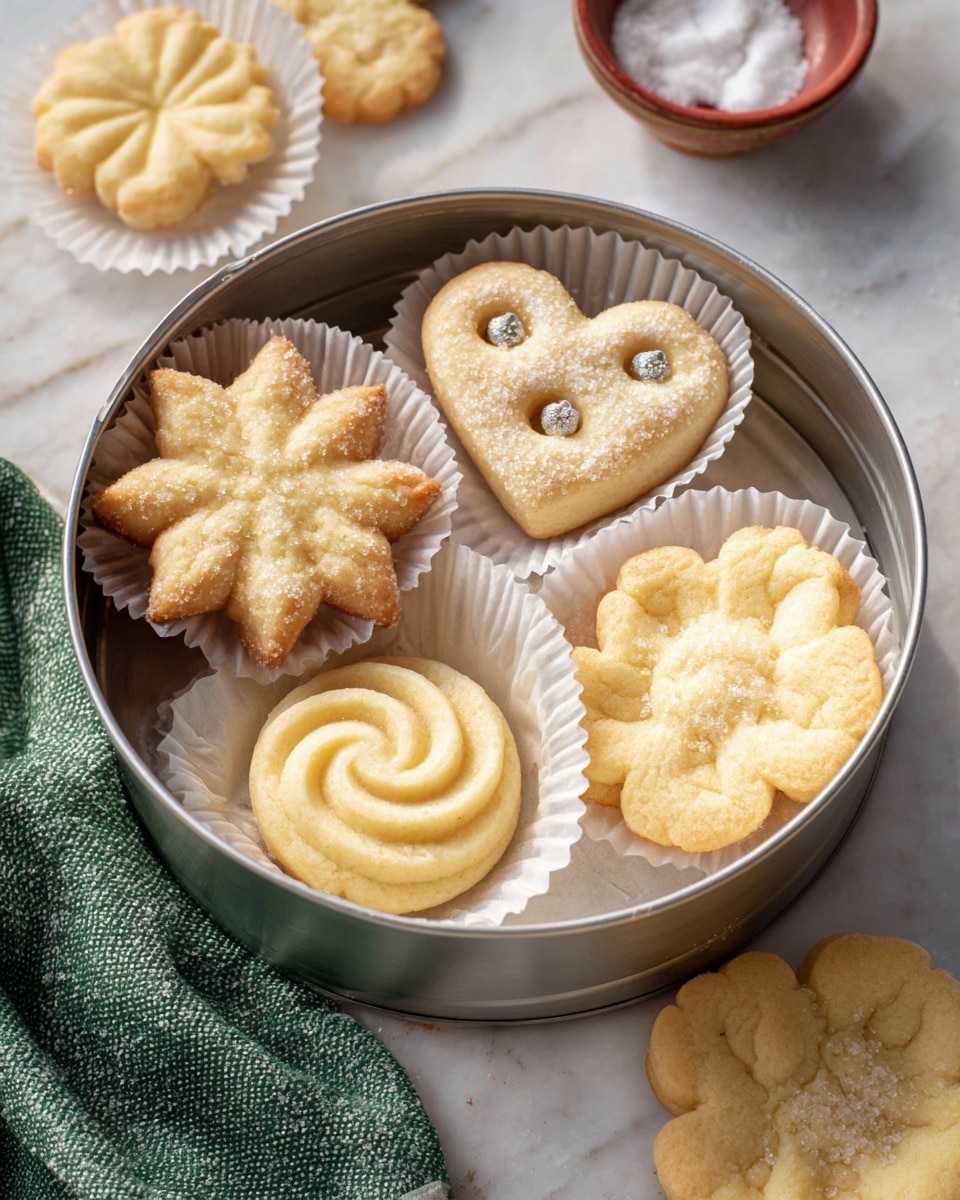
- Versatile Shapes & Flavors: Customize your cookies with piping shapes and festive toppings that bring personality to your baking.

Ingredients You’ll Need
The ingredients for this Melt-in-Your-Mouth Danish Butter Cookies Recipe are pretty straightforward, but each one plays a key role. Using room temperature butter and eggs makes a huge difference in texture, and blending two types of flours ensures those crisp edges and tender centers we all crave.
- European salted butter: Provides rich, creamy flavor; room temperature makes mixing easier.
- Granulated sugar: Sweetens the dough and helps create a slight crunch.
- Salt: Balances sweetness and intensifies the butter’s flavor.
- Egg yolks: Add richness and help bind the dough.
- Vanilla extract: Brings warmth and depth to the cookies.
- Whole milk: Softens the dough for easy piping without drying out the cookies.
- All-purpose flour: Builds structure while contributing to crispness.
- Cake flour: Keeps cookies tender and delicate.
- Coarse sugar (for decorating): Adds sparkle and an extra delightful crunch on top.
Variations
I love how adaptable this Melt-in-Your-Mouth Danish Butter Cookies Recipe is — whether I want to keep it classic or jazz it up with different flavors and toppings, there are tons of fun options to explore. You should definitely try personalizing it to suit your taste or the occasion.
- Chocolate-Dipped: Dip half of the baked cookie in melted dark or white chocolate for a fancy twist that my family adores.
- Lemon Zest: Add a teaspoon of fresh lemon zest to the dough for a bright, fresh flavor that feels so summery.
- Almond Flour Substitution: Swap out half of the all-purpose flour with almond flour for a nutty scent and softer crumb, perfect for gluten-sensitive friends.
- Spiced Variation: Sprinkle a little cinnamon or cardamom into the dough to give your cookies a warm, cozy update during fall.
How to Make Melt-in-Your-Mouth Danish Butter Cookies Recipe
Step 1: Prep Your Space and Chill Spot
First off, save room in your fridge for the cookie trays — you’ll want to chill the shaped cookies before baking to keep them from spreading too much. Line two baking sheets with parchment paper or silicone baking mats and set them aside. This little step helps your cookies hold their shape beautifully and creates that perfect texture we’re after.
Step 2: Cream Butter, Sugar, and Salt
Using a stand mixer fitted with a paddle attachment, cream the room temperature European salted butter on medium speed until it’s smooth. Keeping the mixer running on low, slowly add granulated sugar and salt and then crank it to medium speed until everything looks light and fluffy. This creates the buttery base that gives the cookies their tender crumb.
Step 3: Blend in Egg Yolks, Vanilla, and Milk
While the mixer is running, add in the egg yolks, vanilla extract, and whole milk. Keep mixing on medium speed until everything is well combined. Don’t forget to scrape down the sides of your bowl so the dough mixes evenly — that’s a small step that makes a big difference.
Step 4: Add Dry Ingredients
In a separate bowl, whisk together the all-purpose and cake flours. Add this flour mixture to your wet ingredients in two batches, mixing on low speed after each addition until you have no visible streaks of flour. The dough should be soft but hold together well. If it feels too stiff to pipe, add another tablespoon of milk to loosen it up.
Step 5: Pipe and Chill the Cookies
Spoon your dough into a large piping bag fitted with a ½-inch open star tip. Pipe 2-inch shapes—like rosettes, pretzels, or circles—onto the prepared baking sheets, spacing them about 2 inches apart. If you want, sprinkle them with coarse sugar or festive sprinkles to add sparkle and texture. Then pop the trays into your fridge for 20-30 minutes to chill. This step is a game-changer for stopping the cookies from spreading during baking.
Step 6: Bake to Perfection
Preheat your oven to 350°F (175°C), making sure the rack is in the center. Bake your chilled cookies for 10 to 15 minutes, keeping a close eye—the edges should just start to turn a light golden brown. Let them cool on the baking sheets for about 5 minutes before moving them to a wire rack to finish cooling. This slow cooling keeps them crisp without drying them out.
Pro Tips for Making Melt-in-Your-Mouth Danish Butter Cookies Recipe
- Butter Temperature Matters: Use butter that’s cool but soft enough to press a finger in without it melting to ensure smooth, creamy mixing.
- Don’t Skip Chilling: Chilling the piped dough is crucial to keep cookies from spreading and helps define those gorgeous cookie shapes.
- Watch the Oven Closely: Cookies vary in size and shape, so start checking for light golden edges around 10 minutes to avoid overbaking and drying out.
- Measure Flour Accurately: Using a kitchen scale avoids adding too much flour, which can toughen cookies — a typical, frustrating mistake.
How to Serve Melt-in-Your-Mouth Danish Butter Cookies Recipe
Garnishes
I usually stick with a sprinkle of coarse sugar because it catches the light beautifully and adds a satisfying crunch, but I also adore dusting the cookies lightly with powdered sugar or dipping edges in chocolate for shows of elegance. Sometimes, I’ll add a few colorful festive sprinkles during holidays to make them feel party-ready.
Side Dishes
These butter cookies pair perfectly with a hot cup of black coffee or a delicate herbal tea like chamomile or Earl Grey. For a special treat, I serve them alongside a scoop of vanilla ice cream or a small bowl of fresh berries to balance the richness.
Creative Ways to Present
I’ve boxed them up in vintage tins tied with pastel ribbons for gifting, or arranged them on tiered dessert stands for parties to create a charming, elegant vibe. Stacking them with parchment paper in between and adding edible flowers on top can make a stunning centerpiece for a tea party or bridal shower.
Make Ahead and Storage
Storing Leftovers
I store my leftover Danish butter cookies in airtight containers at room temperature, and they stay fresh for up to five days. Using a container with a tight seal really helps keep their crisp edges intact while maintaining that delightful melt-in-the-mouth quality.
Freezing
If I want to make a batch ahead of time, I freeze the fully baked cookies separated by parchment paper in an airtight container for up to three months. Alternatively, shaped but unbaked dough can be frozen for 2-3 months as well — just bake from frozen and add a couple extra minutes to the bake time.
Reheating
To gently refresh the cookies, I pop them in a preheated oven at 300°F for 5 minutes — this revives the crisp edges and warms them just enough without drying out. I avoid microwaving since it tends to make them chewy, and that’s the last thing you want with a Melt-in-Your-Mouth Danish Butter Cookies Recipe!
FAQs
-
Can I use unsalted butter for this recipe?
Yes, absolutely! If you use unsalted butter instead of European salted butter, just add about ¼ teaspoon of kosher salt to the dough to make sure the flavors stay balanced and rich.
-
Why do I need both all-purpose and cake flour?
The combination of all-purpose and cake flours provides the ideal texture for Danish butter cookies—crisp edges with a tender, melt-in-your-mouth center. You can use just all-purpose flour, but you might lose some of that delicate softness.
-
How important is chilling the dough before baking?
Chilling is crucial! It prevents the cookies from spreading too much, helps preserve the beautiful piped shapes, and contributes to the perfect texture. I recommend chilling for at least 20-30 minutes.
-
Can I make the dough ahead of time?
Definitely! You can chill the shaped, piped dough in the refrigerator for up to 2 days before baking, or freeze it for even longer. Just make sure to cover it tightly so it doesn’t dry out. When baking from frozen, add a couple minutes to the baking time.
Final Thoughts
I can’t recommend this Melt-in-Your-Mouth Danish Butter Cookies Recipe enough if you want a simple, fail-proof treat that feels special and tastes like pure comfort. Every time I make these, I’m reminded of the joy that comes from baking something homemade and delicious, and the smiles they bring around my table. So go ahead, gather your ingredients, and let these buttery beauties become your new favorite cookie tradition — you’ll be glad you did!
Print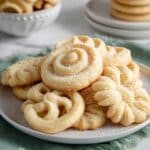
Melt-in-Your-Mouth Danish Butter Cookies Recipe
- Prep Time: 15 minutes
- Cook Time: 15 minutes
- Total Time: 1 hour 30 minutes
- Yield: 24 cookies 1x
- Category: Dessert
- Method: Baking
- Cuisine: Danish
Description
Danish Butter Cookies are classic melt-in-your-mouth treats known for their delicate, crisp texture and buttery flavor. This recipe combines European salted butter with a mix of all-purpose and cake flour to achieve the perfect balance of crispness and tenderness. The dough is piped into charming shapes, chilled to prevent spreading, and then baked to a light golden perfection. Perfect for gifting or enjoying with tea, these cookies are simple to make yet incredibly satisfying.
Ingredients
Butter and Sugar Mixture
- 1 cup (227 g) European salted butter, room temperature
- 1/2 cup (100 g) granulated sugar
- 1/8 teaspoon salt
Wet Ingredients
- 2 egg yolks
- 2 teaspoons (10 g) vanilla extract
- 1 tablespoon (15 g) whole milk, plus more if needed
Dry Ingredients
- 2 cups (220 g) all-purpose flour
- 1/2 cup (50 g) cake flour
For Decoration
- Coarse sugar for decorating (optional)
Instructions
- Prep Work: Clear space in your refrigerator to chill baking sheets with cookies and line two baking sheets with parchment paper or silicone mats to prepare for baking.
- Cream Butter and Sugar: In a stand mixer with a paddle attachment, cream the room temperature butter on medium speed until smooth. Slowly add sugar and salt on low speed, then increase to medium speed and beat until the mixture is light and fluffy.
- Add Egg Yolks, Vanilla, and Milk: While mixing, add egg yolks, vanilla extract, and milk to the creamed butter. Mix on medium speed until fully combined, scraping down the bowl to ensure even mixing.
- Mix and Incorporate Dry Ingredients: Whisk together the all-purpose flour and cake flour in a separate bowl. Add the flour mixture to the wet mixture in two batches. Mix on low speed until just combined with no streaks of flour. If the dough is too stiff to pipe, add an additional tablespoon of milk to soften.
- Pipe Cookies: Transfer dough to a piping bag fitted with a ½-inch open star tip. Pipe 2-inch shapes on prepared baking sheets, leaving 2 inches between each. Sprinkle with coarse sugar if desired. Refrigerate the shaped cookies for 20-30 minutes to prevent excessive spreading during baking.
- Preheat the Oven: Preheat the oven to 350°F (175°C), placing the oven rack in the middle position.
- Bake: Bake cookies for 10-15 minutes or until the edges are just lightly golden brown. Keep an eye on baking times as shapes and sizes vary.
- Cool: Allow the cookies to cool on the baking sheet for 5 minutes, then transfer them to a wire rack to cool completely to room temperature.
Notes
- Use room temperature butter for smooth mixing; about 67°F (19°C) is ideal.
- Bring eggs to room temperature for even baking; soak in warm water for 5 minutes if needed.
- Avoid overmixing to prevent tough cookies caused by excess gluten development.
- Watch cookies closely while baking since sizes and shapes affect bake time.
- You may substitute cake flour with additional all-purpose flour (total 260g) for a slightly different texture.
- Measure flour accurately using a kitchen scale or spoon and level method to avoid dry, crumbly dough.
- If using unsalted butter, add ¼ teaspoon kosher salt to the recipe.
- Store cookies in an airtight container at room temperature for up to 5 days, or freeze for up to 3 months.
- Chilled, shaped cookies can be stored in the fridge up to 2 days before baking; cover well for longer chill times.
- You can freeze shaped, unbaked dough for 2-3 months and bake directly from frozen, adding a few extra minutes to baking time.
Nutrition
- Serving Size: 1 cookie
- Calories: 110
- Sugar: 6 g
- Sodium: 55 mg
- Fat: 7 g
- Saturated Fat: 4.5 g
- Unsaturated Fat: 2 g
- Trans Fat: 0 g
- Carbohydrates: 11 g
- Fiber: 0.3 g
- Protein: 1 g
- Cholesterol: 25 mg

Your email address will not be published. Required fields are marked *