
Nothing says comfort and celebration quite like a Classic New York Cheesecake. If you’re a cheesecake lover (or even on the fence about it!), this recipe might just become your new dessert obsession. Creamy, luxurious, and decadently rich, this cheesecake comes together with surprising speed thanks to the Instant Pot—no need to fuss with water baths or endless oven time! Whether you’re throwing a last-minute dinner party or just craving a sweet treat on a weeknight, this cheesecake promises to deliver that signature New York tang and silkiness with minimal effort.
Why You’ll Love This Recipe
- Quick and Convenient: From start to finish, you’ll need less than an hour—and most of that time is hands-off, letting the Instant Pot do all the heavy lifting.
- Incredibly Creamy: By combining cream cheese and sour cream, the filling achieves that classic, dense-yet-airy texture New York cheesecakes are famous for.
- Foolproof Method: Instant Pot cooking means no cracks, no water baths, and no stressful oven checks.
- Simple Ingredients, Stunning Results: Every ingredient here plays a starring role, creating a cheesecake that’s both straightforward and sure to impress.
- Perfect Make-Ahead Dessert: Chill it ahead of time and just top with cherry filling before serving—easy for entertaining or a little self-indulgence.

Ingredients You’ll Need
Let’s talk about what goes into this show-stopping cheesecake, and why each element matters:
For the Crust
- Graham Cracker Crumbs: The classic, crunchy base with a hint of honeyed sweetness—absolutely iconic.
- Sugar: Just a bit to sweeten the crust and boost the flavor of the crumbs.
- Unsalted Butter (melted): Binds everything together while adding rich flavor.
For the Filling
- Cream Cheese (softened): This is the hero—make sure it’s at room temperature for silky smooth blending.
- Sugar: Adds gentle, not overwhelming sweetness that lets the tangy cream cheese shine.
- Eggs (room temperature): These provide structure and that signature custard texture—let them come to room temp so they mix in seamlessly.
- Flour: A touch of flour stabilizes the batter and keeps the texture impeccably creamy.
- Sour Cream: For that irresistible tang and an extra layer of creaminess—don’t skip it!
- Vanilla Extract: Rounds out all the flavors; pure vanilla extract really makes a difference here.
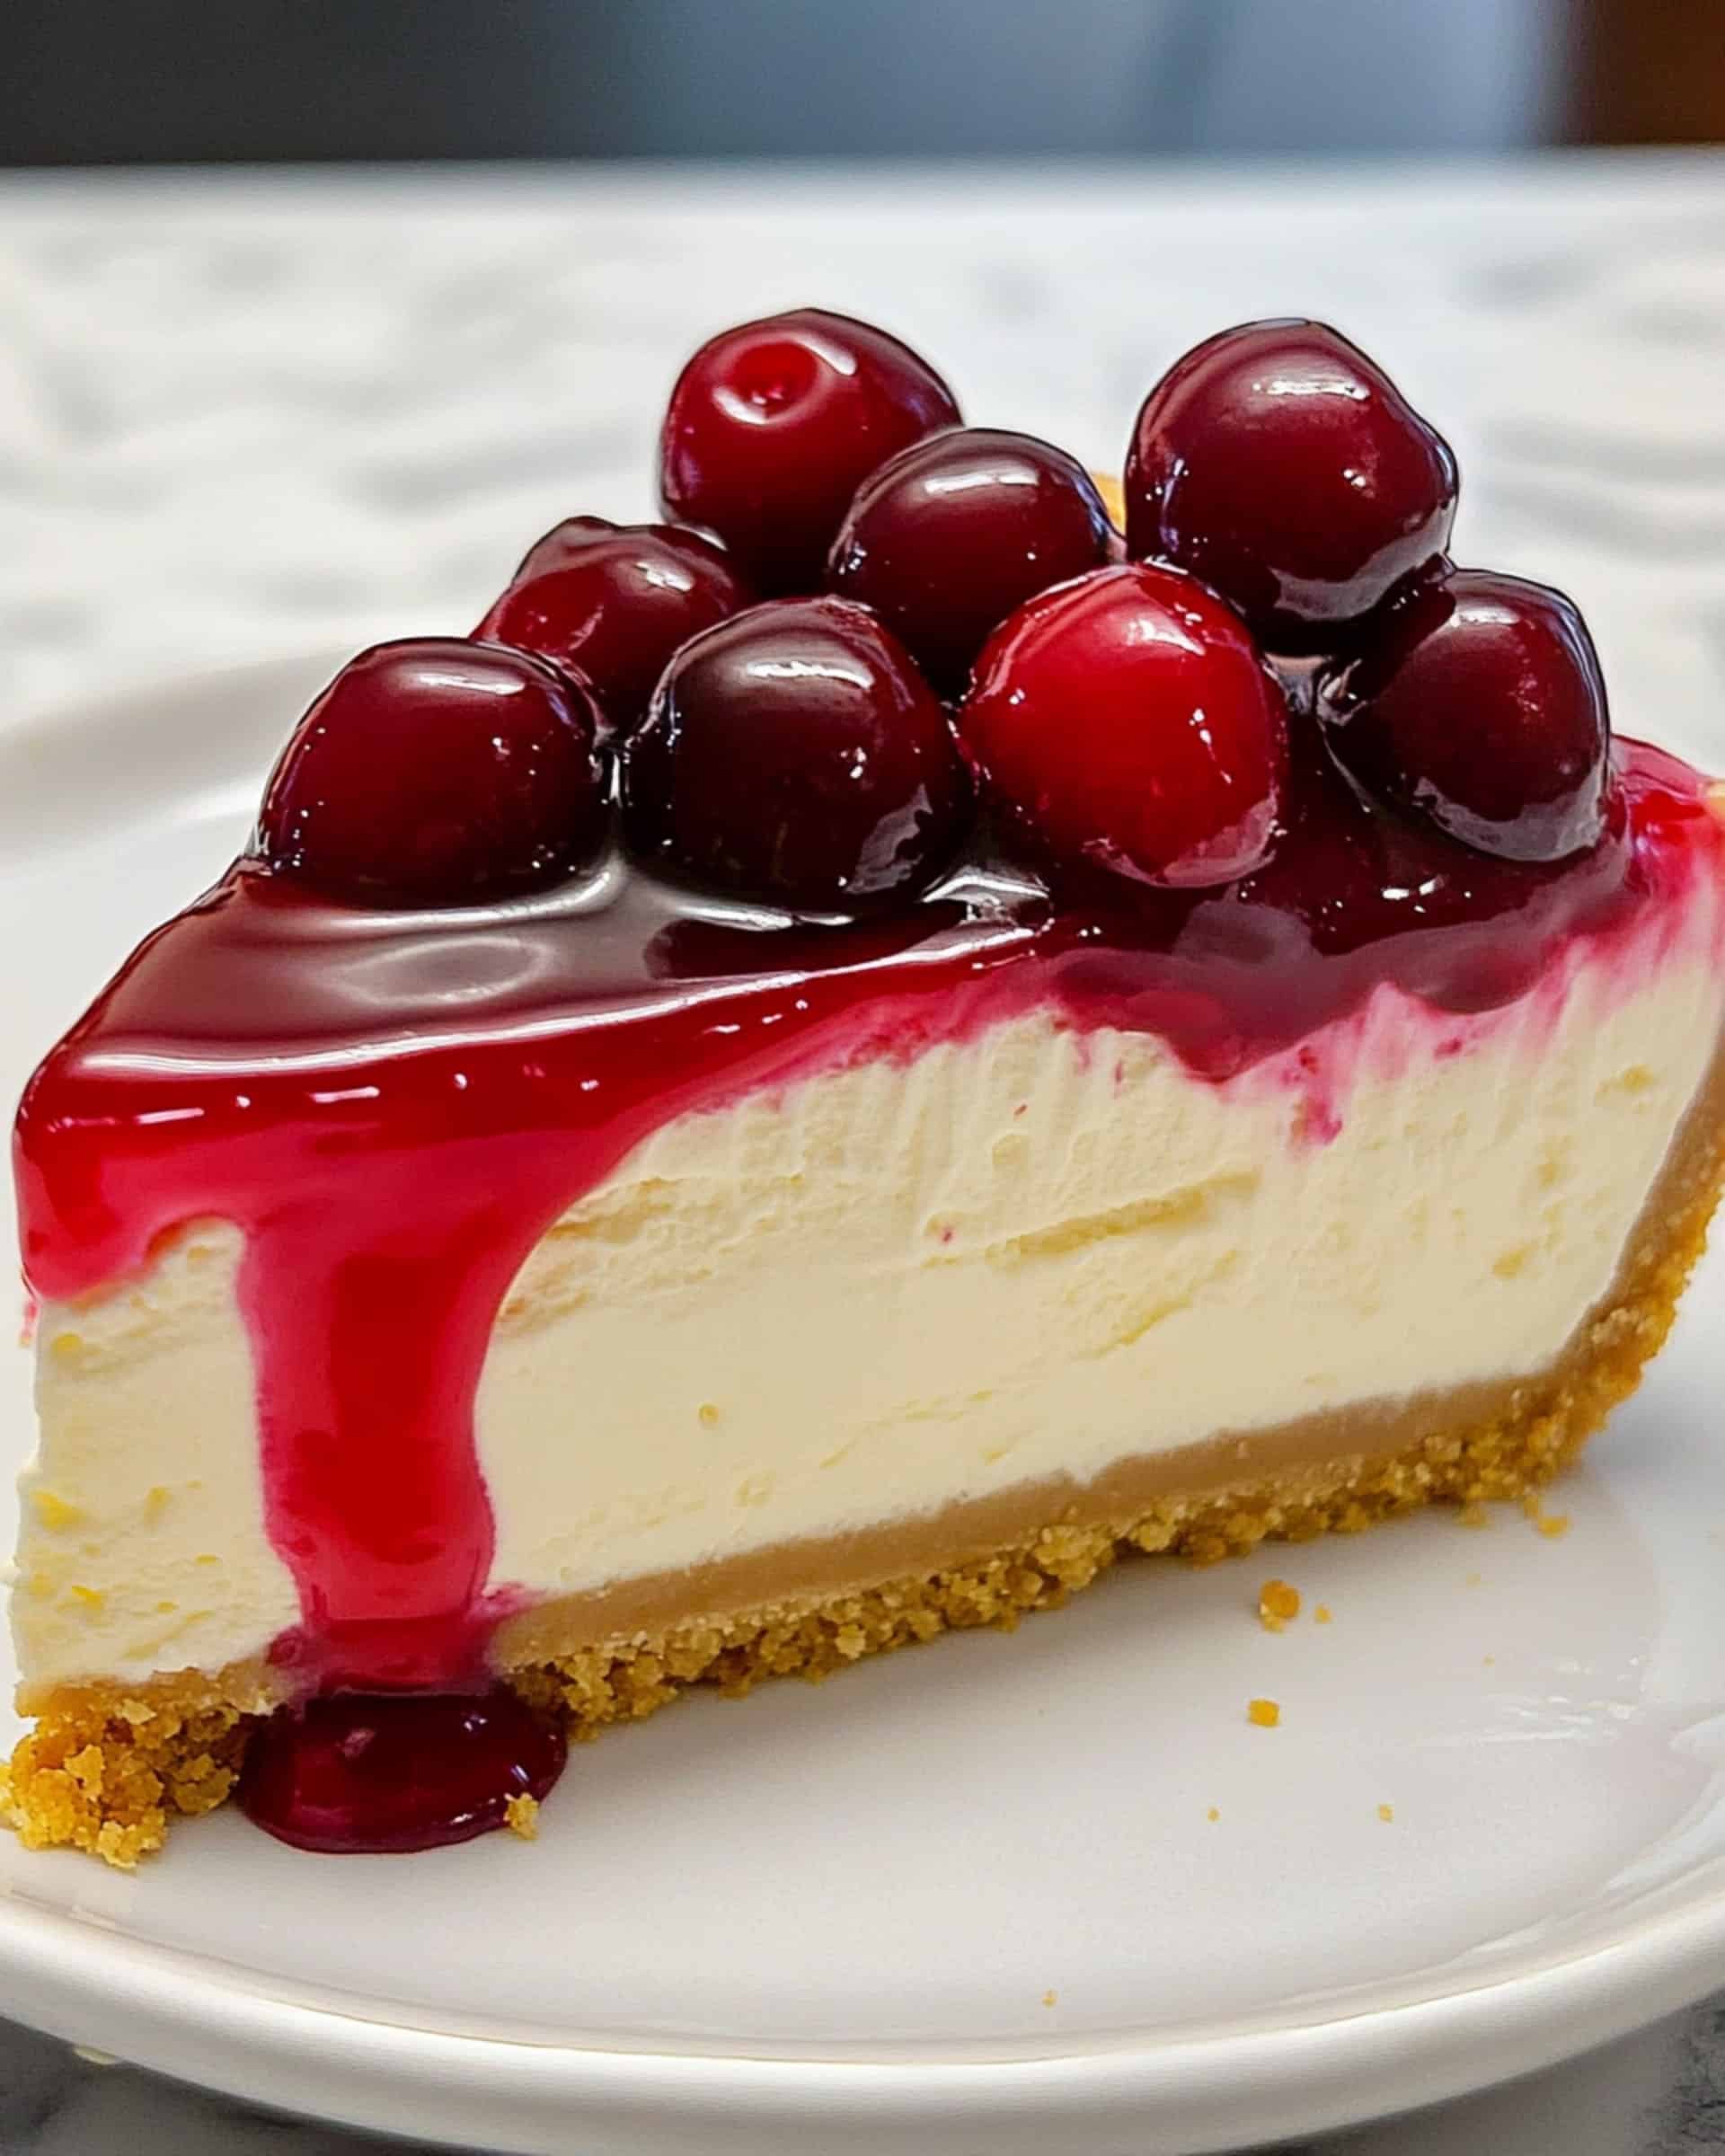
- Cherry Pie Filling: The sweet-tart finishing touch; the bold cherry flavor complements the richness of the cheesecake perfectly.
Tip: Always use full-fat dairy for true New York-style richness!
Variations
Cheesecake is wonderfully adaptable—here’s how to make it your own:
- Berry Lovers: Swap cherry filling for blueberry, raspberry, or a mix of fresh berries tossed with a spoonful of jam.
- Cookie Crust: Replace graham crackers with chocolate cookie crumbs, digestive biscuits, or even gingersnaps for a fun twist.
- Citrus Zest: Add a teaspoon of lemon or orange zest to the filling for a bright, zippy undertone.
- Chocolate Drizzle: Melt semisweet chocolate and drizzle over the cherry topping for extra decadence.
- Nutty Crunch: Sprinkle toasted slivered almonds or pecans between the crust and filling for texture.
How to Make Classic New York Cheesecake
Step 1: Prepare the Pan and Crust
Spray a 7-inch springform pan with baking spray to keep sticking at bay. In a bowl, mix the graham cracker crumbs, sugar, and melted butter together—they should look like wet sand. Press the mixture firmly into the bottom and up the sides of your pan, creating a sturdy, tasty base.
Step 2: Make the Filling
Beat the softened cream cheese and sugar until smooth and velvety—no lumps! Add the eggs one at a time, making sure each is fully blended before adding the next. Mix in the flour, sour cream, and vanilla extract, and give everything one final stir for a creamy, luscious batter.
Step 3: Pour and Set
Pour the filling over your prepared crust in the pan, smoothing out the top.
Step 4: Instant Pot Cooking
Place the metal trivet in the bottom of your Instant Pot and pour 1 ½ cups of water underneath (this steam ensures a moist, even bake). Set the springform pan carefully atop the trivet.
Step 5: Cook the Cheesecake
Lock the lid, set the valve to “sealing,” and cook on high pressure (manual mode) for 30 minutes. Once done, let the Instant Pot naturally release pressure—about 10-15 minutes. This gradual release helps prevent cracking.
Step 6: Cool and Chill
Lift out the cheesecake carefully (don’t let any water drip onto the top!). Place it on a rack until cooled to room temperature. Transfer to the fridge and let it chill for at least 4 hours (overnight is even better—patience is key to that legendary texture).
Step 7: Top and Serve
Just before serving, generously spoon cherry pie filling over the top. Slice and savor!
Pro Tips for Making the Recipe
- Room Temperature Everything: Softened cream cheese and warm eggs make for an ultra-smooth batter—cold cheese can turn lumpy.
- Don’t Rush the Chill: Four hours minimum in the fridge! Chilling firms up the filling and enhances the flavors.
- Prevent Water Leaks: If your springform isn’t watertight, wrap the bottom in foil to keep water out.
- Smooth Edges: For neat slices, dip your knife in hot water and wipe clean between cuts.
- Customize the Topping: Not a cherry fan? Try fresh strawberries, caramel sauce, or even lemon curd.
How to Serve

Serve this cheesecake cold, straight from the fridge, for maximum creaminess. The tangy, smooth filling paired with a crisp, sweet crust is a dream on its own, but the vibrant cherry topping adds a juicy, fruity pop. Want to go all-out? Add a dollop of freshly whipped cream or a sprinkle of grated chocolate.
Pairing Tips:
- Coffee or espresso works beautifully to cut the richness.
- A glass of bubbly or dessert wine can turn dessert into a celebration.
Make Ahead and Storage
Storing Leftovers
Wrap the cheesecake tightly (or pop into an airtight container) and refrigerate for up to 5 days. The flavors only get better as it rests, making leftovers a real treat.
Freezing
To freeze, wrap the cheesecake (without the cherry topping) in plastic wrap and foil. Store slices or the whole cake for up to 2 months. Thaw overnight in the fridge, then add your topping before serving.
Reheating
Note: Cheesecake is always best served chilled. If you like it just slightly softened, let a slice sit at room temp for 15 minutes before enjoying.
FAQs
Can I make this cheesecake without an Instant Pot?
Absolutely! Bake it in a water bath at 325°F in the oven for about 45-55 minutes, keeping an eye on the center. The Instant Pot simply makes the timing more predictable and reduces the chance of cracks.
Can I use low-fat cream cheese or sour cream?
Full-fat is highly recommended for authentic texture and richness, but low-fat versions will work if you prefer a lighter option—just know the cheesecake may be less creamy.
How do I know when the cheesecake is done?
The edges will look set, and the center should still jiggle slightly when the pan is gently shaken. Don’t worry if it looks a bit soft—it will firm up beautifully as it chills.
Is it safe to add the cherry topping before chilling?
For best results, add the cherry pie filling just before serving. If you add it earlier, the cherries may lose their shine, and the topping could slide off as the cheesecake firms up.
Final Thoughts
Classic New York Cheesecake is one of those desserts that never goes out of style—for good reason! With an unbelievably creamy filling, a crisp graham crust, and a crown of glossy cherries, it’s an absolute crowd-pleaser. And with how quick and easy this method is, it’s perfect for any busy weeknight or special occasion. Give it a try and discover just how delightful homemade cheesecake can be. Happy baking!
Print
Classic New York Cheesecake Recipe
- Prep Time: 15 minutes
- Cook Time: 30 minutes
- Total Time: 45 minutes
- Yield: 8 servings 1x
- Category: Desserts
- Method: Instant Pot
- Cuisine: American
- Diet: Vegetarian
Description
This Classic New York Cheesecake is a rich and creamy dessert featuring a buttery graham cracker crust, a luscious cream cheese filling, and a vibrant cherry topping. Made effortlessly in the Instant Pot, this cheesecake comes out perfectly smooth and decadent, with minimal fuss and maximum flavor—a showstopping treat for any occasion.
Ingredients
For the Crust
- 1 cup crushed graham cracker crumbs
- 2 tablespoons sugar
- 4 tablespoons melted unsalted butter
For the Filling
- 16 oz cream cheese, softened
- 1/2 cup sugar
- 2 eggs, at room temperature
- 4 tablespoons flour
- 4 tablespoons sour cream
- 2 teaspoons vanilla extract
For the Topping
- 1 1/2 cups cherry pie filling
Instructions
- Prepare the Pan – Spray a 7-inch springform pan with baking spray to ensure the cheesecake doesn’t stick after baking.
- Make the Crust – In a bowl, thoroughly combine the graham cracker crumbs, 2 tablespoons sugar, and melted butter. Press this mixture evenly into the bottom and up the sides of the prepared pan, forming a compact crust.
- Prepare the Filling – In a separate bowl, beat together the cream cheese and 1/2 cup sugar until the mixture is smooth and creamy. Add the eggs one at a time, mixing gently until just incorporated. Then, mix in the flour, sour cream, and vanilla extract, blending until smooth.
- Assemble the Cheesecake – Pour the cream cheese filling over the prepared crust, smoothing the top with a spatula for even baking.
- Set Up the Instant Pot – Place a trivet inside the Instant Pot and add 1 1/2 cups of water to the bottom. Carefully position the cheesecake pan on top of the trivet, ensuring it is stable.
- Cook the Cheesecake – Seal the Instant Pot lid and set to “sealing.” Cook on manual high pressure for 30 minutes. When finished, allow the pressure to release naturally to avoid cracks.
- Cool and Chill – Carefully open the lid, avoiding any water dripping onto the cheesecake. Remove the pan and let the cheesecake cool on a rack. Once cooled, refrigerate for at least four hours before serving to allow it to set completely.
- Add the Topping – Once chilled, top the cheesecake with the cherry pie filling before slicing and serving.
Notes
- Ensure cream cheese is fully softened for a smooth, lump-free filling.
- For easy removal, line the bottom of the pan with parchment paper.
- Do not overmix the eggs into the batter to avoid excess air and cracking.
- Chill for at least 4 hours, but overnight yields the best texture and flavor.
- Substitute cherry topping with any fruit pie filling or fresh berries as desired.
Nutrition
- Serving Size: 1 slice (1/8 of cheesecake)
- Calories: 380
- Sugar: 26g
- Sodium: 280mg
- Fat: 24g
- Saturated Fat: 14g
- Unsaturated Fat: 8g
- Trans Fat: 0g
- Carbohydrates: 36g
- Fiber: 1g
- Protein: 6g
- Cholesterol: 105mg

Your email address will not be published. Required fields are marked *